
One of our first spaces we made over in our home was our side entry. Ironically we didn’t use the space much besides going downstairs and rarely used it as a point of entry… until our kitchen renovation. By using it more, our needs for this space changed and it just felt like it was time for a refresh — we wanted to do something a little more bold compared to the rest of the house, we were especially inspired after our glam front entry makeover.
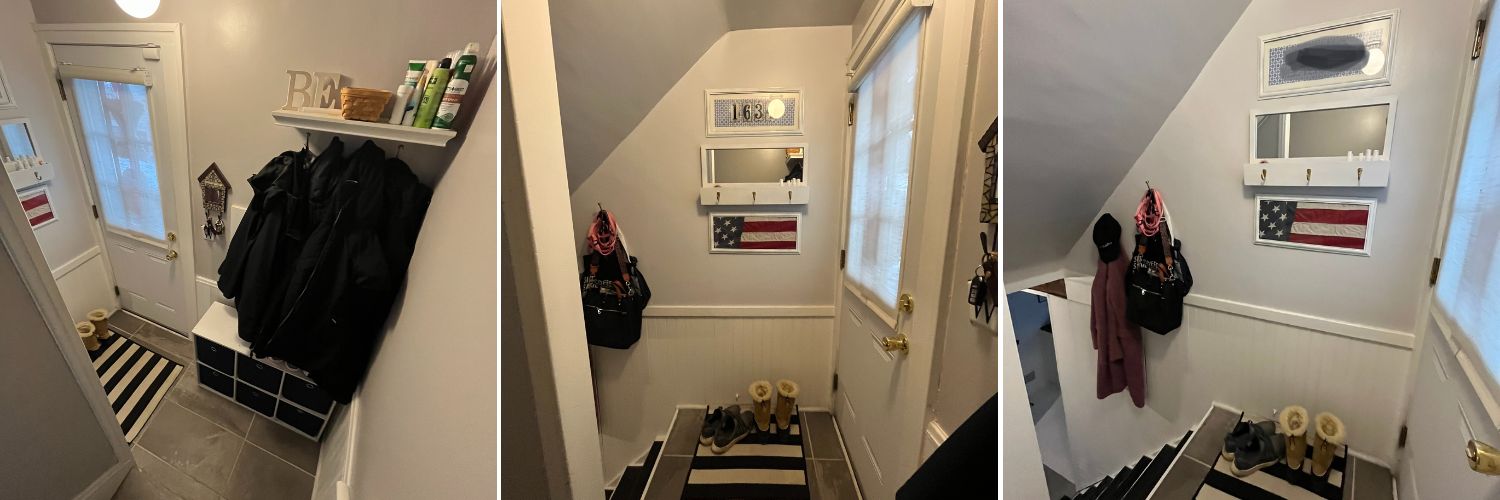
To get this project started and start making decisions, we started curating inspiration and creating a mood board for the space which included a mix of function and design. For shoes, we utilized an 11″ cube storage solution, which also became sort of a dumping ground within each of the bins. Also the shelf and hooks were crammed and small — it all made the space feel tight for an already smaller entry. We weighed the pro’s and con’s and had to lower the wishlist that would be a bit friendlier on the wallet and timeline.
What We Did:
– New paneling on lower half of stairs for a cohesive look – this included wood filler, sanding, caulking, priming & painting.
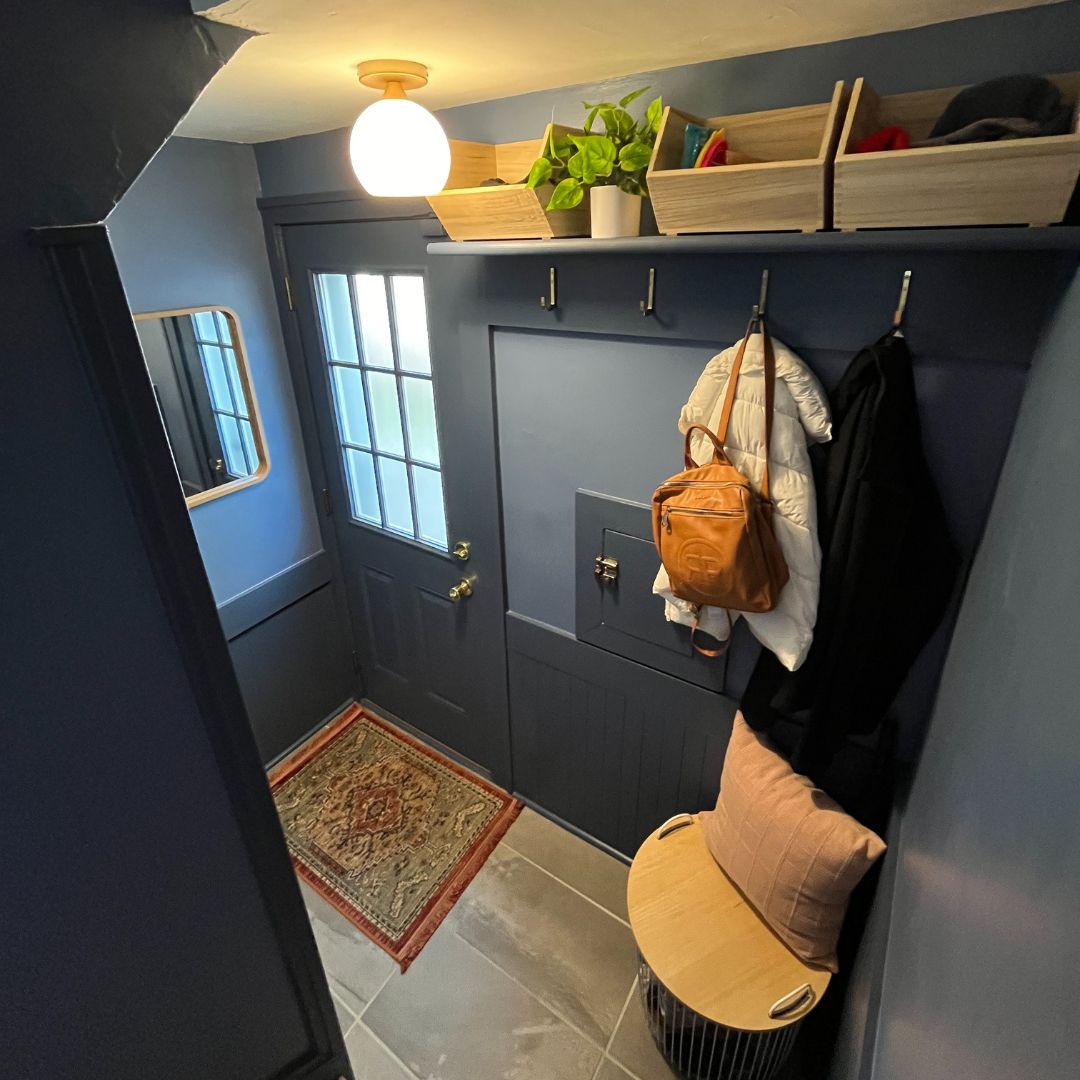
– We made a custom shelf that was wider with boarder trim that we raised much higher
– Electrical Update: The original light fixture had an exposed wire along the ceiling, so we worked with an electrician friend, cut open the ceiling and the wall to reroute the wiring & ended up installing a new fixture
– We did a lot of painting, which included priming, two different blue colors for our two-tone look, and even painted the ceiling
– New stair runners
– All new organization solutions for the space
BEFORE
Let’s talk budget
As I mentioned, we definitely scaled back some of the plans to try to be more budget friendly – but this project still added up quickly with the wood updates and all of the paint. We ended up priming everything, painting the darker blue and then the light blue, AND THEN the ceiling (which luckily we already had ceiling paint). Lot’s of painting and a lot of time with the wood. Electrical updates are expensive too especially when wire is involved, but this was a nonnegotiable for our project since we wanted to get rid of the wire running along the ceiling! When it comes to doing your own home projects, definitely weigh the pros and cons that make an impact for you and your space. Sometimes that is time and we are willing to spend more to outsource and get it done quicker, than if we were going to do it — and others it’s spending a little more to change something that has always bugged you.
Project Breakdown:
– Paint & Wood: $270
– Decor & Accessories: $250
– Electrical: $140
– 35+ hours of work
TOTAL: $660
My main goal for this space was to be more intentional with built-in finishes, like our custom shelf and wide border trim. I also really wanted to make this a statement like our front entry… wallpaper was honestly a pain for the front entry and super expensive, so that got crossed off the list — causing me to be a bit more creative with the impact. I’ve always loved rooms that are all one color, including the trim, accessories, etc. so I grabbed some paint samples and put some on the walls to see what B and I liked.

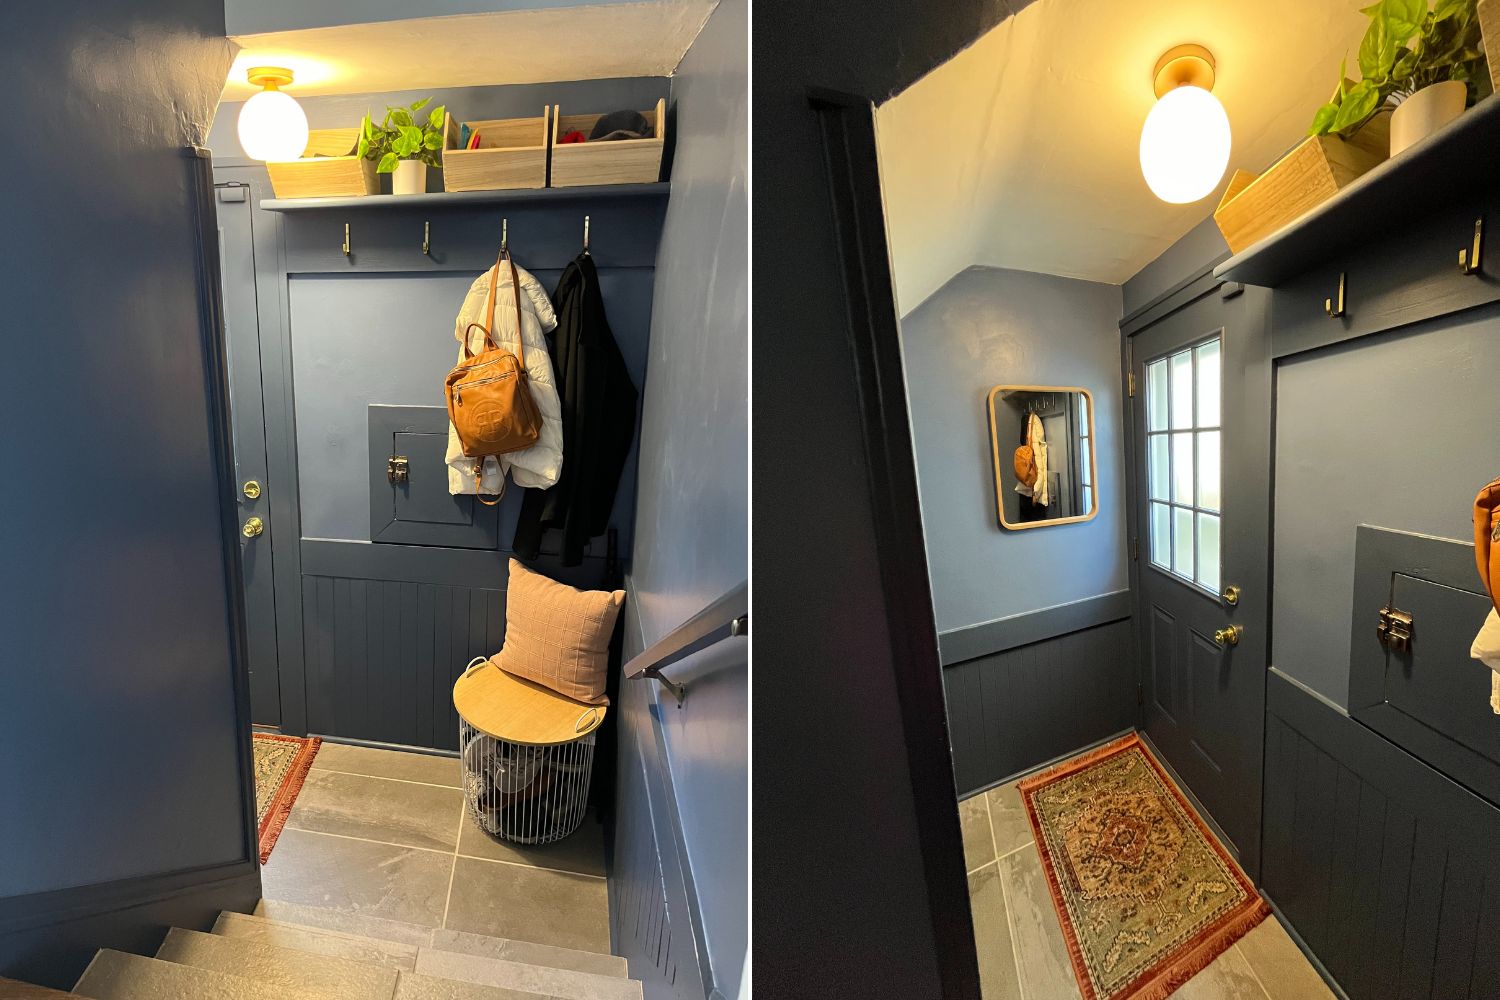
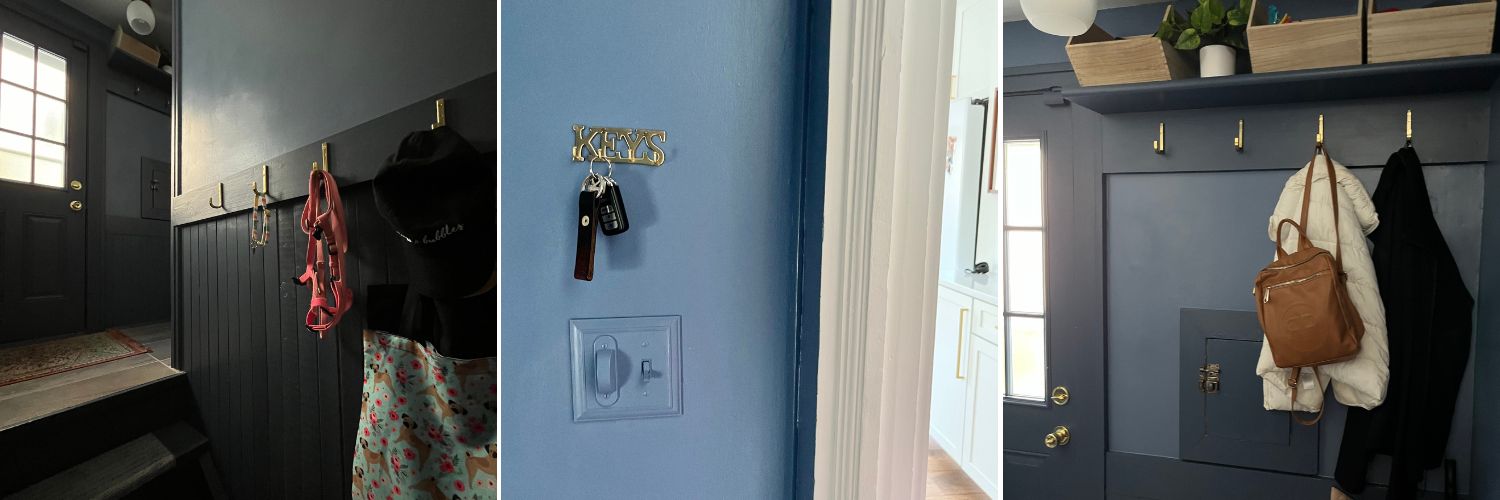
It’s amazing to me that by painting this small space a dark color and making a few other design tweaks, this space could feel even bigger than the white and grey space we had before! The custom shelf being raised with the hooks being spaces out is also another reason why this space feels big. Painting the door was another last minute decision that I’m so glad we did, because it really just creates and makes this space complete. I pulled in lighter wood and orange accents to really compliment the blues. We also painted the light switch cover, railing the wall color for a full take over.
Eliminating the cube for our shoes has also been really great, the basket holds my shoes and we switch out seasonal to our front hall closet to what we need here. The same goes for those wooden bins on the shelf, we switch out seasonal items to just what we need, so that we don’t have a catch all — it’s worked out so great and has been easy to maintain. We also have some extra hooks going down into the basement for additional storage and overflow as needed for seasonal/Moz’s items/hats or for guests!
We’ve been living in this space for awhile, I definitely want to hang up some more photos, I considered doing the frames the same color or doing all gold frames for a speak-easy type feel and mix in some vintage and images of things we love for an eclectic feel — still trying to figure out exactly what that might be.

Shop our finishes: brass hooks, wooden bins, shoe basket with lid, accent rug
