Mood Board – Sally’s Living Room Makeover

So it’s taken YEARS, but I’ve finally convinced my mom (Sally) to let me help her redecorate my childhood home living room! I was the kid rearranging photo frames, cleaning up, or suggesting we spray paint the mirrors for an upgrade – also the kid who redesigned her bedroom; from picking out new floors, to determining a statement wall, a painted closet with new shelving for more organization and a custom desk designed all with the manual labor help from of course, my parents.

Needless to say, I’ve been pestering my mom about this for a loonnnggg time. I know the hurdles I’m up against – the space/layout limitations, what my mom likes, doesn’t like, how she reasons things,  pricing and when some persuading is needed.  But I’m up for the challenge, plus it’ll be fun and I’m SO excited!  So I’ve started gathering ideas and inspiration with a shared Pinterest board with my mom to get us started!
Sally's Living Room Makeover - Mood Board - the bee life
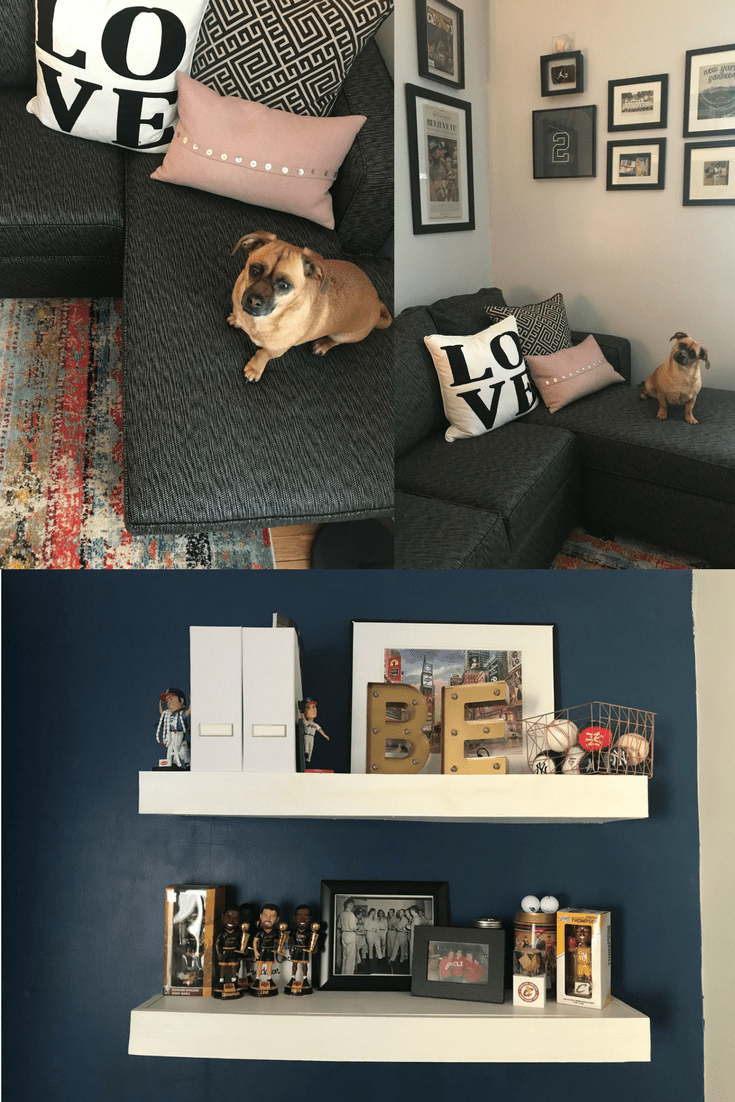
First things first, everything I’ll be pulling together will fall into the look/feel my mom wants for this space, I asked her for three words to describe the ideal feel of the space and she said: Cozy, Warm and Inviting. I’m adding a fourth one to the mix: Functional, because it’s a smaller space, the pieces need to be purposeful with more than one use! Secondly, I’m looking at this space in five sections; (1) window coverings, (2) gallery wall, (3) storage (side tables, ottoman, TV stand, etc.), (4) furniture and (5) lighting. Looking at these sections will help check the list of the look and feel AND function during the planning stages.  I’ll also be considering what current pieces can be used or revamped for use in the space.

This project won’t be done overnight, especially coordinating and making sure mom is comfortable with everything. Sally also likes to take time with her decisions especially if it comes with a heftier price tag (i.e. furniture)! So stay tuned for more updates, progress, and planning along the way, it is going to be a fun project!


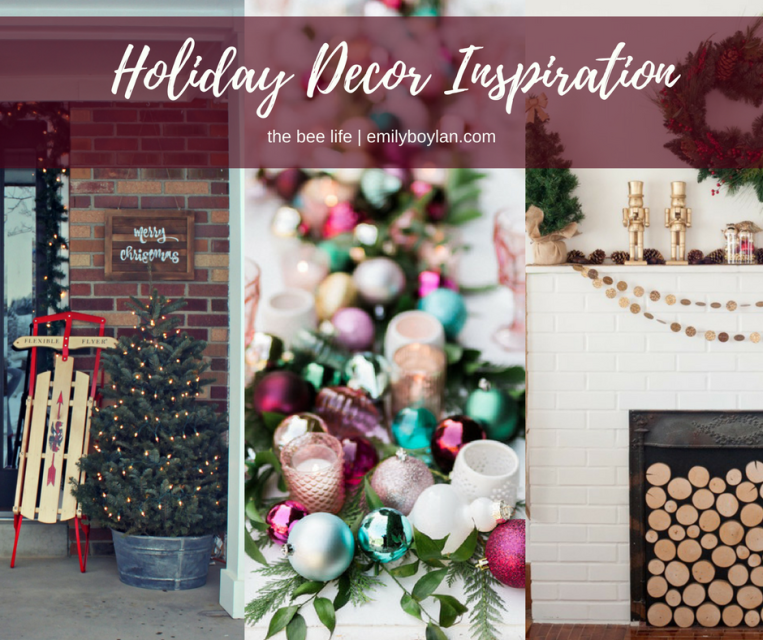
Image Sources: Gallery Wall Inspiration| Curtains & Seating Inspiration | Chair Inspiration | Function Inspiration

House Tour – Home Office

Our home office has been the latest room we’ve been putting the finishing touches on, it started preemptively this summer when we had a lot of visitors and needed to make this space more functional for overnight guests.  With two spare bedrooms and our office, there are times when all three of these rooms are occupied with guests! The old college (uncomfortable and brown) futon wasn’t cutting it anymore – we needed to get a more sleep friendly piece that also worked with the whole home office feel as well.
16House Tour - Home Office - the beelife
Instead of adding a bed into our office – we opted for a pullout sofa that was functional in both ways and matured the space! We purchased the couch site unseen, it’s also super versatile not only with the pull out (queen bed) but with it’s switchable left or right extended ottoman, perfect if we ever need to rearrange the space! This of course led to needing a new rug with some flecks of color and a fun pattern.  Mainly I was trying to find a subtle way to bring PINK into the space, well any space in fact – but bringing in subtle tones of pink in the rug and accent pillows seemed more acceptable (with B) than painting the walls pink. *smiles*

Our office is the one space in our house for our sports memorabilia being a mix of Cleveland sports with some New York Yankees thrown in. I grew up watching them, and they’ll always have my heart. It’s also the perfect space for our race medals and photos, in addition to other accomplishments and fun keepsakes – like all the Cavs Championship bobbles we had to buy.
17House Tour - Home Office - the beelife
My initial vision for this space was for it to first and foremost be a functional spare guest room, but also be a bit glam with a taste of sporty flare.  We had the initial framework with the bold accent wall, and pops of white with the floating shelves and desk – we just needed to finish the space with the functional and pops of pink! I know there will still be things we tweak and more sports memorabilia added, but for the most part it’s another room that is finally gotten a little more love and is functional for us.

Latest Obsessions 02.18

It’s that time to share my latest obsessions this month!  And these obsessions are all around the house, the latest trends and styles that I’ve got my eye on to help make a statement.
Latest Obsessions 02.18 - the bee life
Floral Curtains. Obsessed with adding any pop of floral I can throughout the house, and a great way to do this is with floral curtains, especially when styled right, absolutely stunning. I haven’t worked floral curtains into our home just yet (chairs and pillows, yes!) but they’re always in the back of my mind trying to see how they might fit when I’m working through room updates. I love the vintage like patterns and bold colors these can bring to a room – I’ve got my eyes on this pair from T.J. Maxx.

Kate Spade Kitchen. We received a handful of Kate Spade goodies for our kitchen from our wedding registry and they’re some of my favorite things, from glasses, to serving platters and bowls, mugs, a rose vase, champagne flutes, oven mitts, and canisters. Not to mention, “Eat Cake for Breakfast” is basically my mantra – it’s become a thing.

Chunky Knit Blankets. These make such a statement and can be that finishing touch to a bed or sofa, and I’m completely obsessed with them (and that bedroom above).  Although I am NOT obsessed with the price tag on these beauties, but that’s another story! Etsy has a lot of these in various colors and sizes, too and I love this one from Ethan Allen.  I’ll be shopping around a bit more for a decent price!

Statement Tile. I love that patterned, statement tiles are becoming more and more popular and accessible. This patterned tile is not only affordable but classic and available at Lowes!  I hope to one day have some stunning tile like this in my bathroom or kitchen.

What have you been obsessing over lately? Any latest trends that you are dying to bring into your house?

Image Sources: Top Left | Top Right | Bottom Left | Bottom Right

DIY Headboard Inspiration

After being in our house for three-years this past November, it more than feels like home and the random after thought rooms are looking more finished – almost to the point that I need another house to decorate! *grins*
DIY Headboard Inspiration - the bee life
But there are still pieces and parts of the rooms that need finishing touches, for example our one guest room, formerly our master, needs a headboard! We currently have the bed set-up as a day-bed, which I really like because it just adds a little extra space in the room.  So while I want to add a headboard to this bed, I really want to keep it as a day-bed, but know I’ll probably want to switch it back – so there in lies my challenge to create a custom headboard that functions both for a day bed AND easily convertible to a normal bed.

Two summers ago I made a custom, upholstered headboard for our master suite, and it was fairly simple once the dimensions and pieces and parts were gathered and cut. That is why I am fairly confident of remastering another headboard to pull off the custom versatility I’m looking for for this space.  Although I love the corner looks for the day bed, it isn’t practical for wanting to switch up the space.  So the bottom right look and style is probably what I will work to replicate for ours!

Hoping to share the finished product soon!


Image Sources: Top | Bottom Left | Bottom Right

DIY – Homemade Valentine’s

It’s February! That mean’s a month all about L-O-V-E! And I have a really affordable DIY to share with you that is easy to make, beautiful, and completely personalized Valentines for all your favorite people.
DIY - Valentines - the bee lifeWhat You’ll Need:
– Craft/Scrapbook paper; think patterns, pinks, reds and hearts!
– Scissors, glue stick, hole-punch
– Markers
– Ribbon
– Stickers; stick to metallics, hearts and letters! (optional)
– Photos (optional)

Step 1: Gather all your goodies to create your Valentine’s; once you’ve got all your goodies and figured out who you want to make a card for – it’s time to start making!

Step 2: Pick out your papers, and determine your shape – obviously a heart is a good go-to, if you’re afraid to freehand the cut find a template online or trace on paper before. You’ll want to cut two of your papers so you can have a front and back – these can be the same or mix and match! It’s OK if it’s not perfect, because it’s handmade!! Once you’ve got your shape cut, glue the front and back together.  An optional add; is to hole punch around the perimeter of the heart and then weave ribbon in and out of the holes.

Step 3: Start to Personalize! Add your pictures; stickers and write a sweet note to your honey or bestie… and wah-la! You’ve got a personal, one of a kind Valentine for that special someone.
DIY - Valentines - the bee life (2)
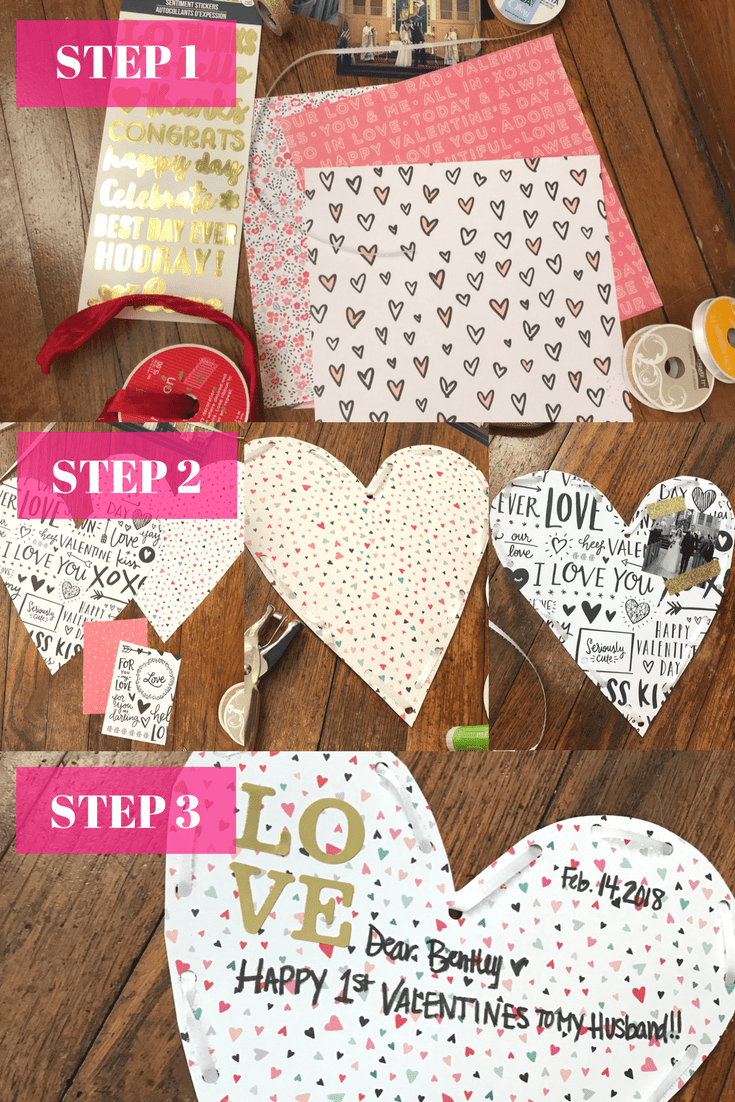
Since I am an avid scrapbooker, I had a lot of these supplies in-house stocked away. But scrapbook paper is usually on sale for 7 for $1; ribbon is around $3.99 a roll, stickers can add up if you buy a bunch; but finding some that can be used as accents won’t break the bank.  Not to mention you can always find a great coupon to help. If you stock up now, you’ll have a mini stockpile ready for next year, woo!

Happy Crafting!

House Tour – Christmas Dining Room

One of my favorite rooms to decorate during the holidays and different seasons is our dining room.  We have a large custom table that is perfect for statement centerpieces and plenty of room for family and friends to gather around for a delicious meal, conversation and laughter.
House Tour - Christmas Dining - the bee life (1)
I love thinking of ways to transform this space each year and building upon pieces I already have or buying new… this year I kind of went the old/new route based off the color theme of gold and green, selfishly carrying our wedding color palette into the holiday season and our home!  I used some pieces from our wedding and ended up buying a new table runner and napkins to pull the look together for guests.

My goal this year was to keep the dining room intimate and cozy for a small group of six, candles mixed throughout with customized ornament place settings. I used glass ornaments, (I basically have plain glass bulbs stock-piled once the year end sales hit) and poured white paint inside of them to drizzle along the inside, so when I wrote names in gold on the outside they popped! Guests can take these home as a keepsake of the holiday memory to hang on their tree!
House Tour - Christmas Dining - the bee life (2)
The greens mixed in help bring that classic Christmas feel and were conveniently trimmed off our tree. I love entertaining and having friends and family in our home, celebrating, laughing and creating memories and with the perfect setting and people it makes it easy.

Cheers to new memories!

Holiday Decor Inspiration

Every year I get an itch to completely redo all of our Christmas decorations, but then there is a part of me that just loves what we’ve created over these last few years and how we’ve made our home a cozy Christmas wonderland.  So I mix things up on a smaller scale, our outdoor space we’ve been doing different lighting variations and and the dining room is always my play space to create a magical setting.

So although I am not completely redoing our decor this year, I love to share future inspiration for holiday decor around the house… enjoy!
Holiday Decor Inspiration - the bee life
Classic. I love keeping decor classic with white lights and pops of color, you can’t beat the feel good sentiments of Christmas and a nice lush evergreen.

Pops of Color. This centerpiece is what dreams are made of and reminds me of the vintage ornaments I’ve found over the years from my grandma and at antique stores – pinks and blues and golds are so fun to play around with!

Simple. I hope one day I can work up to simple, right now it’s a complete flip of decorations in the house; picture frames are put away and the house is completely transformed with greens, lights, multiple trees, candles and ornaments.

What are your favorite things about decorating for Christmas? What theme or color palette are you dying to do?


Photo sources are linked above. 

Christmas Ed. Latest Obsessions 11.17

Since I was already obsessing over some Christmas items last month, it’s only fitting to continue the obsessions!  From vintage to plaid, it’s a mix of nostalgia and inspiration for the upcoming holiday season.
Latest Obsessions 11.17 - the bee life
Ornaments: Every year growing up it was tradition to pick out a Hallmark ornament to add to a collection, start a new one, or just whatever was the favorite that year. Where I still love getting my annual Hallmark ornament, I like getting other ornaments each year, for a milestone, for B, gifts for neighbors and friends… I love ornaments and they’re so sentimental and easy.

Vintage Wrapping Paper: I cant help but feel nostalgia when I find some prints with a vintage flare, especially with Santa’s! Growing up my presents from Santa always had a Santa pattern on them, and now that I’m older, I can’t help but love that small piece of my childhood.

Just Plaid: This has been a latest Christmas obsession for a few years now… it started with a plaid pattern on our Christmas cards, to table runners, and just wanting EVERYTHING plaid. Where you can’t go wrong with a classic red plaid print, green plaids are starting to grow on me.

Multiple Alpine Faux Trees: So we have one of these adorable faux alpine trees, and I love dressing it up and having multiple trees around the house… but I want more of these skinny guys! Since I keep our main tree pretty uniform and simple – these trees are where I like to have a little more fun and keep the holiday chair going throughout the house! I’ll keep keeping an eye to build my little cluster.

What’re you Christmas obsessions? Are they new and trendy or vintage and nostalgic?

Photo Sources: Top Left | Top Right | Bottom Left | Bottom Right

Fireplace Makeover Inspiration

Since we’ve been on hold with house projects with all of the wedding planning and expenses – I’m admittedly already secretly planning some projects that B and I can conquer this winter, while the cold and snow surround us outside.  So because I just can’t contain myself, here is some inspiration for a project we’ve had our eyes on.
Fireplace Makeover Inspiration - the bee life
Refacing Our Fireplace: This project has me a bit conflicted – but at the same time I’m curious to see how it would work in our space.  We have built-in’s on either side of our fireplace and these are the original oak color with beveled glass windows.  The brick had been already painted white, which we like and still flows with the space, but I can’t decide if white wood over top of the brick would work or if the mix-match of textures is what makes currently work. We definitely don’t want to paint the original built-in’s… they’re original features with original wood, and it would be so painful to do that!  Check out our current fireplace!

New Tile in Front of Fireplace: Because the refacing is a bit more conflicting, we may end up doing this project before jumping all in, since this might be the only update we need to help with the space.  Currently we have maroon tiles in front of our fireplace that meet up with our original oak floors.  We’ve been talking about replacing these for awhile, and since we finally have one tiling project under our belts – we are feeling confident, plus it’s a small space! Updating these dated maroon tiles with some white marble would really make this space pop and be a clean look.

One of the reasons we love our house so much is because it’s a century home and we love a lot of the original features, like the natural woodwork, the built-in’s in both our dining and living room and our hardwood floors.  So whenever we’re updating a space,  we make updates that only enhance and highlight those original features we love!

Photo Sources:  Left Image | Right Image