House Tour – Our Christmas

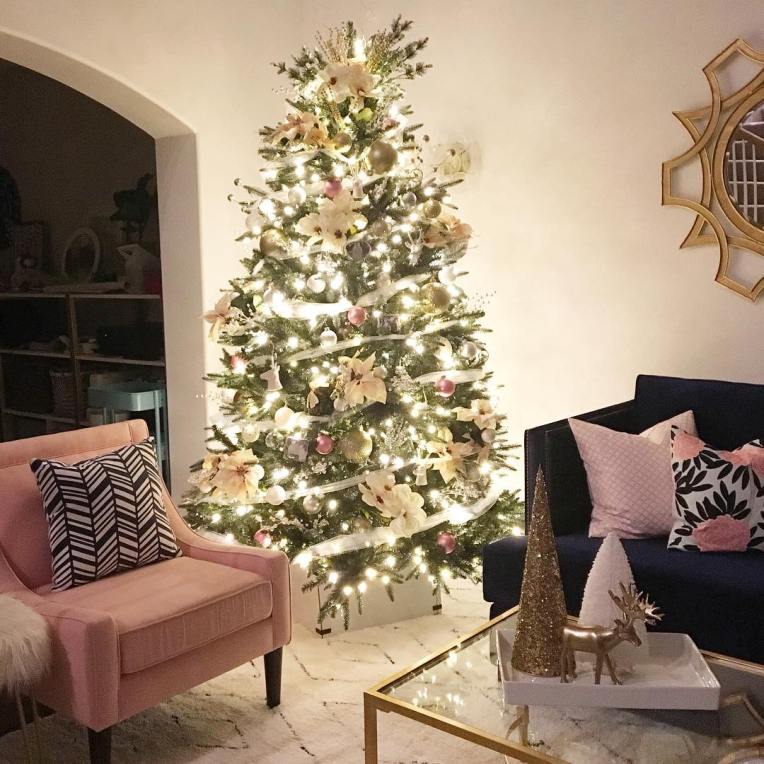
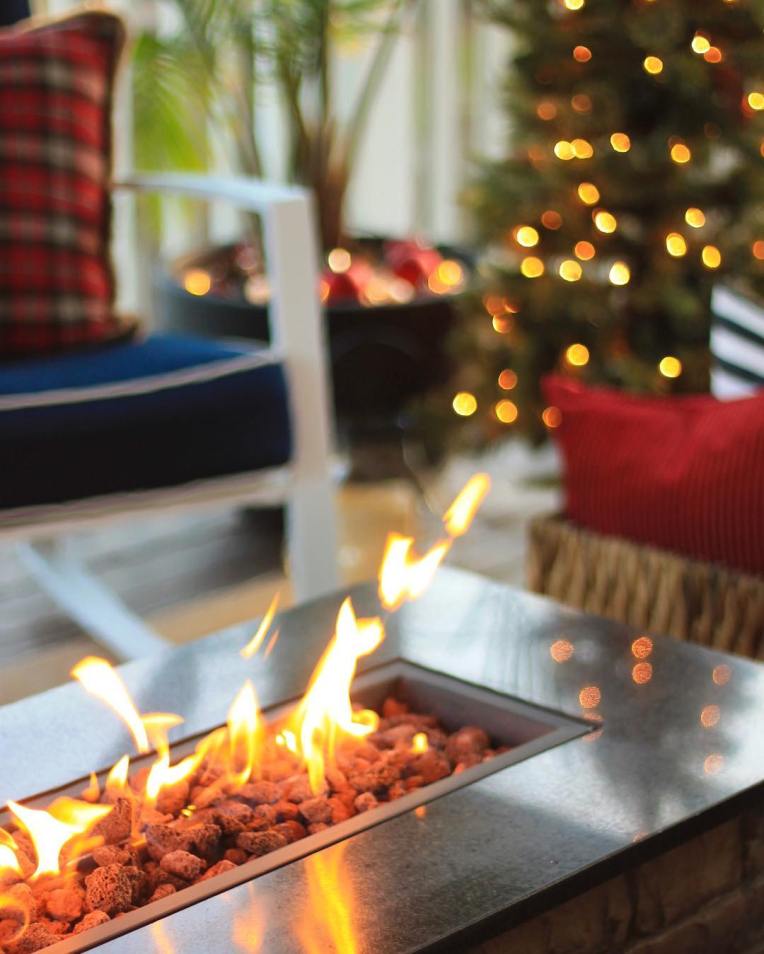
Eleven more days until Christmas! Our house is full decked out and ready for the holidays, it’s cozy and festive… I may be a bit biased, but I’m in love.

With this being the third Christmas at our house (wow!), I’ve definitely continued to perfect the finishing touches but also try a few new things! This year I took to Pinterest for some new ideas, specifically for our front door and dining room centerpiece. I looked for ideas that I could use preexisting pieces/decor but also be able to put my finishing touches on them!

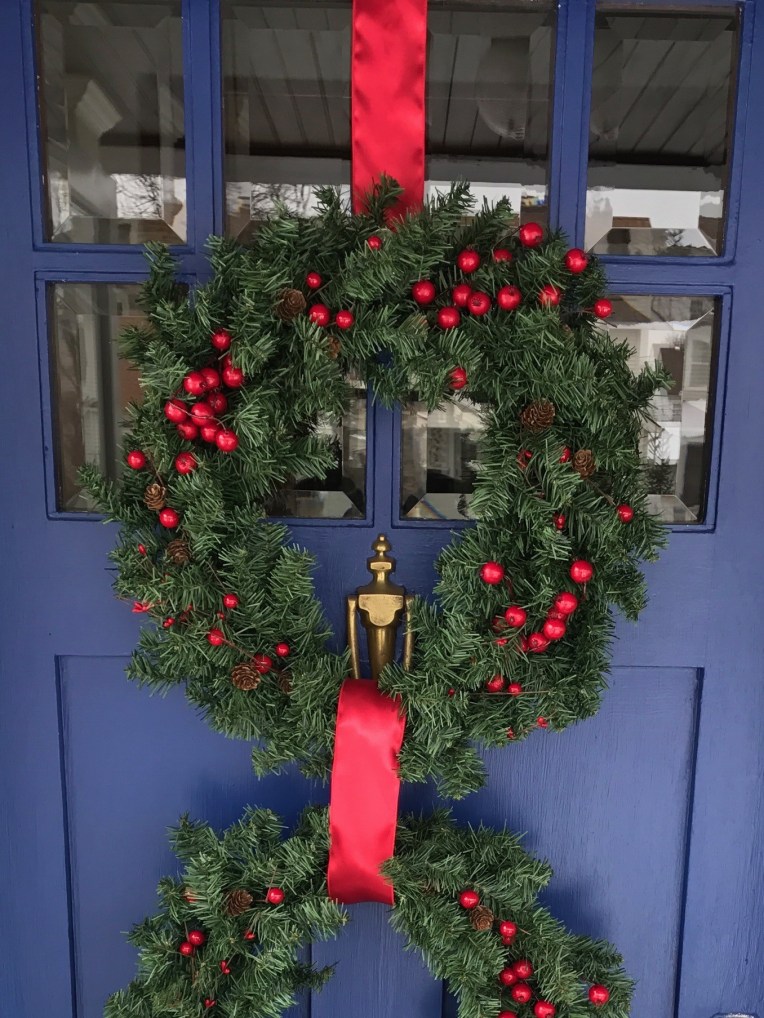
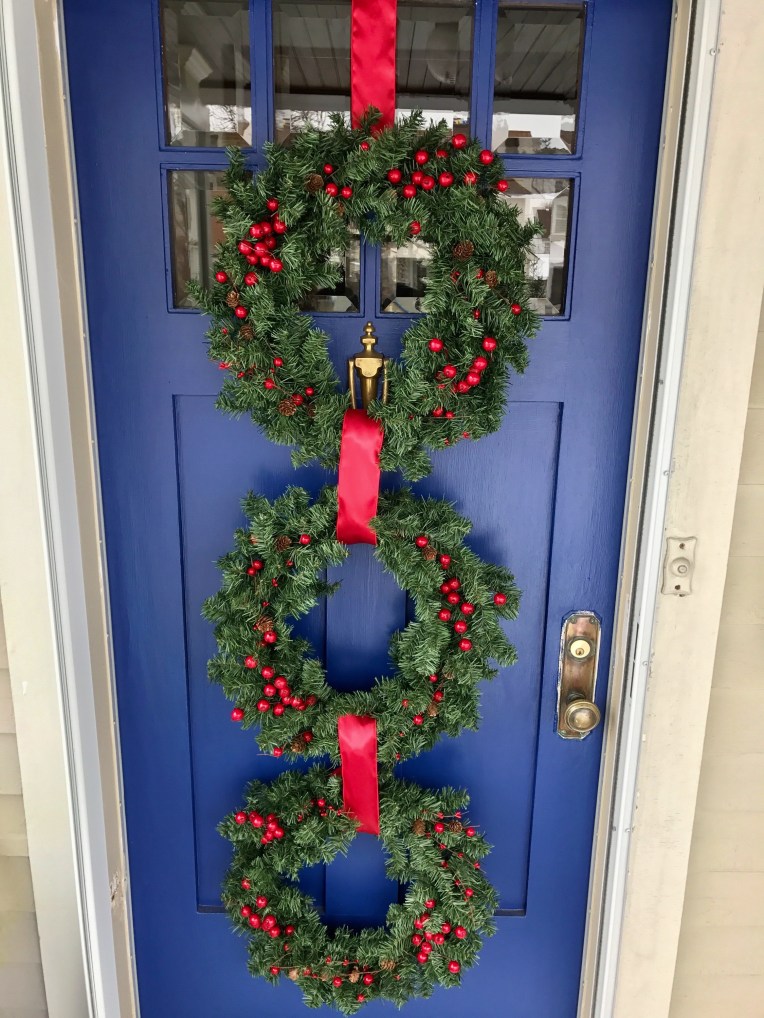
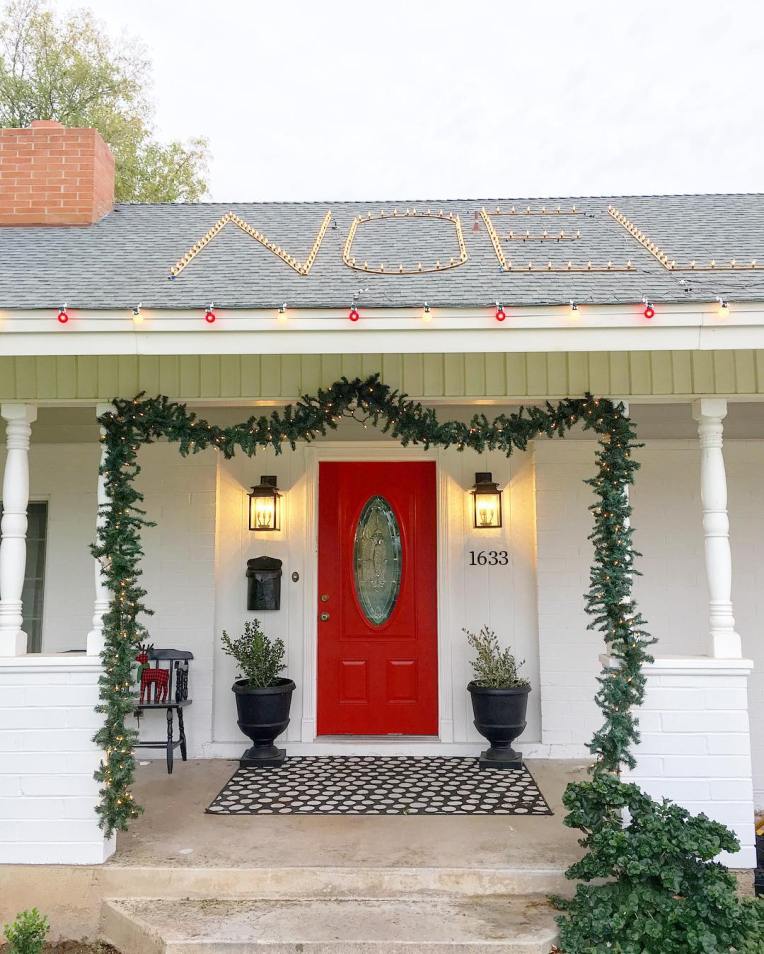
Front Door: We amped up the front door to really make a statement, now that we have a full glass storm door, we can fully utilize all the real estate.  I’ve mentioned this many times, but your exterior of your home is the first impression guests receive, so why not make a statement?

My hack was to use wire to connect the three wreaths together, and then wrap the ribbon around to cover it up.  I probably spent $10 for the berries to add into the greens and the ribbon (sale at Joann’s!). I already had the wreaths, door hanger and wire.  I just hot glued the ribbon on the door hanger to make the ribbon look continuous! I love how the red pops on our blue door.
front-door_3front-door_1Dining Room Centerpiece: I wanted to switch up the centerpiece, since as much as I loved last year’s centerpiece it wasn’t conducive for entertaining with friends and family.  I often had to move it for space or take certain parts out of it.  I needed something a little more low maintenance, less intrusive and easy to move. I saw some inspiration on pinterest with a wooden box and since we found one when we first moved in (under our front porch of course), it was the perfect idea.  I used greens from the Christmas tree farm and just had to buy the candles. I added in some color and it’s completely portable if we need to move for a game night, dinner or cookie baking!
dining-room_1
dining-room_2I definitely got my “Martha Stewart” on and love the way these two spaces turned out! Everything I got too can be reused or altered next year – which would be my second hack for all of you is to think of DIY/Pinterest solutions that work multiple years, aren’t too trendy.

Bee Holiday Hacks – Printables

Shhh! I want to share my latest Holiday Hack with you all, some may be giggling and saying “You’re a little late to the game!” but whateves! I’m okay with that, it’s new exciting for me and might be to you too! Plus you may always see all these cute printables but then think, I need to get a frame, where would I put these, do they go with the rest of my decor?
bee-holiday-hacks-printablesSo here is the best part, you don’t need to worry about buying new frames or reworking your entire decor you can just switch out artwork in frames you already have hanging.  There is no need to put new nail holes in the walls or redesign color pallets or double up on frames – it’s perfect! Most of the prints to download are free and fairly easy to scale if you’re looking to fill at 5×7 or 8×10 frame.

This is a low-cost (if any) update to really put the finishing touches on your Christmas decor around the home.  These will be the little things that guests will notice around the house at your upcoming holiday party and drive home your cozy, welcoming, Christmas home!

Here are some of my favorite Printables (links below):

Share your Holiday Hacks with me on social, @mmariebee!

Links to Printables Featured Above:
Merry & Bright Plaid | 
Spread Christmas Cheer | Merry Little Christmas | Woody Wagon Christmas 


7 Insta’s to Get You Amped for Xmas

I get so excited every Christmas season once the stores start lining their shelves with decorations, greenery, ornaments and nutcrackers.  Social media is also a crutch to find the latest inspiration for my Christmas decor, new DIY’s, wrapping paper ideas, food, holiday dress… you name it.  So I wanted to share my favorite social accounts (since I am always sharing off Pinterest) to help you feel inspired or just get amped up for Christmas (and secretly envy their perfect trees and living rooms).

14547580_138826539932926_2771364215095558144_n1
@landeelu: Definitely feeling more festive on the inside too! Oh how I love the glow of a Christmas tree. Truly magical. #christmastree #christmaslights #christmasmagic
15101635_1629796847313956_1654694223036809216_n1
@peabodyandsassafras: This week’s winner for our #create4theholidays challenge is this amazing black and white mantle by the ever talented and sweet @craftedsparrow! Make sure you’re playing along with us to be featured on all the host’s accounts next week.
15034622_118221211995366_6497343035519533056_n
@dearlillie: Our den decorated for Christmas is up on the blog! (Link in profile). We’ve had most of these ornaments since our first married Christmas ten years ago. There’s a detailed source list on the blog along with lots of pictures and links to all the other bloggers we are joining for the #farmhouseholidayseries! – Jenni
15047981_394681884204175_964802362243809280_n1
@memehillstudio: Well it’s looking a lot like Christmas inside and out! More of Chloe’s room and a big shout out to my niece @cralphy_5 for helping me out alllll day. Love you Char! Both chairs from @raymourflanigan, ornaments, rug, desk from @homegoods, striped panels from @overstock,tree from @walmart , ribbon and ornaments from @michaelsstores … more pics to come. Have a wonderful night friends and keep sharing #howyouholiday!
15035635_1171822979567826_5135532016900505600_n1
@ourfifthhouse: Happy Friday friends! #fifthhouseholiday #oursixthhouse
14547747_349036608796196_2849261985403502592_n1
@diaryofdaveswife: The NOEL house has never looked better! 😉 We got all our exterior lights up today and I can’t tell you how much I am loving my new red door! I have a few more touches to put on the inside and we are officially ready for Christmas! 🎄🎄🎄🎄🎄🎄🎄🎄🎄🎄🎄🎄 . . . #thenoelhouse #mesa #mesaarizona #az #instaaz #hillviewacres #daveswifeshouse #christmas #christmaslights #thatsdarling #abmhappylife #abmlifeissweet #abmlifeisbeautiful #abmathome #abmlifeiscolorful
15101545_1257806580932145_7057578775768203264_n
@theeverygirl_: 🎁 GIVEAWAY! 🎁 Win a $3,000 package to treat yoself to some much needed pre-holiday pampering this season. We’ve partnered with some of our favorite brands to cover everything from 💅🏼 to 🍷. Click the link in our profile to enter! || photo by @sarahkjp

What I love about social media is that you can find other people/accounts that share the same style as you, but also find different styles that inspire you.  I’ve got lots of ideas up my sleeves for our home and Christmas this year, but I am a firm believer that it’s always a work in progress, I would love to have a perfectly done house (like the ones above) over night, but I’m still finding my styles, my pieces, my likes and dislikes! Either way it will definitely feel like Christmas around our house.

Share your Christmas decor inspiration with me on instagram @mmariebee!

 XO –

Photos above link to instagram accounts featured on this blog post. 

Our Master Reveal

The time is finally here!! Our master bedroom reveal!

For those who didn’t follow along on my 8-months worth of updates throughout last year… It all started with our attic, even though it was a ‘finished’ space, it was poorly done.  It’s open feel, large bright windows, closet space and size made this an instant dream master retreat.  Since B is so tall, we ended up raising the ceiling 6-inches, but that basically became a complete gut job down to the studs. This wasn’t part of the original plan – but we ended up doing new electric, new insulation, new drywall, new blinds, closet doors, new everything – and B did 97.9% of it! This was definitely our biggest house project to date.

So without further ado here is our awesome master retreat including the seating area and my two closets, yes two, one for clothes, one for accessories. *grins* We’ve tried to DIY and make as much as possible, including the headboard, curtain rods, barn door, DIY night stands and reading table, painted and redid the dresser and shopped smart for other accessories but splurged on a few items like the fireplace, rugs and our chairs.

master-reveal-the-bee-life-10master-reveal-the-bee-life-6
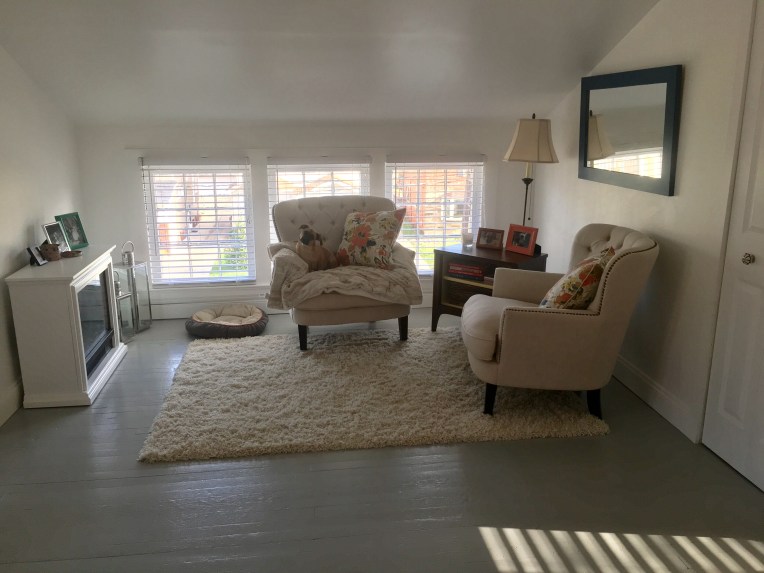
The black frames next to the bed hold the love letter B wrote and proposed to me with. It’s the perfect addition to the room and show casing that instead of hiding it in a box somewhere. We also tried to keep some of the original wood work, especially on the stair railing coming up, but opened it to give an open feel.

I had full intentions of sharing the closet space with B, but he insisted I use both of the closets upstairs (don’t worry he has two-closets on the second floor). So I kindly thanked him and told him he was creating a monster and then proceeded to work on creating my dream <organized> closets.

We would both be lying if we didn’t say we were proud of the way this turned out. It was everything we imagined and more and I love having our own little getaway from the rest of the house and world (Moz really loves it too!)

Go Us!

Front Porch Decor Tips for Fall

Since this past Thursday was the official kickoff to fall, and the fact we’re coming off a beautiful fall weekend, I’m ready to start accepting everything fall.  One place that you can really make a statement for fall is your front porch/entryway; and this can be accomplished simple or on a more grand scale.  Here is some inspiration along with key pieces and tips to consider as you put your fall front porch together!

Inspiration:

First You’ll Want to Determine:

  1. Your color pallet – if you want to go with the deep oranges, reds, and yellows or if you want to keep it simple with white pumpkins and pops of one color.
  2. If you’re going to keep it simple and understated or if you’re going all out.
  3. Halloween specific or fall; personally I learn towards for fall since this will last you up until your pulling our your Christmas decorations. Halloween only lasts a month. CONSIDER:  If you’re leaning towards Halloween, because you have kids or are hosting a killer party, think of ways to switch out key pieces after the 31st so that you can keep it up through Thanksgiving.

Key Pieces:

  • Pumpkins/Gords
  • A sign or focal point
  • Mums – remember your color pallet!
  • Lanterns
  • Wooden crate or old windows

And wah-la! You should have a fabulous, inviting front porch for the next 2-months! I still need to finish a few DIY’s and crafts, but I’ll share my finished front porch here in the next few weeks.

Share your fall front porches in the comments below or tag me on social media @mmariebee. 

House Tour – Our Living Room

Hi friends! I wanted to invite you inside our home and give you a little tour of our living room!  It’s one of the rooms where we spend most of our time besides our master… yes I know… I still owe you all the official master tour, it’s coming, I promise! Anyways, back to the living room, since it’s one of the rooms we spend most of our time in, it’s one of the more finished spaces.  It’s also one of the spaces that I like to update and switch things around on the mantle, coffee table and even the picture frames. So here is the space just Plain Jane, no holiday decor – just normal life.
Living Room (2)Living Room (3)Living Room (1)
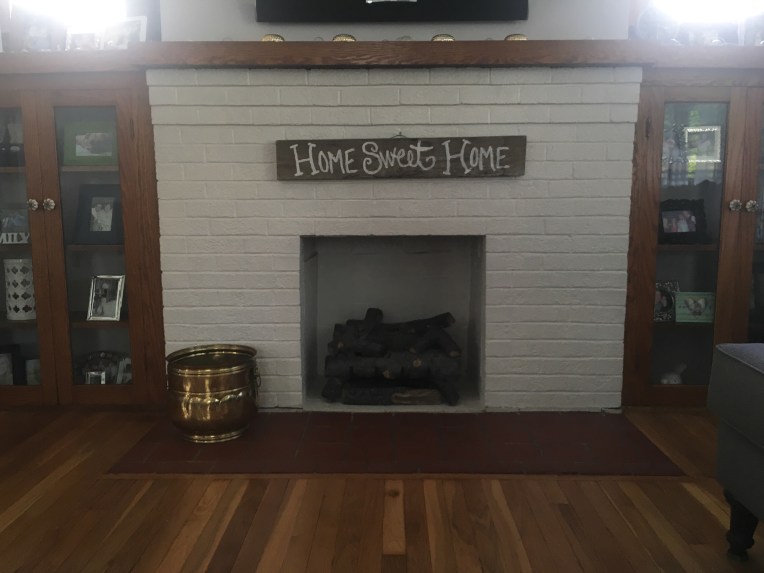
One of my favorite parts of our living room is all of our old photos that we’ve incorporated into the gallery wall or through the mantle and built-in’s.  They’re pieces of our past and what make up our families and who we’ve been shaped to be.  Family is very important to both of us, so it’s nice to be surrounded by our loved ones, past and present.

It’s the little details we’ve been able to focus on and update (like the knobs on the built-in’s) still giving it an appropriate feel for the period of the house but giving it an updated feel. 

Hope you’ve enjoyed one of our most loved spaces!

DIY – Coordinates Sign

Remember our big attic renovation into our master suite?  Well the little details have still been a work in progress, as they usually are. But we are getting closer to getting the little details finished up. I am finally happy to share one of the last pieces to the gallery wall puzzle. It’s a coordinates sign that I made using old wood from our house and the renovation! IMG_4970IMG_4972
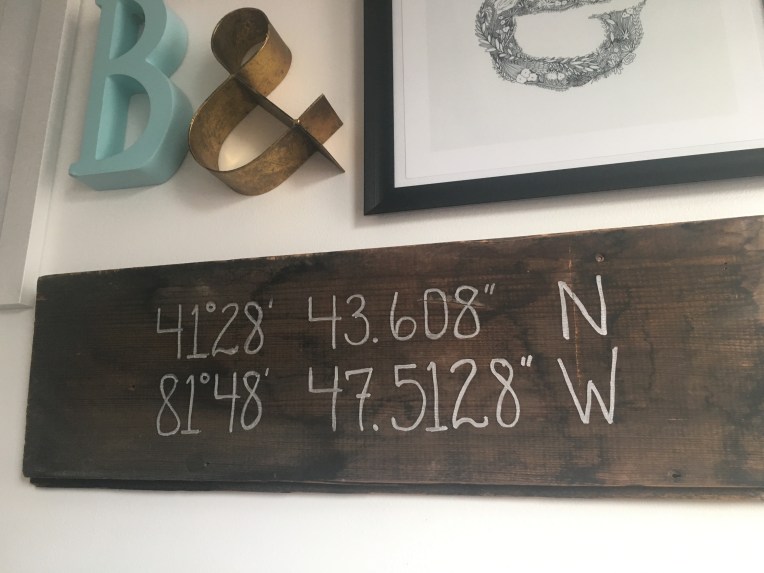
I love the way it came out, the old wood is what brings this simple sign to life. The metallic silver lettering also pops on the wood grain with a nice mix of old and new. I wanted to keep it simple with the text and not do anything to fancy to really rely on the wood to pull this piece to life with the metallic accents. One of my goals for the gallery wall if you remember wayyy back to my Gallery Wall Inspiration was that I wanted to add color, textures, and different elements that represent B and I without it getting too girly.  I feel like the earthy wood grain in the coordinates sign helps balance the ‘girly’ along with pulling in the other wooden frames used on the wall.
IMG_4716IMG_4972For now the gallery wall is feeling pretty complete. There may be some additional pictures added below but for the longest time there was this awkward section where the coordinates sign ended up going, so order has been restored! And I am loving the piece of our home that we’ve been able to restore in more than one way.

DIY – Window Side Table

I am excited to share my latest project with all of you; a window table.  Once you have the materials, this project is pretty easy and low cost! It’s a win-win when it comes to creating a cool piece that’s custom to your needs, whether it be a coffee table, plant stand, or a side table the options are endless.

What You’ll Need;

  • Window (of your choice) – I used an original window from our basement, since they were pulled out when we had glass block put in. Total cost; $0
    • Don’t have any old windows laying around? Check garbage day, it’s amazing what people will put on the curb!
  • 4-Legs; length and style of your choosing. I used: Waddell Ash End Table Leg from Lowes. Total cost; $16
    • NOTE: I bought legs with pre-installed hanger bolts that allowed for a clean smooth finish without needing extra hardware to attach the legs
  • Wood Glue
  • Paint – color of your choice & paint brush
  • Drill and drill bit to predrill holes for legs
  • Blade to scrape off excess paint on windows
  • Timing; finished within a weekend

From there you can prep your window by cleaning it up and sanding if you’d like. I opted to keep the hinges and some of the other rustic elements since I was working with a 100-year old window.

Next, flip over and mark out where you’d like to place your legs – as you can see with the window I was working with the spacing and exterior width was inconsistent and not much to work with so I eyed about an inch from the edges. Once I had those marked, we pre-drilled a hole, although we didn’t go deep enough a few times so we had to go back over the holes.

Before screwing the legs in we added wood glue in the hole and around the bolt on the leg. Make sure your legs get all the way in and are secure, some of ours were wobbly, so we had to re-drill new holes and start over. But once they were in and secure you definitely knew it. The wood glue required about 12-hours to dry, so day one was finished.

After the wood glue was dried, I flipped the table over and began to paint! I opted to use a primer over the preexisting brown, and also did the legs in the same color.  I had to do 3-coats before this beauty was looking clean.

I let B do the fun stuff and scrape the paint I’d gotten on the window.  This really cleaned up the piece to give it that finished look. From there it was just giving it a good clean with some Windex and setting it up in place – we added this gem as an accent in our sun room. The light and airy of the white and windows ties into the space perfectly.IMG_4428IMG_4430IMG_4432
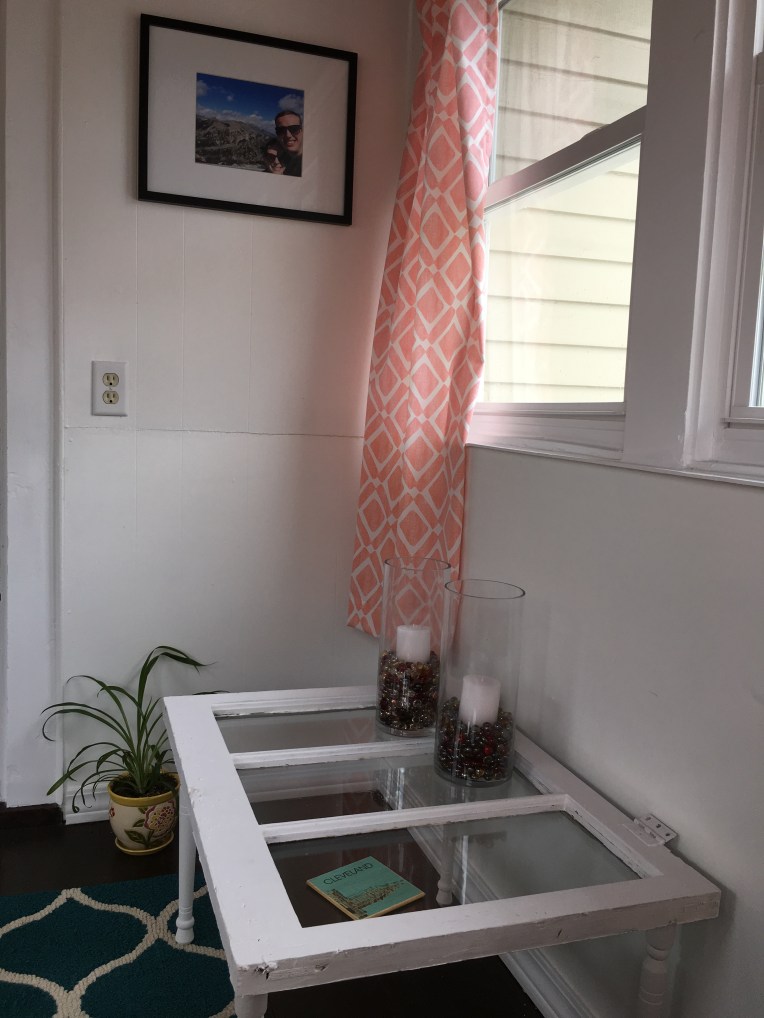
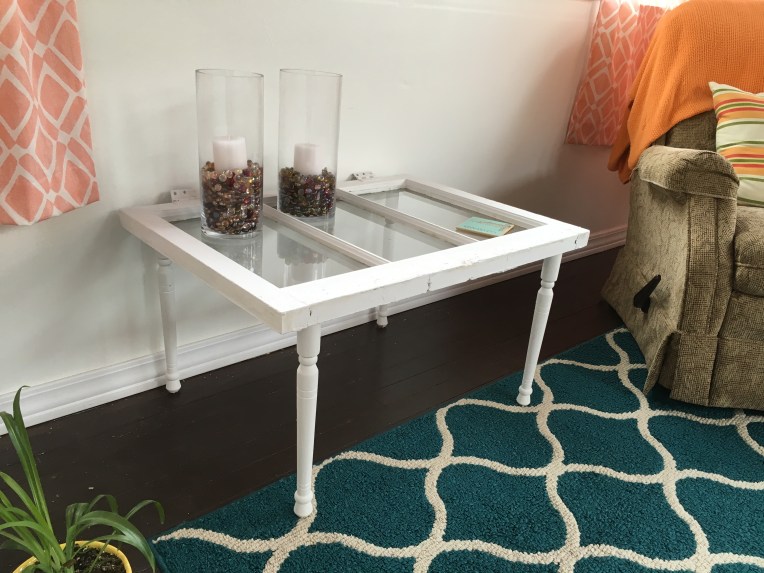
Using most of what we already had, the main expense was buying the legs for $16 – you can’t even get a coffee table for that!  I love the way it turned out, it still has a vintage and rustic flare to it. Not to mention it has multiple purposes and I am sure it will change overtime for us!

Happy DIYing!

Latest Obsession: For The Home

HERE’S WHAT, I have been absolutely obsessing over especially as the summer months are approaching and the store’s are switching out their inventory to be summery!!!

Lanterns. OBSESSED. I want them everywhere, but especially for outdoor spaces like our front porch. I love them as decor for your entry way and even lightening for your seating area. I also love lanterns for decoration inside, around a fireplace or hearth area, especially the really big lanterns. Not to mention you can find them in almost any finish from silver, to gold, wooden, ceramic, or bronze to fit into your current decor or switch to something new. You can get hanging lanterns or keep them on the ground or table. Plus you can use them season round by mixing up colors and styles with different fillers for the insides… I could go on for dayzzz!  On a lantern kick like me? Check out craft stores, as a lot of them have sever price cuts on summer and outdoor decor (like 60-70%!) you can’t beat it.

Greenery. I am loving me some greens, the fake kind. I first saw some moss like letters at Michael’s and really wanted to impulsively buy them, but one didn’t know what to spell or letters to get, and two thought they would look way out of place in my house, but I can’t help but pine over them. I also really love boxwood wreaths, but refuse to spend the money online and will most likely DIY one, one of these days. And as much as I truly don’t like fake plants, because I’d rather just have a few real ones – I really like the fake greenery balls… yes I just described them as such, okay they’re technically “boxwood vase fillers” (according to Target). Anyways, I like the idea of having some greens around the house to add to the real greens, it brings some added life to your living space.

So those are my two latest obsessions right now, I’ve had my eyes on the lookout for these whenever I hit the stores.  I recently grabbed two silver lanterns for some added decoration up in our master suite, and I love how they compliment the space, we have a mixture of metals, but somehow it’s all working.

What’re your summer favorites?