Ohhh, you guys!! This was a fun, easy and affordable craft and I just love how it turned out! This custom Valentine-inspired painted table runner is a spin on an everyday piece and not one that I really ever thought about making, at least one that didn’t involve buying fabric, sewing or investing a ton of time on. Read more to see my supply list, project cost and step-by-step for painting and creating your own X’s and O’s table runner, just in time for a Galentine’s brunch!
 Craft Supplies:
– Off-white plain linen table runner from Amazon ($14.99)
– All purpose craft paint: Pink / Rose from Michael’s ($0.79 each)
– Smaller paint brush – I have this 7ct Paint Brush set from Target
Project Cost: $17
(not including paint brushes)
Step-by-Step:
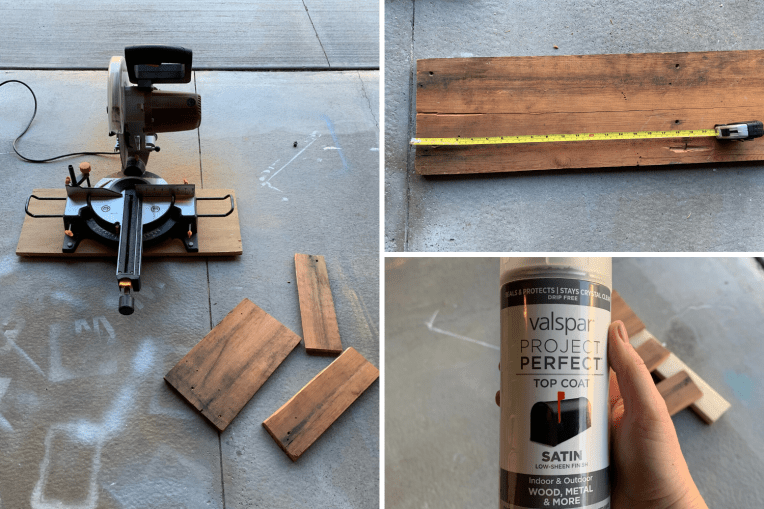
1. I order my linen table runner from Amazon, there was a brief though to try and make my own with buying fabric – but I quickly saw that being a disaster. Two-day shipping and $14.99 on Amazon, sounded way better! I compromised on the size (14″ x 72″), as I like a wider table runner since we have a larger dining room table, but found a off-white linen that looked to be perfect.
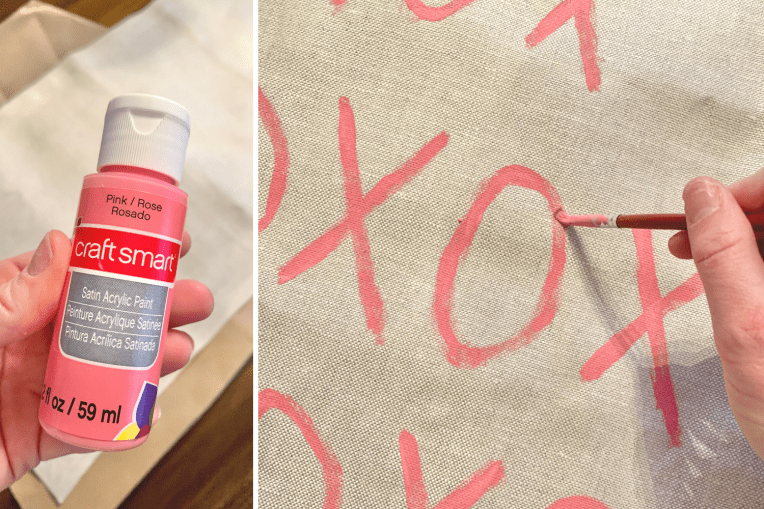
2. Paint color was my toughest decision – I initially planned to do black, but thought red could be fun and then ultimately decided on a lighter pink as that worked better with dining home decor and I love how it turned out! Now to the fun stuff…
3. Before I got painted, I did have to iron my table runner to smooth out some of the fold marks! I didn’t get it as smooth as I would’ve liked, but it was much better than before – this was definitely needed before painting.
4. Get ready to paint! I put paper bags down in order to paint, and painted on my dining room table — which was a good feel for the space while I painted and scaling my X’s and O’s. Starting in the bottom corner I kept it simple and fit four across and repeated the pattern by alternating which letter I started with and worked my way towards the center.
Pro-tip: I eyed my spacing and letter size, but you could use a ruler to keep spacing even between lines and/or letter height!
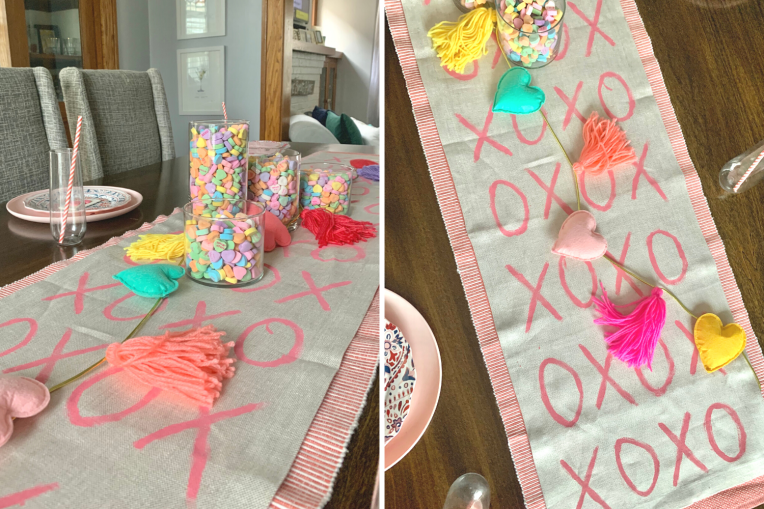
5. Keep going until you finish up the length of your runner! Keep in mind as you’re painting if you mess up, or have brush strokes showing, it’s OK — it’s suppose to look hand drawn and painted which gives it a unique look. Besides, from a distance you can’t really see any of the imperfections.
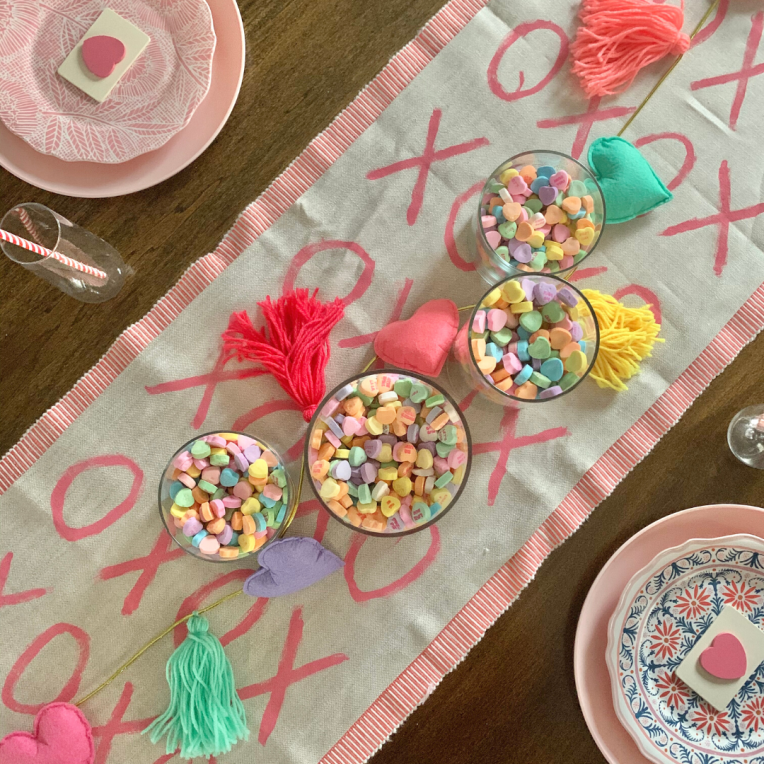
I let this dry overnight before styling this up! I had another pink table runner that was a little wider than mine, so I was able to layer underneath and the pinks complimented each other perfectly! I then added a few jars with conversation sweet heart candy, some fun colorful garland, this table was just needing a few finishing touches for a Galentine’s brunch!
Besides just completely loving how this came out (slightly obsessed!) — the price can’t be beat for a custom piece that fits EXACTLY what you were wanting. $16 is about the going rate, if not more for you’re every day or holiday themed table runner, so I imagine I’ll be doing this in the future for more holidays or special occasions! Plus it only took me about 45-minutes to iron and paint.
What do you think!?

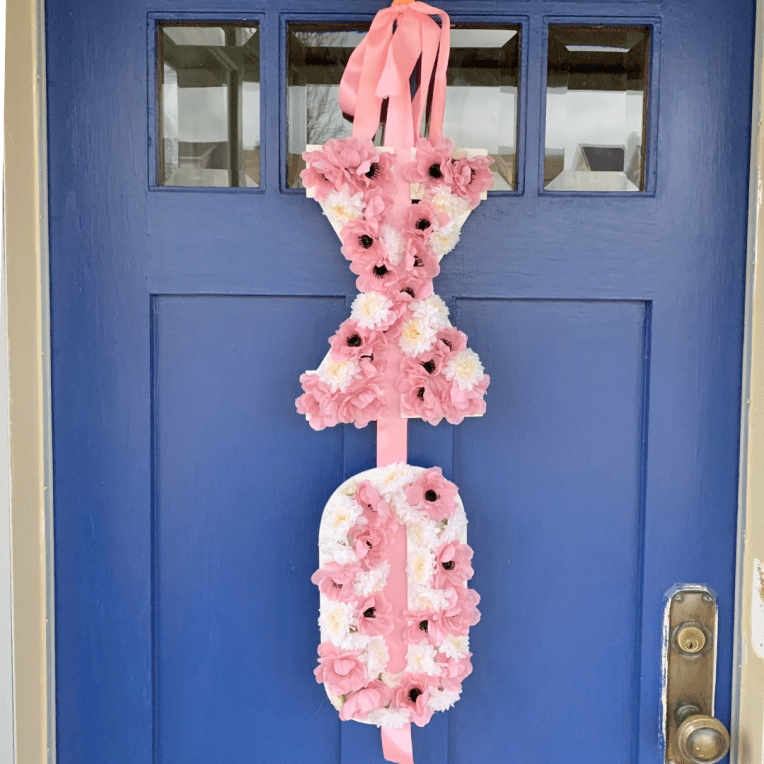
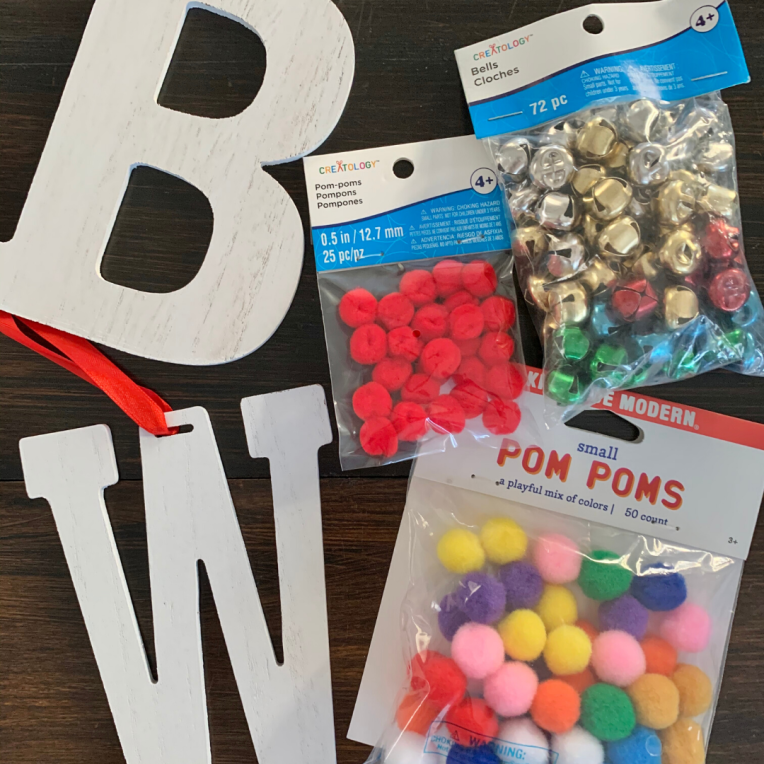
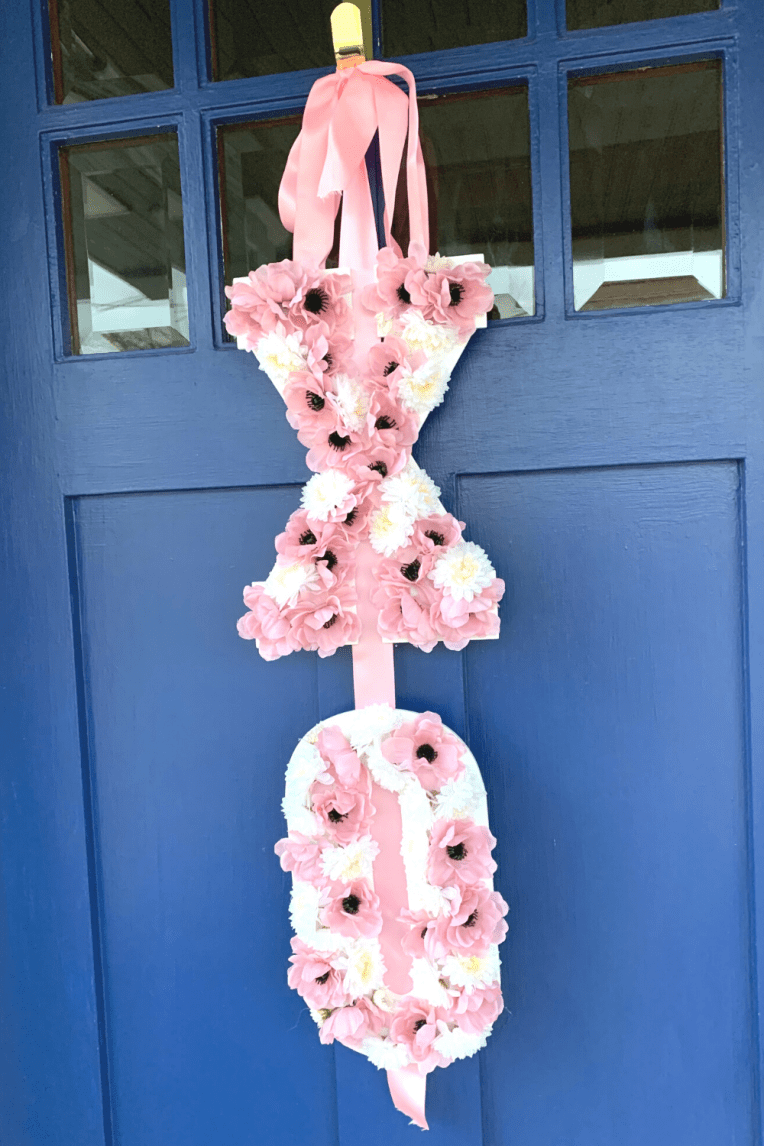 Ok! Here is what you’ll need to get started, in addition to a step-by-step guide to filling in your letters with florals and then securing for a stunning statement piece for your front door!
")
")
")
")
")
")
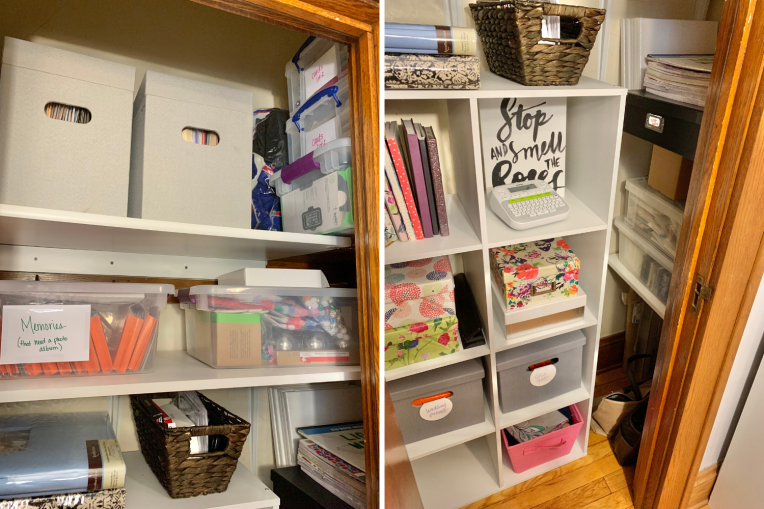
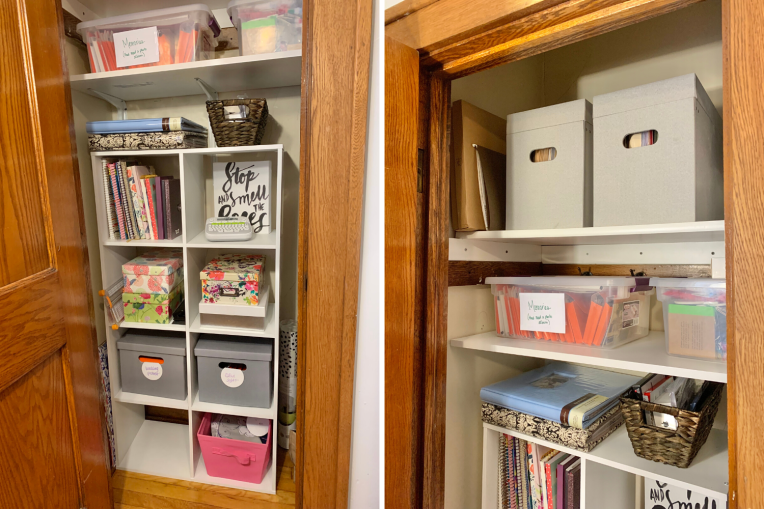
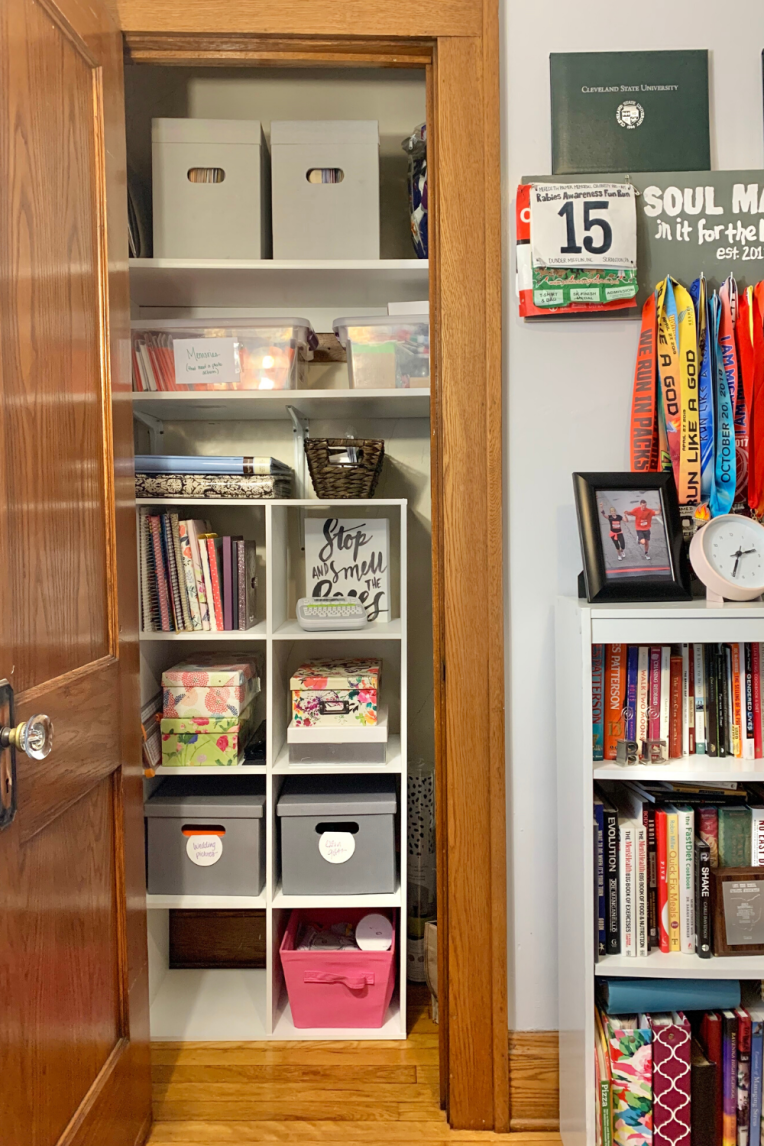
 Obsession: Getting Organized. I went to town last winter on a few projects including
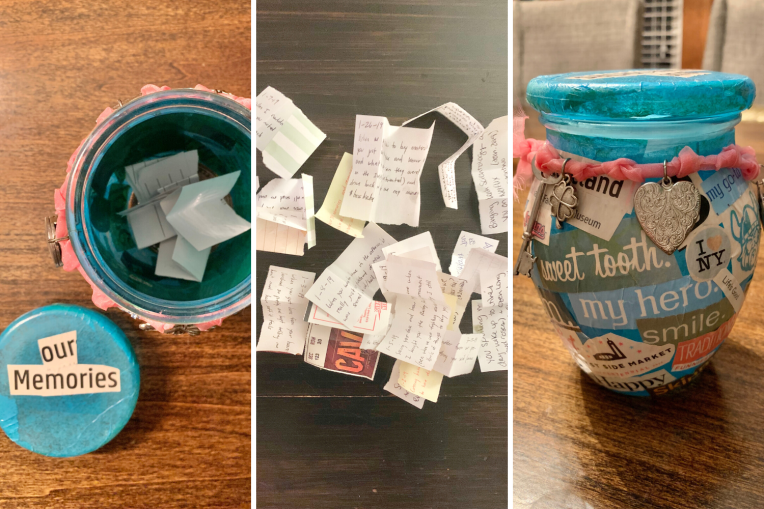 On New Year’s Day, B and I make time to dump out all our little notes and take turns reading them back and forth to each other. We laugh, try and guess who wrote the other’s note and reminisce on those ones that we forgot about. To keep these notes accessible, I tape them into a journal – filling the pages, so it’s easier to look back and we’ve added to the same journal year after year, with more memories captured in more years than others.
 Step-by-Step:
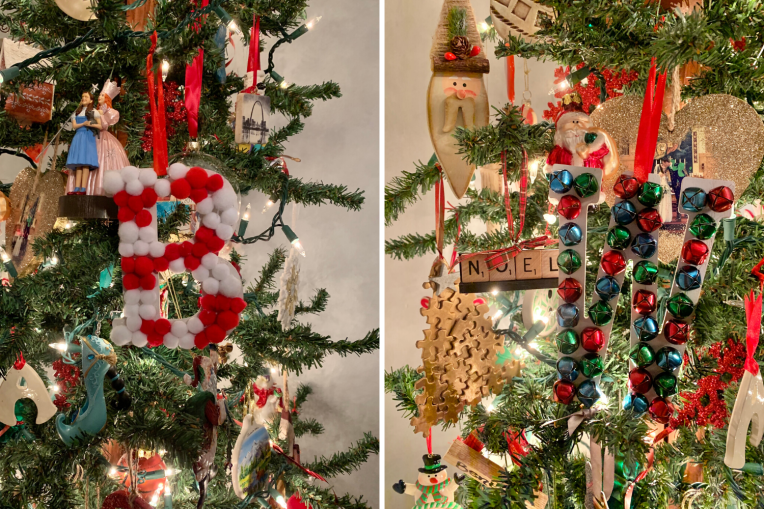
")
")
")
")
 2. Woo! We have our openings, so now it’s time to cut our our bases and start planning our wintry scene. I used thicker card stock, that I ended up painting and putting glitter on — I would highly recommend buying
 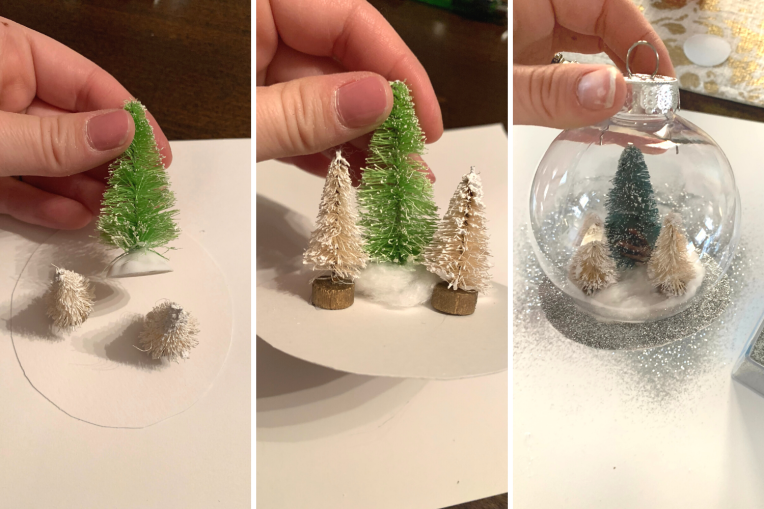 5. Now, depending on if you bought glitter paper or not, this step may not be needed. Using mod podge glue I painted the top of the white paper bases and then covered in silver glitter over a paper plate to catch the excess. I had to touch up a few spots once the glue dried and I dumped the remaining glitter off to see emptier spots. If you bought glitter paper, you are 10-steps ahead of me!
")
")