Galentine’s Brunch Planning Guide

With Galentine’s falling on a weekend, it is the perfect excuse to host a brunch! And for me, there is nothing more that I love than a good brunch — not to mention, I think it’s one of the easier meals to host, while still being able to make an impressive spread that is tasty for everyone. But don’t worry, I have you covered from the menu, recipes, table setting, Valentine’s and decor, too!
Galentines_beelifeblog(2)
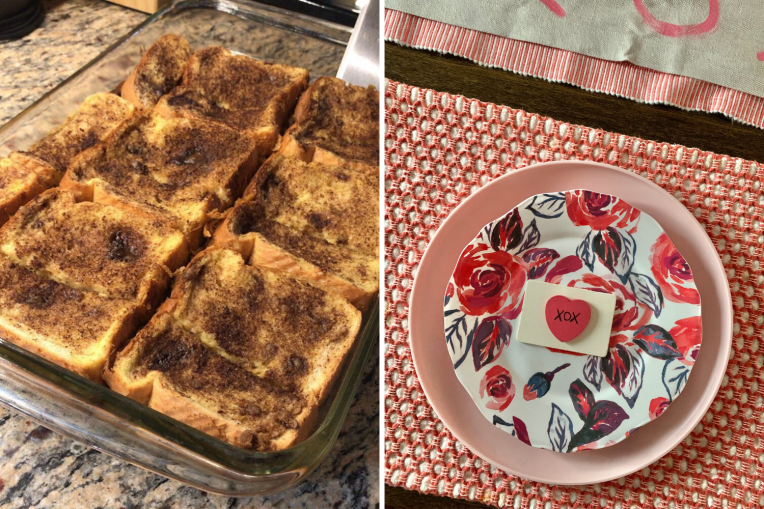
When it comes to brunch food, there are a ton of great recipes that are overnight prep so all you have to do the morning of, is stick them in the oven and wait for your guests to arrive! Not to mention both casseroles are easy to prep, don’t require a done of ingredients and cover both bases for those friends who are sticking to a diet or maybe love indulging in a little something sweet! The overnight egg casserole is easy to switch out to be meat free if you’re accounting for any dietary needs. Fresh fruit with brunch is always a must, I like to go with blueberries, strawberries or raspberries – something colorful and health conscious to take away some of the guilt!

Galentine’s Brunch Menu:
– Overnight Casseroles: Breakfast Egg Casserole + French Toast Casserole
– Fresh Fruit
– Donut holes or Cinnamon rolls
Bloody Mary Bar
– Mimosas

Lastly the beverages for your Galentine’s Brunch are just as important as the food! Knowing your gal-pals preferences always helps streamline this, so you can have a mix of Bloody Mary’s and Mimosas or can stick to one. This post on how to create your own Bloody Mary bar can help you make a fun statement and if you’re planning for mimosas, be sure to grab a few extra juices besides the standard, like cranberry or pineapple plus your fresh fruit can garnish these too!
Galentines_beelifeblog(3)
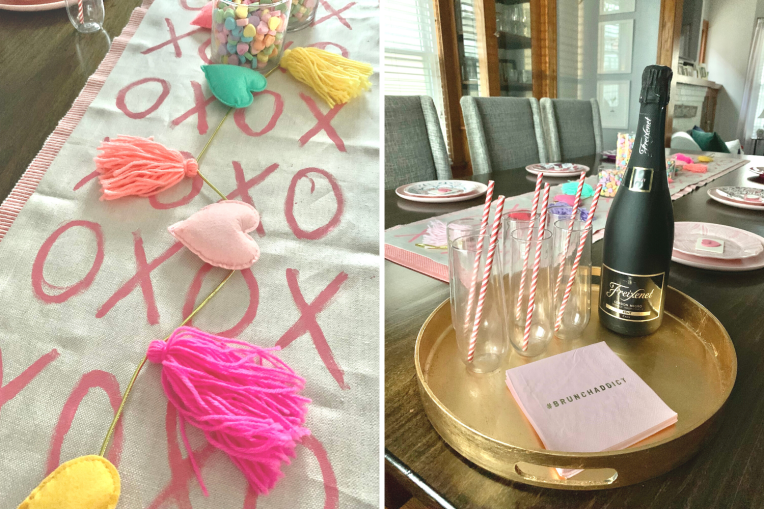
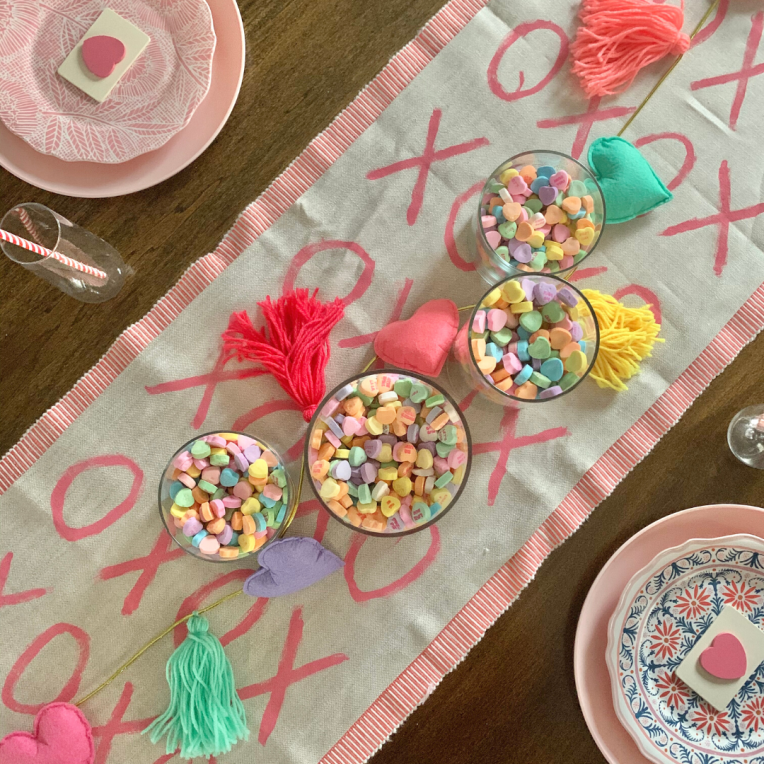
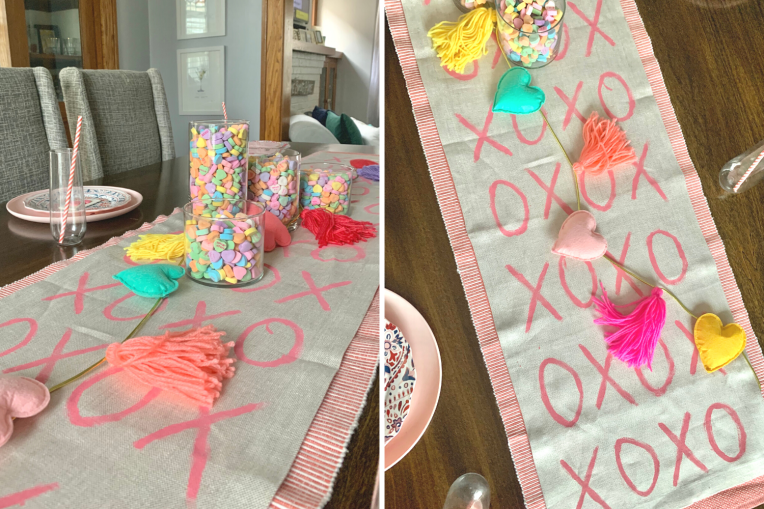
Set the Table & Decor. Since it’s your gal pals, keeping the table setting and decor simple, yet fun and festive is key and will also let you enjoy yourself too! Making your own table runner and place settings can help save some money with taking little time and effort on the crafting side, and still resulting in a big impact. This hand painted X’s and O’s table runner, I shared last week is just too stinkin’ cute and is pretty in pink for Galentine’s Day!

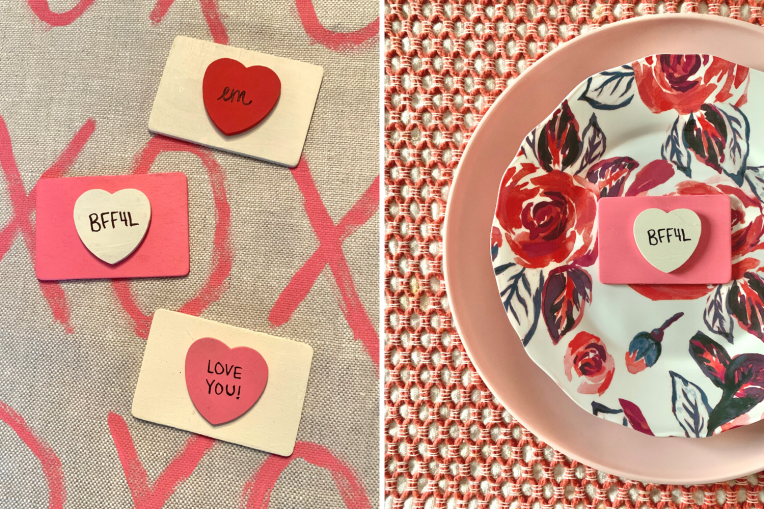
Also, don’t let your gals go home empty handed without a little keepsake; these wooden love letter Valentine’s can be customized with everyone’s names or fun little notes like, “U R CUTE” or “BFF4L” or “Ride or Die.” Adding a little note on the back is another way to send a little extra love their way! These will help finish off your table decor and filling these seats, while also bringing a big smile to your pals faces. And snag the colorful cute heart tassel garland from Target for only $6 to add to your table decor or hang in an entry way! Galentines_beelifeblog(1)Finishing Touches. Getting festive red or pink paper straws can be a fun touch for those Bloody Mary’s or the mimosas. Fresh flowers are always a nice touch if you wanted to switch out your table centerpiece.  Don’t forget to set the mood for your brunch with some music, check out my Heart Ache playlist or my emnblovetracks playlist for a mix of all those feelings of love. Heart Ache has a lot of good throw backs, especially some good ones to sing with your gals.

Happy Galentine Brunching!

bee (1)

DIY – Wooden Love Letter Valentine’s

I love getting crafty and making my own Valentine’s especially when it comes to my hubby! A few years ago, I shared my go-to homemade paper Valentine, made from scrapbook paper, pictures, stickers and ribbon — but this year I wanted to mix it up and do something still crafty but different.
DIY_Valentines(3)
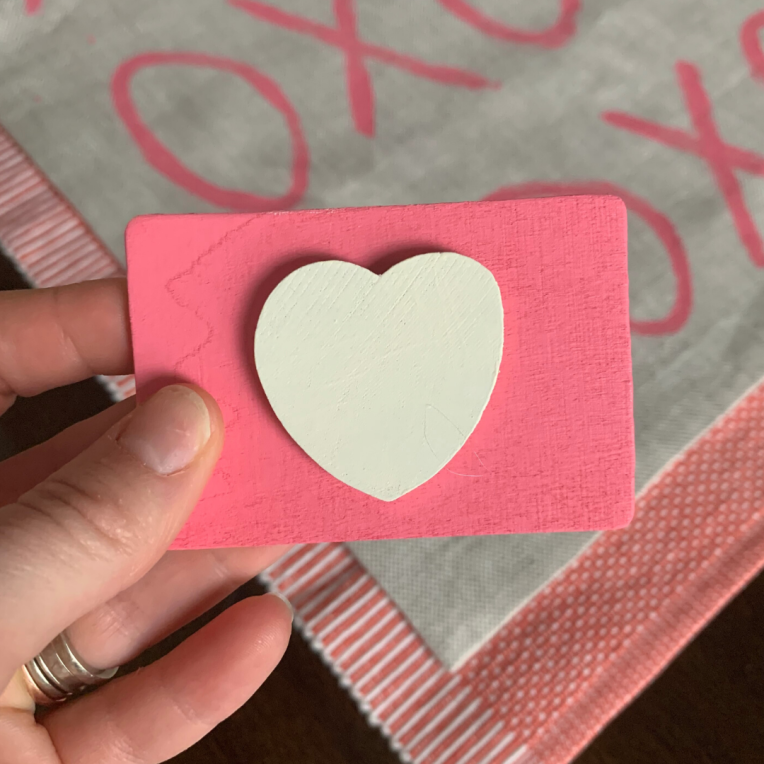
I found these really cute wooden pieces at Michael’s for this fun DIY Valentine that is so easy and affordable to make by stacking them to make mini love letter envelopes with big hearts on them! Super easy, super cute and then you can personalize them for all your Valentines. The best part is these wooden Valentine’s can double as adorable place-settings for your Galentine’s brunch!
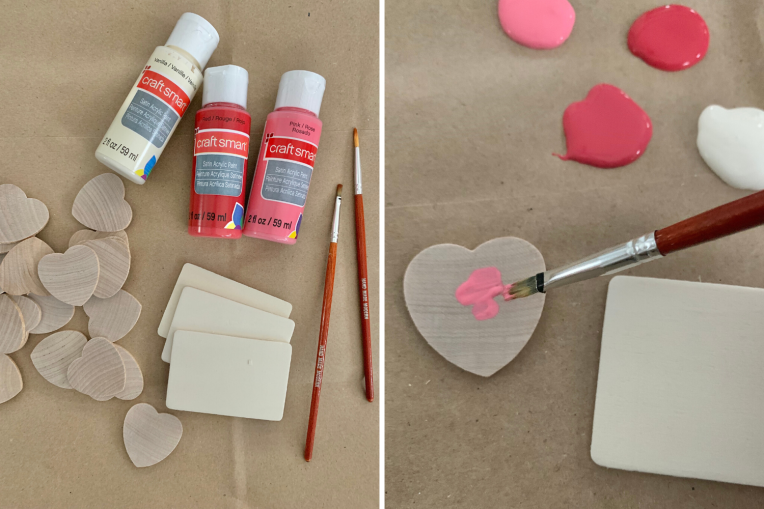
Craft Supplies:
– (1) Wooden Hearts – 21pcs
– (2) Rectangular Wooden Signs – 6pcs
– All purpose craft paint Valentine colors of your choice ($0.79 each)
– Hot Glue
– Smaller paint brush – I have this 7ct Paint Brush set from Target

Project Cost: $12
DIY_Valentines(1)

Step 1: First things first, is to paint all of your wooden pieces — have fun with this and mix and match but pick colors that’ll compliment each other. I did a lot of white bases with pink or red hearts.  I also did a few pink and red bases with white hearts which was a fun pop!

Step 2: You’ll probably need to do a few coats, especially the white on the wood — it soaks up the color, make sure to paint both sides of the bases and let all your pieces dry with plenty of time!

Step 3: Once everything is painted and dried, you can hot glue your hearts onto your bases. I kept my centered, but you could offset to write if you wanted too!

Step 4: Personalize as you’d like with fun phrases, names, or cute messages on the heart and write a longer message on the back of the bases for all your favorites. If you’re using these as place settings for a Galentine’s brunch or dinner you can stick with names or write fun little notes for each of your bae’s.
DIY_Valentines(2)
These little love letter Valentine’s are to cute, hand held and also dual purpose (which I also love!) So get your crafting pants on and head over to snag these supplies so you can create your own custom, cute and clever Valentine’s that will be the perfect keepsake for friends, family or all your gal pals.

bee (1)


Gearing up for Valentine’s Day? Check out these easy painted Valentine themed table runner or this festive floral door decor!

DIY – Painted Valentine Table Runner

Ohhh, you guys!! This was a fun, easy and affordable craft and I just love how it turned out! This custom Valentine-inspired painted table runner is a spin on an everyday piece and not one that I really ever thought about making, at least one that didn’t involve buying fabric, sewing or investing a ton of time on. Read more to see my supply list, project cost and step-by-step for painting and creating your own X’s and O’s table runner, just in time for a Galentine’s brunch!
DIYTableRunner(3)Craft Supplies:
Off-white plain linen table runner from Amazon ($14.99)
All purpose craft paint: Pink / Rose from Michael’s ($0.79 each)
– Smaller paint brush – I have this 7ct Paint Brush set from Target

Project Cost: $17
(not including paint brushes)

Step-by-Step:
1. I order my linen table runner from Amazon, there was a brief though to try and make my own with buying fabric – but I quickly saw that being a disaster. Two-day shipping and $14.99 on Amazon, sounded way better! I compromised on the size (14″ x 72″), as I like a wider table runner since we have a larger dining room table, but found a off-white linen that looked to be perfect.
DIYTableRunner(1)
2. Paint color was my toughest decision – I initially planned to do black, but thought red could be fun and then ultimately decided on a lighter pink as that worked better with dining home decor and I love how it turned out! Now to the fun stuff…
3. Before I got painted, I did have to iron my table runner to smooth out some of the fold marks! I didn’t get it as smooth as I would’ve liked, but it was much better than before – this was definitely needed before painting.
4. Get ready to paint! I put paper bags down in order to paint, and painted on my dining room table — which was a good feel for the space while I painted and scaling my X’s and O’s. Starting in the bottom corner I kept it simple and fit four across and repeated the pattern by alternating which letter I started with and worked my way towards the center.
Pro-tip: I eyed my spacing and letter size, but you could use a ruler to keep spacing even between lines and/or letter height!
DIYTableRunner(2)
5. Keep going until you finish up the length of your runner! Keep in mind as you’re painting if you mess up, or have brush strokes showing, it’s OK — it’s suppose to look hand drawn and painted which gives it a unique look. Besides, from a distance you can’t really see any of the imperfections.

I let this dry overnight before styling this up! I had another pink table runner that was a little wider than mine, so I was able to layer underneath and the pinks complimented each other perfectly! I then added a few jars with conversation sweet heart candy, some fun colorful garland, this table was just needing a few finishing touches for a Galentine’s brunch!

Besides just completely loving how this came out (slightly obsessed!) — the price can’t be beat for a custom piece that fits EXACTLY what you were wanting.  $16 is about the going rate, if not more for you’re every day or holiday themed table runner, so I imagine I’ll be doing this in the future for more holidays or special occasions! Plus it only took me about 45-minutes to iron and paint.

What do you think!?

bee (1)

Valentine Floral Letter Door Decor

With the last few days of January, I’m starting to get the house ready for the holiday and love! And our front door is always my starting point. Over the summer I finally made a floral letter craft that I’ve had on my list for year’s (and was a gift) and was inspired to create my own floral letter’s only for some new Valentine door decor. I was pumped when I snagged some seriously discounted pink and white florals over the holidays along with an oversized wooden X and O, this was just what I needed for some pretty and festive Valentine decor!
Valentines_Floral_Final(4)
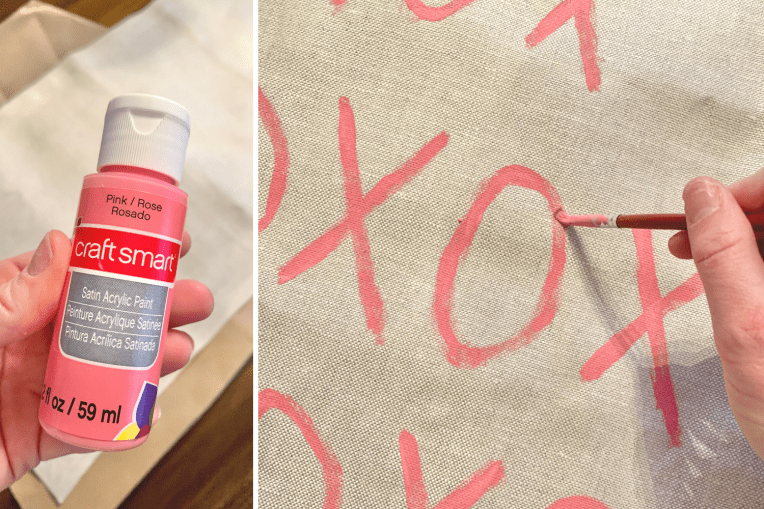
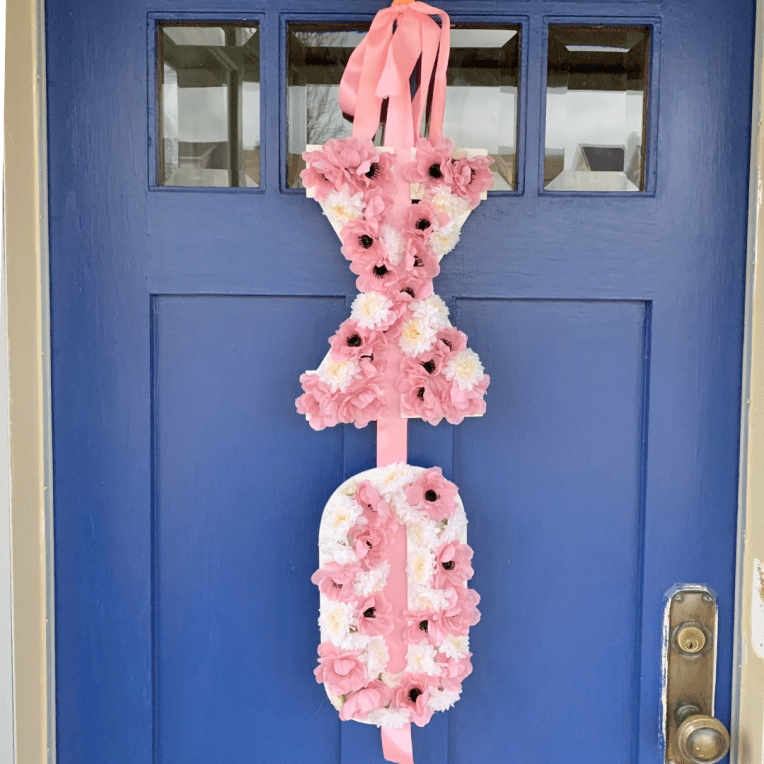
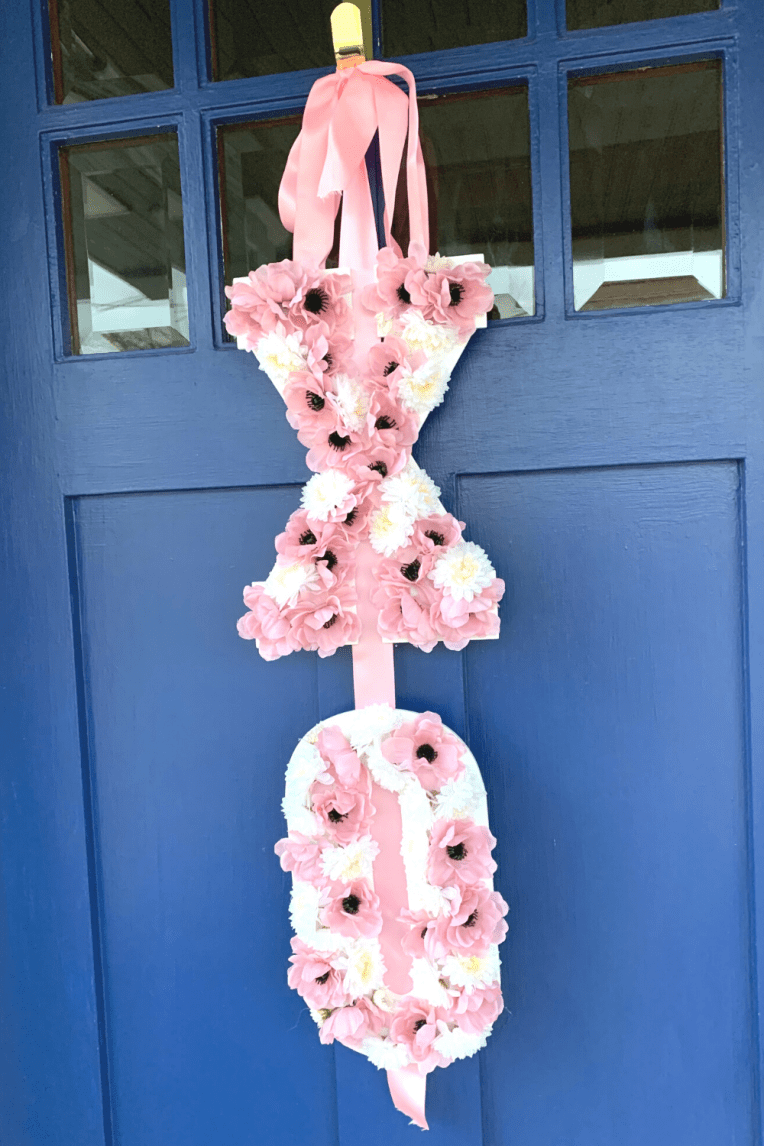
Ok! Here is what you’ll need to get started, in addition to a step-by-step guide to filling in your letters with florals and then securing for a stunning statement piece for your front door!

What You’ll Need:
13″ Wooden Letters from Michaels for $5.49 each
– Florals of your choice (7-9 stems)
– Hot glue
– Pink ribbon or color of your choice, make sure it’s at least 3-feet long if you’re working with 13″ letters

Pro-tip: Keep an eye out for discounted seasonal florals in the off season to stock up for future projects or gift ideas!

Step-by-Step:
1. Floral buying tip — always buy a few more bunches than you think! I used about 4-stems of the pink poppy flowers and 3 stems of the white flowers, and I was running short! My initial plan was to do all pink, but did not have enough… which leads me to an important step #2.
2. Once you’ve dead-headed all your faux flowers (removing flower from the stem) — it’s crucial to map out your placement before any gluing! This can help you determine if you need more fillers or need to switch up the design.
3. Now that you have your florals mapped out on your letters, it’s time to start gluing your flowers on! It’s important to be generous with hot glue on the base stem of the flower in addition to the petals if needed to help with coverage. Cut off any additional stem that might make your flowers stick out more than you want! Repeat, until letters are filled in.
4. Allow for plenty of hot glue dry time for your X and O flower filled letters before flipping over to add the handing ribbon. This ribbon will connect the two letters in order for them to hang. Make sure the length of the ribbon is long enough to span the X and O with some extra, to be able to tie a loop/knot for hanging — stretch out over the back of your letters before gluing to make sure you have length. Again, be very generous with your hot glue with this since your floral letters will be hanging from the ribbon. Allow this proper time to dry before trying to hang. Valentines_Floral_Final(1)
Once you have your letters filled in and the ribbon attached, tie a loop to hang on your front door — it’s time to hang! This would even make fun wall decor that could hang inside your dining room or in place of a photo.  I added extra ribbon at the top to have a bow for a nice finishing touch on the door – and love how the pink and white pops on our blue door! Our front door is now ready for the Valentine holiday and spreading love to anyone who passes by.

bee (1)


Looking for more Floral Letter Inspiration? Check out my $25 Floral Letter for Baby Shower decor.

Before & After: Office Closet Organization

Are you ready for a swoon worthy before and after?! As I mentioned in my last latest obsessions post, I’ve been gearing up for another fun before and after and getting my office closet organized, as it was in a dire state.  This space is one of the most utilized closets in the house, besides our clothes closets. As it’s my go-to closet for craft supplies, scrapbooking essentials, seasonal decor and other office items – so it’s used a lot, and needed more shelving!
Closet_Final(4)
The Issue. I would have to unload multiple containers to get the one I needed, it was a pain in the butt and NOT functional. We also had a filing cabinet that was conveniently stored, as it was a bit of an eye sore, but also took up a lot of space and left for awkward openings for the rest of the storage containers.

In general, there was just an overall lack of shelving — B had previously installed a white shelf at the top which helped immensely at the time, but just wasn’t enough.  I also had a few larger tubs that took up a lot of space and held a lot of things, with this being a smaller, crammed closet – these larger tubs didn’t help. Check out the before pictures…

The Solution. I needed more shelves! I knew I could add in a few shelves in the nook area to the left, but didn’t want to close off complete access to those. One solution was to add in long shelves the entire length all the way down, but felt that would still cause for some unpacking to access other things.

I needed the nook shelves to be accessible, while still having full storage across the entire space of the closet. I looked at a few different nicer storage and shelving units, but the sizes weren’t quite right or were too tall with the existing shelf already in place. So I opted for my trust cube storage, but looking for a larger 8-cube piece from Target and then some other white shelves from Lowe’s that would allow for customization and cutting. I got a 48″ white laminate shelf that I cut for my larger shelf, and a 23.8″ white laminate shelf that I cut in two for the nook area and utilized these shelf brackets to hold in place.

The final solution was also downsizing in a lot of the storage containers and also getting rid of that big, bulky filing cabinet – it had to go!

Final Organizing. The filing cabinet was easy to nix and opened up so much space — but I did still need some storage solutions that were function to hold on to some files. I found these fabric gray filing boxes and bought two of them to see how far that would get us in the consolidation process! They worked out perfect and were just what we needed, and they look great in the space.

I also moved some of the larger tubs that contained seasonal decor, down into our basement with the rest of my decorations so they’re all in one space. From there downsized my craft supplies into smaller boxes and containers and labeled them.  This has been much over due, and will be so helpful with crafting and putting away!
Closet_Final(2)
Closet_Final(1)
This space was instantly transformed with this new storage which ultimately allowed me to customize for my needs, for this space. I spent about $125 on the new shelves, supplies and fabric boxes and I just love how it turned out! Eventually I’d love to get all matching storage containers and boxes — but I used old boxes and baskets that I had since the all matching wasn’t in the budget and I had a lot of containers that weren’t being fully utilized.

Questions? Thoughts? Leave a comment below!

bee (1)

Latest Obsessions 01.20

This past weekend was a cold and snowy one, which meant it was perfect to plan a few upcoming house projects, work on some Valentine crafts and get extra snuggles in with the pups while binging the latest hot documentaries on Netflix! Which brings me to my latest obsessions, aka, all of the above.
LatestObsessions01.20-beelifeblog
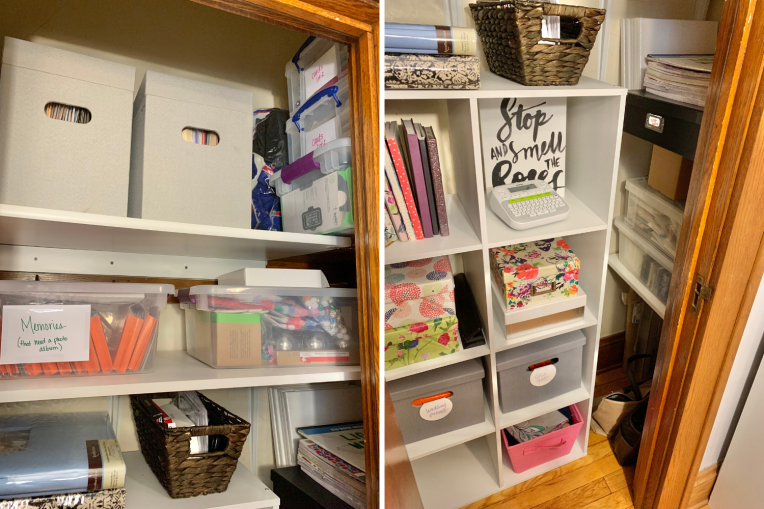
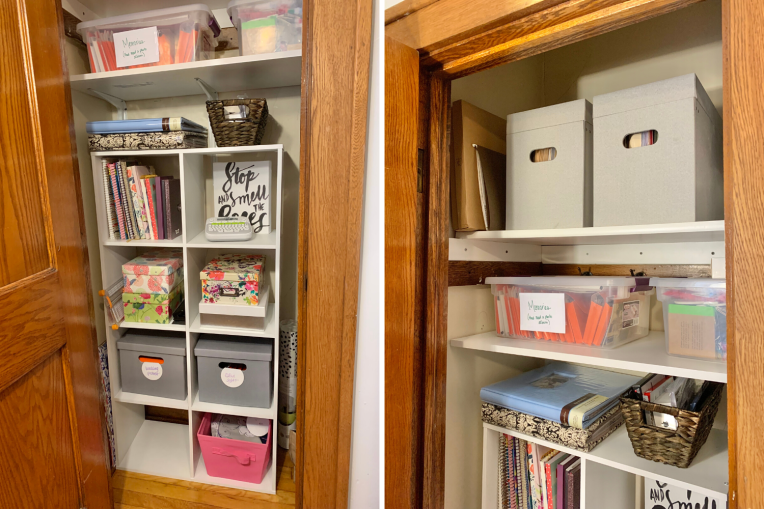
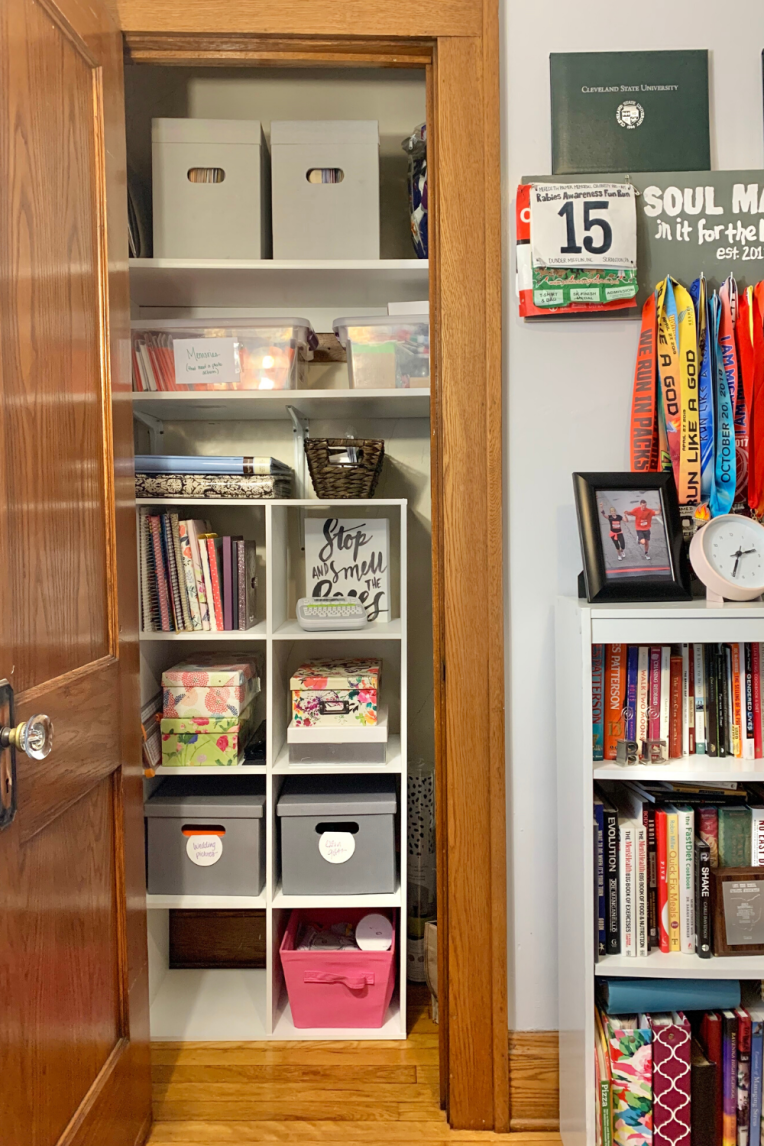
Obsession: Getting Organized. I went to town last winter on a few projects including my kitchen pantry transformation, which I’m proud to report has maintained just as pretty  and organized as it was when I finished it up! I also worked on glamming up and organizing our linen closet on the second floor – not only have then both been more functional, they both look pretty while doing it!

Next up is my office closet; this just needs more shelves and is one of the most utilized storages spaces in the house, and houses my crafting, scrapbooking and some other office goodies. So it really needs to be functional and accessible – currently I have to unload everything to access certain containers. I think I figured out my game plan this weekend, so stay tuned for a fun before and after!

Obsession: Valentine’s Decor. I have so many fun DIYs to share to help celebrate this upcoming Valentine’s Day! I know a lot of other bloggers have been Valentine ready for the last two weeks, but I try to live a little more in the present and was still enjoying Christmas around our household until last weekend! So, from Galentine’s Day planning, to some fun fashion, to simple decor around the house.

If you’re planning and getting your house all Valentined-up, check out these fun and affordable banners at Target: Fun Heart Tassels Banner for $6 or Beaded Tassels Banner from Opalhouse for $9.99! The Opalhouse banner is a great subtle addition if you’re not overly X’s and O’s and hearts everywhere.

Are you decorating for Valentine’s Day or keeping it simple?

bee (1)

P.S. If you’re looking for some good Netflix documentaries we’ve loved: Killer Inside: The Mind of Aaron Hernandez and Don’t F**k With Cats Hunting An Internet Killer. We also just started The Outsider on HBO and just binged Seasons 1 and 2 of Good Girls thanks to Netflix (on NBC) — and can’t wait for season 3 to air this February!


Image Sources: Office Closet Inspiration | Valentine Decor Inspiration | Lolly Jane Blog

My 2020 Goals

I feel like my 2019 goals sort of sucked? Ok, maybe not all of them, but a good handful of them — I look back and am like, HA! Not a good thing, right? Well, that’s why it’s a new year! So, in addition to making my fitness goals a priority, which includes getting six races in this year, I have a few other personal goals that I want to focus on!
goals(2)-beelifeblog Pay off My Credit Card Debt by my 30th Birthday. This has been a goal of mine for… a bit, and it’s been one that I’ve been embarrassed to share, but I know I’m going to get this paid off and I’m damned determined to enter my 30th year with $0 in credit card debt. So that is just about 2-months from today *smiles*

More vacations. I just want to travel, always. I want to see so many places and experience, see new views and taste all the good foods. Our trips for the year are pretty much already planned out. But, I’m hoping to squeeze a few long weekends into a few more getaways beyond the bigger trip we have planned for later in the year. As always, I love sharing our travel adventures and eats with all my Bee readers, so stay tuned for a fun year of new places!
goals(1)-beelifeblogSaying No. I just had an exchange with my mom the other day, as I told her I’m sick of doing things – especially in my free time/weekends – that I don’t want to do. And she responded saying; “Well isn’t that life?” …and I said back to her… “Why does that have to be life!?”  We do things to please other people, because we may feel guilty or it’s just easier to say yes than it is to say no. But I’m over that, so don’t get offended people, or get ready to be offended. *winks*

Being More Present. This is across the board; in personal, professional, friendships, in family and self care.  I find myself being distracted, my mind wandering, picking up my phone to scroll — it’s easy to think of the millions of other things we want to do, already forgot about, or even dream about, but it’s not always easy to be present. And I think another part of that is continuing to be present and staying touch with all those important people, especially my hubby.
goals(3)-beelifeblog
I want to continue spending time with our dear friends, more one on one time, slowing down and just talking — we were reminded of that over the Christmas holiday and it was, refreshing, it was like old times, times I missed. I want to continue fostering my creativity through DIYs, house projects, writing, my career, and through encouragement and support of loved ones around me.

Needless to say, there is no shortage of goals over here in the Bee Life — but the ones above are the top, for now. What’re your goals for 2020? There’s no better time to start working on them, than now!

bee (1)

DIY – Every Day Moments Jar & How to Capture Your Year

A yearly tradition that B and I do is writing little notes down and placing them into our Memory Jar — but as I like to call it our “Every Day Moments Jar” because it’s more than just memories… we actually write down every day moments. Those moments that are easily forgotten or overlooked and don’t stack up to all of the other big memories throughout the year.
MemoryJar-beelifeblog(2) copy
I first made the jar in 2012 as a Christmas gift for B — it was a year we were trying to be frugal with gifts and saving our pennies, so I created a decoupage jar with words, letters and phrases that make up B and I.  This made our jar special and unique to us — a lot of memory jars on Pinterest are plain mason jars with a simple label stating ‘Memory Jar’ or ‘2020 Memories.’ Your memory jar is really whatever you want to make it, it could even be a wooden box, but I love making it a bit more special!

To create your own memory jar you could decoupage a mason jar or a jar similar to the one we have like this Libbey® cylinder jar from Michael’s – snag some old magazines, photos or notes and glue to cover the jar using modge podge.

So you have your memory jar, now what?  It can be hard to keep up with this throughout the year — so B and I keep this on our dining room table where we eat each night and make it a habit of adding in a note or two every night or every other night.  Next to the jar I keep a couple pens and a notepad that we tear pieces of paper from. Adding memories regularly, help capture those funny, thankful, or sweet moments.  We even add in tickets, wrist bands or other fun keepsakes throughout the year in the jar as we go.
MemoryJar-beelifeblog(1)
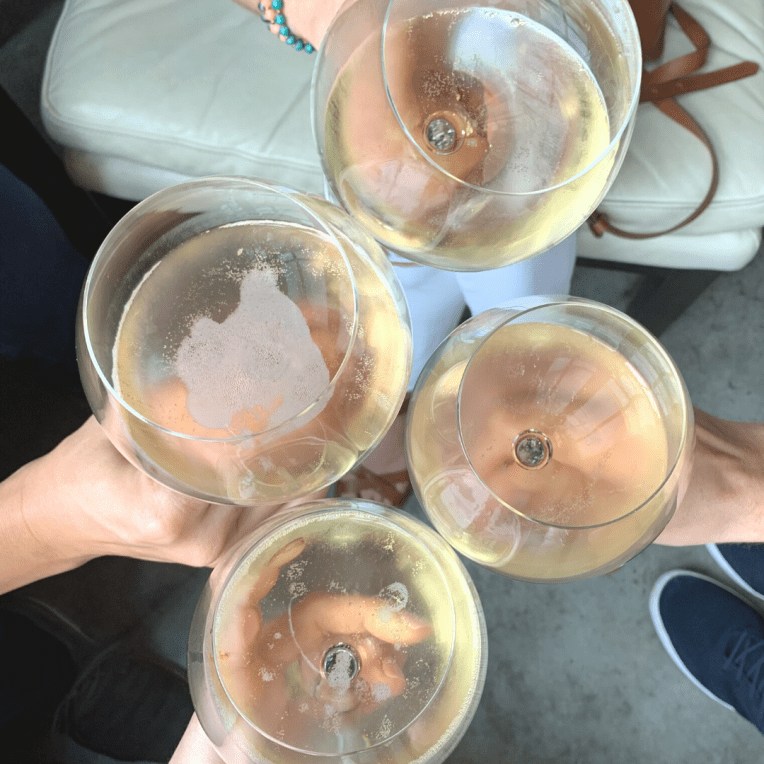
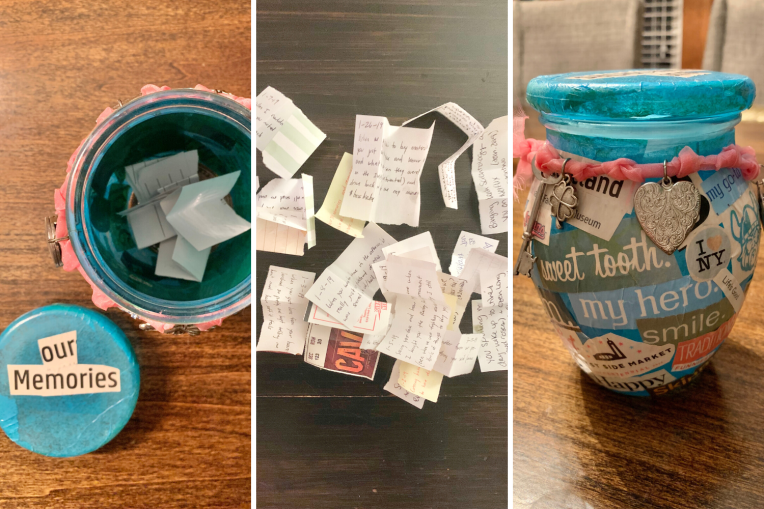
On New Year’s Day, B and I make time to dump out all our little notes and take turns reading them back and forth to each other.  We laugh, try and guess who wrote the other’s note and reminisce on those ones that we forgot about. To keep these notes accessible, I tape them into a journal – filling the pages, so it’s easier to look back and we’ve added to the same journal year after year, with more memories captured in more years than others.

This would also be a great Valentine’s Day gift and won’t be too late to start writing down those memories with your family and loved ones.

bee (1)

Race Recap – Resolution Run 5k

This past weekend I ran my first race of 2020! It was a last minute decision to sign up just four days before the race — but I’m so glad I did and I’m glad my running pal, K said she would run the race too.  One of my fitness goals is to run more, and completing six races this year – check the first one off the list!
RaceRecap5k-beelifeblog(1)
With the race being the first weekend in January, I knew the weather could be a crap shoot, but I didn’t want that to be an excuse.  It was 37 degrees and misting rain, which was manageable for the dead of winter and quite frankly my type of running weather.  I was feeling good and started with a slower pace for the first half mile or so and then picked it up to have a 9-minute pace for the second and third miles.  Kayla was not far behind and had an awesome time for her first race of the new year, too!
RaceRecap5k-beelifeblog(2)
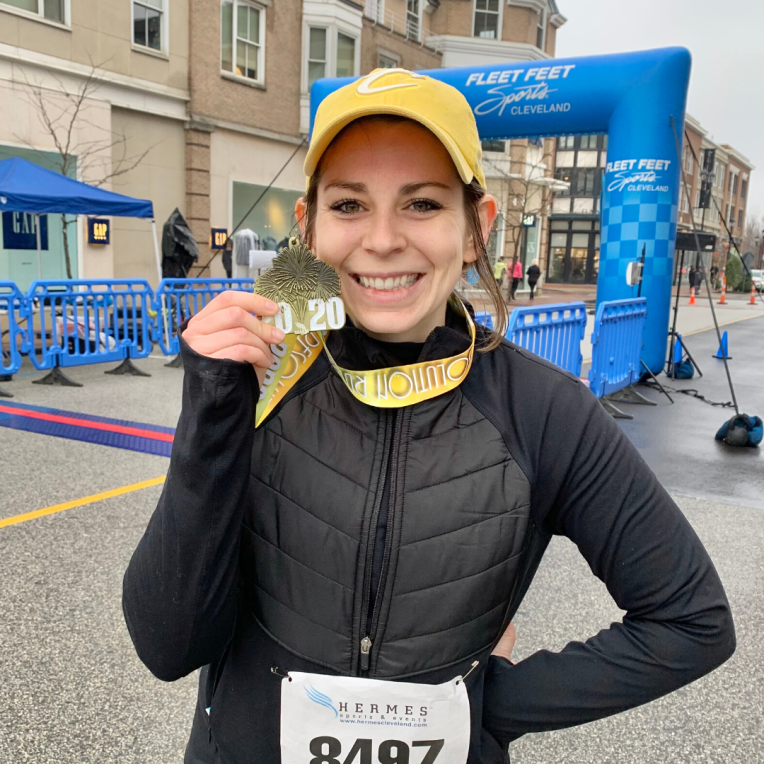
Part of the resolution was was pre-race toast with sparkling juice to toast to everyone’s resolutions.  There was even a resolution wall that everyone could write and share their resolutions for thew New Year on, K and I both thought of meaningful resolutions and wrote ours on the board.  Mine was not necessarily fitness based, and even a little cliche, but it’s true! I want to be more in the moment, with friends, with B, with family and even with coworkers.
RaceRecap5k-beelifeblog(3)
It feels good to have one race down. I signed up for my next race in April, a race we do every year. With two races already figured out, I only need to work on getting four more.  Not to mention it was truly great kicking off the new year with an awesome time, feeling great and staying motivated!

bee (1)