Dairy Free Taco Night Recipes

There are a few staples that I miss dearly being dairy-free among my many other dietary restrictions, a few of those being staples at taco night… *clears throat* queso… sour cream… cheese… all the good things!  So since I’ve been sticking to the opt-out of dairy lifestyle and finding substitutes or alternate recipes to fill in those gaps, I wanted to share a few recipes I have my eyes on and will be testing out in the kitchen here shortly.
Dairy Free Taco Night - bee life blog
For any of those newer to the dairy free world, in case you didn’t know but a lot of recipes use cashews as a substitute for cheese.

Vegan Queso: I’ve been scoping out a few different recipes a spicy jalapeno recipe, this delicious looking one, and then one surprisingly with eggplant instead of cashews! I’ve already assessed a few of these and know I’ll have to peel back on some of the ingredients and alter accordingly to make sure they’re kosher for my stomach – but that is the fun part about cooking!

Dairy-Free Sour Cream: A 10-minute recipe to give you the taste and texture of real sour cream, sign me up!  This recipe looks so easy it would be silly not to try it out – and have as the perfect topper for build-your-own tacos!

While I continue to research and look for more dairy-free recipes to try, I feel like I can at least start getting back to a normal taco night by incorporating these recipes in.  I’m also super lucky that B not only is game to eat and try these different recipes out, but he often takes the first step and makes a lot of them with me!  It definitely helps being on the same page when it comes to diet and restrictions, because it can become a lot to remember!

Do you have any dairy free recipes that you just love? Leave me a comment! I want to try them!

bee (1)


Image Sources: The Cookie Rookie | 24 Carrot Kitchen (recipes also linked above)


Tips for Swoon Worthy Engagement Pics

Planning your engagement photos?  With the Pinterest & Instagram the exposure and pressure to have pin-worthy engagement photos is kind of a thing.  There are sooo many stunning photos out there it’s a bit intimidating! So how do you make yours special? Well, I have a few tips to help make sure these photos are swoon worthy, personalized and show stoppers.

Wardrobe.  If you really want something show stopping, yet simple – steal the show with a jaw dropping look. Whether it’s a gorgeous skirt, bright color in front of a stark back drop, or a casual look on a fall day – don’t skimp on the wardrobe! Also ladies, don’t forget about your significant other and making sure they step up to the plate and match your look.  Just remember, wear what you’re comfortable in, and true to you both as a couple!

Location.  Beach? Forest? City-scape?  Your favorite diner? With the help of your photographer scope out your spots, and see what might work – but have a couple ideas in mind.  Working to get multiple locations in one day? Make sure they’re close, and again chat with your photographer too see what might be possible. Don’t forget that some of the simplest locations will result in the most stunning pictures.

Time of Day.  We wanted some beach photos, and our photographer recommended sunrise photos instead of sunset.  Although we had to get up super early, the sky was perfect, no one was around and we were able to capture some gorgeous shots.  Evening photos could get tough and might need lighting to be involved, which could be a bit more costly, and some locations might not allow photography, so be sure to ask ahead of time if you photographer doesn’t!

Photographer. Finding the right photographer that has a portfolio inline with your vibe is important! But don’t forget about working within your budget – since you still have to save up for the big day! Although, this is a good test run to see how you’ll work with them on your actual wedding day.  Some photographers might also offer a package for engagement & wedding day, so be sure to ask!

For B and I, it was a little awkward at first, posing, kissing, and trying to look longingly at each other.  But once we got warmed up, we started to get the hang of it and have a little more fun.  Also have fun with props (balloons, your pup, fresh flowers) and don’t over think it – but also talk with your photographer and be sure to share your vision and even a few examples from your Pinterest board to show some different angles or inspiration!

bee (1)


Missed Out? Or planning your wedding? Check these out:  Our Engagement Photos Tips for Creating your Wedding Registry How to Plan your Honeymoon Our Wedding Sneak Peak


Image Sources: Black & White Close-up Blue Tulle Skirt White Dress Kiss Forest  Hands & City

Breakfast Nooks for Days

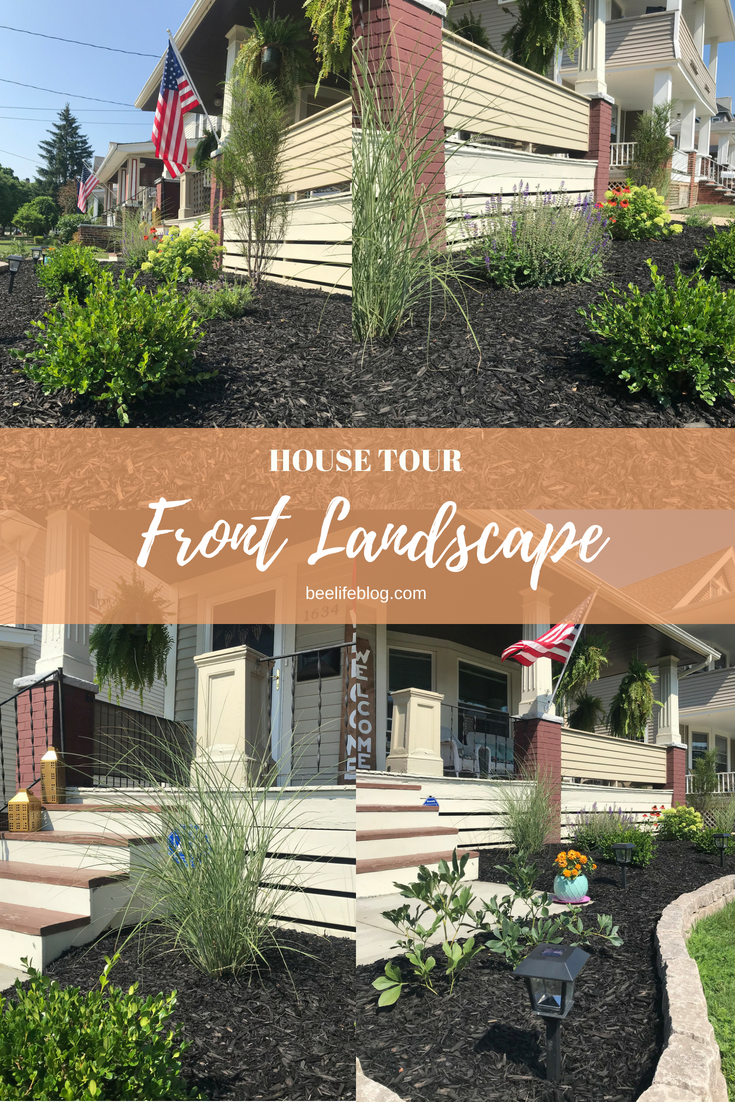
So now that we have our Front Landscape project wrapped up, I’m ready for the next and still dreaming of our someday kitchen makeover… One piece that I particularly want when we makeover our kitchen is an adorable, cozy and functional breakfast nook!
Breakfast Nook - the bee life
As I started looking for different breakfast nooks – I didn’t realize how many different options there would be! Traditionally you think of a galley style booth or a half circle of benches – but news flash! There are SO MANY other options! Let me walk you through the many considerations and options of a breakfast nook.

Permanent & Functional. This is a great idea if you’re truly committed to having a breakfast nook. With a permanent bench you can also be sure to build in extra storage so it’s functional in more than one way.

Movable Furniture Pieces. Mind blown? Yup, mine was. And I think this might be one of the ways we end up going.  Whether using a Settee or this awesome customizable piece from the Home Depot.

Square vs. Round Table.  This is another piece that can make a huge difference depending on the base you’re working with.  A square/rectangular table could work for a larger space or a foldable one could work for a smaller space.  A round table is just another perfect option that can work in an L-shape bench layout or your half-circle nook.

Accents Chairs. Depending on the route you go, the accent chairs opposite of the bench are just as much of a statement as the rest of the set-up.  These can be industrial, warm and cozy or traditional.

Bold Colors vs. Classic Neutrals.  Either way you decide to do it, you can either start with a bold footprint with your main bench, or add in pops of color with wall art and pillows. Neutrals can play on each other bringing in deep wood grains from your floor or table can really pull a neutral look together with your other pieces.

Working with a Window? Don’t be afraid to build your bench in front of your window.  No window? That’s okay – breakfast nooks work either way, whether it’s behind a half-wall or in a corner of a room don’t let one or the other hold you up from creating your space. We only have windows on one side, so we’ll be able to have a little bit of light and fun with our space.

Pillows & Cushions, Cushions & Pillows.  One of the parts I love about breakfast nooks is they’re so warm and inviting, and one of the reasons is because of all the pillows and possibilities of bench cushions!  It is no secret I have a slight pillow addiction.

All Shapes & Sizes. Whether you’re working with a tight space, or have a 12-foot wall to fill with your breakfast nook, this is once piece that can work in any kind of space, especially if you decide the non-permanent route! So don’t feel like you can’t fit in your breakfast nook if you have limited space!  On the contrary, if you have extra dead space this might be a great way to fill it or make up for a lack of a dining room.

Lighting.  Depending on your overall style of your breakfast nook, you can either play it down or create a bold statement with a chandelier.  Not ready to commit to a chandelier?  Consider wall sconces to book end your space or light the way.

I was always dreaming over our breakfast nook as super traditional with a built in bench with storage, circular table and calling it a day with some pillows.  But now that I see all these different options and all the fun color options I am wide-eyed and drooling over the possibilities.   I mean that pink sectional and shell chandelier directly above is Oh. Em. Gee. Swoon worthy.  And I think we’ll probably end up going with the less permanent, yet cozy route with a great Settee or baller sectional.

bee (1)


Image Sources: Top Left | Top Right | Settee Neutral | Corner with Red Chandelier | Black & Gold | Mustard Bench | Classic U-Shape | Pink Rectangular Swoon 

House Tour – Front Landscape

We are feeling pretty accomplished after finally crossing off a house project we’ve had on the list for just about 4-years, our front landscape!  Although, like all house projects it ended up being a bit pricer than we initially expected – it was totally worth it.

When we first moved into the house, there were two over grown/random scrubs that didn’t do much from an aesthetic perspective – so we tore those out pretty quickly after we moved in, leaving us with a blank slate to dream about.  We made some improvements over the years, like updating the front lattice, adding in some perennials and a couple annuals that stuck around, we tried to dress up the empty dirty with mums and ferns as the seasons changed so it wasn’t completely bare, but alas it was still a blank slate that needed some love.
House Tour - Front Landscape - bee life blog
This project seemed daunting especially from a plant perspective, we didn’t want to pay for a landscaper and had a few ideas about what plants/bushes to incorporate, it was really just filling in all of the holes.  So one day, B and I went to three different nurseries and read tags, looked at plants and started to narrow down our options and took pictures, while we also price compared.  From there we ordered 5-yards of dirt to build up the area, it seemed like too much, but somehow we managed to spread it throughout.  And then we went and bought our plants;

(1) Little Lime Hydrangea
(2) Sorbet Peonies
(4) Boxwood Winter Gem
(3) Fern Line: Fern Leaf Buckthorn
(2) Maiden Grasses
(1) Coneflower – Cheyenne Spirit
(1) Lavender plant (already had)
(1) Butterfly bush (already had)

We spread the love with our plants purchases between some locals shops like Petitti’s Garden Center and Gale’s Garden Center. So once we bought all the plants, worked through placement, we got to planting!  Before we mulched, we built the stone wall to help divide the grass and landscape (this was a compromise of the project with B and I!) – he wanted one, I didn’t – the stones I wanted to compromise with were wayyy to much so we found some at Lowes that ended up working out. From there we ordered 3-yards of mulch (via Kurtz Bros!), which was more than enough, giving us a good base and finished look.
14House Tour - Front Landscape - bee life blog13House Tour - Front Landscape - bee life blog
The house feels a little more complete with the front landscape done, we are so happy to get it done and with the way everything turned out.  We also took our time working through this project (clearly!) but I think that helped to our benefit because we weren’t stressed about it and were able to take advantage of some cool summer days/nights to get everything done.   We can’t wait to see how it fills in and welcomes visitors to our home!

bee (1)

Latest Obsession 07.18 – Fashion Ed.

This summer has been HOT! So lately I’ve been trying to find outfits that are not only cute and fashionable, but are easy with the heat.  So I’ve been leaning on a few staples to help me stay inspired through this hot hot heat, and these are my latest obsessions!
Latest Obsessions 07.18 - bee life blogClassic Neutrals.  Jean shorts have been my go-to weekend outfit, because you really can’t go wrong with a pair of these and a neutral tank or tee. Whether you’re dressing these down for a more causal day, at the ball game or running errands, or dressing this up with a sexy tank or fun top for date night, jean shorts are a perfect staple for casual or cute!

Mixed Prints.  Whether it’s polka dots and stripes, or a floral print with a pin-stripe – I’m loving mixing patterns up to pull off a fun statement. This also gives a bit more variety of options in your closet for switching up your looks if you have multiple outfits throughout the day!

Lots of Dresses.  Because who wants to wear pants when it’s 90+ degrees!? Not me.  So my dresses are being fully cycled through, even needed to dig into a few dressier options for day looks. For my dressier dresses, I’ll usually grab a denim jacket to help dress down for a day at the office.  And some of my more casual dresses I’ll mix with a fun statement necklace or wedges.

Kimonos for Summer.  Kimonos were one of my fall obsessions and they’re carrying on into the summer months. I love wearing one over a plain dress or paired with my classic neutrals, the fun patterns lend endless options! Plus they’re easy to go from picnic to pool with a singular look to navigate through the day over a one-piece and jean shorts.

What are you favorite summer trends? Comment below!

bee (1)


Image Sources linked above. 


Fitness Friday 07.18

I’m not sure about you guys, but the 4th of July holiday really whooped my butt! With it being on a Wednesday, I regrettably didn’t take any time off directly before or after – I figured a holiday in the middle of the week would be no biggie, if anything a nice way to break up the week.  Well it definitely broke up the week and then derailed it completely – day drinking on a warm summer day, leading to a Thursday night happy hour with family, only to still have one day of work to wrap up.  The food, fun, friends and family continued through what seemed like a 5-day weekend (with some work thrown in) and I was not only exhausted, but feeling super unhealthy after over indulging on delicious cocktails and tasty eats the entire time!! Ick!!
Fitness Friday 07.18 - the bee life
This past week was a rough start, but also a time to reset, recharged and get back into a healthy routine of balance.  I told B, Sunday afternoon we were going to be ‘detoxing’ this week – and I think my version of detoxing is probably different than many others and I’ll tell you how.  My detox isn’t a juice cleanse, it isn’t eating celery sticks for 4-straight days, it’s simply cutting out the crap and getting back on track.  No sweets, no alcohol, no chips/snacks, no candy and low-to-no carbs.  My detox is making healthy choices, picking veggies over chips, salads over cookies, and no bagels/bread/rice/heavy carbs.

For me, when I know the balance has been lost, it’s better for me to be a bit tougher on myself, keeping myself accountable than letting a few more things slip through the cracks.  I maintain plenty of that balance – but it’s getting back into the mental state of making those smart choices and saying ‘no’ to the ones we often want to say ‘yes’ too.

I fought many temptations at the office this week and stuck to my guns when it came back to getting back into my balance, waking up and running or getting to the gym and then maintaining those healthy food choices (cheated with some bubbles one night!) throughout the day of what I put in my body.  How do you get back on track? Have questions, or need help – leave a comment below!

bee (1)

3 Tips for Hosting a Summer Dinner Party

With a little over a year with our back patio, we made it a point to have both dining and relaxin space – making it the perfect spot for a classic dinner with family and close friends.  We hosted, the first of many dinners on the patio and it was the perfect combination of all the things that make a dinner party great a classic and easy menu, a stunning table setting and awesome company.

My favorite part about hosting a party or dinner is the planning that goes into it and the opportunity to make a special memory for our guests, while also having a fantastic meal and great company.  It’s about making the night special from all the other dinners we have every other night and giving the people you care about a little extra love.
IMG_1700
I’ve realized that hosting a dinner or party for some may seem super daunting and overwhelming, but focusing on these three things helps keep it simple while also allowing you to enjoy the night as well!

The Menu. We kept the menu simple, healthy and refreshing for a warm summer day.  We opted for chicken and steak kabobs mixed with mushrooms, peppers and onions.  We had a fresh mixed greens salad with cucumbers and cherry tomatoes (cheese on the side for us non-dairy folk) and a fresh fruit salad with blueberries and strawberries.  When it comes down to it, there are just a few staples that just can’t be beat – not to mention we had plenty of kabobs that we were all stuffed!

The Setting. I had fun dressing up our not so glamorous outdoor table with placemats and neutrals. I used a variety of outdoor friend pieces like the plastic salad plates and glasses from Opalhouse while bringing out some nicer Kate Spade serving dishes and fabric napkins.  The neutral base let the table be the center of attention with it’s bright colors and inviting feel with the mix of patterns.  Pro Tip: dress your table and prep as much food as possible before your guest arrive so you’re able to enjoy their company and a cocktail!

The Company.  Although I love large parties, sometimes it’s better to keep things small – so we had my parents and B’s parents up. It was the perfect mix of company and conversation was able to be had with everyone vs. side conversations or too much noise, especially if this is your first major dinner party – keep it small and low key so the impress isn’t stressing you out.

IMG_0615

The best thing about hosting is that you’re able to call the shots! From the menu, to the vibe you can set the tone for the evening – but it’s always important to make sure your guests are taken care of first and feel welcomed!

Cheers!

bee (1)

DIY – Upcycle Skinny Dresser

You guys, I’ve been so excited to share this DIY with you all.  We first picked up this piece in the winter on a curb, it was calling my name – although banged up with multiple broken drawers, I saw the potential.  I didn’t even have a space for it at first, but I just needed to take it and make it over – and I wanted to pull out the stops to make this a show stopper.

First we had to assess the situation, three of the six drawers were busted up, one significantly cut that needed a little extra TLC (still a work in progress).  With a little bit of wood glue and updating, B helped put these back to life.  The old handles really dated this piece, so we removed those and got to work sanding down the surfaces.  Surprise, surprise we went with an off white color that we had from the house and painted this piece instead of spray painting, which is usually my go-to.  Painting was surprisingly really easy, and covered the piece well with only a couple of coats needed.
DIY -- Upcycle Skinny Dresser - the bee life
Let’s talk finishing touches. I wanted to splurge a bit on the finishes and was really hoping to indulge in some hardware from Anthropologie, as mentioned in my Latest Obsessions.  But I didn’t want to order them online, the store near me was SUPER picked over and I couldn’t talk myself into spending $8 or $10 per knob, when I needed six!  So I stopped at Pat Catans on a whim, and found some knobs I kind of liked ($2.99 each) – the first knobs I bought didn’t do much on the drawers, they were small – I need something more… bold. I went back and traded the pink blah knobs for these chunky stunning silver ones.  These still might get switched out one day…

Inside of the drawers was another place I wanted to find something a bit more fun and fancy.  Just as I was about to compromise on some typical contact paper from Target, I ended up getting distracted, swooning over some Opalhouse when too my surprise noticed the wallpaper was 50% off! Light bulb! I put down the gross contact paper and bought this elegant peel and stick wallpaper! For $15, I was leaving with my show stopping piece I wanted to help finish off this piece – not to mention the peel and stick was super easy to work with and customize per drawer.

Cost Breakdown:

  • Knobs: $18
  • Stick Wallpaper: $15 (on sale)
  • Paint: $0 (already had it)
  • Sandpaper: $5
  • TOTAL COST: $38

We have this piece in our dining room for now, and aired out a few other pieces to make this work.  Worst case I will put it in my walk in closet and use it to organize my clothes (bummer!)  But it was a fun piece to update and bring back some new life too.  The drawers still aren’t perfect – but you’d never know!

#EmnBWed – The Ceremony

I hope you’re not sick of my wedding pictures yet?!  If you’ve missed out on these beauties, check out our first sneak peak, the girls getting ready, my handsome groom and our stunning venue. And now, I leave you with the main event – the actual ceremony and the last of wedding photo posts for a bit!

We had a traditional, full service mass for our wedding vows, something that was important to the both of us.  We also put a lot of thought into the readings we chose, and who we asked to be involved in the ceremony. Most of it was a blur but we had a few good laughs with the sweet homily from our priest and then a little moment during our vows that will always be sweet memory.  My main goal was not to cry walking down the aisle, because I’m a Kim K. cryer, but I kept it together and only got a little teary eyed.
I28A9260I28A9271I28A9274I28A9285I28A9294I28A9350IMG_2166_TLOCCIMG_2178
Since it was a tsunami of rain our entire wedding day, our exit from the church had to be adjusted – I had hand cut and made over a hundred ribbon wands and they weren’t going to waste! So we had a quick brainstorm while we were held up in the bridal suite to hand them out to guests ahead of time and asked everyone to wave them as we walked down the aisle – it worked out pretty great, and the best part was B had no idea so he was completely surprised!

What I love the most about these photos is they share the true emotions of happiness and love that we all felt that day, it was an unbelievable feeling that won’t be able to be duplicated.

Planning your big day? Here are some helpful posts; Wedding Registry Guide | Choosing a Florist | Tips for Planning Your Honeymoon | How to Create Your Sweetheart Table 

Photography by: Timothy Logan Photography