You see, we found this old trunk on a neighbors tree lawn and had to snatch it up, it had admittedly seen better days… but that never stops me. I didn’t know what I wanted to do with it just yet, but that would come in time… after some trunk searches on Pinterest I determined to flip this baby into a coffee table, but I had a hard time figuring out how I wanted to finish this piece. I was tempted to go the all white route or maybe pink with gold accents? And then the inside… what was I going to do with the inside?! Oh, and we didn’t need another coffee table. *smiles*


The trunk was pretty banged up, it had old stickers all over it and then the inside was a little stinky with some blue paper that was torn. It was a little daunting – how easy was the inside paper going to come off? What about the outside… and getting those stickers off? Well with a little bit of water and a scrapper the paper came off with a little added elbow grease and help from B. To my surprise, the stickers came off the same way! Although, I still didn’t know how I wanted to finish this sucker.


After doing some research, I liked the look of Hairpin legs and found these 6″ black ones on Amazon, so I purchased – still trying to figure out the color scheme, knowing I could spray paint to match if the black wouldn’t work. I finally decided I was going to stick to the trunks original colors and just bring some life back to it! I loved the gold accents and couldn’t cope with the idea of painting over them in white or another color. After a good clean and a few layers of paint, this trunk was seeing new life.


To finish off this DIY, I finally went with some fabric for the inside vs. peal and stick paper. I thought the fabric would be nice to work with, and a lot of options for the patterns and colors. $18 later we had our fabric picked out, I bought 4-yards just to be safe and within one night cut and place the fabric to line the trunk with 3M Adhesive spray. Before adding the fabric, I did spray the inside with bleach a few times (with weeks in between) to help with the smell and kill anything that might be hanging out!
DIY Cost Breakdown:
- Trunk = $0.00
- Hairpin Legs = $25.00
- Paint Supplies = $12.00
- Fabric = $18
- TOTAL = $55.00


We also figured out a home for this guy, with our Basement Makeover happening, this was another piece of the puzzle that fit just perfectly with the overall look and feel of the space. It’s a little side table and perfect for some extra storage for blankets, games and extra candles! Of course, I love the way it came out and how the gold pops against the black – plus it looks perfect in the new space.


")
")
")

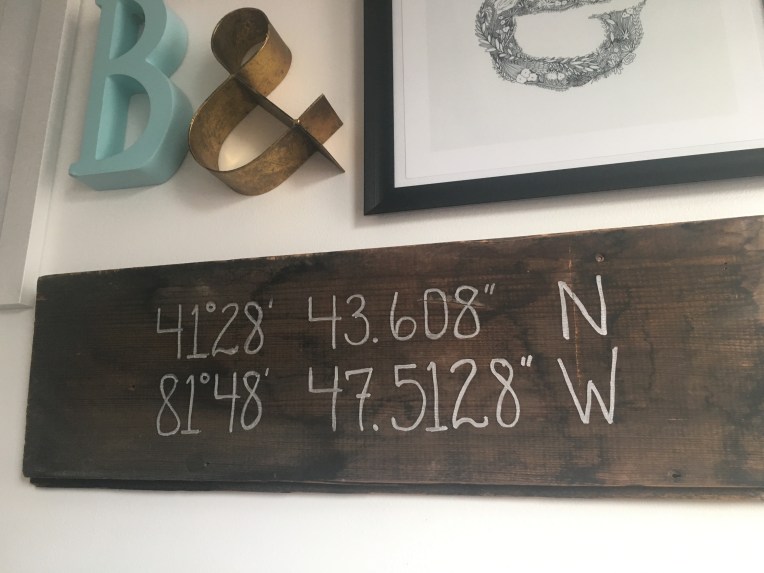 I love the way it came out, the old wood is what brings this simple sign to life. The metallic silver lettering also pops on the wood grain with a nice mix of old and new. I wanted to keep it simple with the text and not do anything to fancy to really rely on the wood to pull this piece to life with the metallic accents. One of my goals for the gallery wall if you remember wayyy back to my


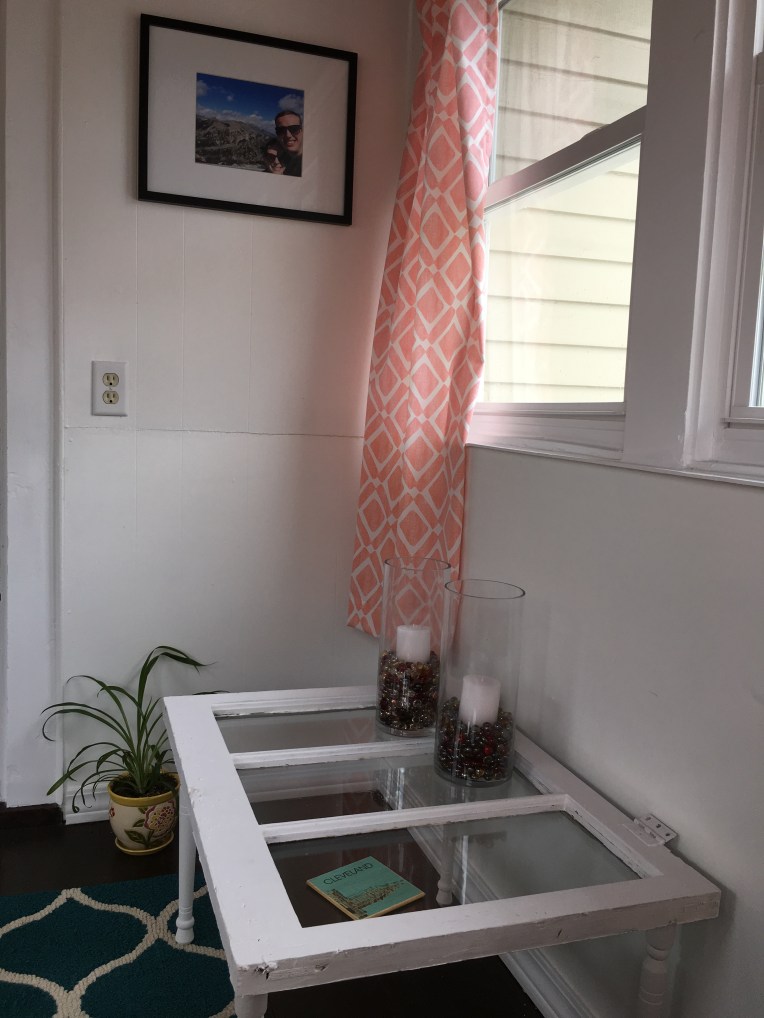

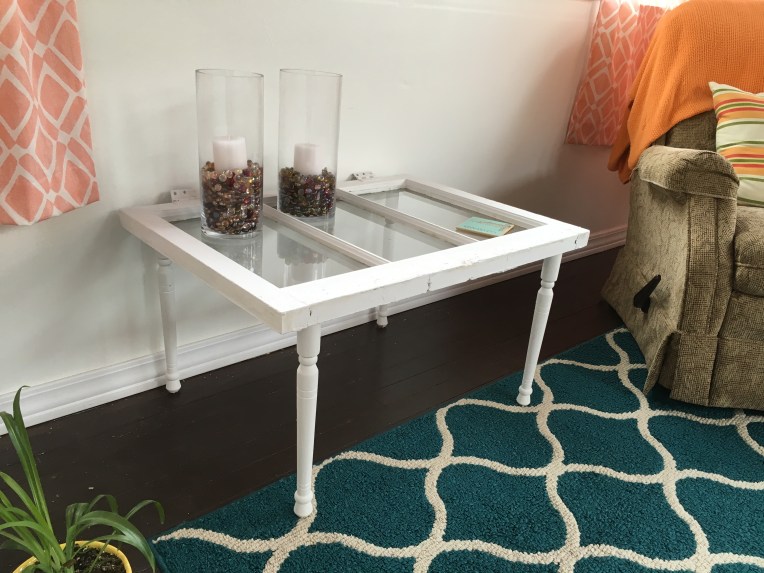 Using most of what we already had, the main expense was buying the legs for $16 – you can’t even get a coffee table for that! I love the way it turned out, it still has a vintage and rustic flare to it. Not to mention it has multiple purposes and I am sure it will change overtime for us!


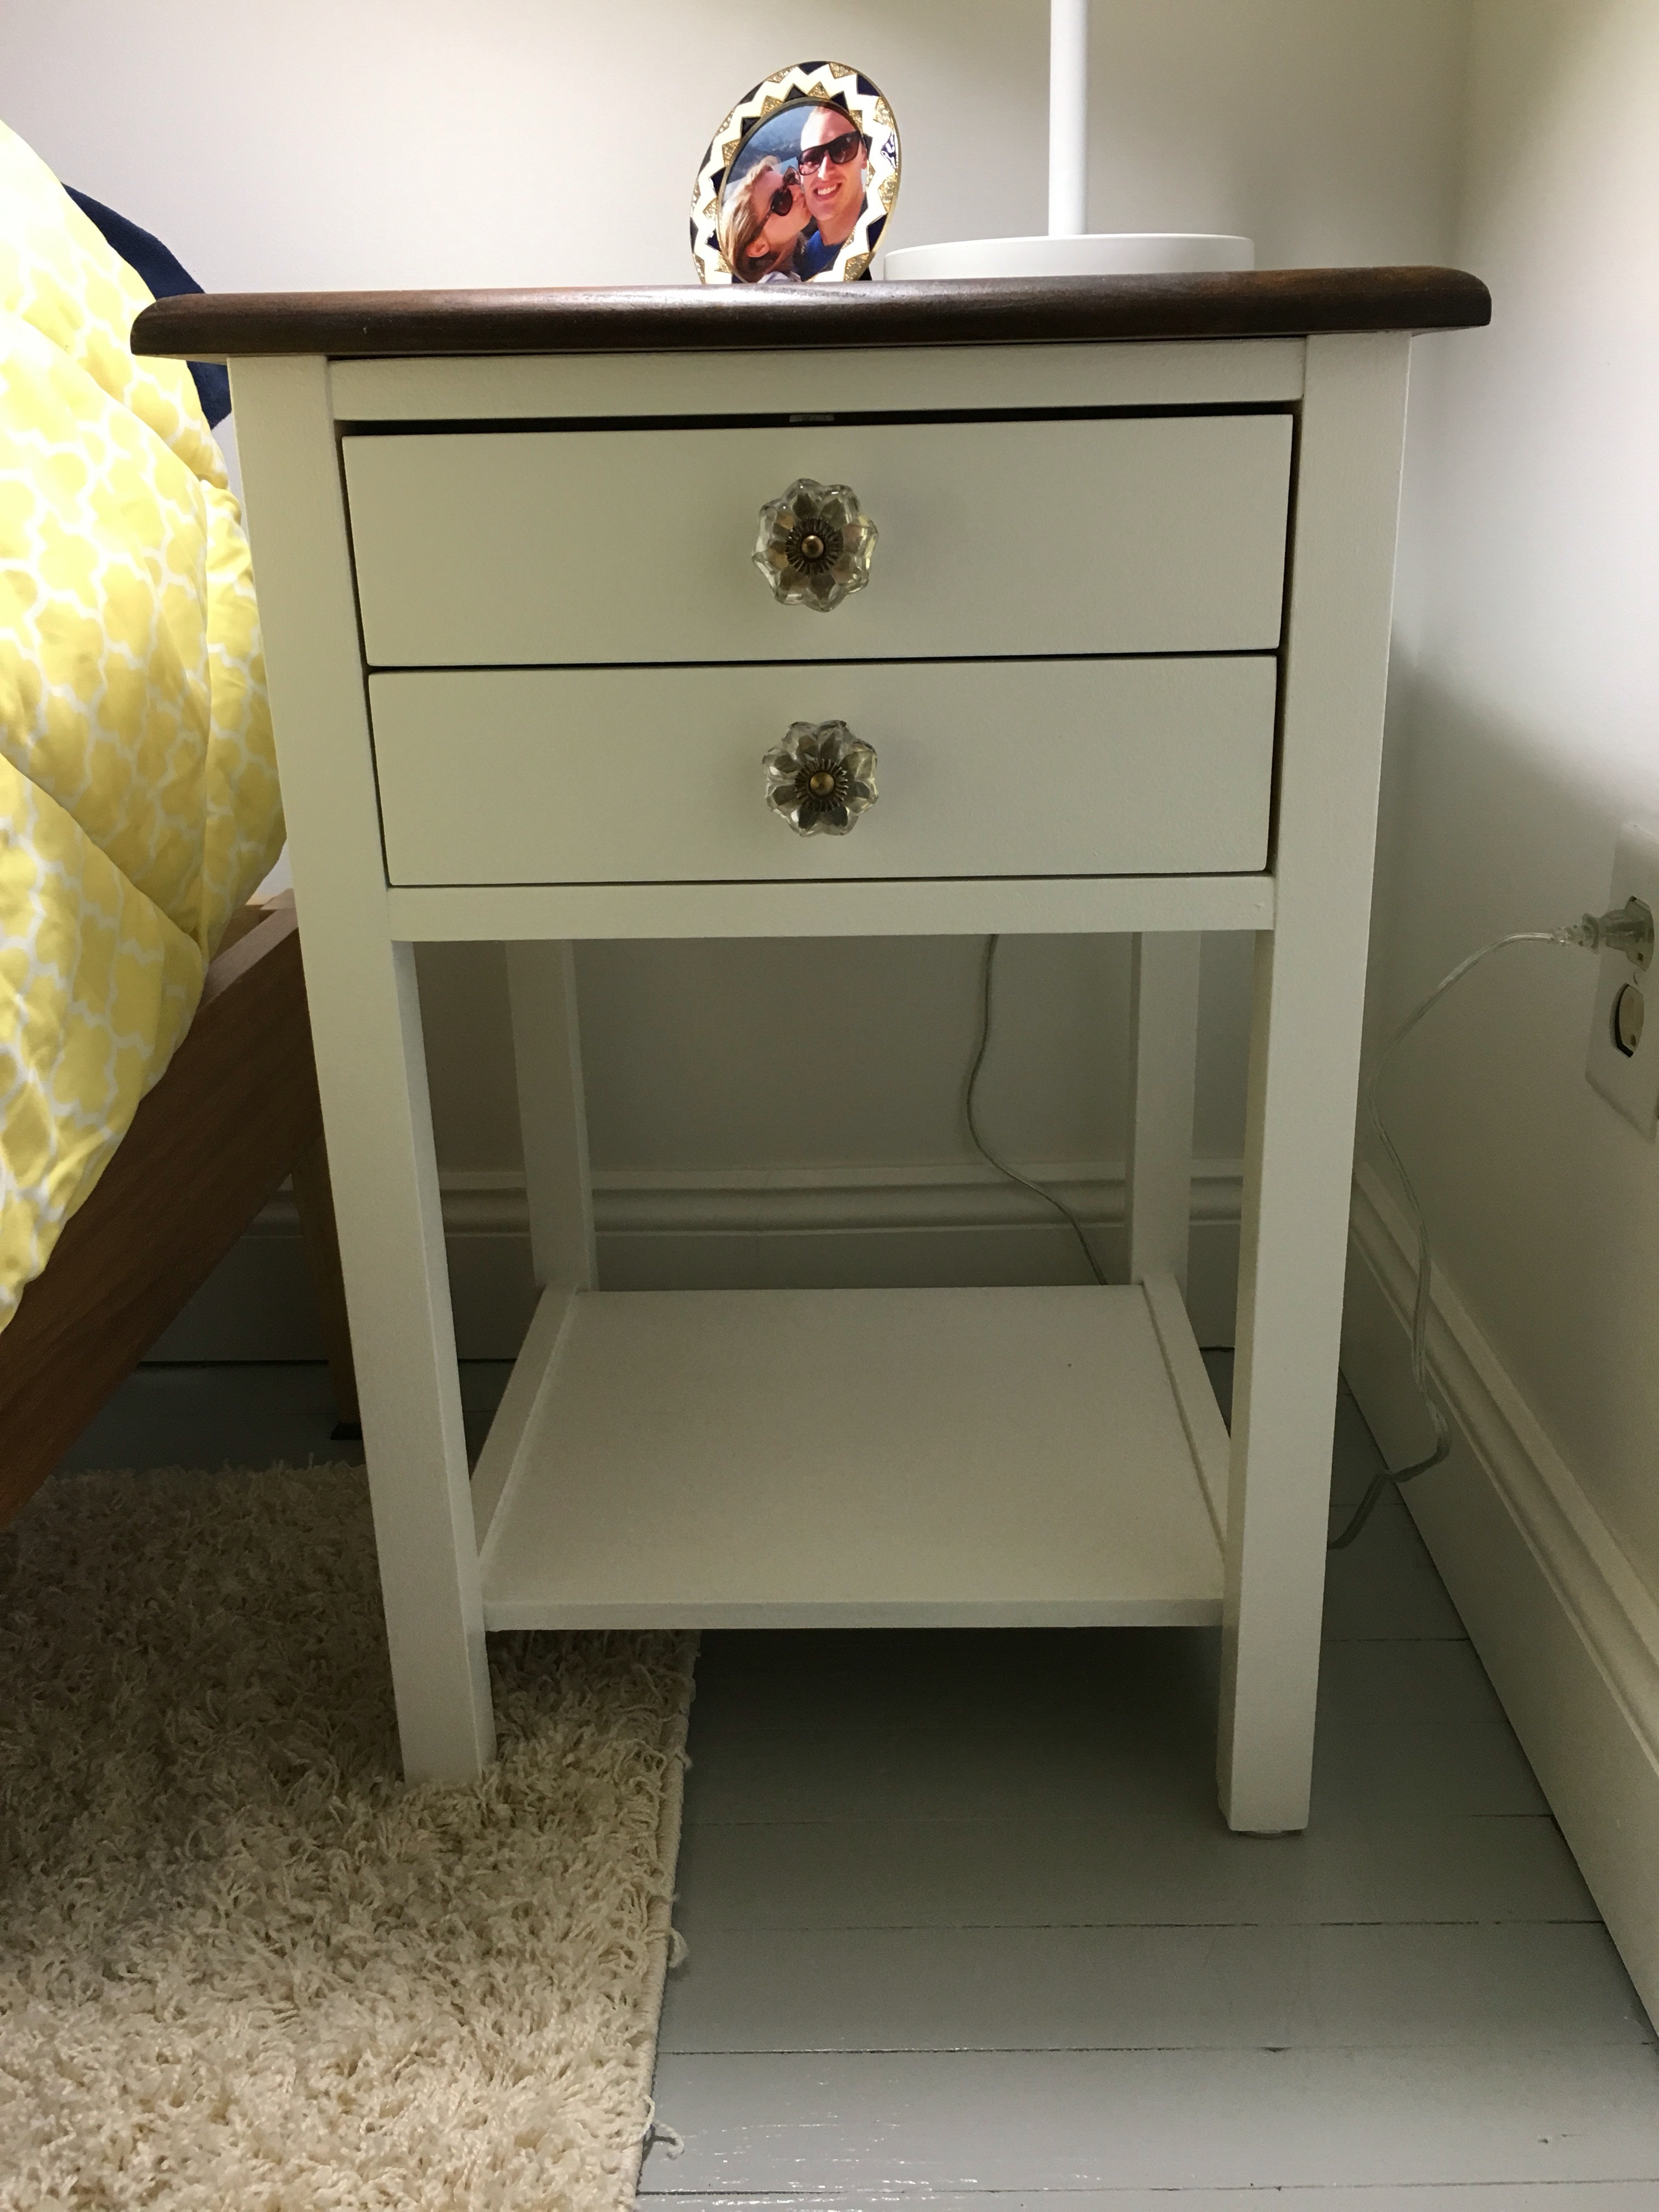
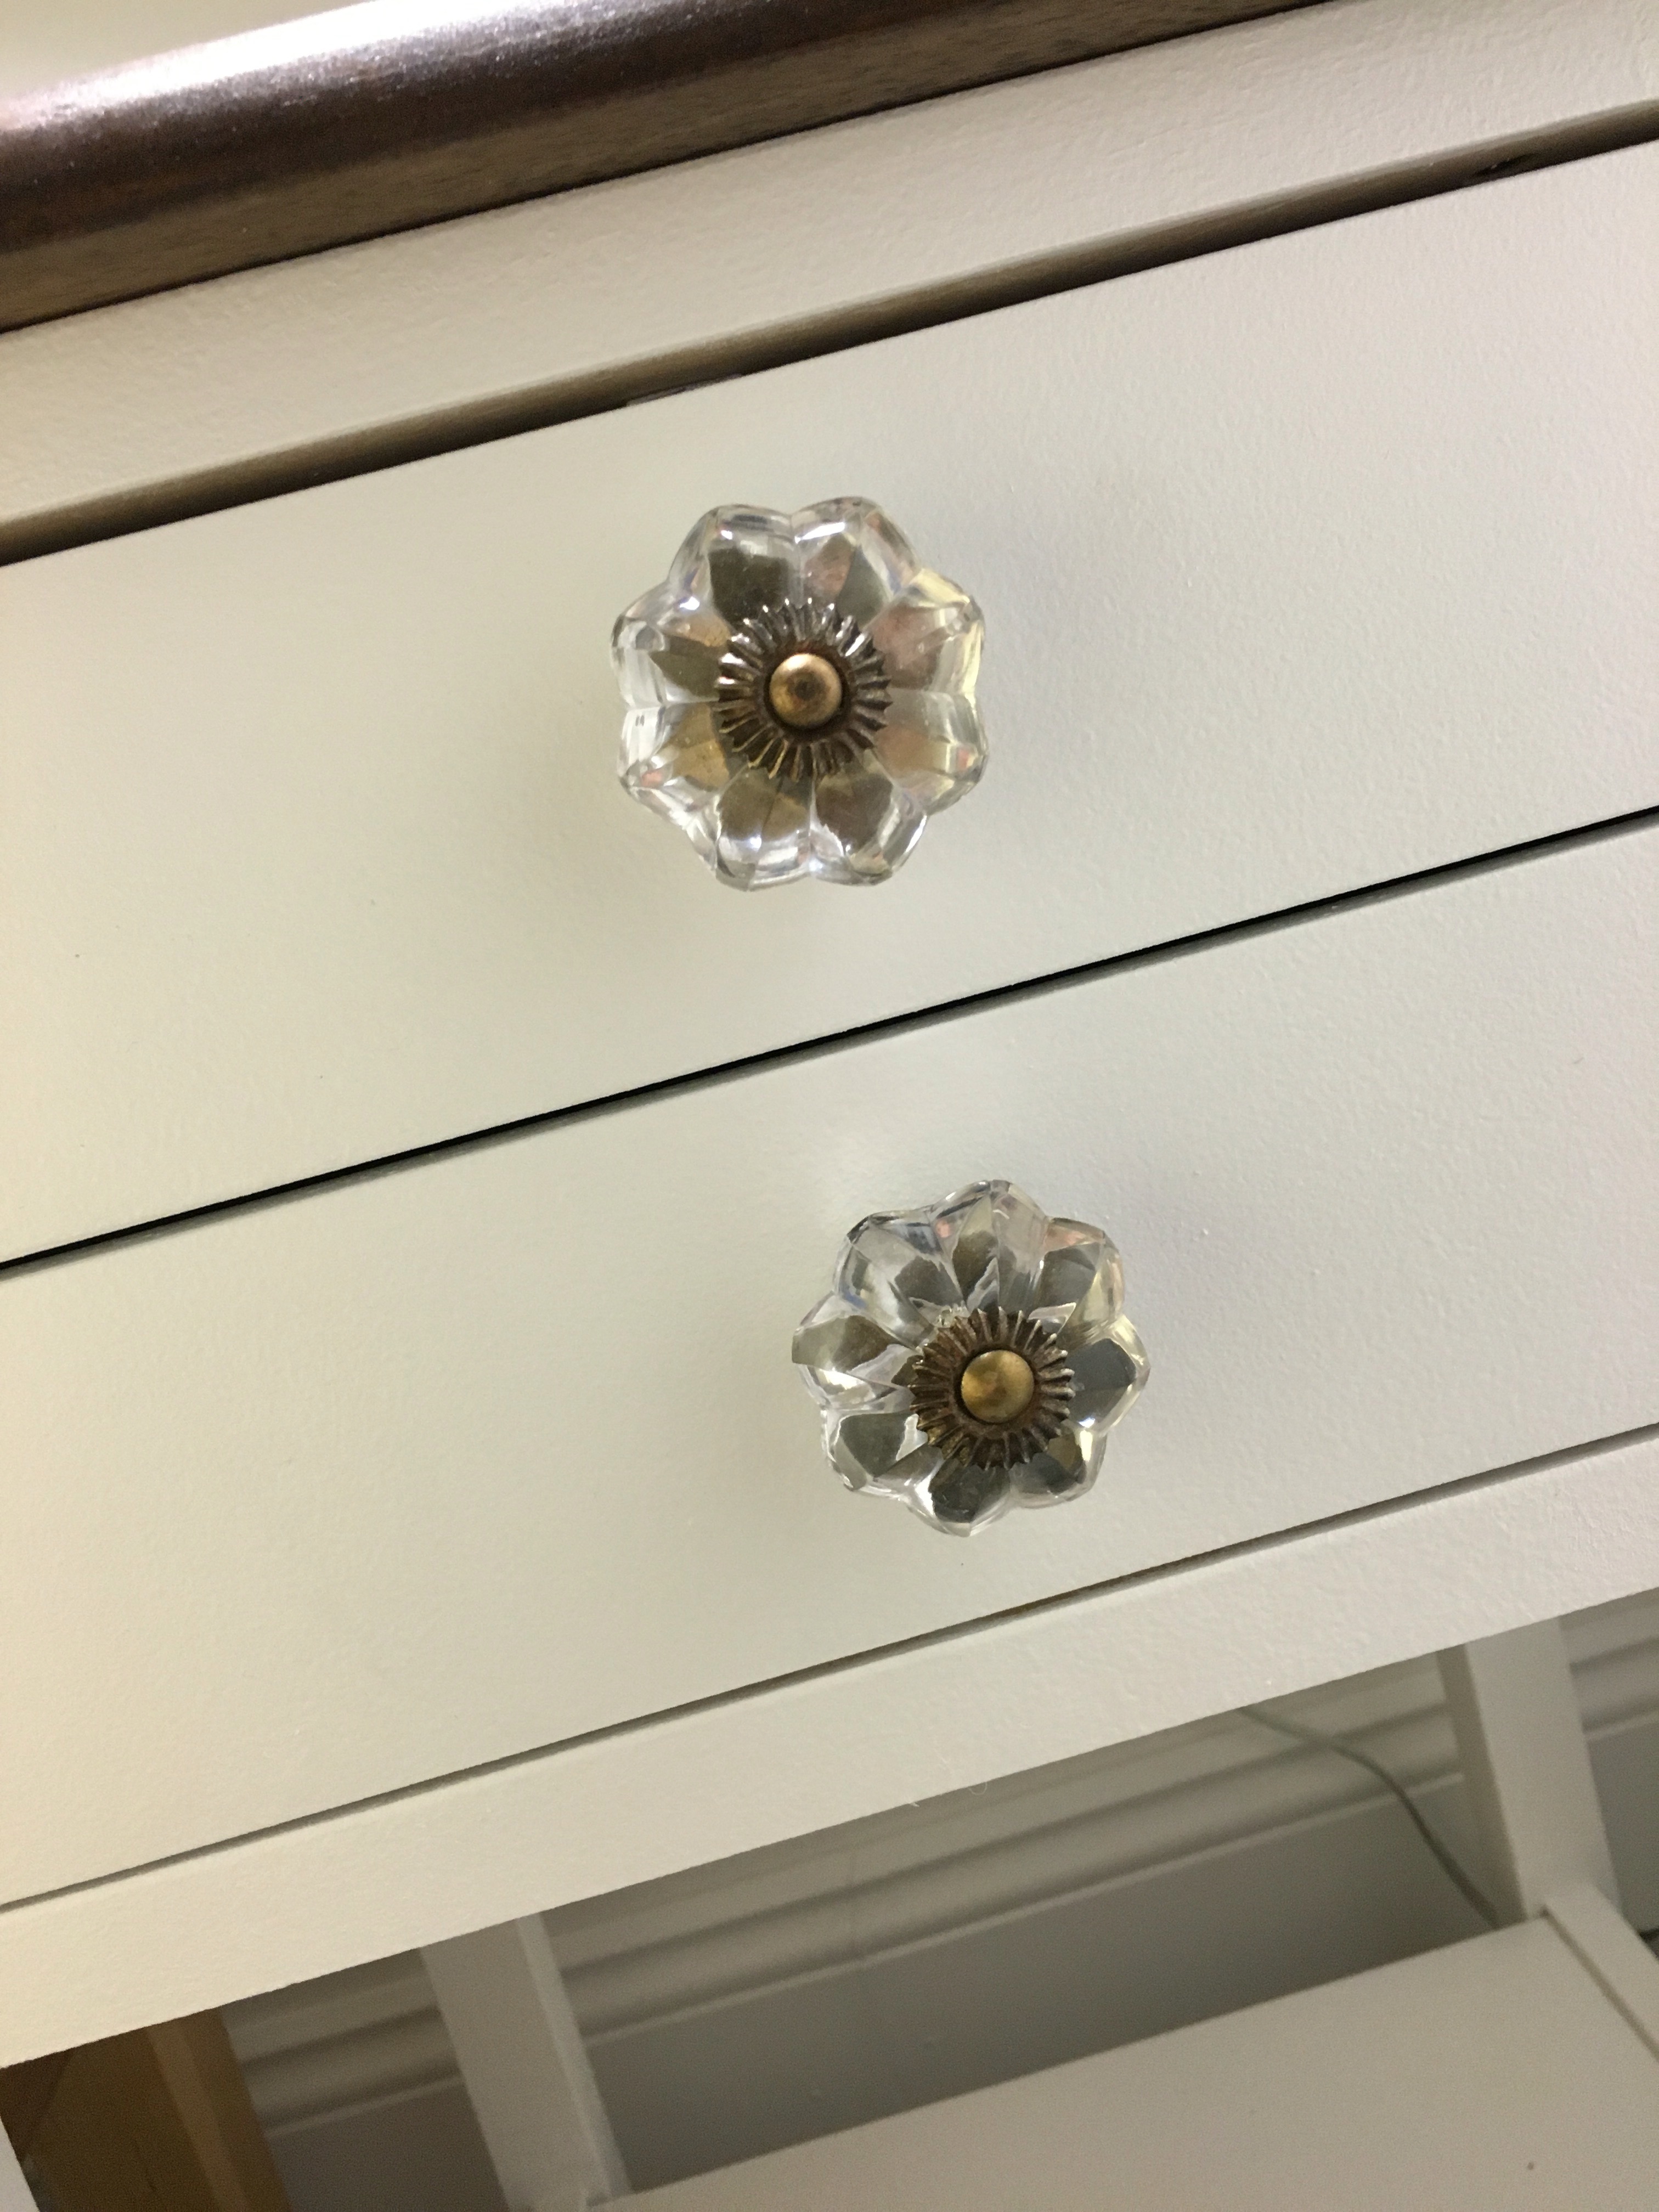
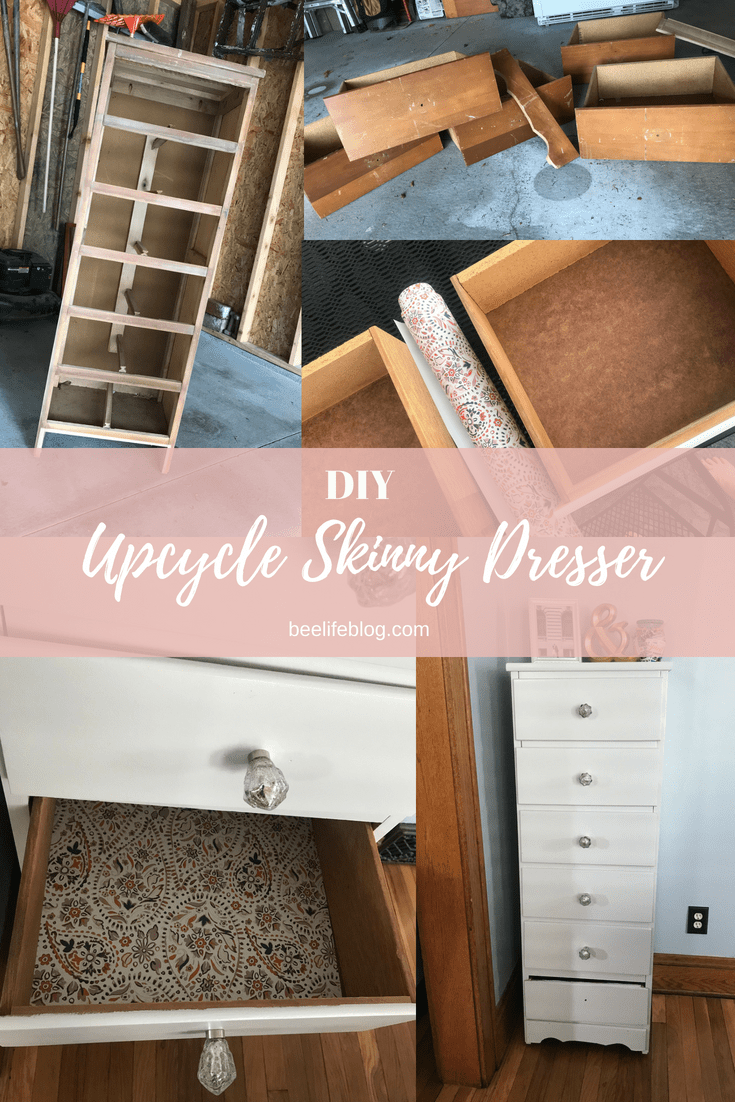
 I love the way it turned out, and I am sure this little night stand will have a few more makeovers in it’s lifetime. The added detail of the contact paper on the sides of the drawers and inside, just upgrade the whole piece. I may still try and get new knobs at some point, but for now this little $5.99 makeover will do the trick and accomplishes the task of being functional and matching within the space! What I love the most about some DIY’s is that it doesn’t take a lot, to make a big difference – time wise or cost.


 With the doors closed, and if the lightening is just right, you can hardly notice – but on the flip-side, if the lighting is just right, you can also see how pretty this added touch is. Sadly, I ran out of paper and was only able to get one side done, I completely underestimated the amount I had left over from the stairs in order to complete these built-ins. But it was a good start, and like I said – easy, not very time intensive, and pretty straight forward for $20 a roll.


 The basket was a gift from Kates (filled with wine) that I happen to try in one of the openings and it worked out perfectly! We did have to buy some thin plywood that we ended up cutting and gluing on the top and bottom shelf’s to make them level, since there was a dip down. So other than the nominal cost of that, the only other expense was the $6 for the adhesive paper, since we already had the stain and poly. I love the way it came out, especially with the subtle pattern and pop of color!