Spare Bedroom – Makeover

I must admit, I’ve had some major writers block on top of feeling uninspired.  Then I realized I should share my latest obsession aka inspiration – our impromptu spare bedroom makeover! It started this past Friday, after a crazy week back to work, a stiff drink, and a few scrolls through Pinterest, I thought out loud to B; “Let’s paint the yellow room.” And B’s response was; “pick a color” – gosh I love him.

Of course, I had a color in mind, so we went to Lowe’s on Saturday, found the color, bought the paint, oh and another can for a different impromptu project and got right to work once we got home. This of course has spiraled into a full room makeover, remodeling some old and buying some new.  *grins*

I’m going for something chic, classic and colorful. My goal is not to rush this and look for solid pieces and see what works in the space as I add in curtains, bedding and DIY’d furniture.

Can’t wait to share our first house project of 2017!

Inspiration sources can be found here

House Tour – Our Christmas

Eleven more days until Christmas! Our house is full decked out and ready for the holidays, it’s cozy and festive… I may be a bit biased, but I’m in love.

With this being the third Christmas at our house (wow!), I’ve definitely continued to perfect the finishing touches but also try a few new things! This year I took to Pinterest for some new ideas, specifically for our front door and dining room centerpiece. I looked for ideas that I could use preexisting pieces/decor but also be able to put my finishing touches on them!

Front Door: We amped up the front door to really make a statement, now that we have a full glass storm door, we can fully utilize all the real estate.  I’ve mentioned this many times, but your exterior of your home is the first impression guests receive, so why not make a statement?

My hack was to use wire to connect the three wreaths together, and then wrap the ribbon around to cover it up.  I probably spent $10 for the berries to add into the greens and the ribbon (sale at Joann’s!). I already had the wreaths, door hanger and wire.  I just hot glued the ribbon on the door hanger to make the ribbon look continuous! I love how the red pops on our blue door.
front-door_3front-door_1Dining Room Centerpiece: I wanted to switch up the centerpiece, since as much as I loved last year’s centerpiece it wasn’t conducive for entertaining with friends and family.  I often had to move it for space or take certain parts out of it.  I needed something a little more low maintenance, less intrusive and easy to move. I saw some inspiration on pinterest with a wooden box and since we found one when we first moved in (under our front porch of course), it was the perfect idea.  I used greens from the Christmas tree farm and just had to buy the candles. I added in some color and it’s completely portable if we need to move for a game night, dinner or cookie baking!
dining-room_1
dining-room_2I definitely got my “Martha Stewart” on and love the way these two spaces turned out! Everything I got too can be reused or altered next year – which would be my second hack for all of you is to think of DIY/Pinterest solutions that work multiple years, aren’t too trendy.

Latest Obsessions: Pillows

So lately I have been completely obsessed with PILLOWS! I want soooo many pillows. All of a sudden there is about 5-places in the house that I could name that need pillows to add that extra finished and cozy look. The dining room built-in bench, the bay window in the staircase, the office, the master and the spare daybed… not to mention the living room pillows could use a freshen up… shall I go on? I have literally been scrolling through screens and screens of pillows, hitting the ‘Add to Cart’ button, until I reach the end, check out my chart (because they all seemed like such a great deal) and it’s $150+ … click “save for later”repeat x5. *smiles*Latest Obsessions - Pillows - Neutrals 01 | 02 | 03 | 04

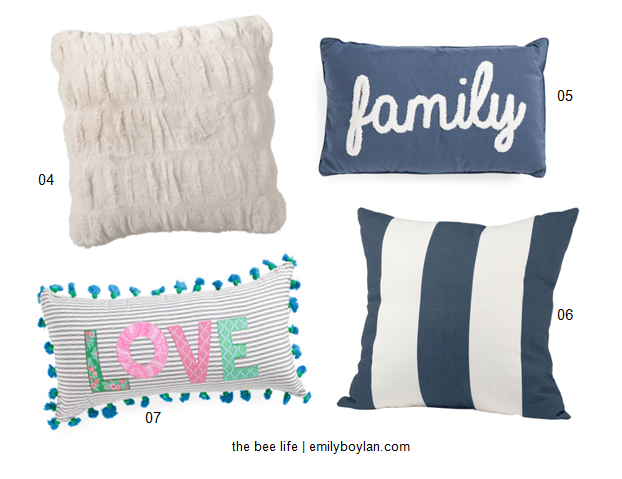
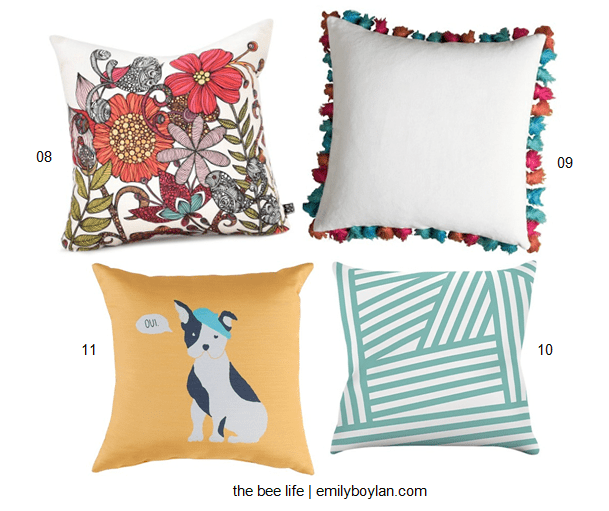
Pillows are the perfect way to spice up a room and add some extra flair without needing to refurnish the entire place. Pillows can also help personalize a space; whether it’s with a state, zip code, or even this fun bee pillow by French Laundry (above) – I’m obsessed!  The other thing I love about pillows is that they can add a level of subtlety when you mix a few patterns or fabrics correctly.  Pillows add a level of cozy and warmth to a space and can be the key finishing pieces, without you knowing! 

The other key to pulling in pillows and buying them is getting different shapes, large square pillows, long horizontal pillows or even larger body pillows to help build the space, (for example normal bed turned daybed).  Having different sizes also creates depth and dimension to your space making the space look larger and more plush than it might be.

Latest Obsessions - Pillows - Blues04 | 05 | 06 | 07

My go-to stores for pillows as you can probably tell if you’re checking out the links throughout are; Target (duh), Marshalls/T.J. Maxx (double-duh), Pier 1, Pottery Barn and Society 6. Although I usually start in the clearance sections first – because you can’t beat a good deal, especially if you’re using the pillows as updates to the space and are more likely to switch them out more frequently.  And as excited as I get about a pillow, I like to wait to see if my initial gut reaction of LOVE, is still LOVE after I see it again in the line-up of a gillion pillows. I also can’t usually resist a good 2-pack of pillows especially if they’re essentially the price of one, it’s a win-win!

Latest Obsessions - Pillows - Color                                                                                  08 | 09 | 10 | 11

What’re your favorite spots to get pillows?  Do you have any pillow rules? I’ve slowly started ordering a few here and there for the spaces I mentioned above. Yay!! 

For the love of pillows,

House Tour – Our Living Room

Hi friends! I wanted to invite you inside our home and give you a little tour of our living room!  It’s one of the rooms where we spend most of our time besides our master… yes I know… I still owe you all the official master tour, it’s coming, I promise! Anyways, back to the living room, since it’s one of the rooms we spend most of our time in, it’s one of the more finished spaces.  It’s also one of the spaces that I like to update and switch things around on the mantle, coffee table and even the picture frames. So here is the space just Plain Jane, no holiday decor – just normal life.
Living Room (2)Living Room (3)Living Room (1)
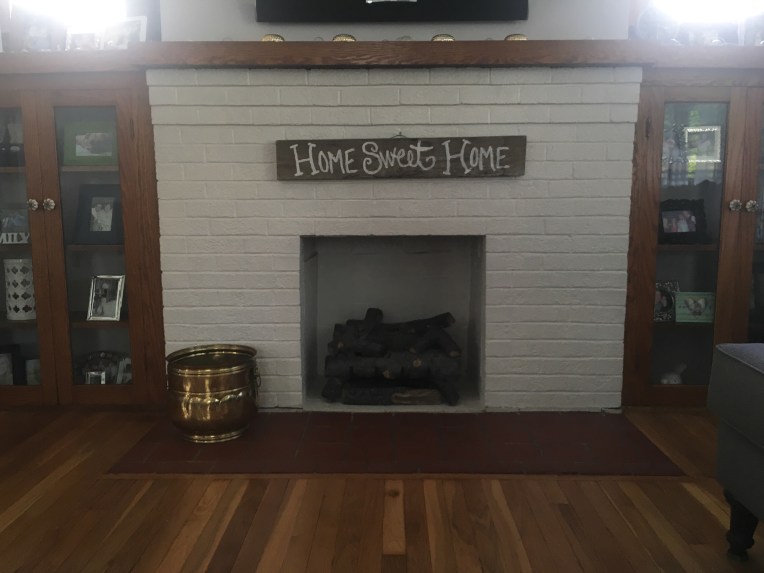
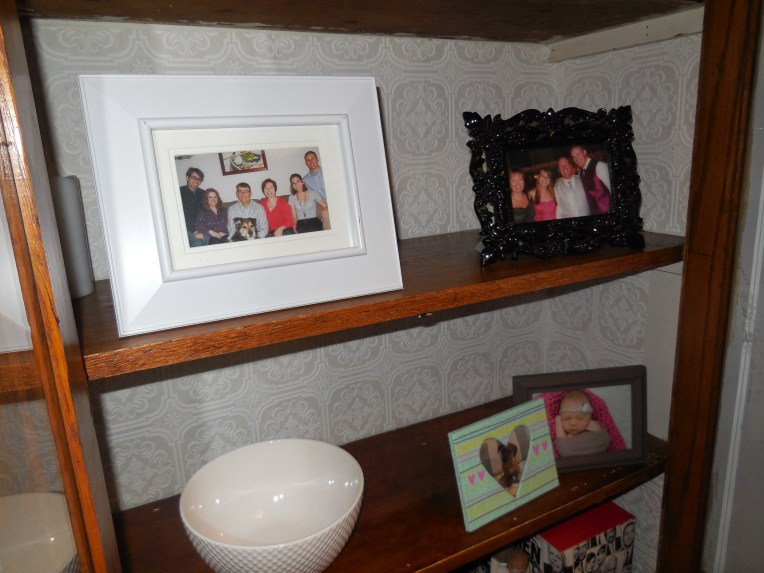
One of my favorite parts of our living room is all of our old photos that we’ve incorporated into the gallery wall or through the mantle and built-in’s.  They’re pieces of our past and what make up our families and who we’ve been shaped to be.  Family is very important to both of us, so it’s nice to be surrounded by our loved ones, past and present.

It’s the little details we’ve been able to focus on and update (like the knobs on the built-in’s) still giving it an appropriate feel for the period of the house but giving it an updated feel. 

Hope you’ve enjoyed one of our most loved spaces!

DIY – Coordinates Sign

Remember our big attic renovation into our master suite?  Well the little details have still been a work in progress, as they usually are. But we are getting closer to getting the little details finished up. I am finally happy to share one of the last pieces to the gallery wall puzzle. It’s a coordinates sign that I made using old wood from our house and the renovation! IMG_4970IMG_4972
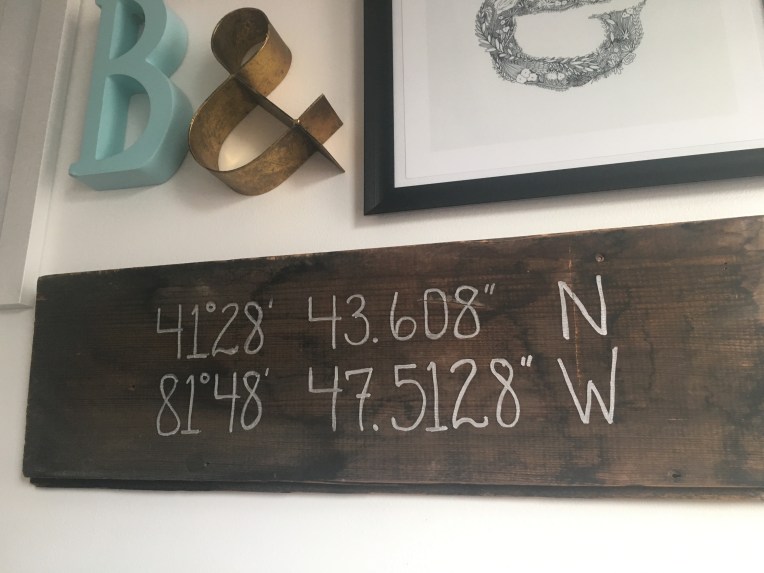
I love the way it came out, the old wood is what brings this simple sign to life. The metallic silver lettering also pops on the wood grain with a nice mix of old and new. I wanted to keep it simple with the text and not do anything to fancy to really rely on the wood to pull this piece to life with the metallic accents. One of my goals for the gallery wall if you remember wayyy back to my Gallery Wall Inspiration was that I wanted to add color, textures, and different elements that represent B and I without it getting too girly.  I feel like the earthy wood grain in the coordinates sign helps balance the ‘girly’ along with pulling in the other wooden frames used on the wall.
IMG_4716IMG_4972For now the gallery wall is feeling pretty complete. There may be some additional pictures added below but for the longest time there was this awkward section where the coordinates sign ended up going, so order has been restored! And I am loving the piece of our home that we’ve been able to restore in more than one way.

DIY – Window Side Table

I am excited to share my latest project with all of you; a window table.  Once you have the materials, this project is pretty easy and low cost! It’s a win-win when it comes to creating a cool piece that’s custom to your needs, whether it be a coffee table, plant stand, or a side table the options are endless.

What You’ll Need;

  • Window (of your choice) – I used an original window from our basement, since they were pulled out when we had glass block put in. Total cost; $0
    • Don’t have any old windows laying around? Check garbage day, it’s amazing what people will put on the curb!
  • 4-Legs; length and style of your choosing. I used: Waddell Ash End Table Leg from Lowes. Total cost; $16
    • NOTE: I bought legs with pre-installed hanger bolts that allowed for a clean smooth finish without needing extra hardware to attach the legs
  • Wood Glue
  • Paint – color of your choice & paint brush
  • Drill and drill bit to predrill holes for legs
  • Blade to scrape off excess paint on windows
  • Timing; finished within a weekend

From there you can prep your window by cleaning it up and sanding if you’d like. I opted to keep the hinges and some of the other rustic elements since I was working with a 100-year old window.

Next, flip over and mark out where you’d like to place your legs – as you can see with the window I was working with the spacing and exterior width was inconsistent and not much to work with so I eyed about an inch from the edges. Once I had those marked, we pre-drilled a hole, although we didn’t go deep enough a few times so we had to go back over the holes.

Before screwing the legs in we added wood glue in the hole and around the bolt on the leg. Make sure your legs get all the way in and are secure, some of ours were wobbly, so we had to re-drill new holes and start over. But once they were in and secure you definitely knew it. The wood glue required about 12-hours to dry, so day one was finished.

After the wood glue was dried, I flipped the table over and began to paint! I opted to use a primer over the preexisting brown, and also did the legs in the same color.  I had to do 3-coats before this beauty was looking clean.

I let B do the fun stuff and scrape the paint I’d gotten on the window.  This really cleaned up the piece to give it that finished look. From there it was just giving it a good clean with some Windex and setting it up in place – we added this gem as an accent in our sun room. The light and airy of the white and windows ties into the space perfectly.IMG_4428IMG_4430IMG_4432
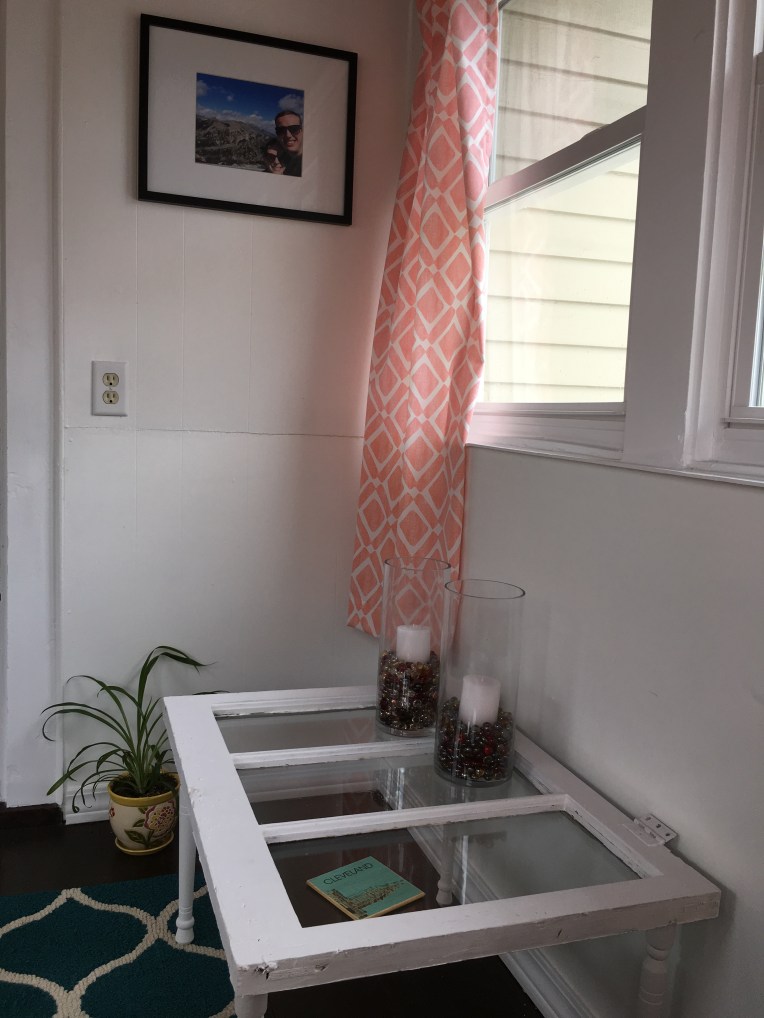
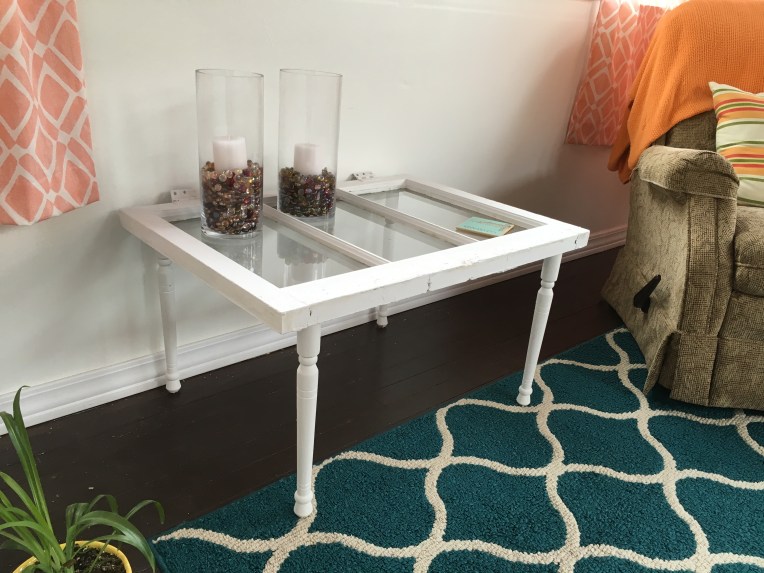
Using most of what we already had, the main expense was buying the legs for $16 – you can’t even get a coffee table for that!  I love the way it turned out, it still has a vintage and rustic flare to it. Not to mention it has multiple purposes and I am sure it will change overtime for us!

Happy DIYing!

Latest Obsession: For The Home

HERE’S WHAT, I have been absolutely obsessing over especially as the summer months are approaching and the store’s are switching out their inventory to be summery!!!

Lanterns. OBSESSED. I want them everywhere, but especially for outdoor spaces like our front porch. I love them as decor for your entry way and even lightening for your seating area. I also love lanterns for decoration inside, around a fireplace or hearth area, especially the really big lanterns. Not to mention you can find them in almost any finish from silver, to gold, wooden, ceramic, or bronze to fit into your current decor or switch to something new. You can get hanging lanterns or keep them on the ground or table. Plus you can use them season round by mixing up colors and styles with different fillers for the insides… I could go on for dayzzz!  On a lantern kick like me? Check out craft stores, as a lot of them have sever price cuts on summer and outdoor decor (like 60-70%!) you can’t beat it.

Greenery. I am loving me some greens, the fake kind. I first saw some moss like letters at Michael’s and really wanted to impulsively buy them, but one didn’t know what to spell or letters to get, and two thought they would look way out of place in my house, but I can’t help but pine over them. I also really love boxwood wreaths, but refuse to spend the money online and will most likely DIY one, one of these days. And as much as I truly don’t like fake plants, because I’d rather just have a few real ones – I really like the fake greenery balls… yes I just described them as such, okay they’re technically “boxwood vase fillers” (according to Target). Anyways, I like the idea of having some greens around the house to add to the real greens, it brings some added life to your living space.

So those are my two latest obsessions right now, I’ve had my eyes on the lookout for these whenever I hit the stores.  I recently grabbed two silver lanterns for some added decoration up in our master suite, and I love how they compliment the space, we have a mixture of metals, but somehow it’s all working.

What’re your summer favorites?

DIY – Upgraded Built-in’s

One of my spring projects was to give a simple upgrade to our living room built-in’s that bookend our fireplace.  I planned to do this with textured wall-paper, that I have used in a few other spots around the house like our dining room built-in’s, our stair-backs on our stairs leading to our master, and even in our DIY bar that started out in our apartment. Overkill? No, surprisingly this is the most subtle upgrade you could do to these tiny spaces for a big impact. Not to mention it’s extremely affordable ($20  for 56 sq.ft.) and super easy to do.

Since we live in a century home, I like to build off the history of the home and add to it when possible, this smaller ‘tin ceiling’ patterned print is the perfect accent to give a face lift without completely giving it an overhaul and taking it into a different era. Textured Wallpaper - Lowes - the bee life

Before:

DSCN1981DSCN1982

After about 30-minutes of leisurely watching eNews (learning all about Lemonade) and measuring, cutting, soaking and putting into place, boom! Instant upgrade. All while dinner was cooking in the oven.

After:

DSCN1984DSCN1985DSCN1989
DSCN1988
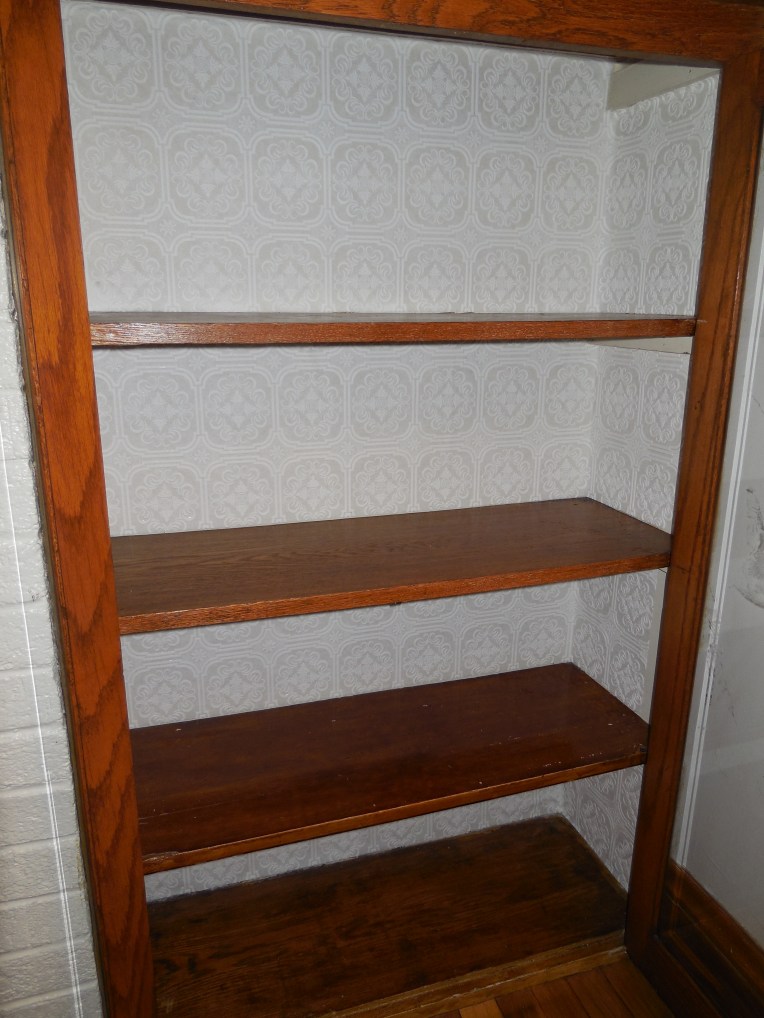
With the doors closed, and if the lightening is just right, you can hardly notice – but on the flip-side, if the lighting is just right, you can also see how pretty this added touch is.  Sadly, I ran out of paper and was only able to get one side done, I completely underestimated the amount I had left over from the stairs in order to complete these built-ins. But it was a good start, and like I said – easy, not very time intensive, and pretty straight forward for $20 a roll.


Latest Obsessions: For the Home 

HERE’S WHAT I have been obsessed with in and around the home, especially since our master is nearly completed.  These are the things I am constantly looking for whether it be in the store or buried in a photo album.

Old Photos: Since the inception of the gallery wall in our living room, and the idea of using old, black and white photographs, (from years long before I was ever born) I can’t help but want to find more! There are so many hidden gems stored away that I know I haven’t found yet.  The last time I was home I insisted my parents dig out their old photos… And there is was, these beautiful wedding pictures of my grandma B, pictures I’d never seen before, pictures that took my breathe away (one pictured below). I also need to dig around in B’s grandma Dee’s pictures. I love making copies and filling my frames with family and memories that make up our history.

Table Top Clocks: I am over the wall clock, practical and useful in some rooms (like the kitchen) but not so much in other rooms. I LOVE table top clocks, vintage or modern, gold or silver, I’m probably going to start hoarding them and put one in every room! I just stumbled upon these gems at Target, $9.99 each, I’ll take one of each, please!
Clocks
01 | 02 | 03

Wooden Accents: With recent DIY projects, I find myself drawn more and more to custom wooden signs with hand crafted letters. I also love wooden frames that elevate the look and feel while tying in a natural element to the room and adding warmth. I have a specific DIY in mind to help finish off the gallery wall in our master, something similar below, only incorporating B and I’s initials or a special date or longitude/latitude.  There are also plenty of pieces like this found in stores, that have a custom, hand-drawn look for the not so crafty people!


What are you obsessing about lately when it comes to pieces in and around your home?