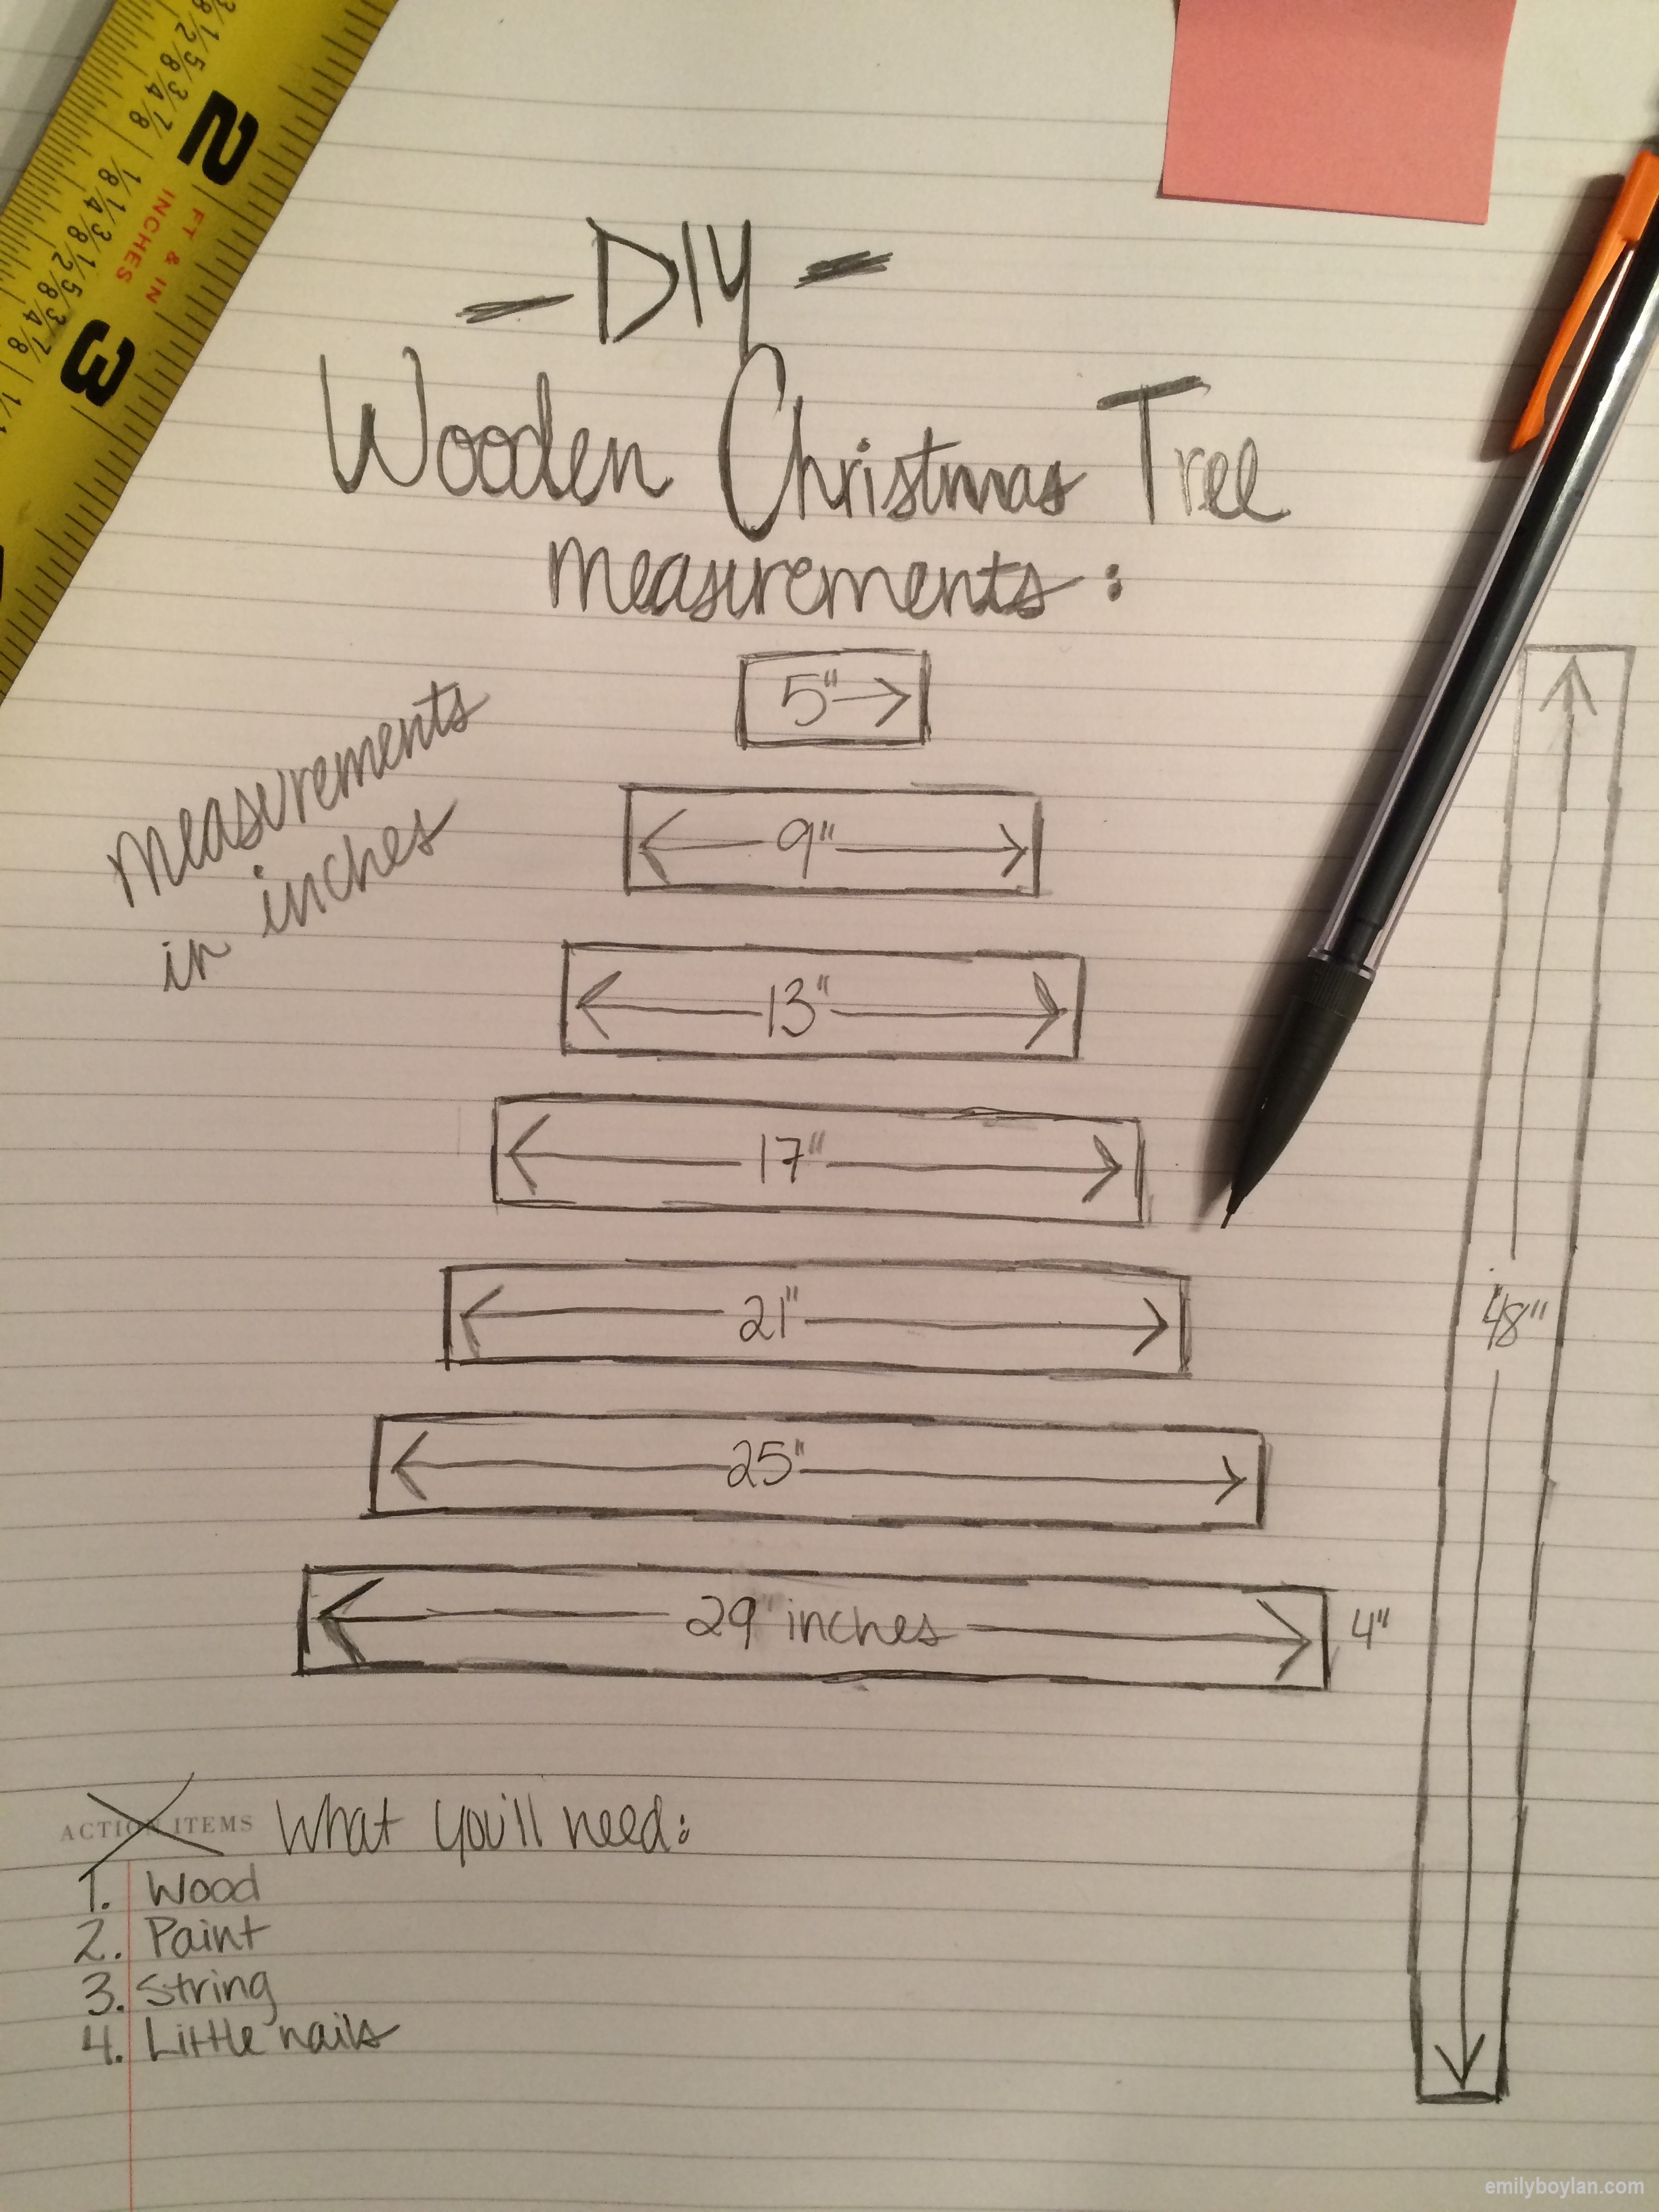
Of course, I wanted to share this a week earlier – but I have been super behind on all things Christmas this year, we JUST got our tree and decorations up this past weekend. BUT – I have been crafting away and can’t wait to share my two latest Christmas crafts this week. The first one was inspired by social, and I just had to recreate my own – it’s using wooden birdhouses from Michaels and turning them into Christmas Village houses, the best part? Totally customizable to your Christmas decor and colors! Here is how I DIY’d a birdhouse in three different ways – because what started with a good normal idea, turned into some fun as the creative juices got flowing.

DIY Shopping List:
– Bird House of Your Choice:
– Brownstown from Michaels
– Corner Lot from Michaels
– Craft Paint & Paint Brushes
– Pipe Cleaners (I used Gold & Silver)
– Glitter (I used the colors ‘Sugar’ & ‘Gold’)
– Mini Trees (optional)
– Hot Glue & Modge Podge
Anything else that might be festive or ‘Christmas Village’ related could be used as a finishing touch to your Christmas birdhouse – I definitely got created and created my own pieces from what I had.
a Retro Christmas Birdhouse
I had the Corner Lot Birdhouse for some time, as I had big ambitions a few summers ago to do some birdhouse crafts – so when I was inspired to create, I was trying to work with the birdhouses I already had. I started somewhat bold with the color choice for my Corner Lot Birdhouse… and I quickly was regretting it and going to scrap it since I was able to secure two Brownstones. But, as I started to dig through my craft supplies, I found my silver pipe cleaners, had a mini silver bottle brush tree a silver, green and blue jingle bells. I was instantly inspired to create a retro Christmas birdhouse. And, oh my gosh I’m obsessed. The silver bottle brush tree also fit perfectly in the little corner behind the fence.
Painting Tip: For clean lines, I used tape to create a clear line between the fence and each house, the back houses as well. There are also a lot of nooks and crannies so take your time and be prepared to paint!


Glam Brownstone CHRISTMAS birdhouses
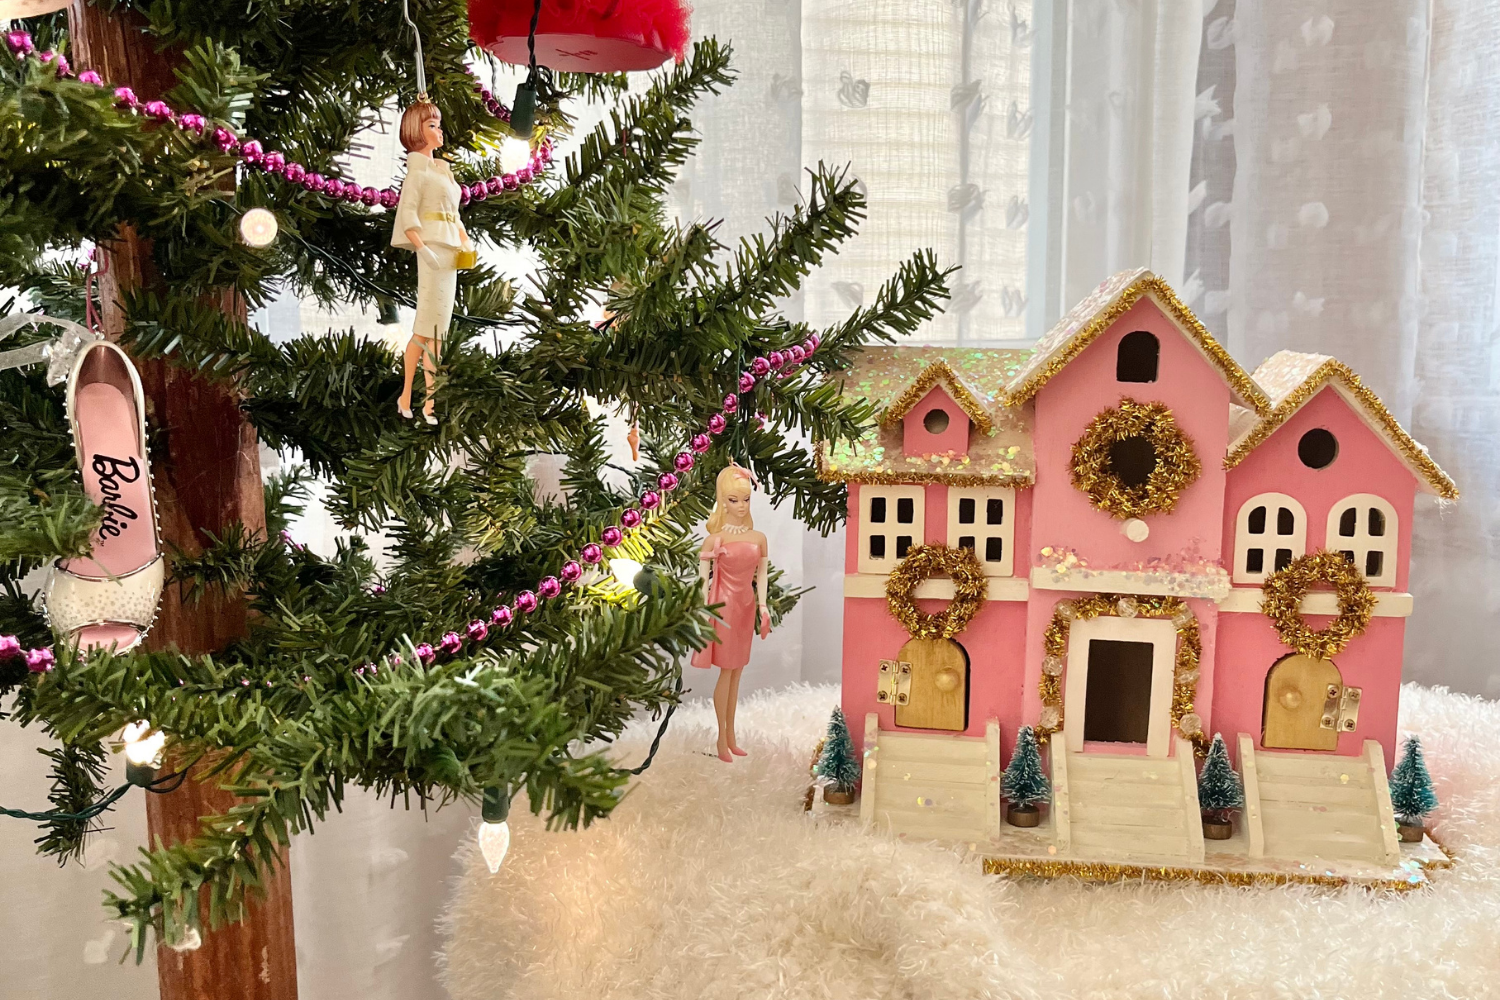
My original plan for the Brownstone Birdhouse was to go white and gold, which goes perfectly with all of my other Christmas decorations. Painting this white, was definitely tedious, but also relaxing – I did have to do multiple coats with the white colors, at least 3 or 4. Darker colors only took about 2-coats. As I worked through my Gold Brownstone, I still wanted to do something colorful, but not so bold as the retro house, and something that would still fit into our decor – that’s when I was inspired to create a pink and gold Barbie Brownstone to go with my Barbie tree (she is definitely my favorite!).
Creating garland and the wreath’s for finishing touches was also fun and used with pipe cleaners. I wrapped at least 3-4 pipe cleaners to create fuller wreaths to hang on each of the houses. The garland was created with at least 3 pipe cleaners woven together and then I added some clear beads along for added detail and to look like lights. To finish off the pipe cleaners also really added a pop along the base and roof lines to really give these a finished look – and the mini bottle brush trees were extra that I had, that were a perfect finishing touch.
The last detail is adding some sparkly snow to your rooflines, stairs and landing – with modge podge I just went glitter crazy and added as a fun pop!

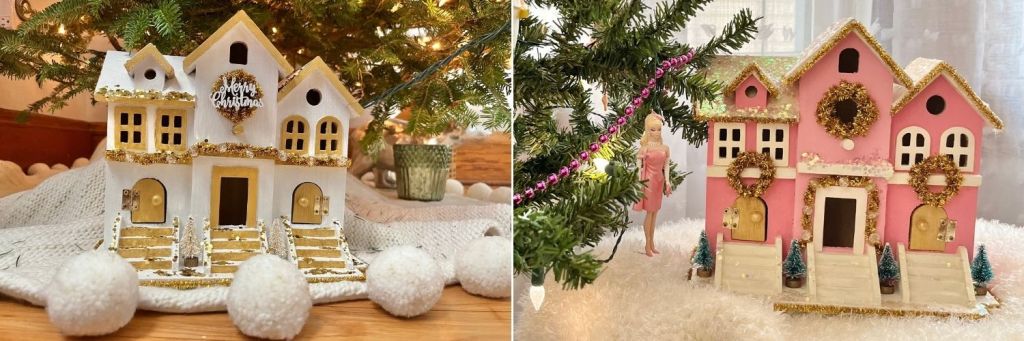
Which birdhouse is your favorite? B loves the white and gold one… I’m a fan of the pink one but also really love the retro birdhouse, since I was about to give up on it early on.

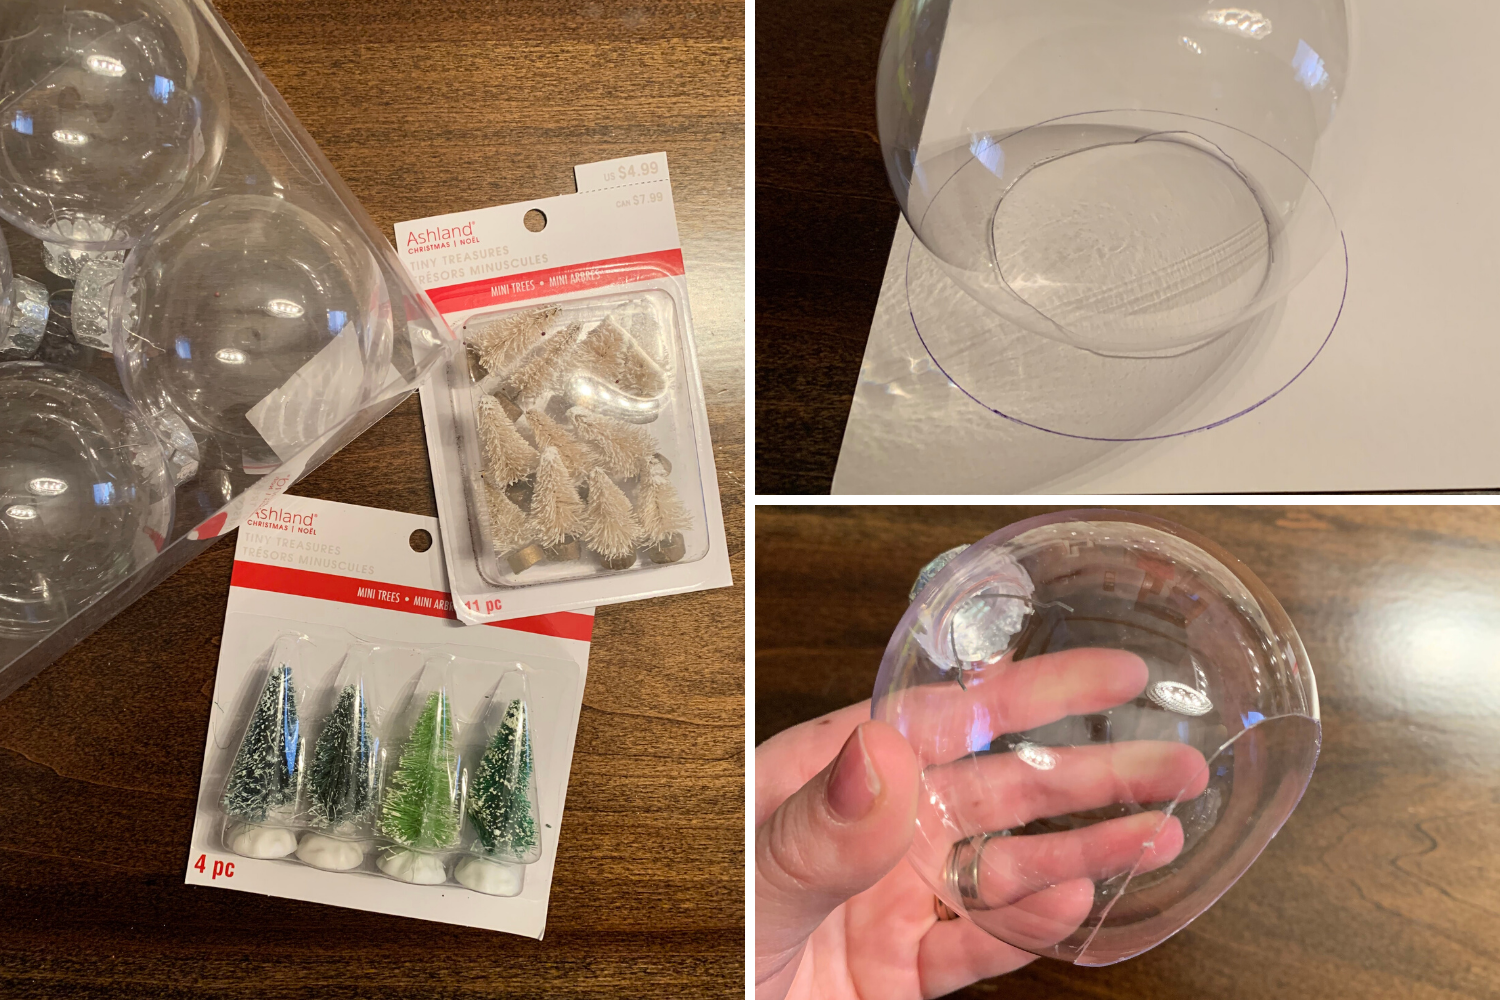 2. Woo! We have our openings, so now it’s time to cut our our bases and start planning our wintry scene. I used thicker card stock, that I ended up painting and putting glitter on — I would highly recommend buying
 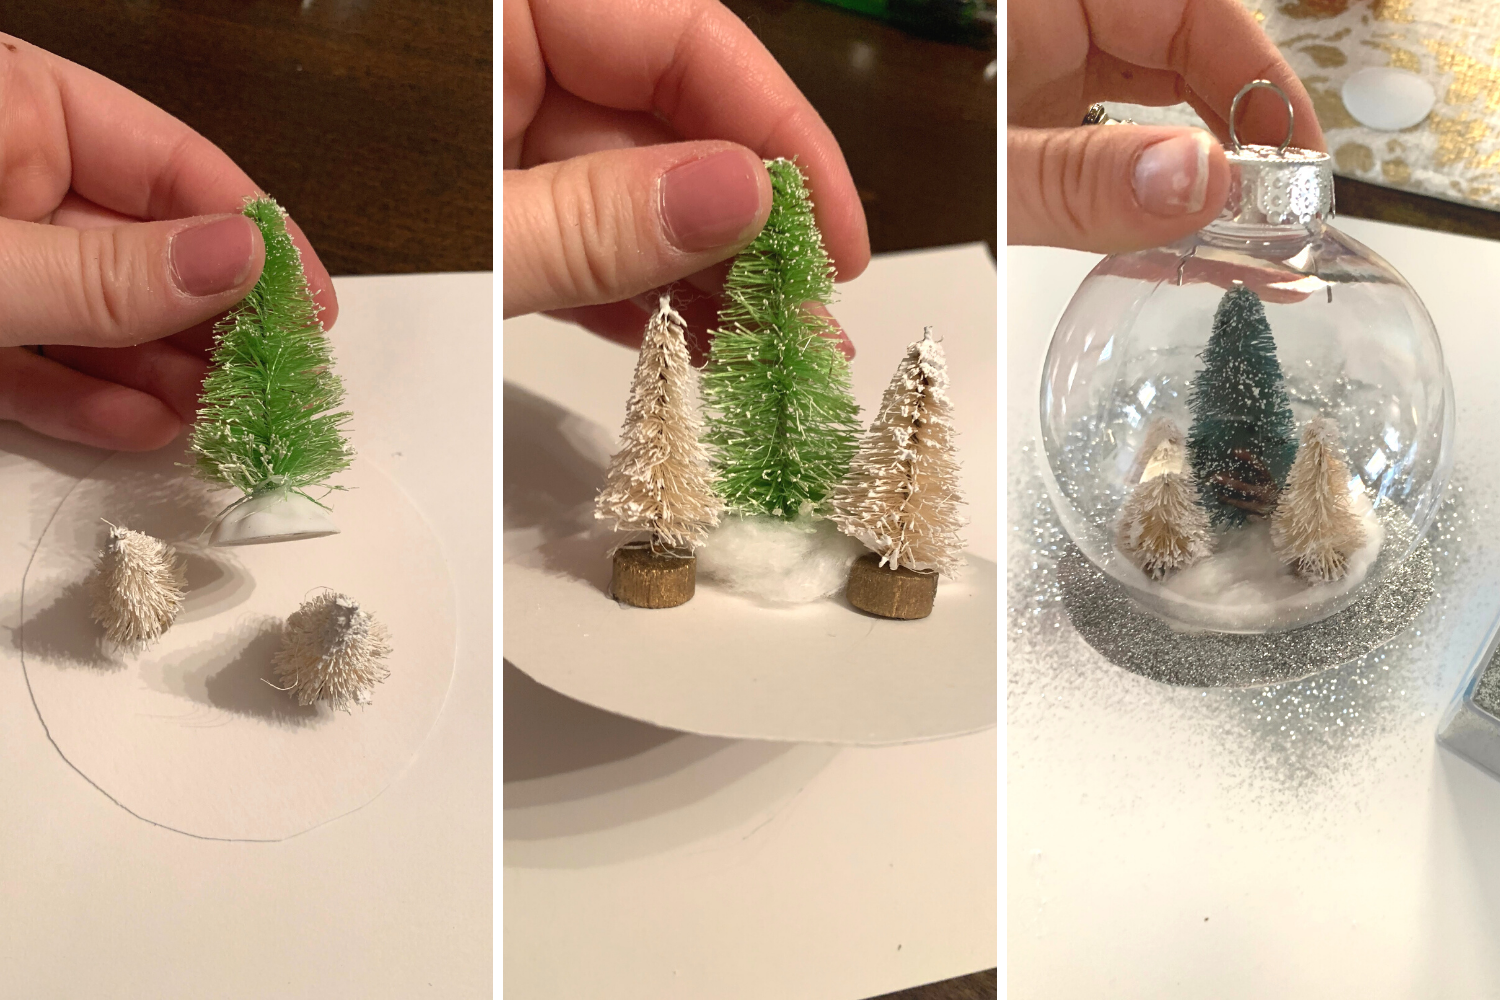 5. Now, depending on if you bought glitter paper or not, this step may not be needed. Using mod podge glue I painted the top of the white paper bases and then covered in silver glitter over a paper plate to catch the excess. I had to touch up a few spots once the glue dried and I dumped the remaining glitter off to see emptier spots. If you bought glitter paper, you are 10-steps ahead of me!
")
")


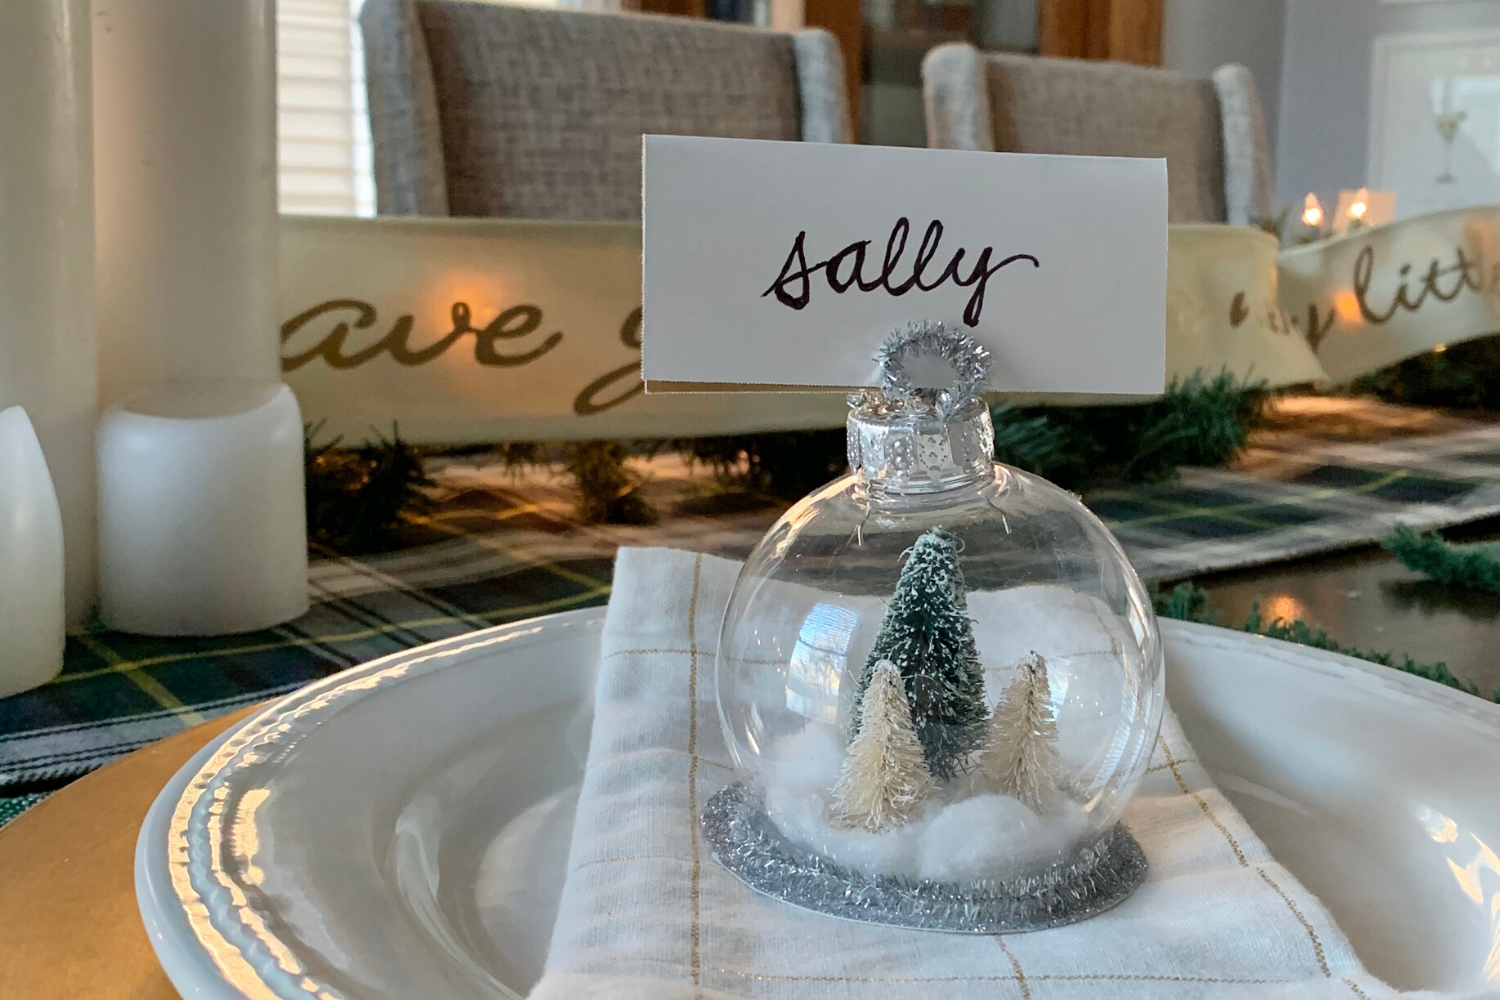
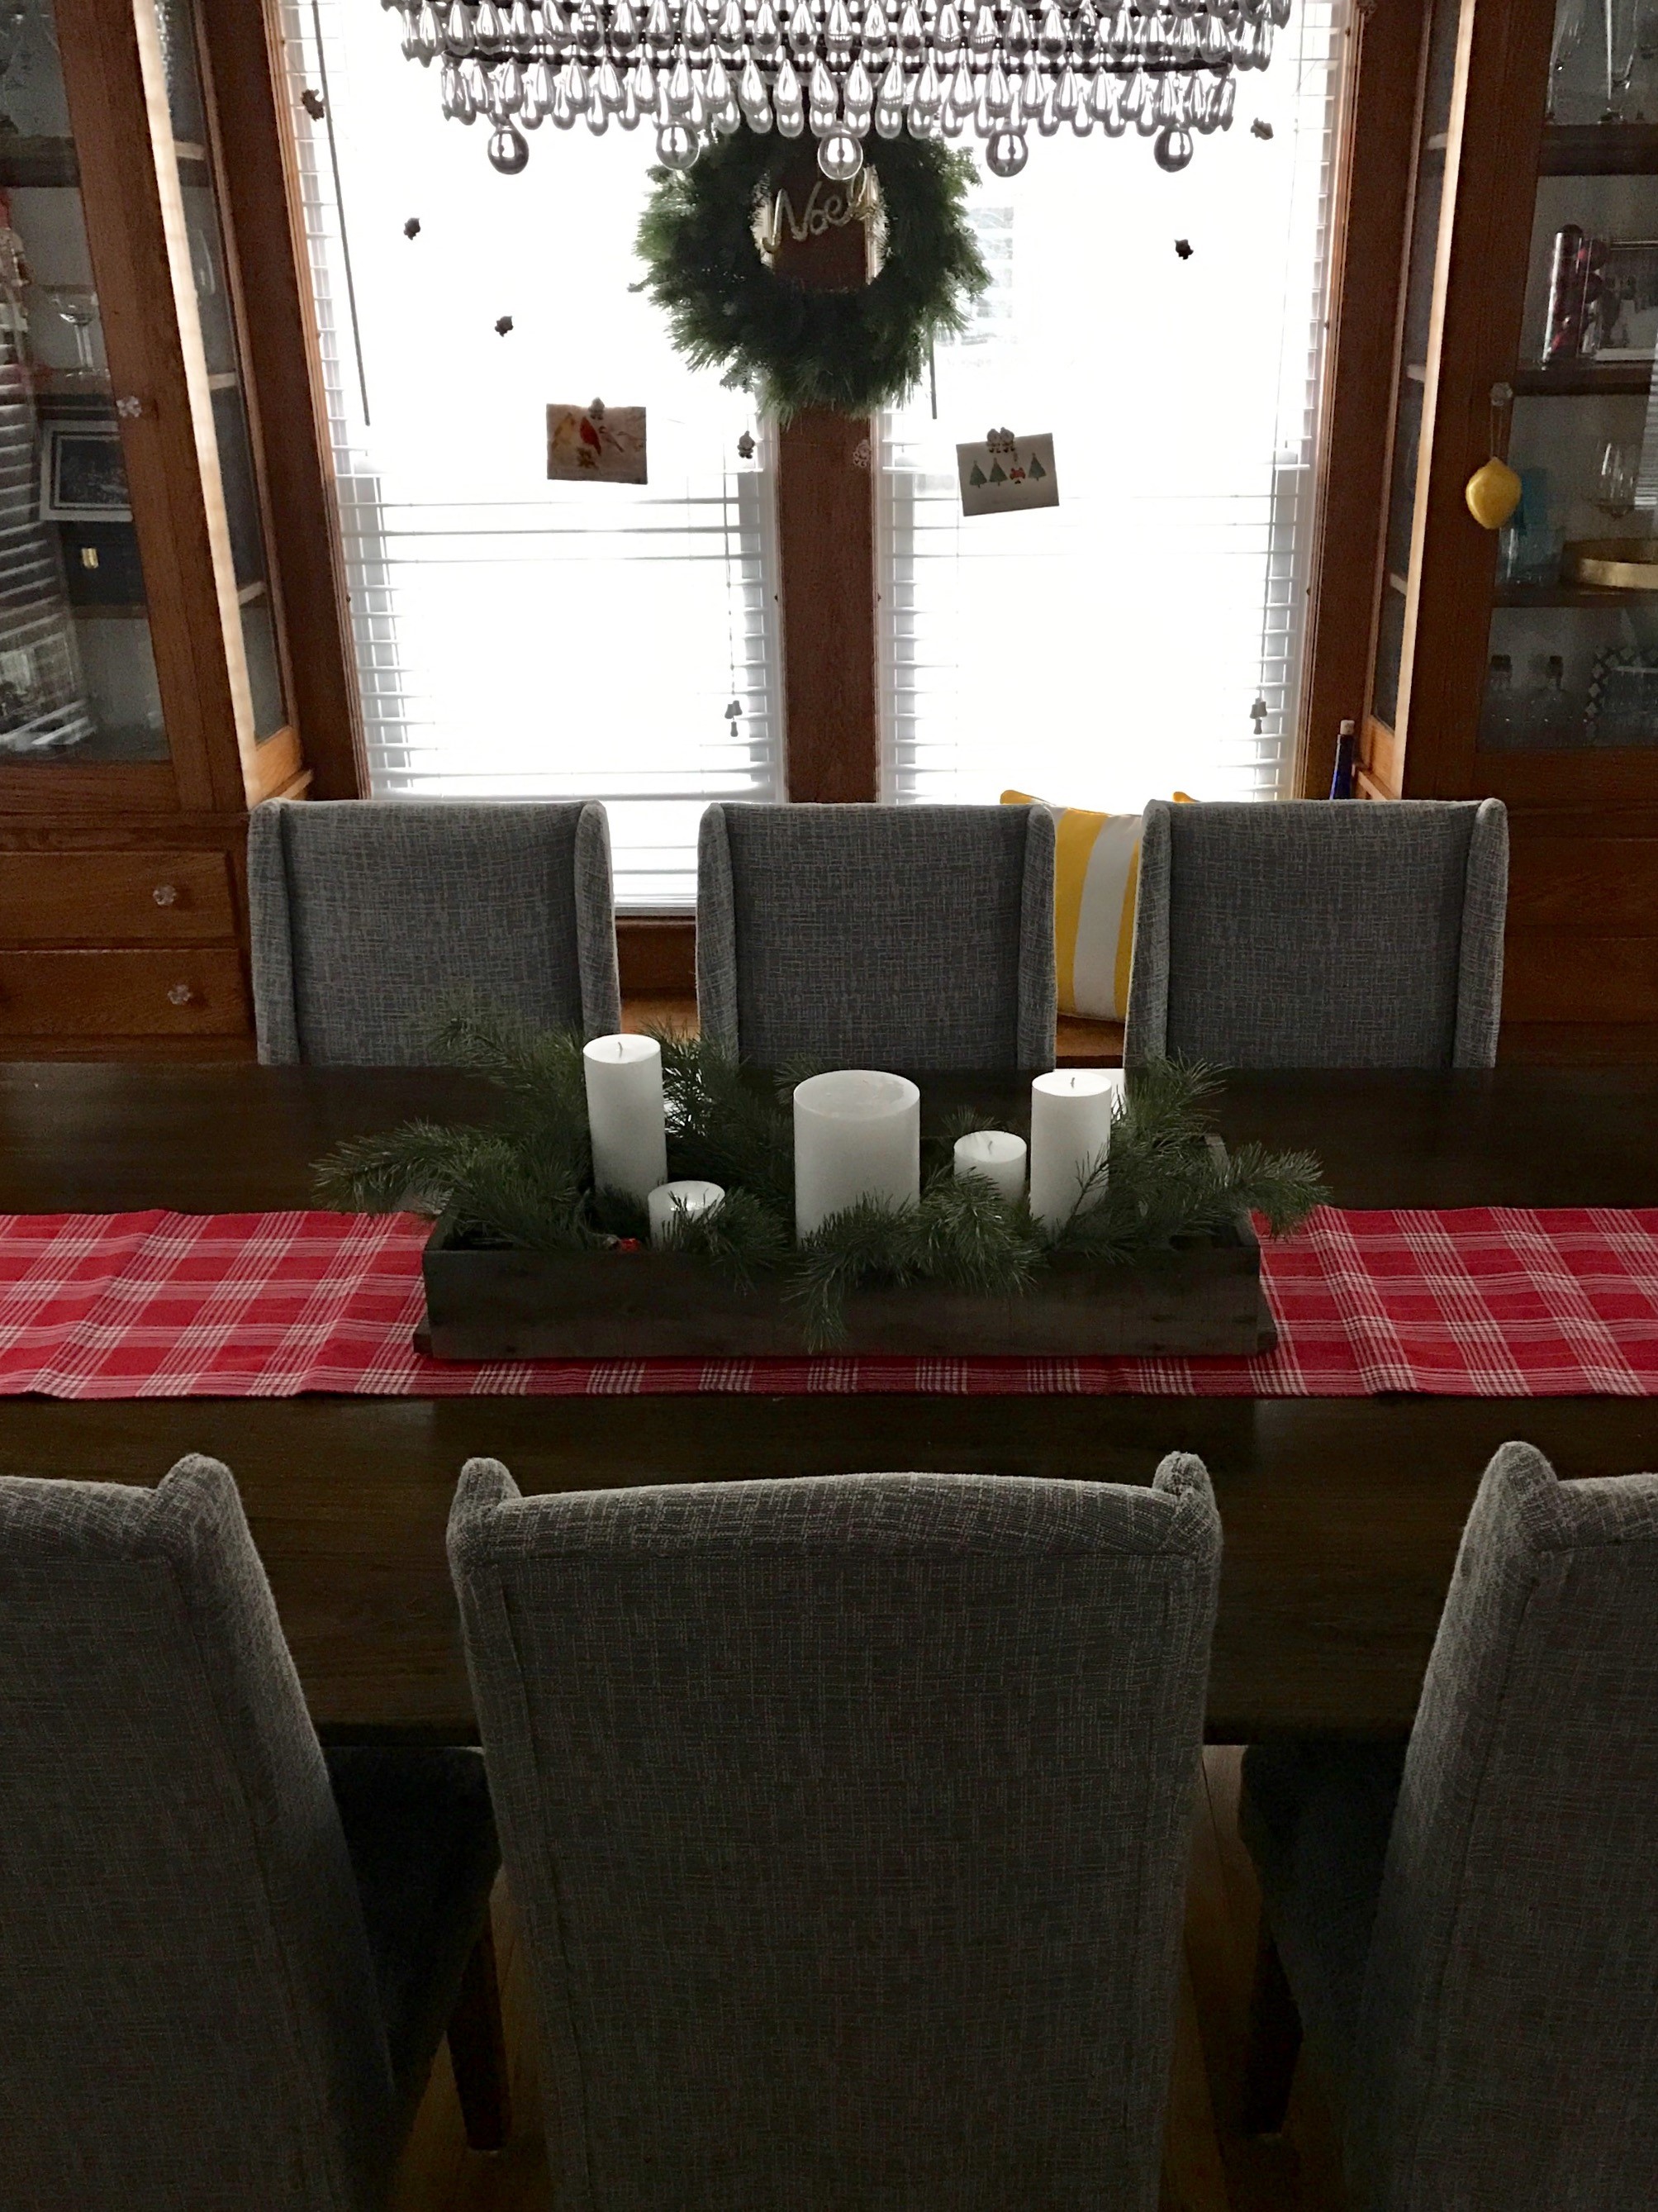
 Dining Room Centerpiece: I wanted to switch up the centerpiece, since as much as I loved last year’s centerpiece it wasn’t conducive for entertaining with friends and family. I often had to move it for space or take certain parts out of it. I needed something a little more low maintenance, less intrusive and easy to move. I saw some inspiration on pinterest with a wooden box and since we found one when we first moved in (under our front porch of course), it was the perfect idea. I used greens from the Christmas tree farm and just had to buy the candles. I added in some color and it’s completely portable if we need to move for a game night, dinner or cookie baking!
 I definitely got my “Martha Stewart” on and love the way these two spaces turned out! Everything I got too can be reused or altered next year – which would be my second hack for all of you is to think of DIY/Pinterest solutions that work multiple years, aren’t too trendy.