One really amazing thing about our master bedroom, is the fact that we have not one, but two walk-in closets — the even better part? I had full intentions of sharing these with B, but he said “Nope! They’re all yours.” 😍 Since these are in our attic, they both are a bit oddly shaped and my accessories closet is definitely the smaller of the two, but works out perfectly for all my fun and special pieces to be on full display.

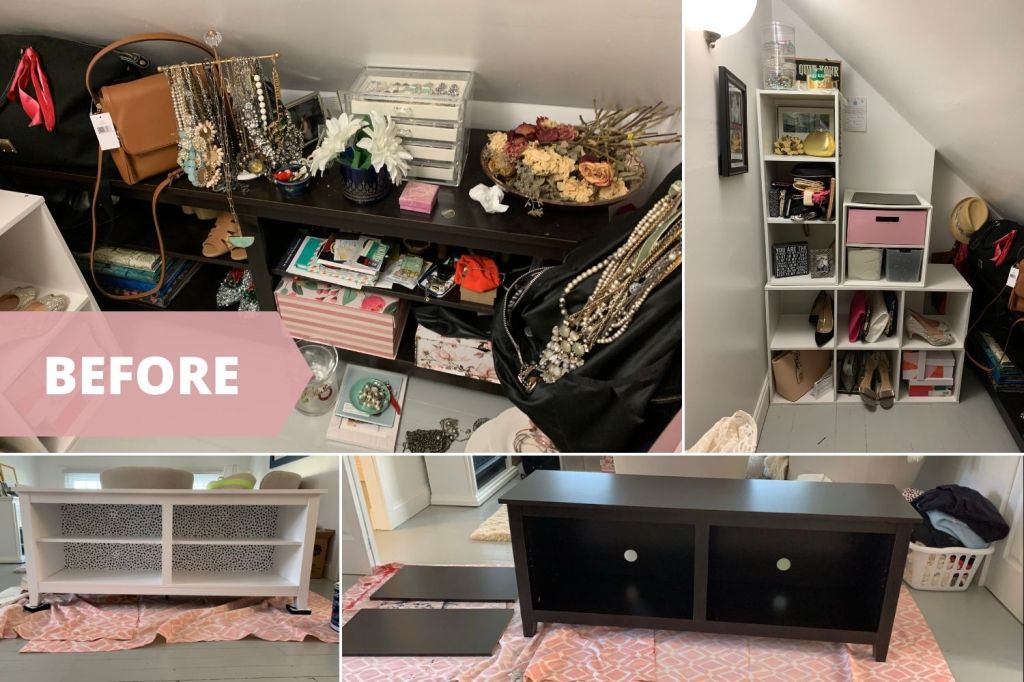
To get this closet, which quickly became a catch all, organized I focused on three areas to get this looking better and straightened up. (1) Purge! I went through all my jewelry and consolidated, donated or stored away, this also included scarfs and handbags. (2) Invest in jewelry specific organization pieces, and (3) paint old TV console that I use for storage. These three things combined helped make it more functional while also looking even more gorg, if I do say so myself.
By purging and consolidating, I was able to even get rid of a few different cube solutions and really consolidate and streamline everything for a clean and useful space, while also limiting myself to what I can store, so that I have to keep up with replacing or purging when new items come in.
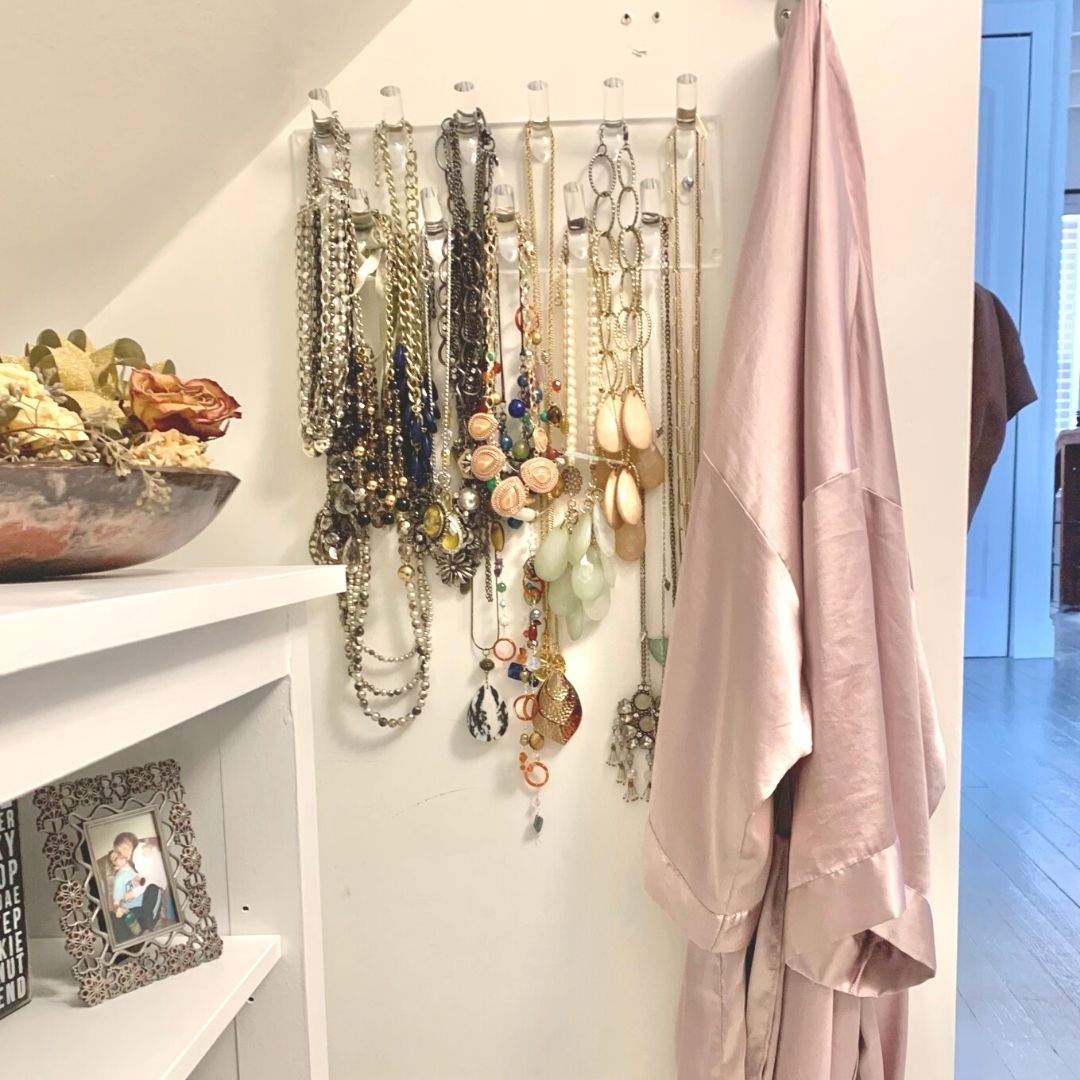
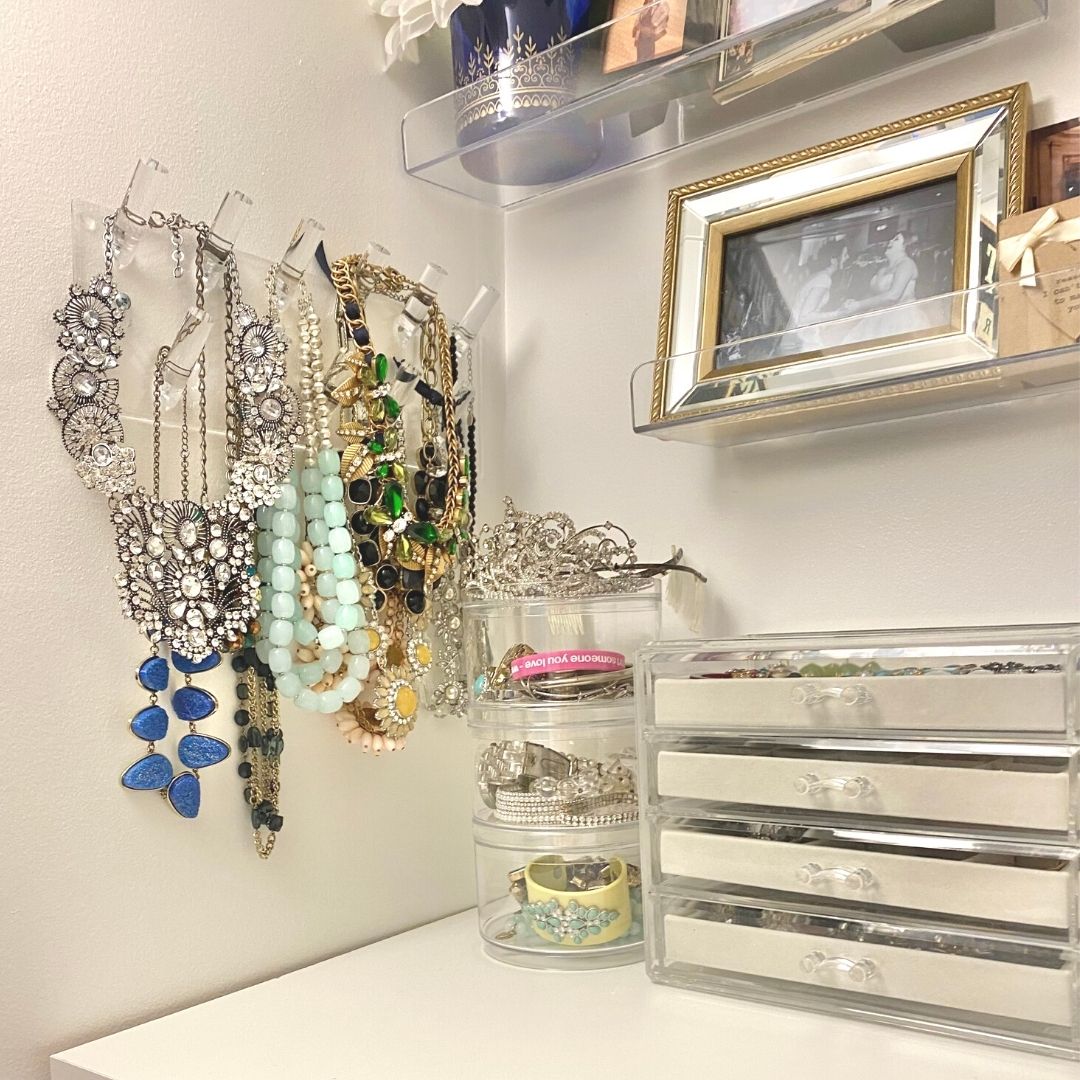
Ok, so I think the things that really pushed this makeover to the next level were the acrylic jewelry organizers I grabbed – and might I add am pretty obsessed with. The two-pack acrylic mounted jewelry stands were an impulse purchase, that I wasn’t sure exactly how I would use them — but they came in clutch and I love how they free up counter space while displaying my necklaces tangled-free and easy to see! I then found these clear jewelry boxes, one with four-drawers in white, and another with six-drawers in white. The six-drawer case is shorter, so it fits perfectly on top of my updated shoe console. I also grabbed this stackable accessory container on a whim, and again I love how it contains pieces, stacks tall, while still showing off the pretty things.
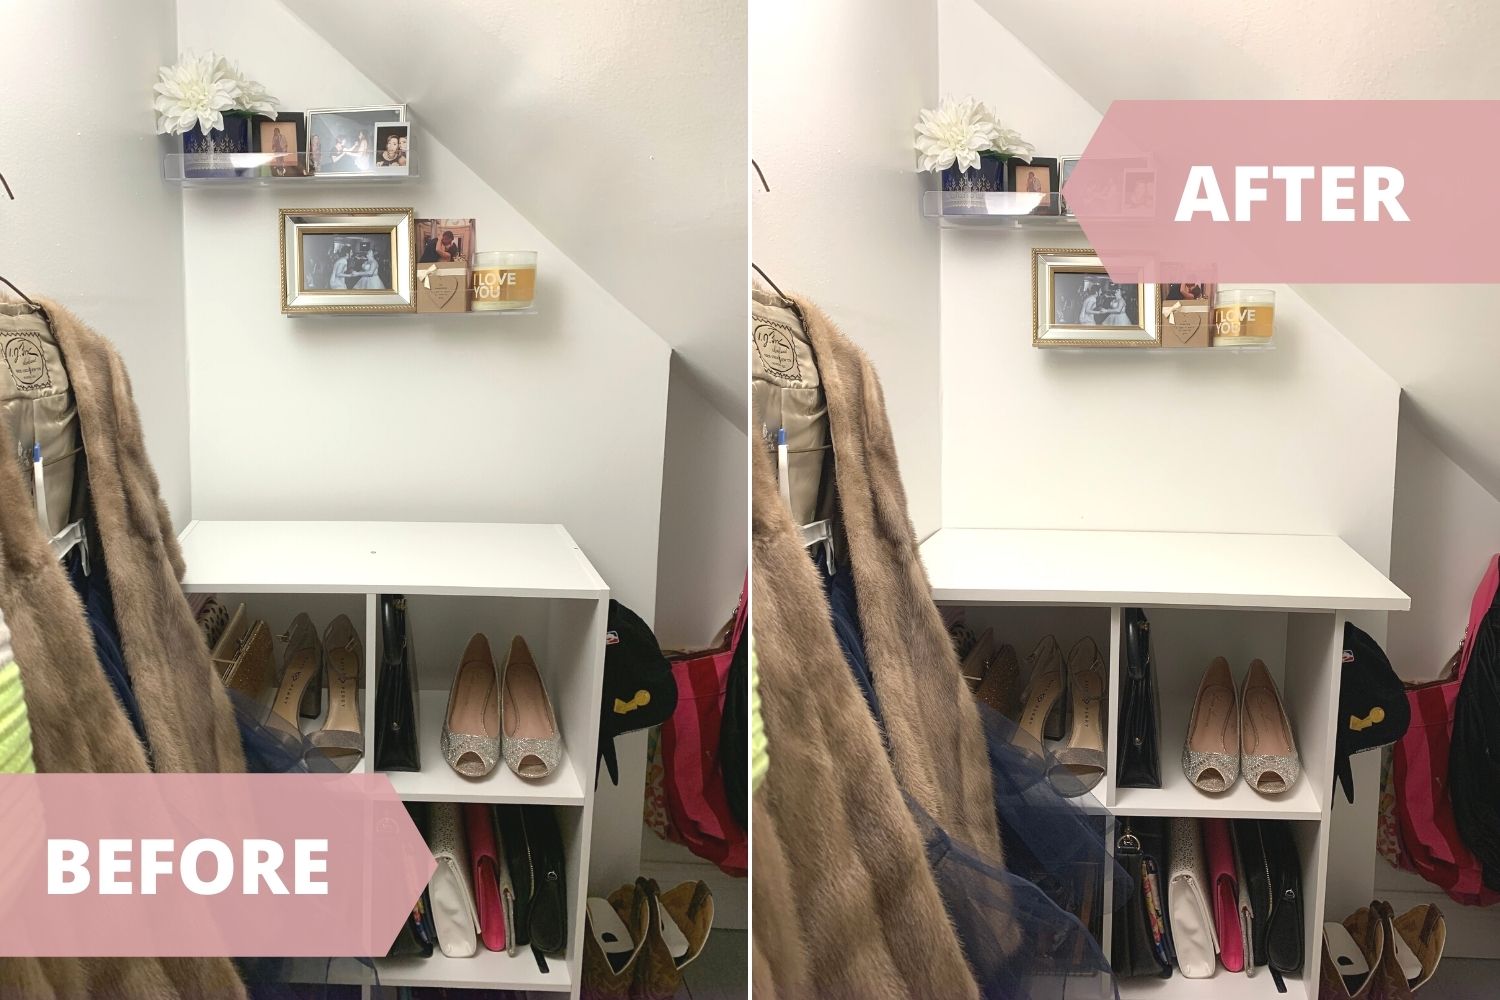
Finally, I ordered a 4-pack of clear shelves to utilize in the space. I wasn’t 100% sure the configuration or what I would want to put on them — I was initially thinking smaller hand bags or displayed jewelry — but ended up putting some pictures and keepsakes I already had in the space to have my favorite people close. I ended up using the other two in my larger closet, which is still getting organized with it’s own update!
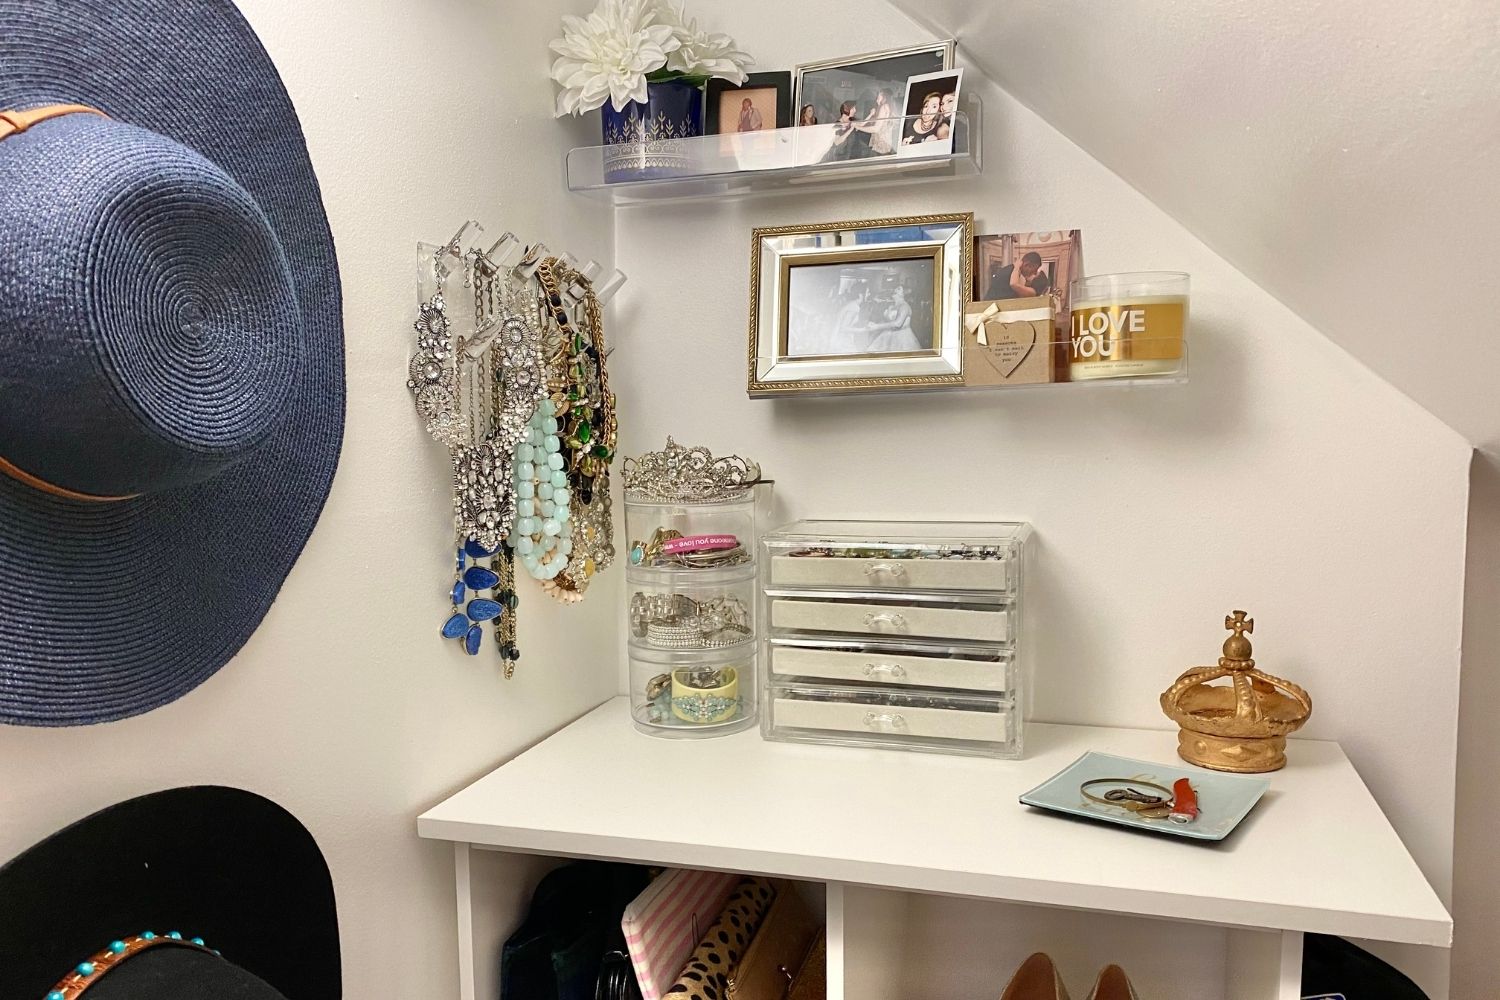
Two final key pieces that really helped spice up this space and make it functional was the addition of a make-shift counter on top of the vertical cubed storage. Because it’s an old attic, there was a decent gap between that and the wall — but getting this Blue Hawk white laminate board, we were able to cut in half and utilize for both of my closet spaces which had this same problem. This created a space where I could put my larger jewelry box, while still having some space for added decor or storage pieces.
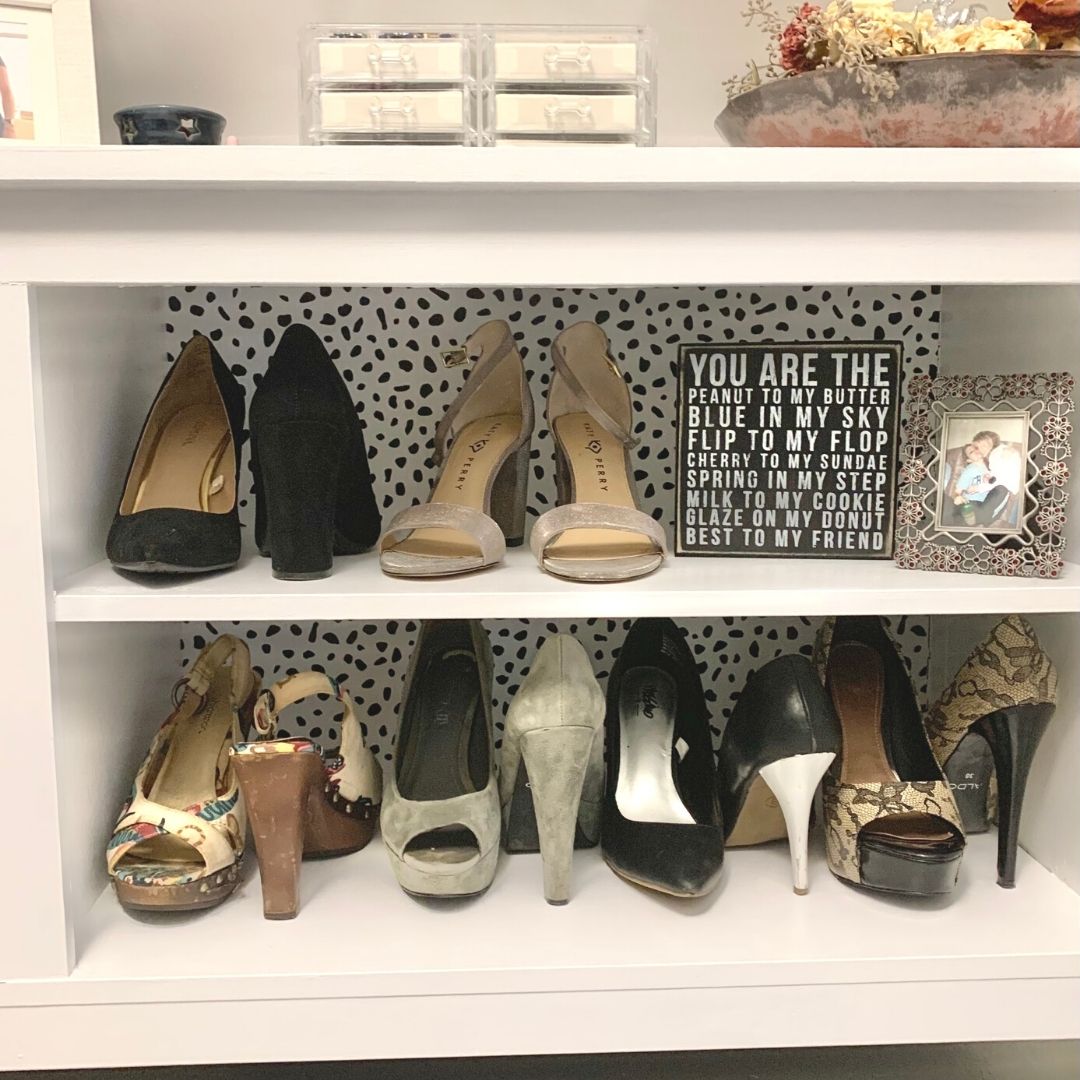
Finally, painting our old brown TV console to white to match the space was a necessity! I almost didn’t do it, but I’m so glad I spent the time and 10-million coats of white paint to give this babe a face lift. I had left over speckled dot peel and stick wallpaper from Target from a previous project that was just enough to add as a backer and give this a bit more glam and flair. And by consolidating all my of heels to this space it really gave a clean separation between bags and shoes. I just kept my wedding shoes as a focal point in the tall cubed piece!

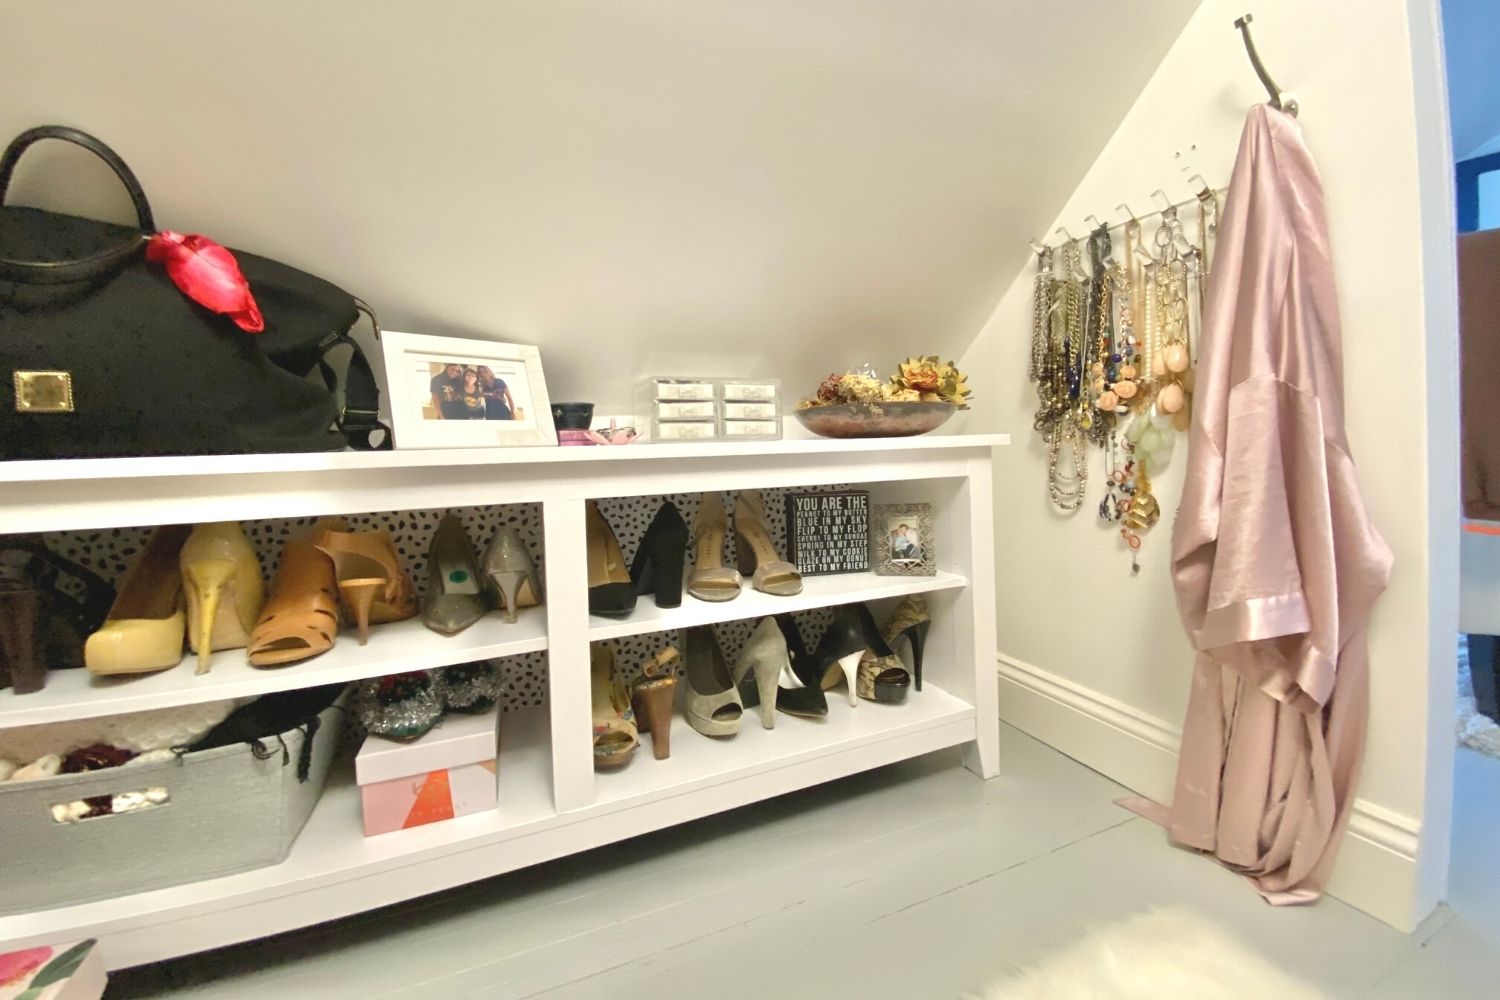
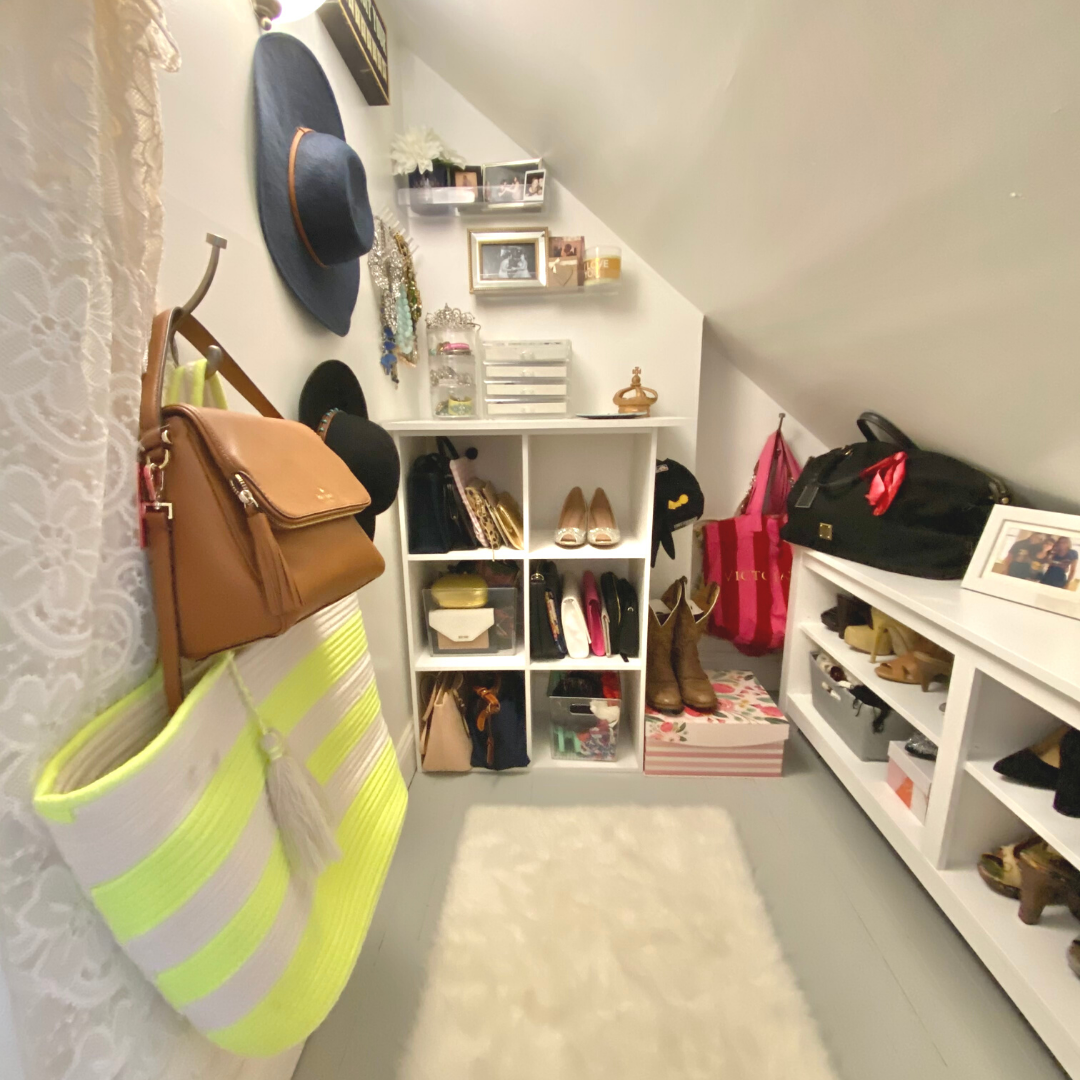
With a few extra hooks and nails I was able to add storage for more bags, wide brim hats, some satin and lace. The last thing I plan to do is spray paint the hooks from silver to gold and also do the same for the wall sconce to spray paint the silver hardware gold for a cost effective update! As I mentioned, my larger clothing closet is also getting a bit of an update, while also getting organized and cleaned out — a mini reveal and a few of my hacks for that coming soon. This space was transformed within a weekend, and I find myself just opening the closet door to peak inside at the perfection and pretty!
Here’s to creating more beauty and organization in our lives! xox

")
")
")
")