
It’s February! That mean’s a month all about L-O-V-E! And I have a really affordable DIY to share with you that is easy to make, beautiful, and completely personalized Valentines for all your favorite people.
 What You’ll Need:
– Craft/Scrapbook paper; think patterns, pinks, reds and hearts!
– Scissors, glue stick, hole-punch
– Markers
– Ribbon
– Stickers; stick to metallics, hearts and letters! (optional)
– Photos (optional)
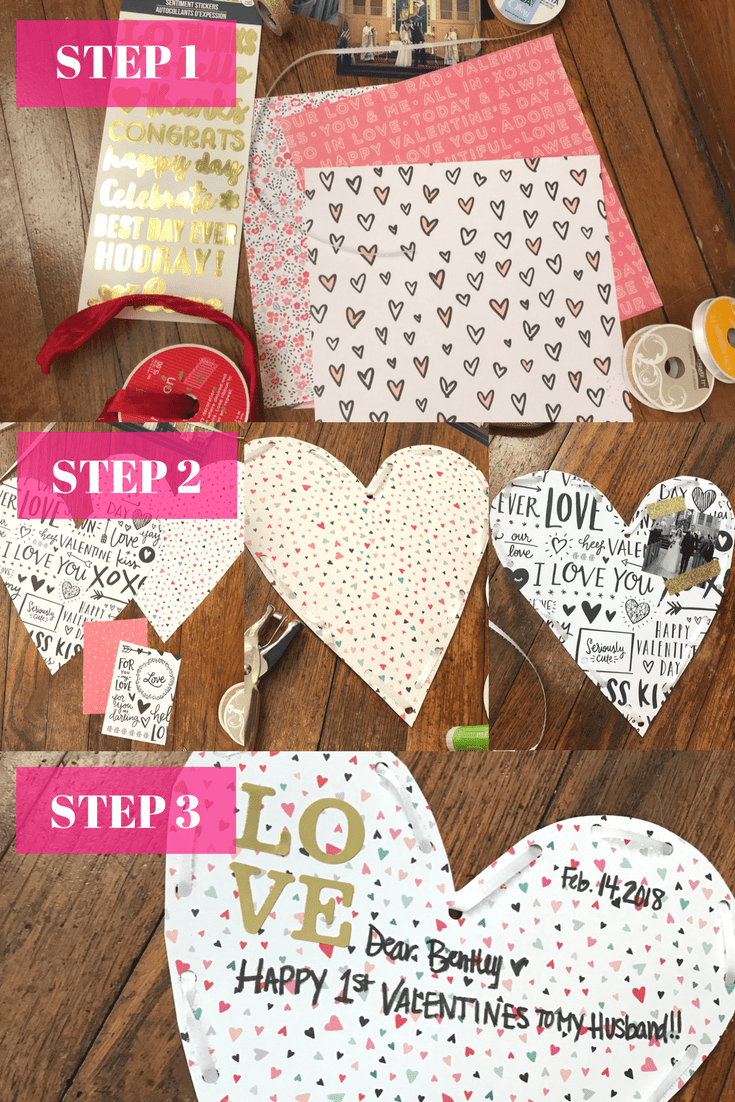
Step 1: Gather all your goodies to create your Valentine’s; once you’ve got all your goodies and figured out who you want to make a card for – it’s time to start making!
Step 2: Pick out your papers, and determine your shape – obviously a heart is a good go-to, if you’re afraid to freehand the cut find a template online or trace on paper before. You’ll want to cut two of your papers so you can have a front and back – these can be the same or mix and match! It’s OK if it’s not perfect, because it’s handmade!! Once you’ve got your shape cut, glue the front and back together. An optional add; is to hole punch around the perimeter of the heart and then weave ribbon in and out of the holes.
Step 3: Start to Personalize! Add your pictures; stickers and write a sweet note to your honey or bestie… and wah-la! You’ve got a personal, one of a kind Valentine for that special someone.
 Since I am an avid scrapbooker, I had a lot of these supplies in-house stocked away. But scrapbook paper is usually on sale for 7 for $1; ribbon is around $3.99 a roll, stickers can add up if you buy a bunch; but finding some that can be used as accents won’t break the bank. Not to mention you can always find a great coupon to help. If you stock up now, you’ll have a mini stockpile ready for next year, woo!
Happy Crafting!


 Being healthy is more than eating right and working out, being healthy is pausing, turning off the noise, taking a few extra deep breaths, a break from ‘reality’ … from the office, it’s focusing time on the important things, the things that makes you whole and happy.
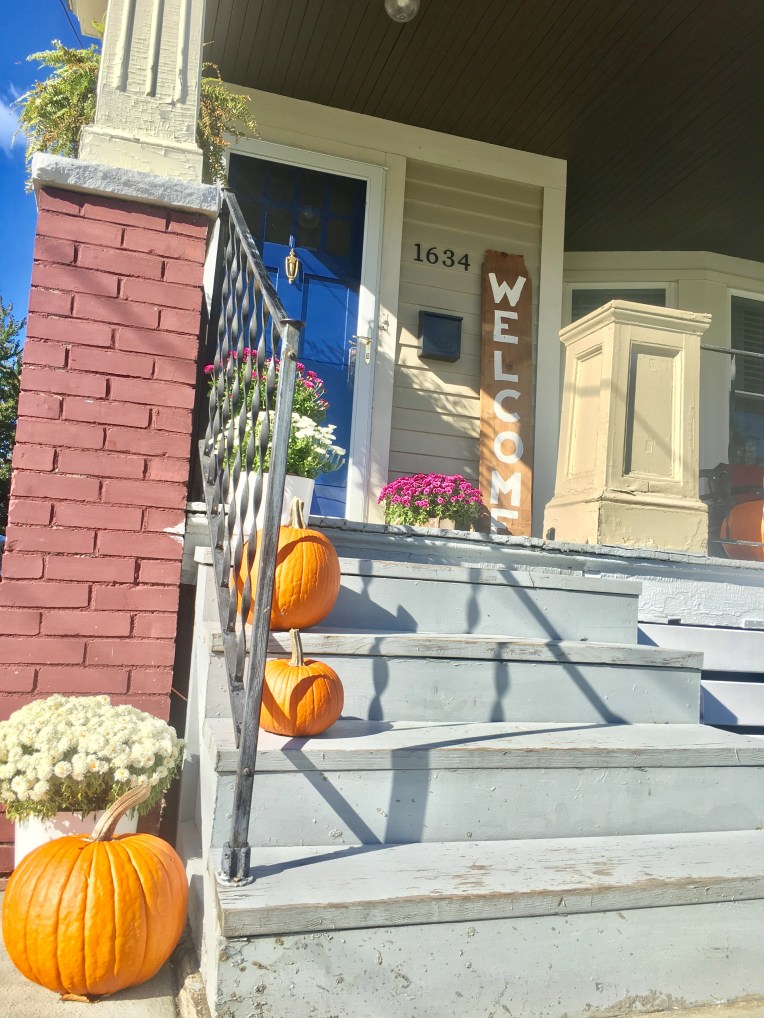

 This year I went for whites and purples for my mums and mixed in some white pumpkins with a lot of bright oranges ones! The pumpkins and mums line the pathway leading to the front door and the large wooden Welcome sign. I just love how the wooden sign turned out with the rest of the fall decor.