Front Porch Decor Tips for Fall

Since this past Thursday was the official kickoff to fall, and the fact we’re coming off a beautiful fall weekend, I’m ready to start accepting everything fall.  One place that you can really make a statement for fall is your front porch/entryway; and this can be accomplished simple or on a more grand scale.  Here is some inspiration along with key pieces and tips to consider as you put your fall front porch together!

Inspiration:

First You’ll Want to Determine:

  1. Your color pallet – if you want to go with the deep oranges, reds, and yellows or if you want to keep it simple with white pumpkins and pops of one color.
  2. If you’re going to keep it simple and understated or if you’re going all out.
  3. Halloween specific or fall; personally I learn towards for fall since this will last you up until your pulling our your Christmas decorations. Halloween only lasts a month. CONSIDER:  If you’re leaning towards Halloween, because you have kids or are hosting a killer party, think of ways to switch out key pieces after the 31st so that you can keep it up through Thanksgiving.

Key Pieces:

  • Pumpkins/Gords
  • A sign or focal point
  • Mums – remember your color pallet!
  • Lanterns
  • Wooden crate or old windows

And wah-la! You should have a fabulous, inviting front porch for the next 2-months! I still need to finish a few DIY’s and crafts, but I’ll share my finished front porch here in the next few weeks.

Share your fall front porches in the comments below or tag me on social media @mmariebee. 

Latest Obsessions: Pillows

So lately I have been completely obsessed with PILLOWS! I want soooo many pillows. All of a sudden there is about 5-places in the house that I could name that need pillows to add that extra finished and cozy look. The dining room built-in bench, the bay window in the staircase, the office, the master and the spare daybed… not to mention the living room pillows could use a freshen up… shall I go on? I have literally been scrolling through screens and screens of pillows, hitting the ‘Add to Cart’ button, until I reach the end, check out my chart (because they all seemed like such a great deal) and it’s $150+ … click “save for later”repeat x5. *smiles*Latest Obsessions - Pillows - Neutrals 01 | 02 | 03 | 04

Pillows are the perfect way to spice up a room and add some extra flair without needing to refurnish the entire place. Pillows can also help personalize a space; whether it’s with a state, zip code, or even this fun bee pillow by French Laundry (above) – I’m obsessed!  The other thing I love about pillows is that they can add a level of subtlety when you mix a few patterns or fabrics correctly.  Pillows add a level of cozy and warmth to a space and can be the key finishing pieces, without you knowing! 

The other key to pulling in pillows and buying them is getting different shapes, large square pillows, long horizontal pillows or even larger body pillows to help build the space, (for example normal bed turned daybed).  Having different sizes also creates depth and dimension to your space making the space look larger and more plush than it might be.

Latest Obsessions - Pillows - Blues04 | 05 | 06 | 07

My go-to stores for pillows as you can probably tell if you’re checking out the links throughout are; Target (duh), Marshalls/T.J. Maxx (double-duh), Pier 1, Pottery Barn and Society 6. Although I usually start in the clearance sections first – because you can’t beat a good deal, especially if you’re using the pillows as updates to the space and are more likely to switch them out more frequently.  And as excited as I get about a pillow, I like to wait to see if my initial gut reaction of LOVE, is still LOVE after I see it again in the line-up of a gillion pillows. I also can’t usually resist a good 2-pack of pillows especially if they’re essentially the price of one, it’s a win-win!

Latest Obsessions - Pillows - Color                                                                                  08 | 09 | 10 | 11

What’re your favorite spots to get pillows?  Do you have any pillow rules? I’ve slowly started ordering a few here and there for the spaces I mentioned above. Yay!! 

For the love of pillows,

My MOH Proposal

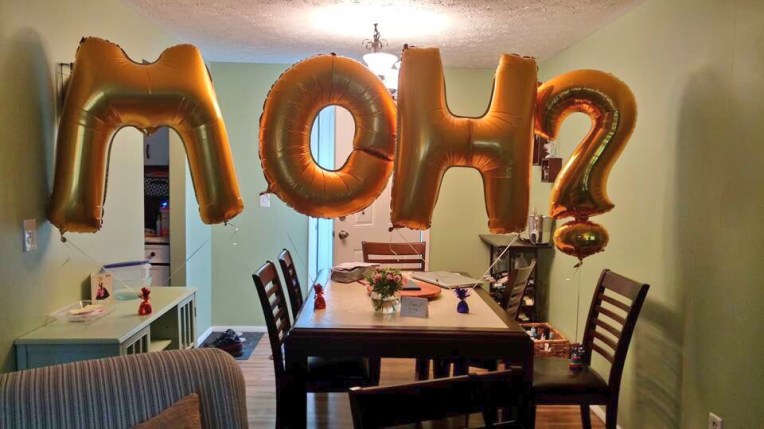
This past week, I finally popped the question to my BFF, Katie, if she would be my MOH!! Now this is probably no surprise to any (especially if you’ve kept up with my MOH journey for Katie’s wedding).  I don’t think it was a surprise to Katie either, since we’ve had a lot of chats about it throughout her wedding festivities and ever since I’ve been engaged. So knowing all of this, and knowing that I am 260 miles away from Katie on a regular basis, I wanted to surprise her!  So after racking my brain away on exactly how to do it, I came up with…. I would send her gold letter balloons spelling out “MOH?” (each in a different box, labeled) with a card, and then a champagne flute and champagne with some other goodies in a basket.

Well finding golden balloon letters was a bit of a challenge, especially the question mark. And I wasn’t trying to spend a fortune, so I ordered the MOH from amazon and the question mark from etsy… it was a bit of a process. I finally got the balloons in the mail, I had ordered the 40″ letters instead of 16″ – thinking the 16″ would be too small… well the 40″ were gigantic (a lot larger than my mind had scaled them to be, oops!) So the box option got shot out of the window, because the boxes would’ve been ginormous.

Back to the drawing board for the surprise.

Luckily my mom was in town the other weekend when I’d received the balloons, I schemed with her to see if she could (1) get the balloons blown up and (2) coordinate with Katie’s mom to get the balloons in Katie’s house during the day. She could take the balloons and card back home and help me put everything into place.

The plan was back on.

Since a few of the other details didn’t arrive in time and the box thing go thrown off, I had to (I say had too, because if you know me, things need to be over the top) send along some roses with the balloons. I had already ordered the card way ahead of time since it was a pinterest find ages ago. It was perfect. Not to mention I was able to pick out a gold envelope that would match perfectly with the gold balloons.

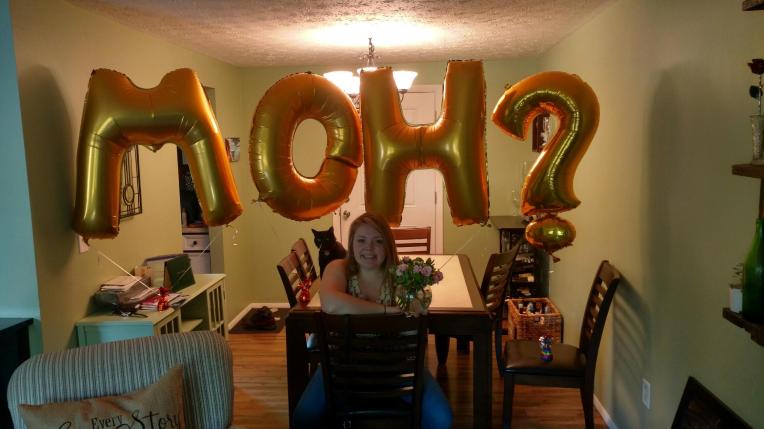
So this past Wednesday, my Mom and Lori got the balloons into Katie’s house and all set-up in the dinning room (and yes the balloons fit in my moms car), sending me pictures along the way.  It was perfect, oh and the balloons were still HUGE.  Hehe. So once things got set-up, I waited. I got a call around 5:30 from Katie telling me she had these massive balloons in her house that just about scared the crap out of her… and that of course she would be my MOH. 
IMG_4987She said, Yes!!

I can’t wait to have Katie help me along the way and share in these special moments, like I got to share in with all of hers.  I have a MOH! The distance was tough during Katie’s wedding, but it’s these moments that it’s especially tough and I wish I could’ve just drove to her house (in a timely matter).  But this just means we will have to plan a few more weekends that normal together!
IMG_5008IMG_5010It was fun surprising Katie from 260 miles away.  I can’t wait to see her in person and give her a gigantic hug and part 2 of the MOH proposal!

Cheers!


Christmas in July Party

Confession! I love Christmas!! And what better than to have an excuse to pull out some decorations, drink some Christmas Ale and have a bunch of your friends over, than Christmas in July!  This upcoming Monday is officially 6-months until Christmas, so next week and weekend are an excuse to throw a party. If you haven’t made this a tradition yet, I highly recommend it, regardless of how all out you go!

Here is your go-to guide for everything you’ll need to throw an epic Christmas in July party this year!

Food/Snacks:  The best part about all of these ideas is that they’re easy, a little healthy and super cute! You can also do a cheese spread in the shape of a tree or a wreath. Also bust out those Christmas cookie receipts and make some good ol’ cut outs or peanut butter cup cookies, they’ll be a hit.

Drinks: Our local breweries always release some of their Christmas Ale’s around this time, so it’s definitely a treat and fun to snag a glass or 6-pack. Add a cinnamon sugar rim to your glasses for an extra treat for you and your guests! Next up, red and green jello shots – yup! It’s a must, not to mention easy and refreshing, and perfect for your Christmas in July festivities. I like to serve with pop-rocks poured on top, so yummy.  Last but not least, find a punch that is both refreshing and light but still hits those Christmas sentiments you love – like this Cranberry Orange Punch, make in bulk and you’re ready for a fun night.

Decor: Have some old Christmas wrapping paper that you’re sick of seeing every year? Wrap some empty boxes as accents around your space.  Pull out some colored lights and string them up in the back yard, garage, or shrubbery.  No need to go crazy here, any other lawn ornaments that’re sitting around put them on prime display!

Dress Code: Asking that your guests dress in red and green or even throwing on an ugly Christmas sweater helps make this party an event.  If it’s mostly couples you can request that each couple comes as a “Christmas Couple” an excuse to get creative!

Details: This is when Pandora really comes in handy, click on your favorite holiday tunes station (mine is, Mariah Carey Christmas) and the mood will truly be set! You can also play a favorite Christmas movie on repeat, either in the house or out in the garage – Elf and Home Alone never get old.  Finally, napkins, plates, and cups that are red and green help add to the theme without breaking the bank – check the Dollar Tree!

Remember all of these things will really bring your Christmas in July theme to life while being able to enjoy a cold Christmas Ale on a hot summer day and all your nearest and dearest by starting a new tradition!

Happy Christmas in July!!

DIY – Window Side Table

I am excited to share my latest project with all of you; a window table.  Once you have the materials, this project is pretty easy and low cost! It’s a win-win when it comes to creating a cool piece that’s custom to your needs, whether it be a coffee table, plant stand, or a side table the options are endless.

What You’ll Need;

  • Window (of your choice) – I used an original window from our basement, since they were pulled out when we had glass block put in. Total cost; $0
    • Don’t have any old windows laying around? Check garbage day, it’s amazing what people will put on the curb!
  • 4-Legs; length and style of your choosing. I used: Waddell Ash End Table Leg from Lowes. Total cost; $16
    • NOTE: I bought legs with pre-installed hanger bolts that allowed for a clean smooth finish without needing extra hardware to attach the legs
  • Wood Glue
  • Paint – color of your choice & paint brush
  • Drill and drill bit to predrill holes for legs
  • Blade to scrape off excess paint on windows
  • Timing; finished within a weekend

From there you can prep your window by cleaning it up and sanding if you’d like. I opted to keep the hinges and some of the other rustic elements since I was working with a 100-year old window.

Next, flip over and mark out where you’d like to place your legs – as you can see with the window I was working with the spacing and exterior width was inconsistent and not much to work with so I eyed about an inch from the edges. Once I had those marked, we pre-drilled a hole, although we didn’t go deep enough a few times so we had to go back over the holes.

Before screwing the legs in we added wood glue in the hole and around the bolt on the leg. Make sure your legs get all the way in and are secure, some of ours were wobbly, so we had to re-drill new holes and start over. But once they were in and secure you definitely knew it. The wood glue required about 12-hours to dry, so day one was finished.

After the wood glue was dried, I flipped the table over and began to paint! I opted to use a primer over the preexisting brown, and also did the legs in the same color.  I had to do 3-coats before this beauty was looking clean.

I let B do the fun stuff and scrape the paint I’d gotten on the window.  This really cleaned up the piece to give it that finished look. From there it was just giving it a good clean with some Windex and setting it up in place – we added this gem as an accent in our sun room. The light and airy of the white and windows ties into the space perfectly.IMG_4428IMG_4430IMG_4432
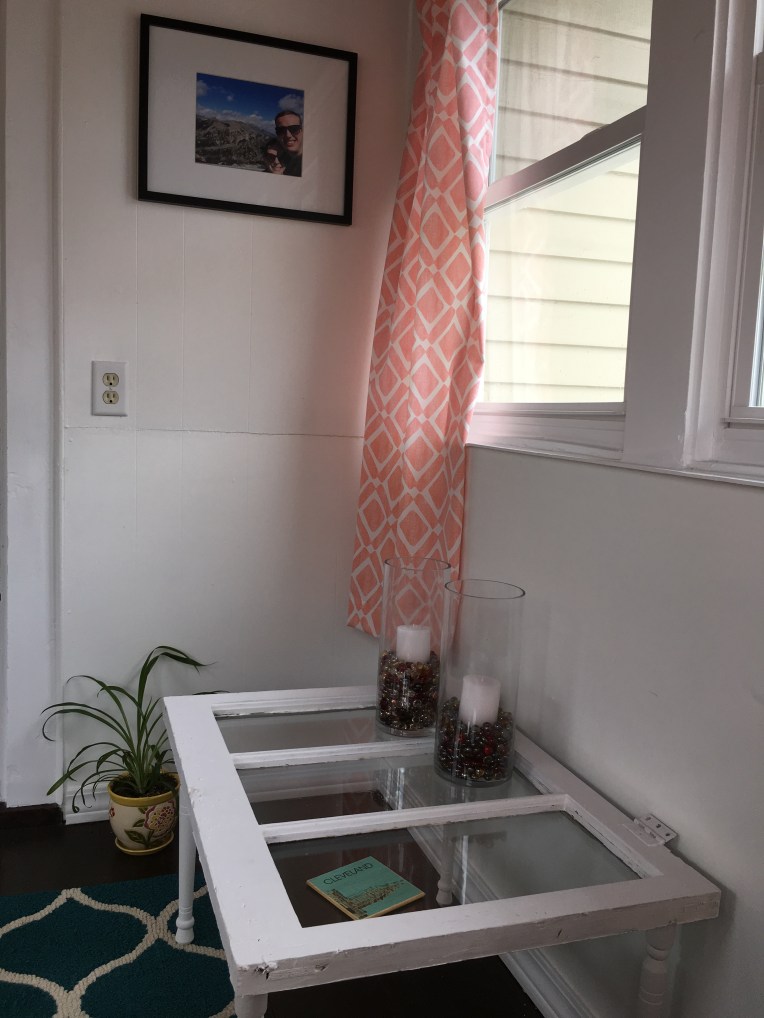
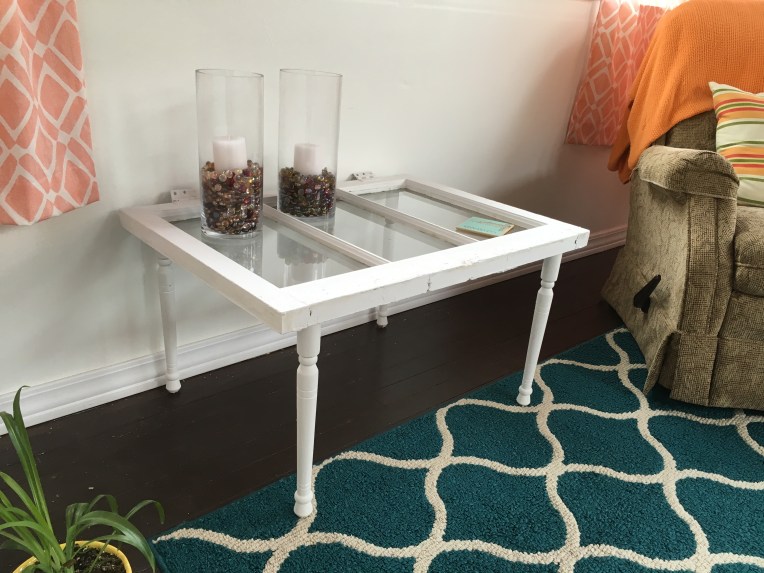
Using most of what we already had, the main expense was buying the legs for $16 – you can’t even get a coffee table for that!  I love the way it turned out, it still has a vintage and rustic flare to it. Not to mention it has multiple purposes and I am sure it will change overtime for us!

Happy DIYing!

Latest Obsession: For The Home

HERE’S WHAT, I have been absolutely obsessing over especially as the summer months are approaching and the store’s are switching out their inventory to be summery!!!

Lanterns. OBSESSED. I want them everywhere, but especially for outdoor spaces like our front porch. I love them as decor for your entry way and even lightening for your seating area. I also love lanterns for decoration inside, around a fireplace or hearth area, especially the really big lanterns. Not to mention you can find them in almost any finish from silver, to gold, wooden, ceramic, or bronze to fit into your current decor or switch to something new. You can get hanging lanterns or keep them on the ground or table. Plus you can use them season round by mixing up colors and styles with different fillers for the insides… I could go on for dayzzz!  On a lantern kick like me? Check out craft stores, as a lot of them have sever price cuts on summer and outdoor decor (like 60-70%!) you can’t beat it.

Greenery. I am loving me some greens, the fake kind. I first saw some moss like letters at Michael’s and really wanted to impulsively buy them, but one didn’t know what to spell or letters to get, and two thought they would look way out of place in my house, but I can’t help but pine over them. I also really love boxwood wreaths, but refuse to spend the money online and will most likely DIY one, one of these days. And as much as I truly don’t like fake plants, because I’d rather just have a few real ones – I really like the fake greenery balls… yes I just described them as such, okay they’re technically “boxwood vase fillers” (according to Target). Anyways, I like the idea of having some greens around the house to add to the real greens, it brings some added life to your living space.

So those are my two latest obsessions right now, I’ve had my eyes on the lookout for these whenever I hit the stores.  I recently grabbed two silver lanterns for some added decoration up in our master suite, and I love how they compliment the space, we have a mixture of metals, but somehow it’s all working.

What’re your summer favorites?

Backyard Patio – DIY Project

After much deliberation and back and forth, B and I have finally figured out what we’re going to do to create a backyard-patio living space. There was a few different options discussed, but I think we’ve come up with a solution that will work for the space, long term, and won’t break the bank (hopefully).

Inspiration:

We did the measurements last night and the biggest part of adding in a completely flat patio (without a deck or floating deck) that I was having an issue is, was the weird space it would be next to the house, being low without a direct door leading out to it. But I think having larger greenery in pots surrounding the area in the corners closer to the house, will help solve that problem I was having.  I also think adding in some lights above the one patio area leading up to our sun room on the second floor will add an intimate feel. We will also have a separate dining area from the lounge area, which I think it’s crucial, since I want both spaces to feel spacious.

Our plan is to get 20×20″ square concrete pavers and river pebbles to place in between the pavers. I’m still determining all the spacing between each of the pavers, I was originally thinking 1-inch, but most of the projects I’ve seen are about 3-inch gaps are larger, so we will see where we net out with ours.

Needless to say, B and I are both itching to get this project complete, although it’s not going to be as inexpensive as I had hoped from the initial figures, but I will be sure to follow-up with the finished product and details in the next month or so!


DIY – Childhood Nightstand

I recently received my old childhood night stand from my parents house, but it was in desperate need of a little make-over, since I had last repainted it in high school to match my pink and orange room. *sigh* I still wish I had a pink and orange room…

Anyways, I digress. This was a really easy and low cost DIY because all it really needed was a new coat of paint, especially since in my dark teenage years I had written touching notes on my night stand like; “love sucks” and other cryptic messages. *smiles* So it needed a little sanding and fresh coat of white paint on the base.

Before

Next, I painted the fronts of the drawers, Naval by Sherwin Williams, it’s such a pretty color, I am trying to figure out what else I can paint with it. I was planning on replacing the knobs, but they were painted on from previous paint jobs, and I really didn’t want to deal with the hassle of trying to wrangle them off and potentially damaging the drawers, so plan B. Plan B was to spray paint the handles metallic silver, which I just so happened to have from a few other previous projects. I had to make-shift something to cover up the drawers, so some magazines and painters tape did the trick. It actually worked out pretty well and I only had to make a few touch-ups with the navy.
DSCN2140
To give this even more of an upgrade, I went ahead and added some adhesive/ contact paper ($5.99 at Target) into the drawers to make it pop!  Not to mention, over the years this little nightstand has seen some love, so it was looking a little rough. I decided to put the contact paper on the outside of the drawers as well, so that when you opened them there was an added pop. I did some simple measuring and cutting, this was even easier because the contact paper has measuring lines on the backside – this probably took me about 20-minutes to finish up.

Even though this is for a guest bedroom, I think it’s important and nice to have nightstands and all the essentials for when your guests stay over – that’s why I’ll be getting a lamp as well to finish off this look!

After

Before and After - the bee lifeI love the way it turned out, and I am sure this little night stand will have a few more makeovers in it’s lifetime.  The added detail of the contact paper on the sides of the drawers and inside, just upgrade the whole piece.  I may still try and get new knobs at some point, but for now this little $5.99 makeover will do the trick and accomplishes the task of being functional and matching within the space!  What I love the most about some DIY’s is that it doesn’t take a lot, to make a big difference – time wise or cost.

Hope you all have a great week!


DIY – Upgraded Built-in’s

One of my spring projects was to give a simple upgrade to our living room built-in’s that bookend our fireplace.  I planned to do this with textured wall-paper, that I have used in a few other spots around the house like our dining room built-in’s, our stair-backs on our stairs leading to our master, and even in our DIY bar that started out in our apartment. Overkill? No, surprisingly this is the most subtle upgrade you could do to these tiny spaces for a big impact. Not to mention it’s extremely affordable ($20  for 56 sq.ft.) and super easy to do.

Since we live in a century home, I like to build off the history of the home and add to it when possible, this smaller ‘tin ceiling’ patterned print is the perfect accent to give a face lift without completely giving it an overhaul and taking it into a different era. Textured Wallpaper - Lowes - the bee life

Before:

DSCN1981DSCN1982

After about 30-minutes of leisurely watching eNews (learning all about Lemonade) and measuring, cutting, soaking and putting into place, boom! Instant upgrade. All while dinner was cooking in the oven.

After:

DSCN1984DSCN1985DSCN1989
DSCN1988
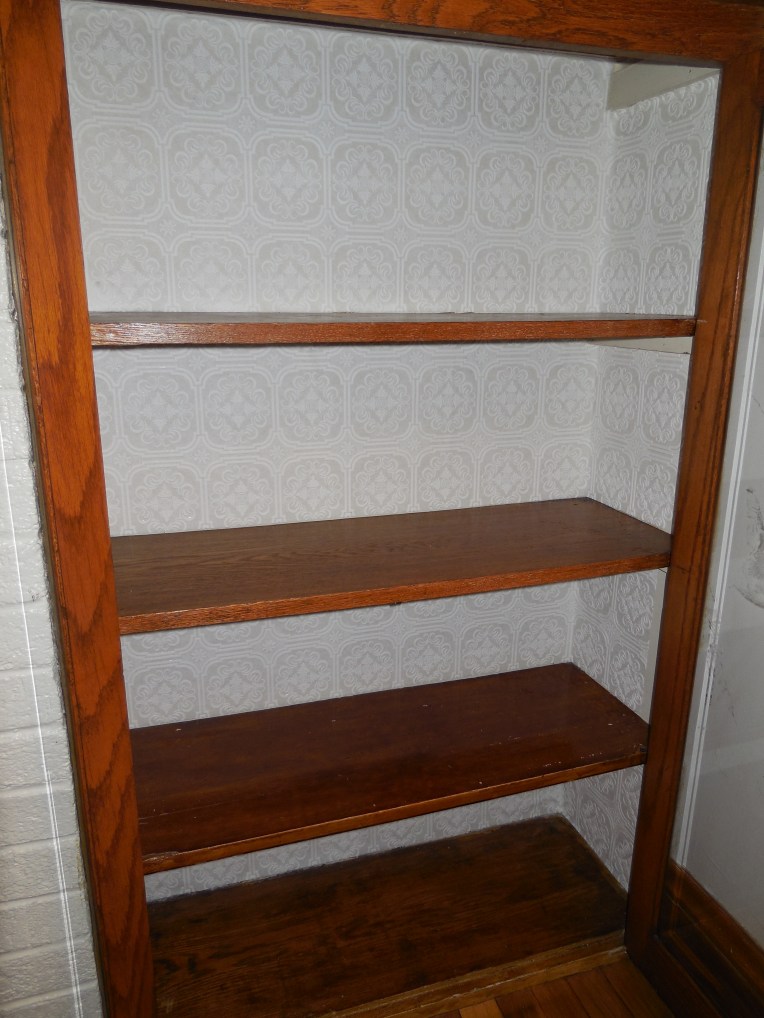
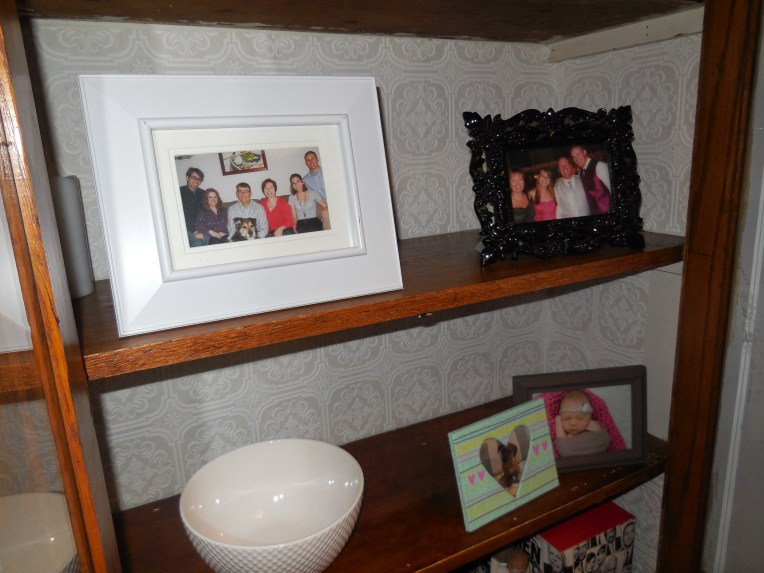
With the doors closed, and if the lightening is just right, you can hardly notice – but on the flip-side, if the lighting is just right, you can also see how pretty this added touch is.  Sadly, I ran out of paper and was only able to get one side done, I completely underestimated the amount I had left over from the stairs in order to complete these built-ins. But it was a good start, and like I said – easy, not very time intensive, and pretty straight forward for $20 a roll.