Latest Obsessions: For the Home 

HERE’S WHAT I have been obsessed with in and around the home, especially since our master is nearly completed.  These are the things I am constantly looking for whether it be in the store or buried in a photo album.

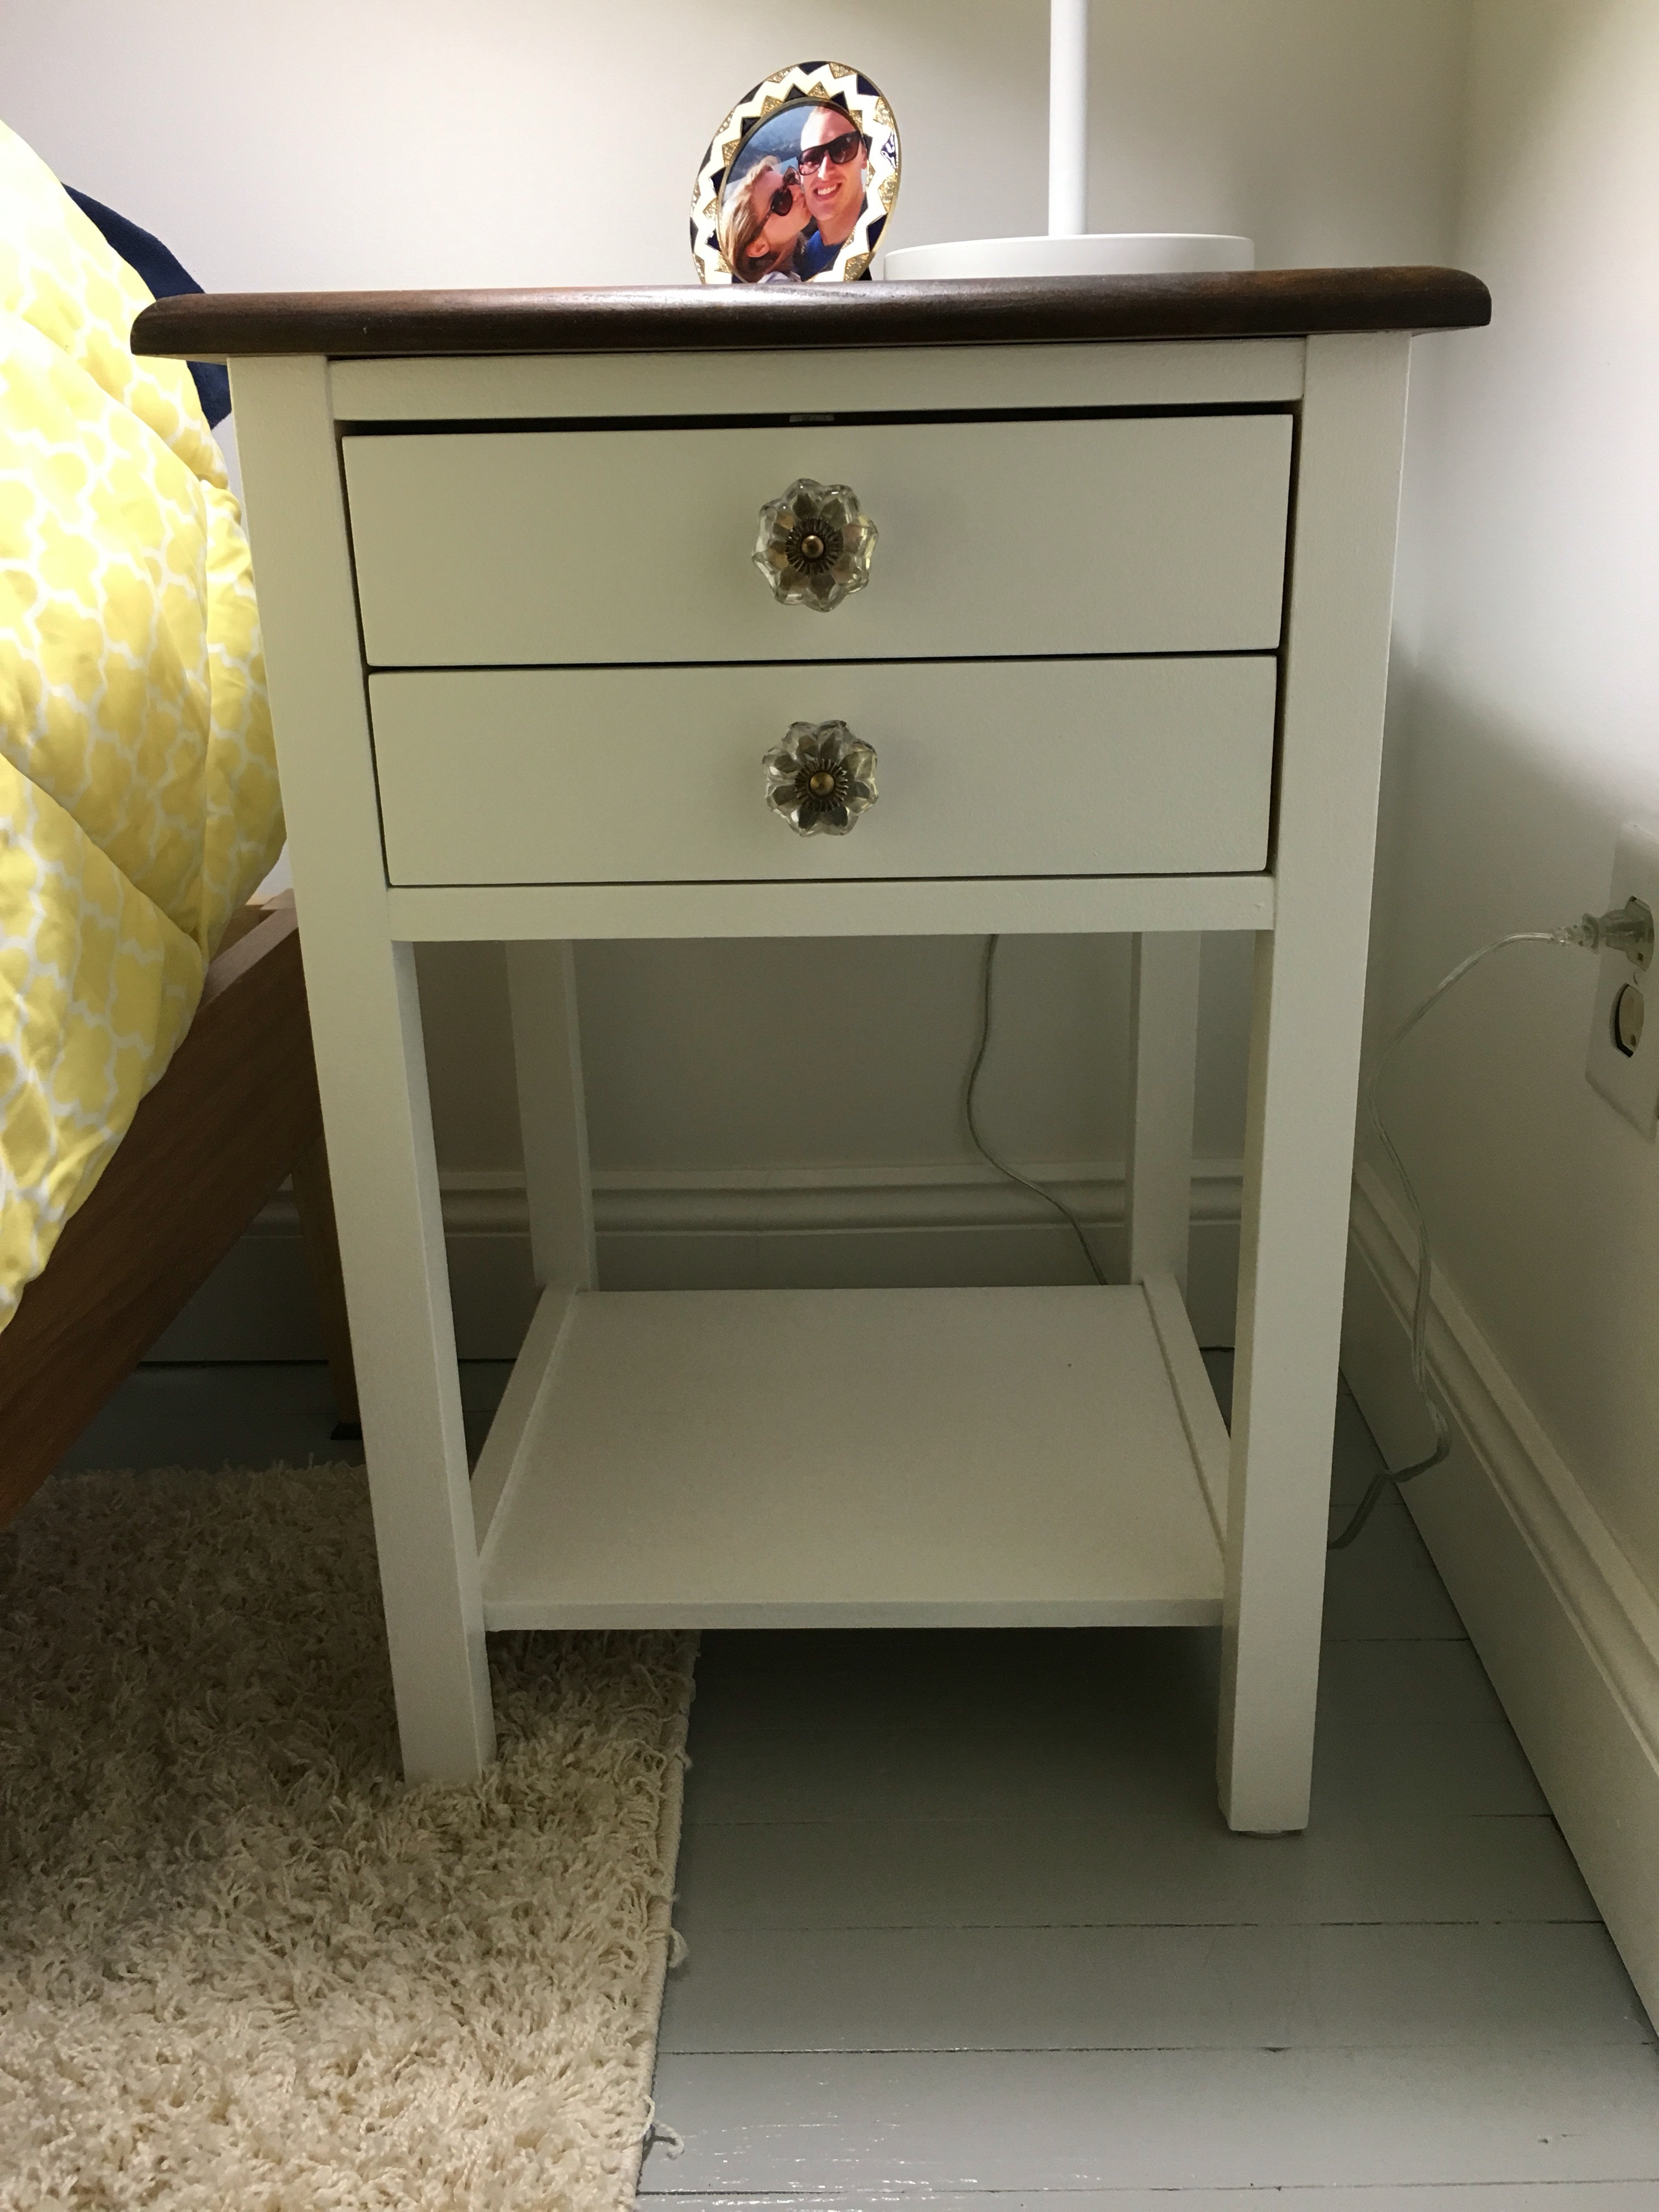
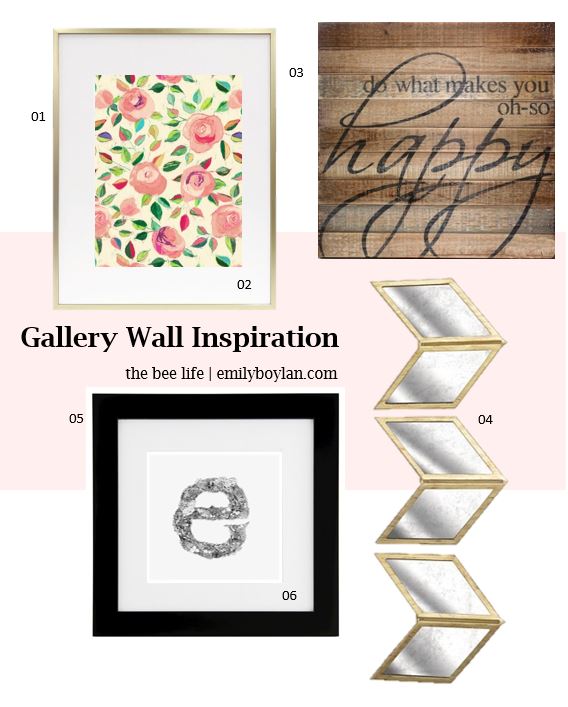
Old Photos: Since the inception of the gallery wall in our living room, and the idea of using old, black and white photographs, (from years long before I was ever born) I can’t help but want to find more! There are so many hidden gems stored away that I know I haven’t found yet.  The last time I was home I insisted my parents dig out their old photos… And there is was, these beautiful wedding pictures of my grandma B, pictures I’d never seen before, pictures that took my breathe away (one pictured below). I also need to dig around in B’s grandma Dee’s pictures. I love making copies and filling my frames with family and memories that make up our history.

Table Top Clocks: I am over the wall clock, practical and useful in some rooms (like the kitchen) but not so much in other rooms. I LOVE table top clocks, vintage or modern, gold or silver, I’m probably going to start hoarding them and put one in every room! I just stumbled upon these gems at Target, $9.99 each, I’ll take one of each, please!
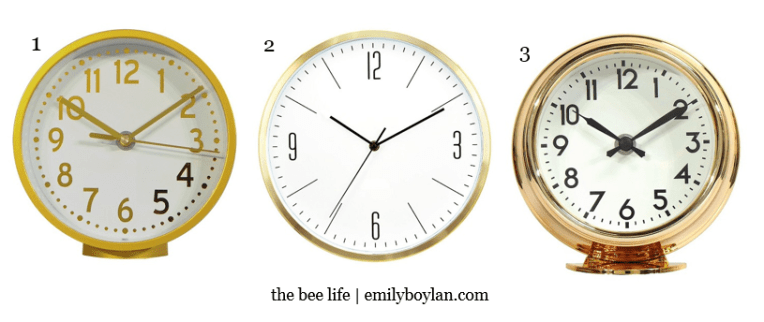
Clocks
01 | 02 | 03

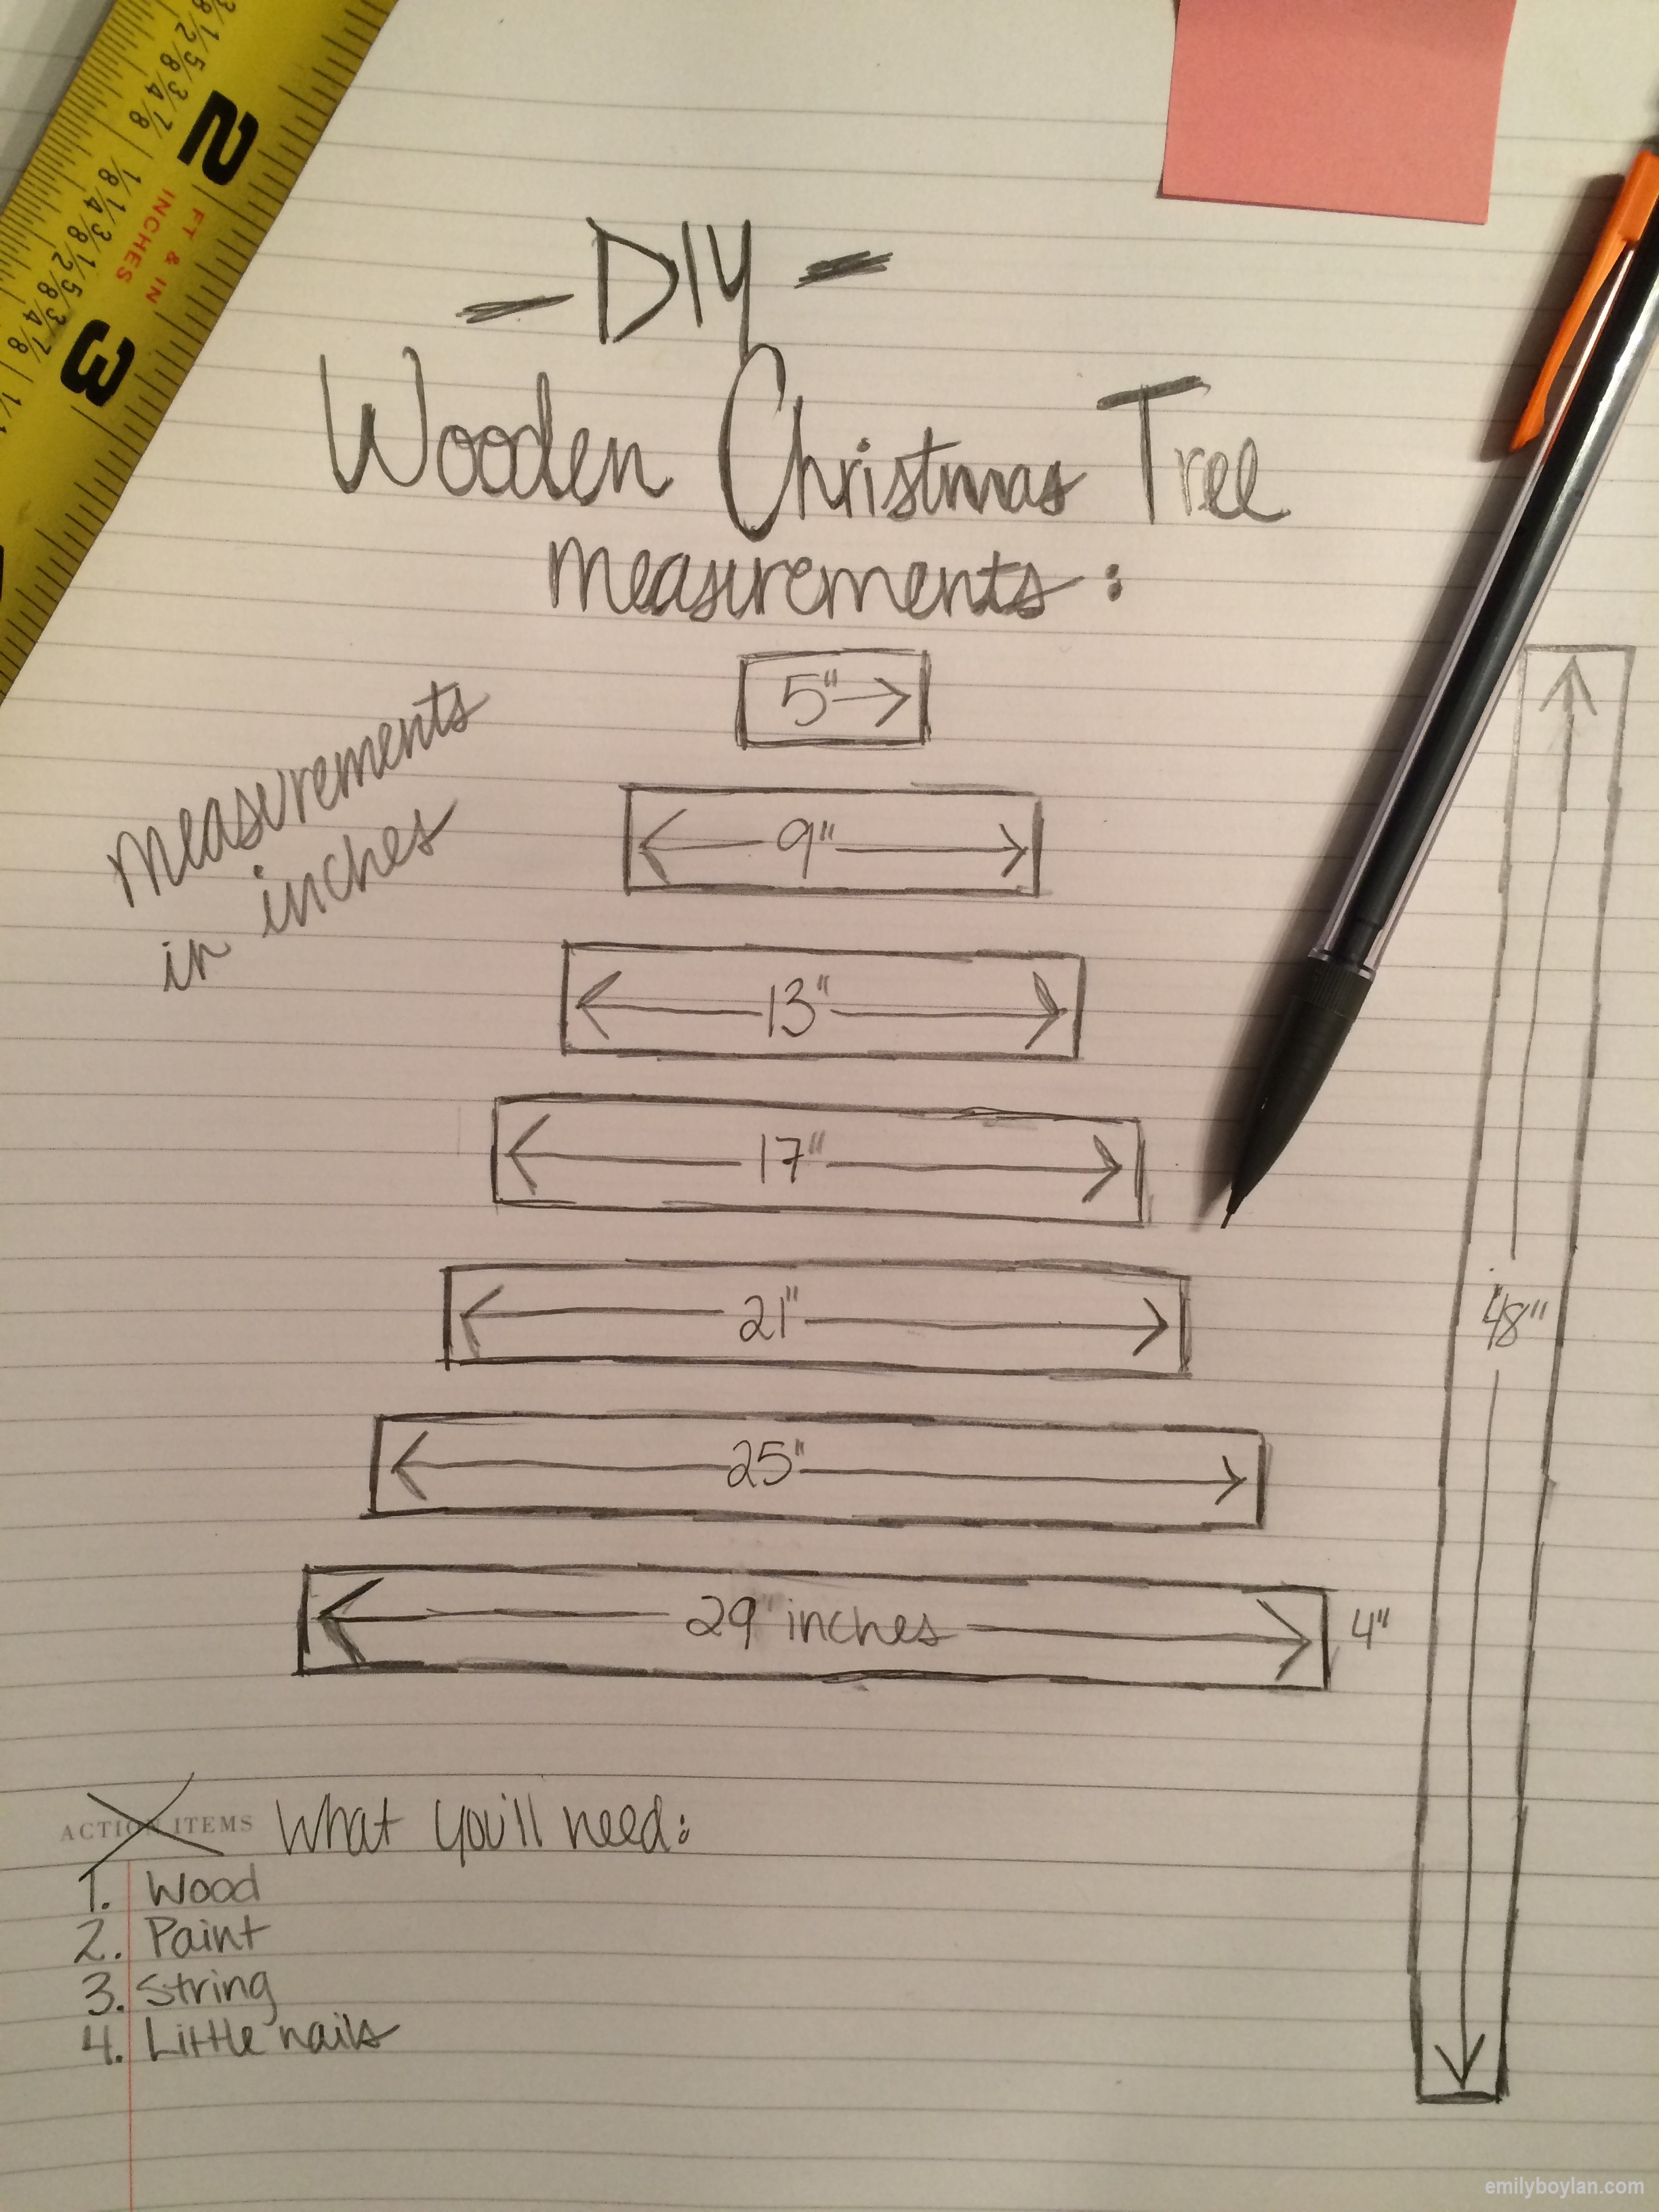
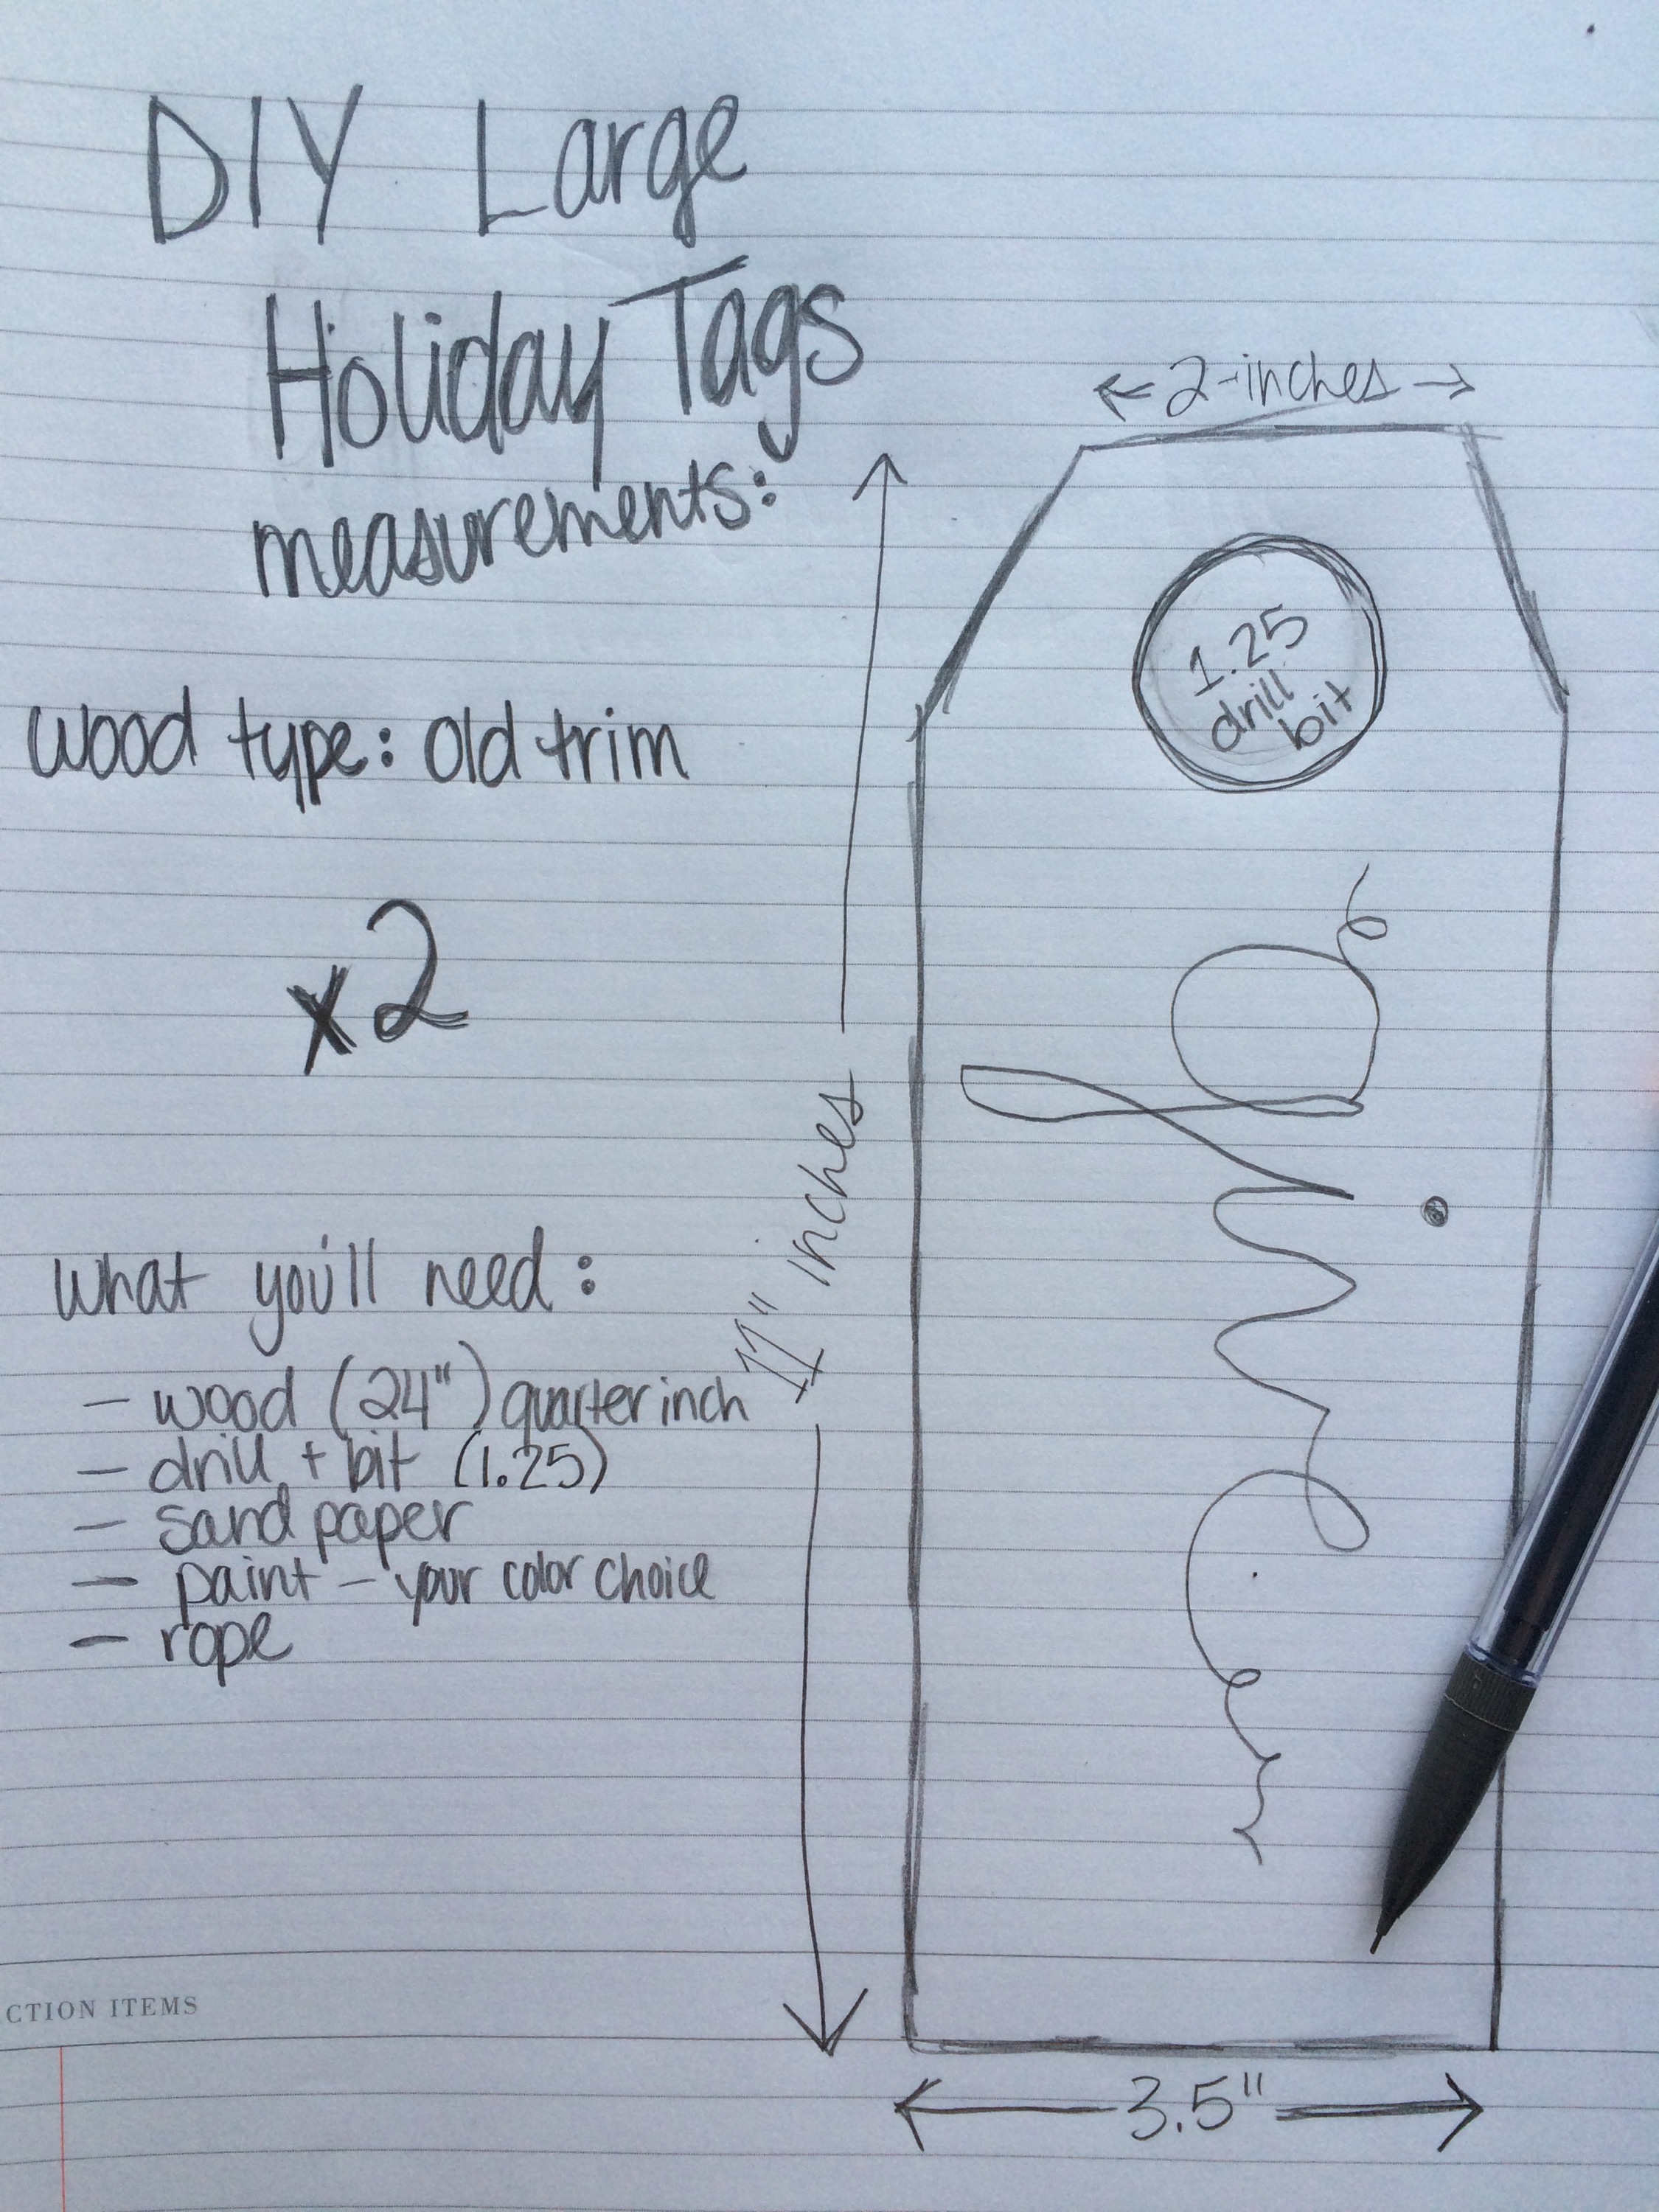
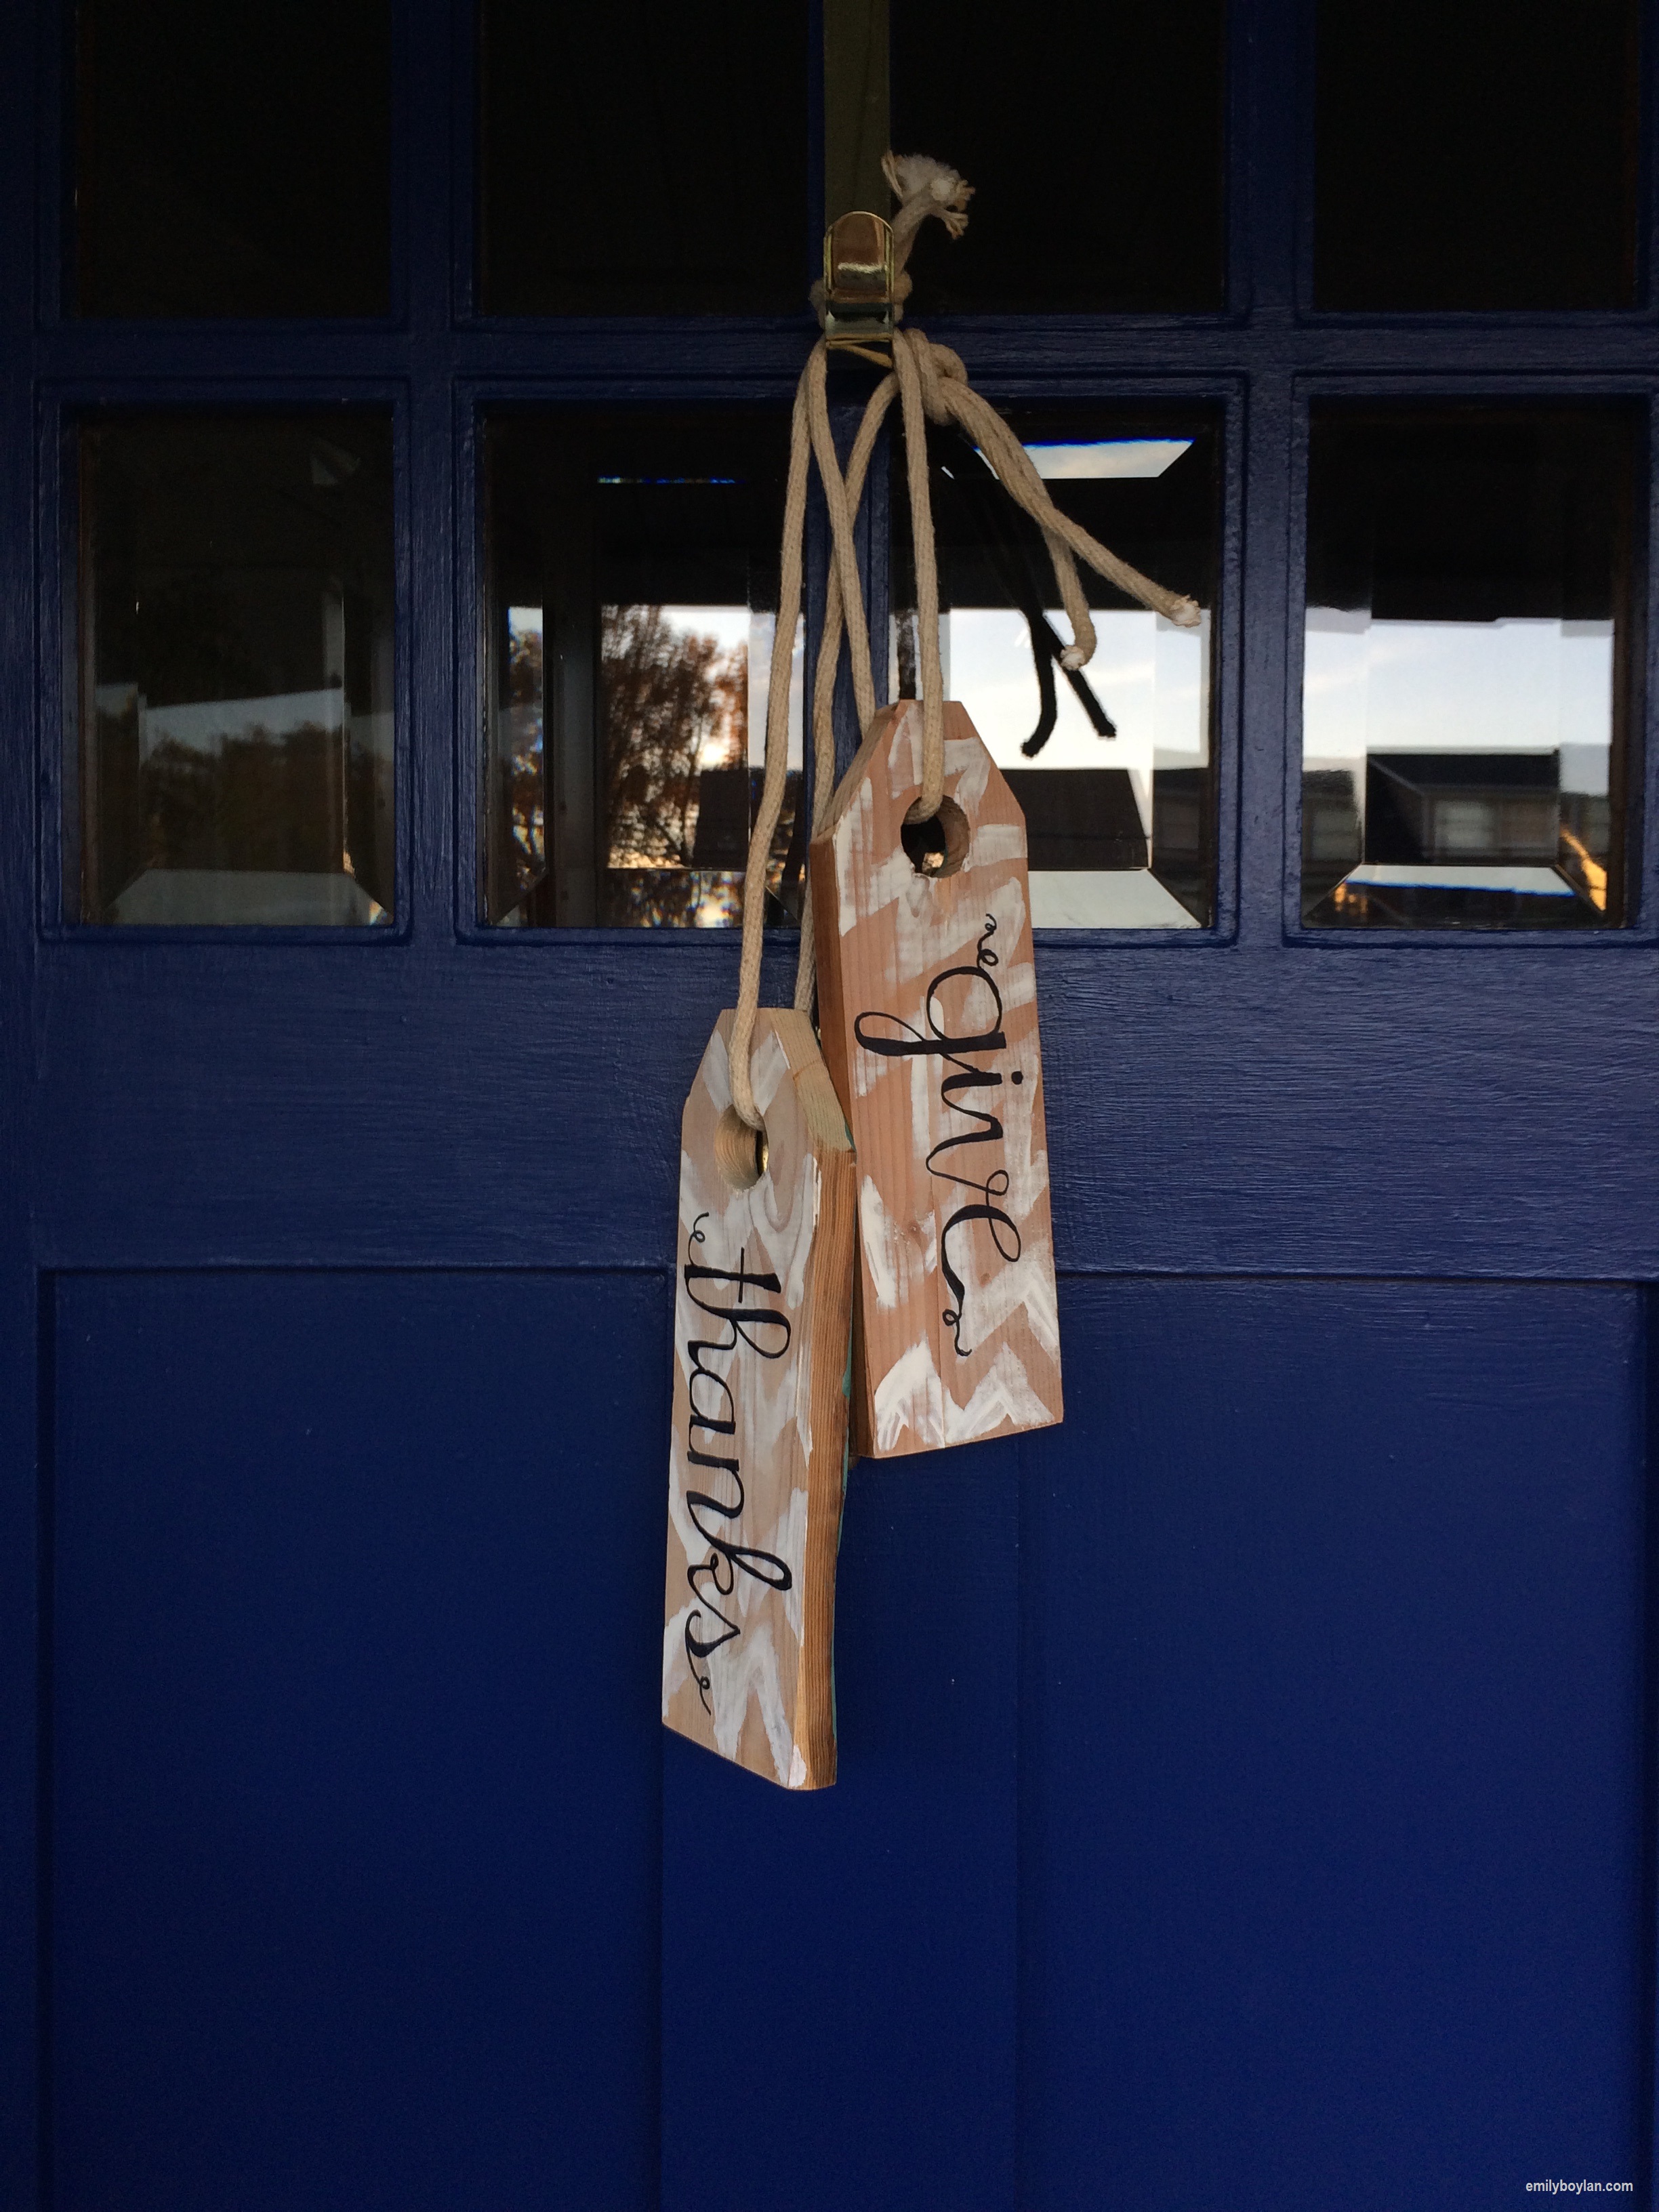
Wooden Accents: With recent DIY projects, I find myself drawn more and more to custom wooden signs with hand crafted letters. I also love wooden frames that elevate the look and feel while tying in a natural element to the room and adding warmth. I have a specific DIY in mind to help finish off the gallery wall in our master, something similar below, only incorporating B and I’s initials or a special date or longitude/latitude.  There are also plenty of pieces like this found in stores, that have a custom, hand-drawn look for the not so crafty people!


What are you obsessing about lately when it comes to pieces in and around your home?

DIY – Reading Side Table

As I have mentioned in a few previous posts, I was on a little mission to try and find some “trash treasures” on garbage day, older pieces that just needed some TLC – well I found one that I picked up back in October and finally finished this piece up. It was a side table with no drawers, a few torn spots but relatively in good shape. See for yourself. . .

I had initially wanted to spray paint it a bright color and find some baskets to go in the inside (but didn’t really have a complete game plan for the inside).  I’m glad we waited a bit for a few of the other pieces in our master suite to wrap up, because I ended up sanding this down and just re-staining it to match the tops of our night stands (plus I like staining pieces WAYY more than painting or spray painting). So I sanded this bad boy down, because we had gotten the top a little messier than we we had found it (oops!) and gave it a few coats of stain.  I found my inside solution one day at Target near the front $1 bins – I grabbed some adhesive paper for $3 a roll – and gave it a shot. Well I scored, two rolls later this baby was brought back to life.

IMG_0933IMG_0934IMG_0935The basket was a gift from Kates (filled with wine) that I happen to try in one of the openings and it worked out perfectly! We did have to buy some thin plywood that we ended up cutting and gluing on the top and bottom shelf’s to make them level, since there was a dip down. So other than the nominal cost of that, the only other expense was the $6 for the adhesive paper, since we already had the stain and poly. I love the way it came out, especially with the subtle pattern and pop of color!

Happy Friday!


DIY – Night Stands

As our attic nears completion (spoiler) I wanted to share a few of the other projects along the way that although much smaller than the overall guts, walls and refinish, have been key for the final touches.

With such a big project like this, I really wanted to try and find a bargain or two especially with furnishings, and I would say we did a pretty good job of splitting that between bargain vs. brand new.

The Before

One surprise that took me awhile to come around too (and find) was our night stands. I found plenty that I loved, but not enough for the price tag that came with them. It had been my mission on garbage days to find some treasures people put out on the tree lawns – but no such luck (only found one).

Enter the “unfinished lamp table with two drawers” from Home Depot. Similar to what we wanted and a price tag that was palatable ($71.99), especially when purchasing two for the price of one finished  – not to mention these suckers are sturdy!

International Concepts Unfinished Lamp Table with 2-Drawer

The After

We ended up painting and staining the tops to mimic one of the pricier side tables we had seen from Target, upgraded the hardware and wah-la you have a high-end night stand for a fraction of the cost! We love the way they turned out.


Since we already had stain and poly from our dining room table project, we saved on materials cost there. We also already had white paint for other projects and the walls (another cost savings) and the knobs I found in a 4-pack at Marshalls for $4.99. Can’t beat it!

Although this was a little extra work on top of all the other finishing touches like paint, trim, caulking, more painting, cleaning, etc. it was totally worth it and we have a completely custom piece that finish the space!

Gallery Wall Inspiration

As we near the finishing touches for our master suite, there is one wall that is completely random the room is also in need of a dedicated place to add a pop of color and make a statement (you’ll soon see the randomness when final photos are posted).

So I’ve been thinking… gallery wall! But when I go to look for inspiration I can’t find a happy medium of what I am looking for, since my ideal gallery wall is all the same, evenly spaced and matched up, like the one below.  A lot of the gallery walls I find are either simple and uniform (not what I’m going for in this space) or completely over done and just too much. Like I said, I want happy medium.

Generations of wedding days. Also like this layout for travel pics:

Here is some of my inspiration and my go-to places for finding the perfect mix of unique, personal, and colorful items for a gallery wall, especially if you’re trying to mix up the mold without over killing it!  Places like Marshall’s/TJMaxx/Home Goods are perfect to find different pieces and pops of color, I also love websites like Society 6 for unique pieces of art that’re trendy and different.  My friend Lucy; http://boundryandthorn.com/ also creates insanely cute floral letters and unique hand-drawn prints which truly give your gallery wall an authentic feel.  Another goal for mine is to have a mix of textures and materials, I’m thinking, wood accents, metal frames, or elements of gold to really pop and add dimension.

Gallery Wall Inspiration - the bee life
01 | 02 | 03 | 04 | 05 | 06

I already have some pieces at home that’re laying around to help get this statement gallery wall started! I just want to be sure to have a good mix of girly and masculine, since it’s also B’s space, any hints or suggestions on how to incorporate that aspect into the mix?

My Latest Obessions

Taking a page from Andy Cohen’s book, HERE’S WHAT I’m obsessed with when it comes to home decor… because I have an entire master suite I am dying to decorate.

Neutrals – White and grey! More please!! I love creating a blank canvas to be able decorate and accessorize with pops of color.  Not to mention white and bright makes a room look 10x bigger, who doesn’t want their room to look bigger?


Floral Accents – This is my way to incorporate a little girly into a space without being totally overt with pink walls … like I would love to do. *smiles* I am completely in love with these pillows and they’re even prettier in real life – because they have flecks of gold in them. *swoon* The candle from Anthropologie also has flecks of gold and an incredible scent.


Navy and Gold – I mean… do I even need to explain? This is one of the most beautiful and classic pairings, in my humble opinion, especially when these colors are used as accents they can make a big impact, although if overdone not so hot.

I won’t lie – you’ll see a few of these beauties in our master suite when it’s all finished. What’re you currently obsessing over? That piece you’ve been eyeing have pinned AND favorited on your Pinterest board.


Product Links:
Neutrals: Unfinished Nights Stands | Upholstered Fabric Chair | Shag Rug
Florals: Pillows | Candle
Navy and Gold: Handsome/Gorgeous Frames | Ottoman | DIY Curtains

Attic Update – 4 Month Check-In

Our 4-monthAttic update!
Well in case any one is loosing sleep out there, here is an update on our attic! hehe. Since my last update a month ago; it’s been nothing but insulation.  B has been doing an awesome job at insulating the place, adding baffles and making sure everything is “properly breathing.”  Insulation is a messy and time consuming job, but the end is in sight!

Drywall started this weekend, and the space is looking like a room again!  Last week we made a Lowe’s trip and tried to pick up and order a lot of the finishing touches for the attic, like paint, blinds, closet doors and the drywall! So now it’s really getting there.

A few of the questionable items, like what we are going to do with the floor have been cleared up.  We are going to paint it a light grey and call it a day, we bought durable gloss paint for a more heavy-duty finish. We are also hoping to put some sort of carpet tred or runner up the stairs to soften the squeaky steps.

I have a few more fun projects up my sleeve for finishing touches, I’ve made good progress on re-beading our chandelier, and am sketching some DIY plans for our custom wing-back upholstered headboard.  Another part I can’t wait to get doing is customizing the walk in closet with useful shelving and making the most of the “small” space.

We’ve put two-solid days in this weekend of drywalling and will continue nightly after work.  B’s brother and dad will be in next weekend to hopefully finish up the last of it!

Keep your fingers crossed everybody! We are getting there!

DIY – Wooden Christmas Tree

Let the unveiling of wood crafts continue! Here is one to surely be easy with lots of options for customization!

With the 100-year old beams from our attic, we created these beauties.  Figuring out the measurements was half the battle – so hopefully the sketch below will help you! We also created a slightly longer and narrower tree so that we can have a little wooden tree family this holiday season in our front yard!

Wooden Tree How-To
Once we had all the pieces cut, we screwed the horizontal posts starting with the square topper first and worked our way down, eye-balling the distance, we even intentionally made a few crooked to give it a custom feel.  The version below is the one I made for my mom – with the bible verse; “For unto us a child is born.”  I free handed the lettering (with a Q-tip, yes I know strange, but that’s my paint brush of choice) with some white paint I had around the house.  I used some small trim work nails for the star and wove colored string around to create the star pattern.  Last but not least, stick you post in the ground for Christmas and you’re one step closer to decorating for the holidays, you could even wrap some lights around!

Happy Crafting!!

DIY – Give Thanks Door Tags

I initially shared some of my wood crafts (see here) that I hoped to do with all of our left over wood from our attic.  Well I’ve made some progress, and wanted to share one of the first ones finished, it’s an easy DIY for your outdoor decor.

IMG_8241
Just a reminder: all wood was reused from our house, so I worked with what we had.

After the cutting was complete I wanted to create a faded chevron pattern, so I free handed the pattern with white paint on the tags.  After that dried, I sanded down significantly so the pattern was faded, enough for the wood grain to show through. Next I carefully free-handed the ‘give thanks’ on the tags, with a permanent marker. For the finishing touches, I found some old rope that the previous owners so generously left at our house and eyeballed the length and cut! Tied a knot, and done. Please I was able to use supplies from around the house, this virtually cost me $0 to make, just a couples hours here and there after work!

Finished
I gained inspiration for this from ‘That’s My Letter‘ – although the tags she made are much larger, I might go back to the drawing board and see if I can make mine a bit larger (with more scrap wood). The best part about these, is they can be reversible for the next holiday, I plan to share the flip side in an upcoming post (hint: green and red).

Decorating for Fall

In case you didn’t know, I love fall – I mean… who doesn’t?  But one thing I don’t like is the immense amount of Halloween specific decorations that are available or the standard cheesy scarecrow and thanksgiving cornucopia.  So I wanted to share ways to keep the decorations up from end of September until the Christmas tree’s are being chopped down!  Also this is the first time decorating our house, so I needed some extra inspiration!  Breaking this down, there are a few focus areas to really spend your time, be creative and make a statement.

Focus Areas: Front Entry Space, Mantle, Dining Room

You can really make an impact with your outdoor decor, simple sprucing and added pieces are easy accents to make a big difference. Mums and pumpkins are no secret, it’s having the right amount and pairings that really set you apart from your neighbor.

Moving inside; there are two places to focus on, your mantle and dining room table. The mantle is the focal point in your living space, making a statement with this, again, can be done using simple and inexpensive elements like pumpkins and candles.  For me, I think the simpler the better – that way you don’t have to go overboard. I love these examples below.

Your dining room is the place where the family will connect, especially over one of the biggest dinners of the year, Thanksgiving.  Having a centerpiece that is no fuss and can be kept up for almost two-months, allows you to focus on the meal plan and less on the supporting elements.

Since this is our first fall in our house, I’ve been having fun figuring out ways to decorate these areas of the house.  I know it’ll transform over the years, but I’ve been loving being able to buy fresh mums, pumpkins and gourds!  It’s been a work in progress, but I hope to share some of my key spots soon with you!

Happy Decorating!