DIY – Nutcracker Napkin Rings

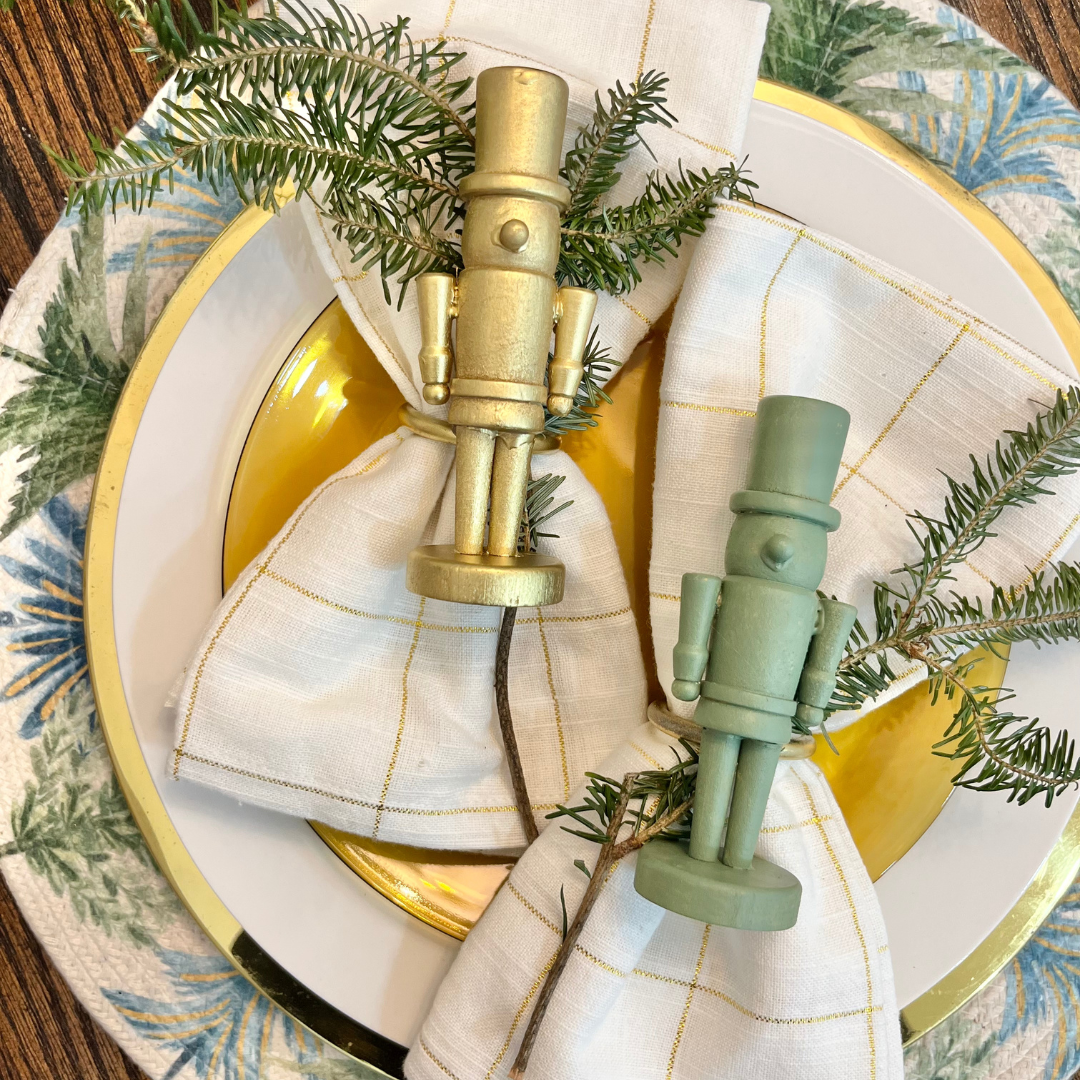
Oversized nutcrackers are definitely all the rage this holiday season if you follow any home DIYers on the gram. I’ve always loved nutcrackers since I was a little girl, and pulling out our nutcrackers each year to decorate was always something I looked forward to doing with my mom. So when I saw these little 2-packs of plain wooden nutcrackers in the Dollar Spot at Target over the fall, I snatched them up and brainstormed fun, easy, and affordable DIY, napkin rings!

The best part of this project is that it maybe cost me $17 to make — if you’re starting from scratch estimated $34 which comes to a little over $4 per table setting, as this makes enough napkin rings for 8 place settings. Which is well under the non-sale price of these similar Crate & Barrel nutrcracker napkin rings that start at $6.95 each.

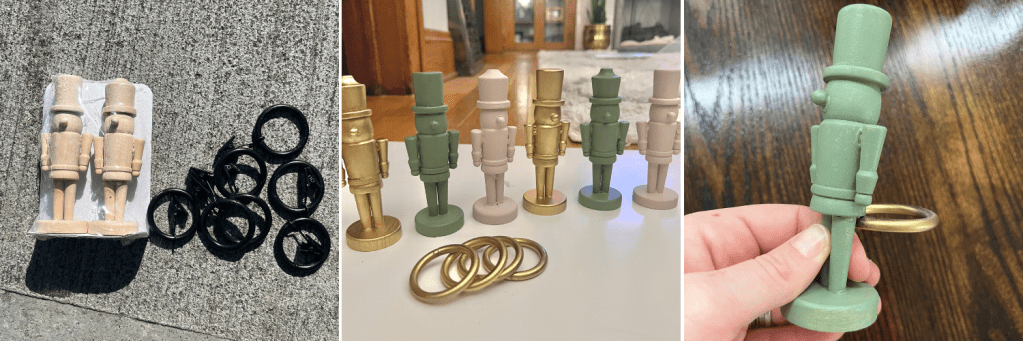
I had old shower curtains that I utilized and then only ended up buying the blush chalk paint, utilizing other spray paint and colors I had, that would fit into my Christmas decor color scheme.

DIY Shopping List:
– Mini Wooden Nutcrackers | $3 ea.
— This 5 count at Michael’s is a good substitute | $4 ea.
Metal Circular Shower Rings | $10 – $12
– Hot Glue or E6000 Glue
– Spray Paint – Color(s) of your choice
Blush Pink Chalk Spray Paint | $8-10
Metallic Gold Spray Paint | $10
Olive Grove Chalk Paint | $36 (don’t recommend buying just for this project!)

Once you have everything from there, this DIY project can be pretty simple. You can paint your nutcrackers all the same color, get more intricate and paint faces and detail out their outfits, or you can do a color scheme like I did mixing in your holiday colors. Mine are green, blush, and gold! One thing to make sure you do is to paint the bottoms of your nutcrackers, as that will definitely be a focal point to guests at the table.

Once all your rings and nutcrackers are painted, you’ll want to glue your rings to the back, bottom of the nutcrackers. I utilized hot glue, but recommend E6000 for a better hold that is a bit more durable. Wah-la!

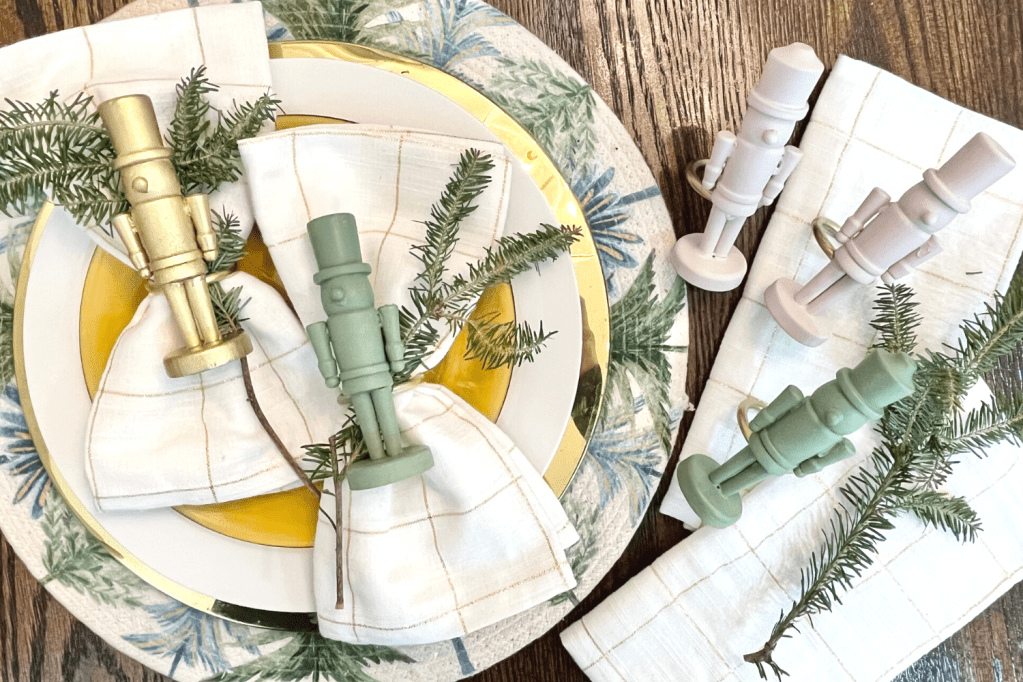
Now you’re hosting holiday ready! The best part about this project is that you can always repaint these in a few years to mix up or adapt to your changing holiday decor and style. I also like these, because they’re smaller to store in your decor.


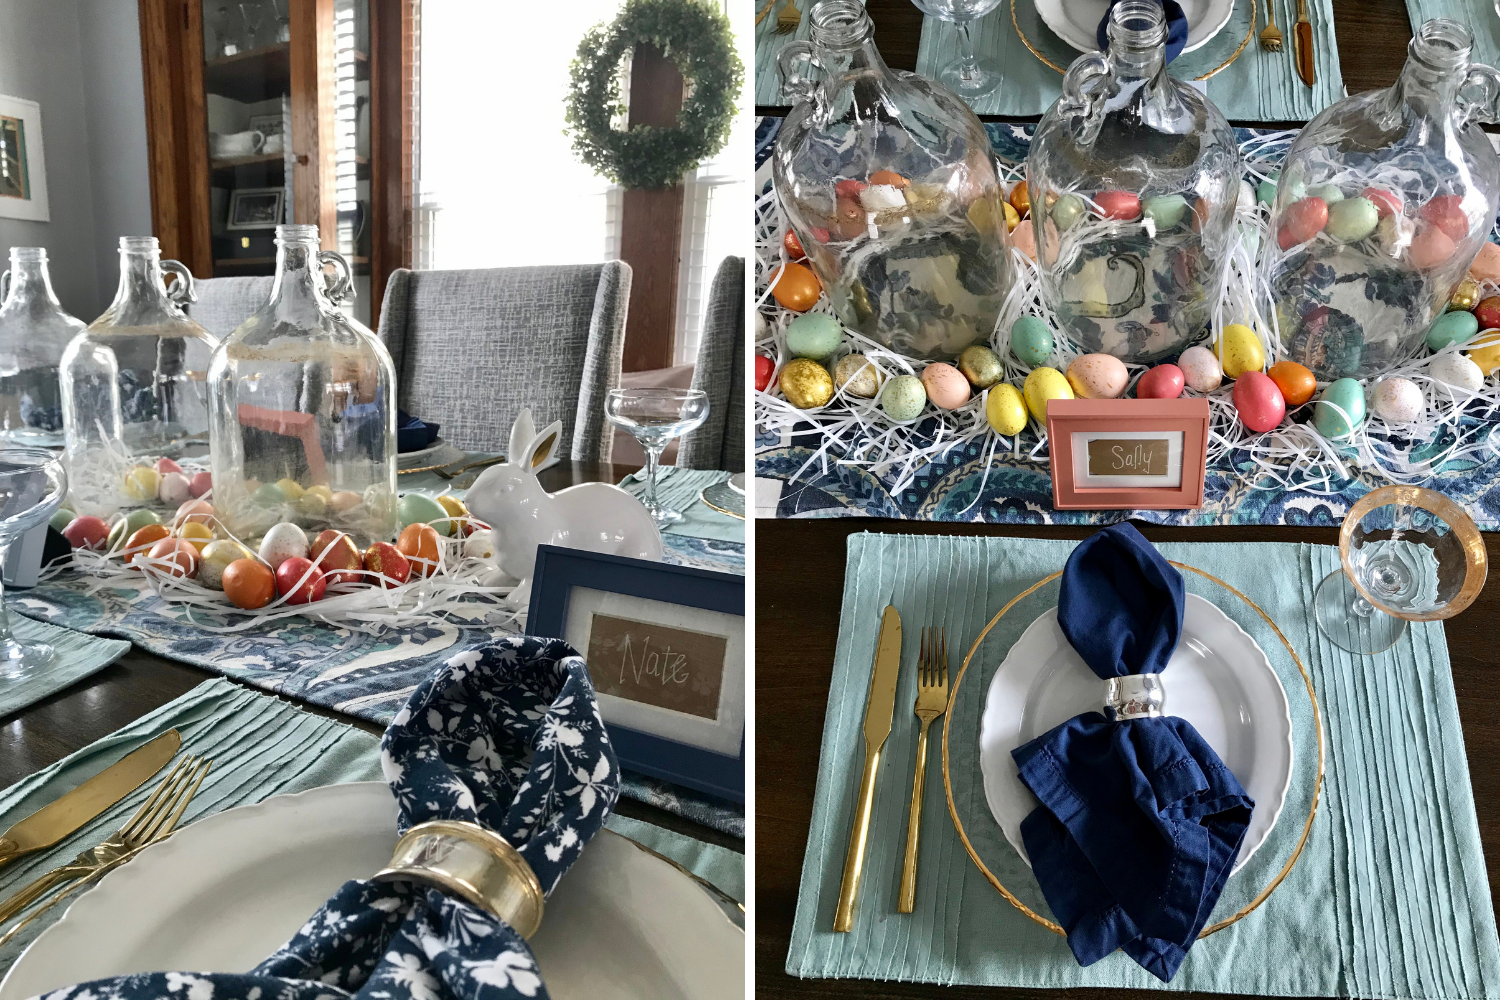
Check out my snow globe Pottery Barn place setting dupe.

A Thanksgiving Table for Two

Anyone else staying home this Thanksgiving and keeping it small? B and I are planning to have a traditional feast for two! But we have this giant dining room table, and usually I’m prepping and styling the table for a larger family feast, but it’s different this year. So if any one else is having a dilemma about making a cozier dinner table for two, I’m sharing our transformed dining room, and a few tips to help create a more intimate space at your larger dining room table!

We are planning on cooking half of our meal, while also getting a little help from Whole Foods and a few other local small businesses with some pre-ordered food and desserts — which I’m super excited about! Ok, now to the fun, transforming your dining room…

Cut Your Table in Thirds. First thing I did, was took our pumpkin centerpiece and table runner and basically split the table in thirds. This gave me a smaller space to work with, while still enjoying our fall-centerpiece! This also allows for you to have some additional space for wine, side dishes and other treats, while creating a more intimate space for dinner.

Set-up Place Settings. Next, I set-up our table settings to help designate where B and I would be sitting. I utilized placemats, napkins, plates and silverware that I already had, so it was easy to bring these spaces to life. And of course brought out my new Monique Lhuillier Gabrielle Etched Flutes and coupes, to finish the space for our adult beverages.

Add Finishing Touches. From the gravy boat (so excited to finally use ours for the first time!), to fresh flowers in your favorite glass and candles sprinkled throughout — the only thing left for the day of is the bird and all the delicious sides! Set your radio to some Peggy Lee radio and you’ll be in for a nice, relaxing evening for two.

I must admit, I’m super excited to have our actual Thanksgiving day… and weekend all to ourselves. We signed up to run our local Turkey Trot, virtually so we’ll be able to partake in a quick morning run, before lounging around, eating delicious food and sipping on drinks throughout the day. Then, I think we’ll be getting into the Christmas spirit!

What new traditions are you looking forward to this Thanksgiving?

Easter Brunch – Tablescape & Prep

Easter is less than a week away and I’m excited to be hosting brunch for my immediate family!  So I’ll be taking you along the ride as I first – prep the dining table and plan the menu, and then I’ll share the actual spread and a recap of how everything went (compared to how I thought it would go!) and finally I’ll share a few of the recipes from the brunch! Easter Dining - the bee life (1)
Setting the Table: I always love planning and setting up my dining room table with holiday and seasonal decor and this year was no different – it’s even better when I actually have an excuse and am able to host! I opted to go with more neutral themed colors with pops of color – using my blue and teal paisley table runner and teal-ish placemats that match the table runner perfect!

For the centerpiece, I wanted to keep it simple while still making a statement, I uncovered three large jugs tucked away in the basement I wanted to incorporate these into the focal point.  Paired with Easter basket grass and my bright eggs with pops of gold this added the right amount of color to the simple base of blues and greens. I had fun mixing and matching plates, chargers, silverware and champaign glasses so we can all enjoy some bubbles with our yummy eats!  Easter Dining - the bee life (3)
For the name tags I found these adorable mini 2×3″ frames at Target on the clearance shelf – with blues and a nice pop of pink these were the exact color pallet I was already working with, so I grab a few to use as the place settings with the idea of adding the names in place of a picture!  Since these don’t scream Easter – I’ll be able to re-use for the future.  I wasn’t able to find my exact frames on Target.com but these stone 2×3″ frame and this modern acrylic 2×3″ frame were two other options I also saw on the clearance rack that would be fun for name tags at the table.

Meal Prep: Planning the meal was fairly easy, I knew that I wanted to have a good spread of options, but keep the prep and cook-time to a minimum since it’ll be a shorter morning with Easter church.  So I went to my go-to guide of overnight breakfast casseroles and then cook in the morning, and then filled in the rest of the food groups with other easy yet filling options! Beyond thinking about food it’s important to think through beverage options as well and having coffee, decaf coffee, tea options, juices and then the staples like a bloody mary bar and the fixing and toppings for mimosas! I will be trying a different casserole than ones I’ve shared before and you’re going to die at how easy it is and how delicious it is – stay tuned!
Easter Dining - the bee life (2)
In addition to hosting brunch, we’ll also be hosting the family at the house – so not only will I’ll be getting all the groceries purchased throughout the week and prepping the house. It’ll be a busy week getting ready but it’ll be so fun having everyone together!

bee (1)