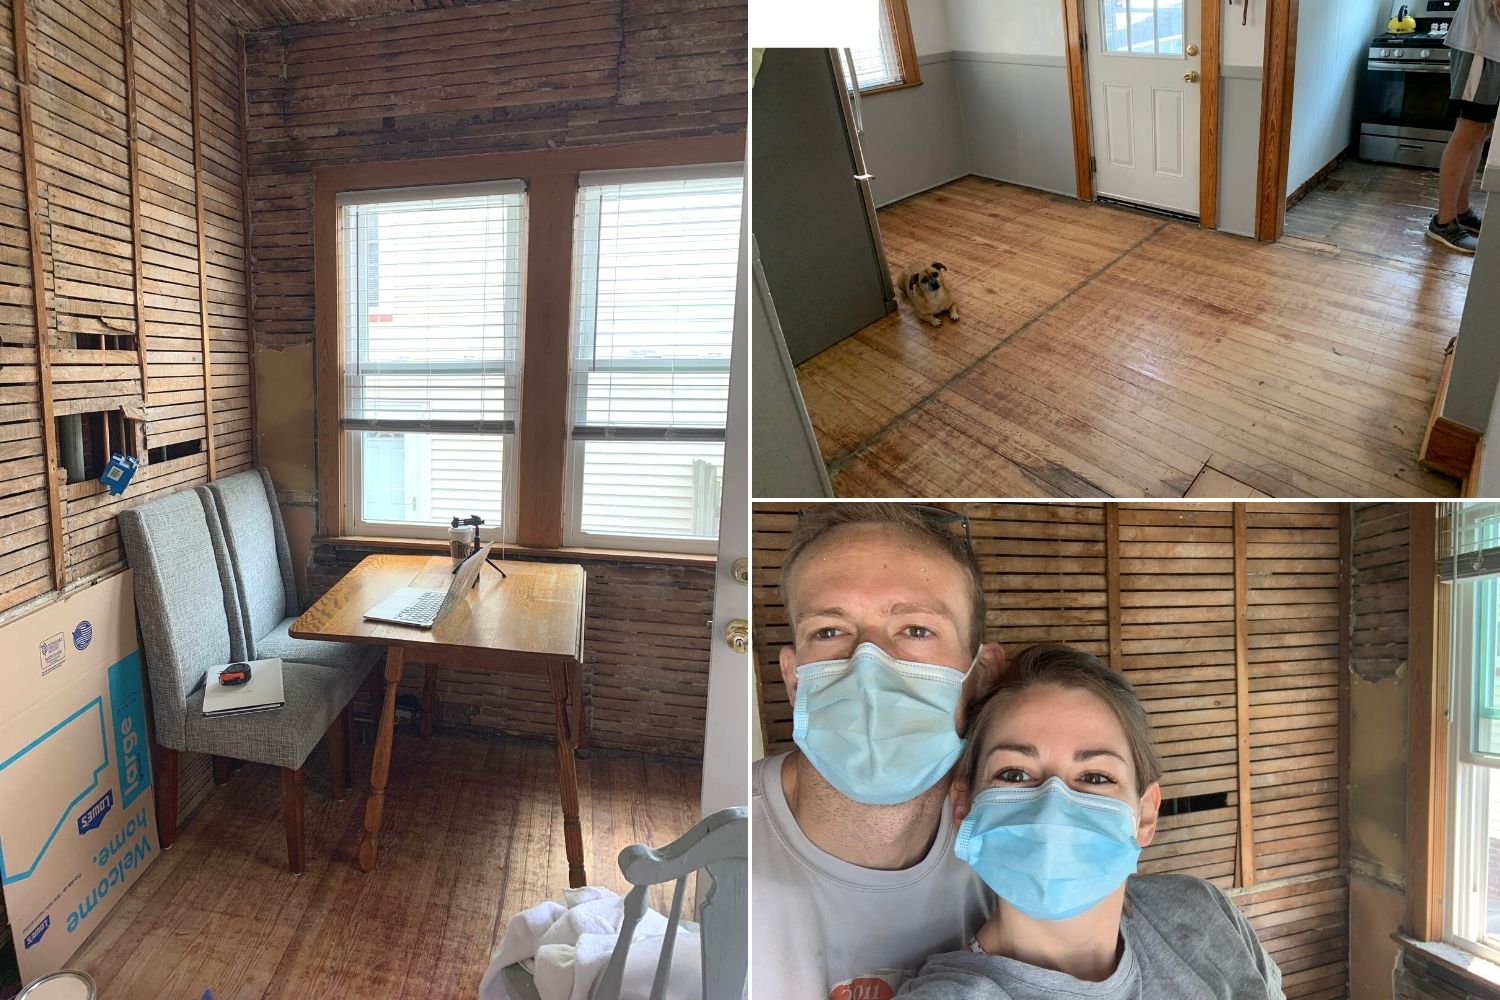
Welp! Demo has officially started on our kitchen reno, perhaps a little preemptively but after meeting with our contractor to talk him through the plan – we quickly realized there were a handful of hidden outliers that had B and I itching to uncover. So last Saturday, we just tried to rip up a few of the lament floor tiles to see if the hardwoods were wrecked or not… a few hours later – we had half the room ripped up and the floor was looking in pretty tip-top shape. Since then we’ve (mostly B) taken down the ceiling, layers of plaster walls to continue to uncover what we’re working with. I mean… we live in a 100+ year old home. So far, we’ve uncovered a ceiling leak (thanks rain) and a few other janky workings.
I say we preemptively started demo, because once we start something – we can’t stop (especially B) and also because, we don’t actually have any contractor confirmed for when work is going to get started. We have gotten a few different cabinet quotes and think we have that nailed down at least the company and general direction we want to move forward with. But now that demo has started – there is no way this kitchen isn’t happening this year. We’re hoping to get a few follow-ups from our slow contractor and then go from there. So until then, I’m working to finalize some of the design and details as we work through the demo — it’s funny, now that we’ve disrupted our currently living room and are starting to get a blank canvas, the design and finishing inspiration is finally coming to life for me.
So now what? We’re going to continue to move forward and get our kitchen cabinets and counter tops finalized – the company we’re most likely going to move forward with the in home field measurement and design consultation to make sure we’re optimizing the most out of our space. Yes, this is getting us more kitchen, but it’s still going to be relatively cozy (that’s the nice way of saying small) — compared to what we’d really want in a dream kitchen — and sadly that still includes moving walls to extend our footprint.
Having a design consultation will be exciting and then we’ll be able to make sure we’re closer to exact as we’ve learned a few hard ways how important accurate measurements are. For example, our first cabinet quote was through Home Depot, super fast, great way to get an initial price for cabinets — but we ended up having more space in one area than we actually do (we had guestimates of our measurements when we went to this apt.) — the reality is those couple inches significantly impacted the potential sink size (like 33″ down to 27″) and the corner cabinet solution, i.e. lazy susan or something a bit unconventional. Luckily, with this new company – it sounds like they have some fun solutions to get us space to have a larger sink while being able to best utilize that corner spot.
Now, with the demo and our kitchen footprint pretty open, we have been able to put a few pieces to “mock up” the spacing to get a better idea of our kitchen nook area and what we can fit comfortably in the space while still letting it feel big and open. I even sat and browsed for products while we had the nook set-up and it was perfect – I can’t wait to hang out and blog while B cooks dinner. I was even finally able to decide on a few design pieces. I might even be as far as to having an idea of the backsplash that will go counter to ceiling on either side of the kitchen above the stove and sink area. Here is a look at a few of the potential final picks, a bit of mood board for our kitchen – I’m still trying to find an affordable faucet!
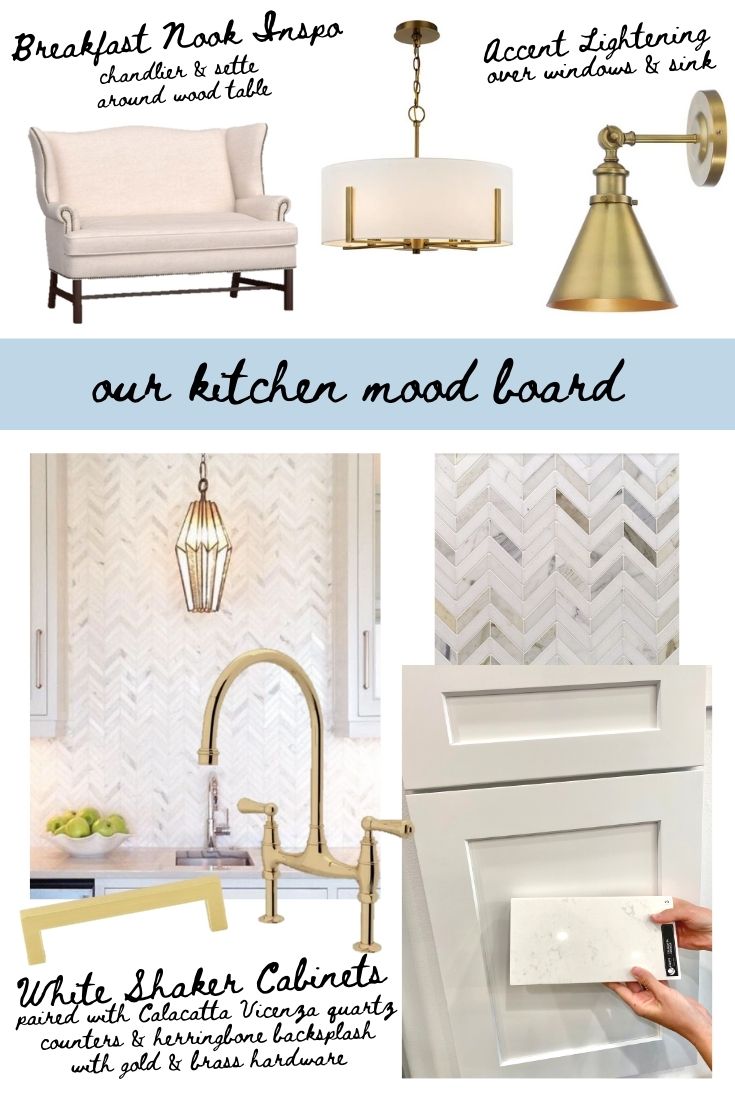
Since I want to incorporate brass/gold – it’s going to be crucial to make sure the shades of everything match up closely. That is why I was excited to find the light fixtures as that look pretty similar in the brass color that they are. Our appliances – as of right now – are white and gold, so as long as the back order doesn’t lead us to cancelling, we’ll be having pops of white and gold! Here’s to making some actual progress towards getting this kitchen done!


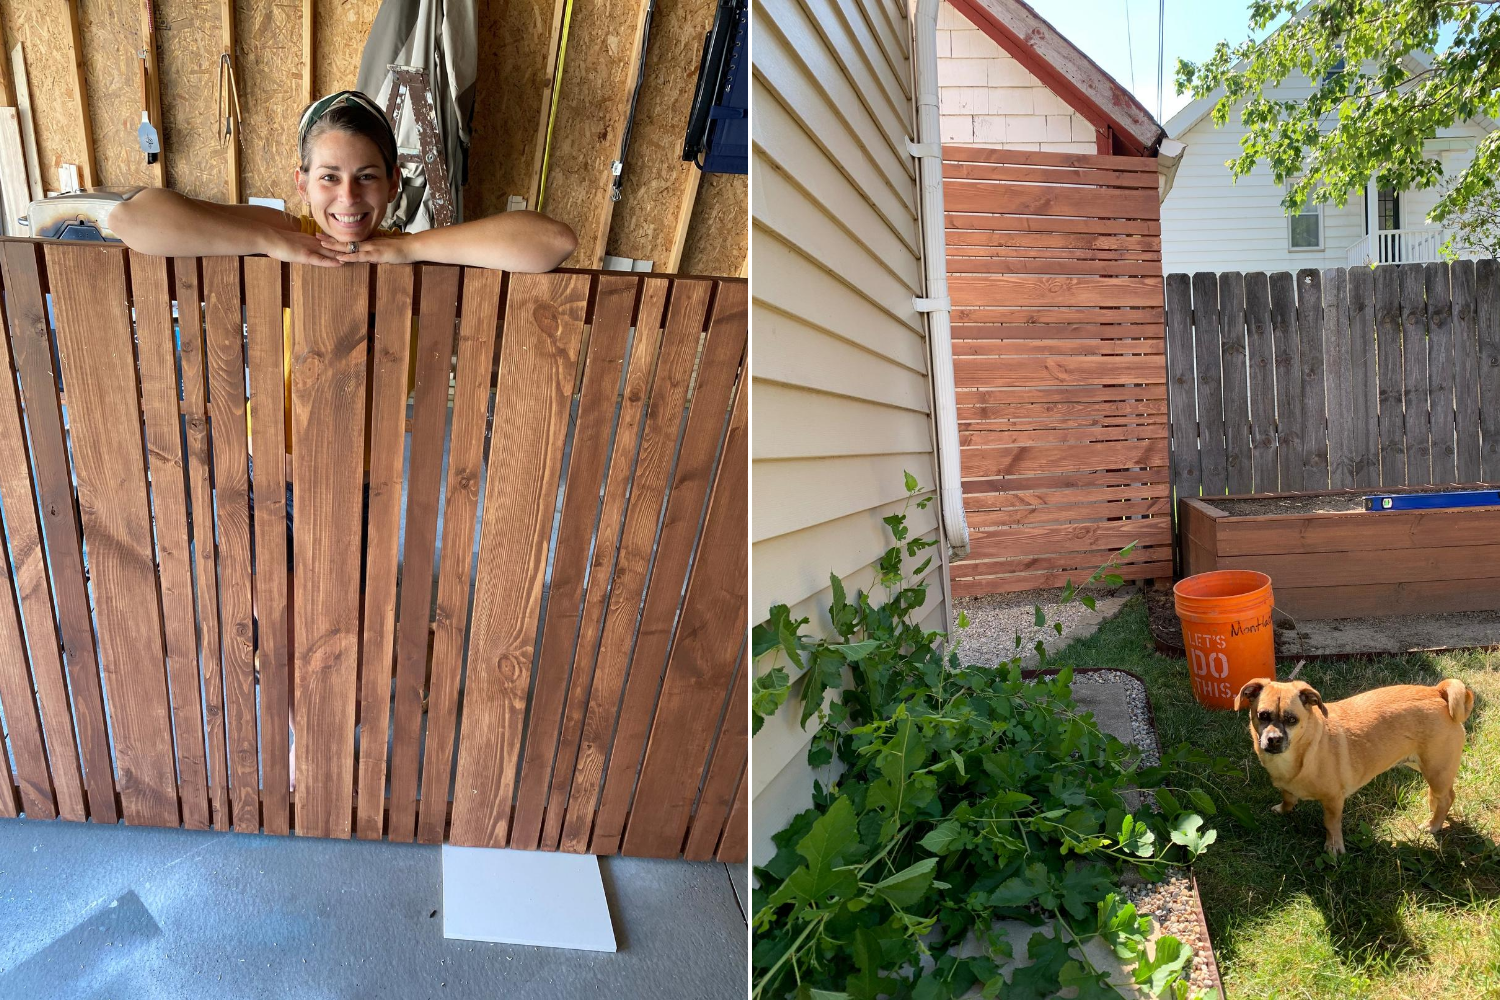
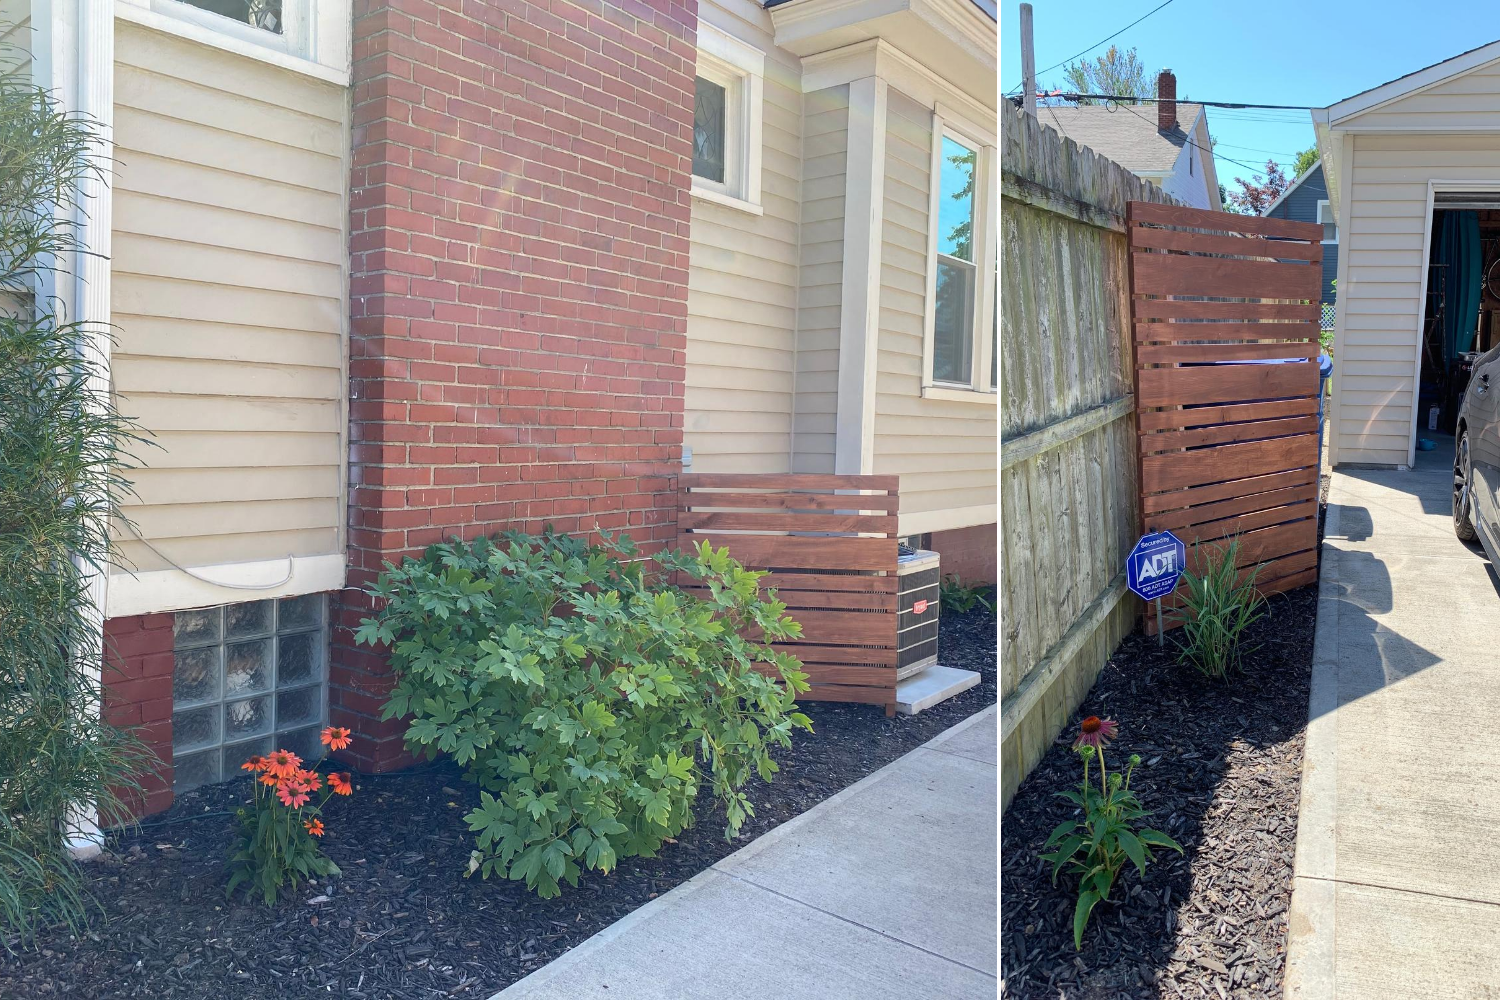
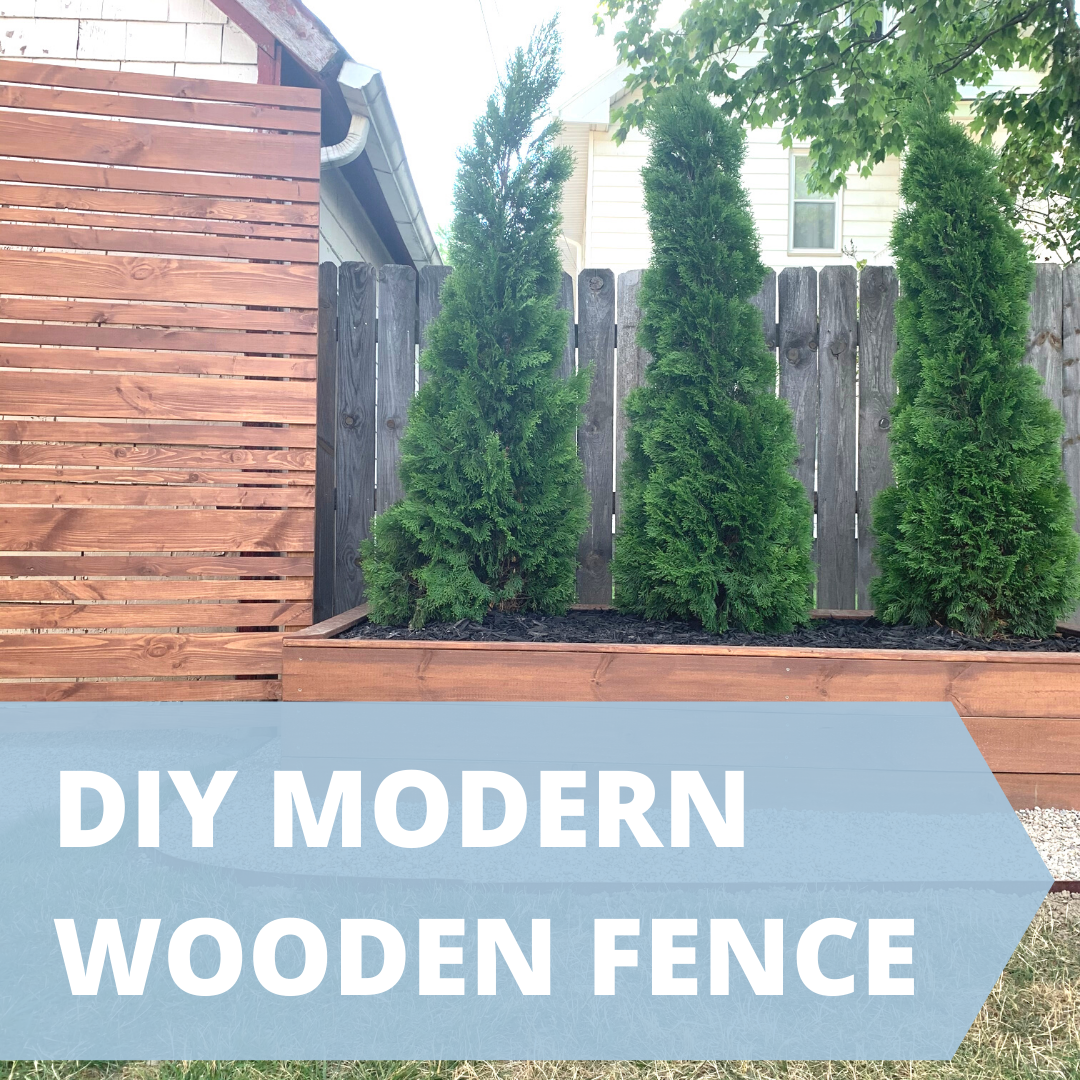 The pitch was a success and the project was a go! The advantage of this project and any DIY project is being able to create a completely custom fence that fits your space and dimensions. We ended up throwing in two other fences to place around our ‘property,’ one in front of our garbage cans along the side of our driveway, and then another on the North side of the house in front of our air conditioner. The thing to remember with these fences is they weren’t going to be complete privacy, but help off-set and distract from the ugly things.
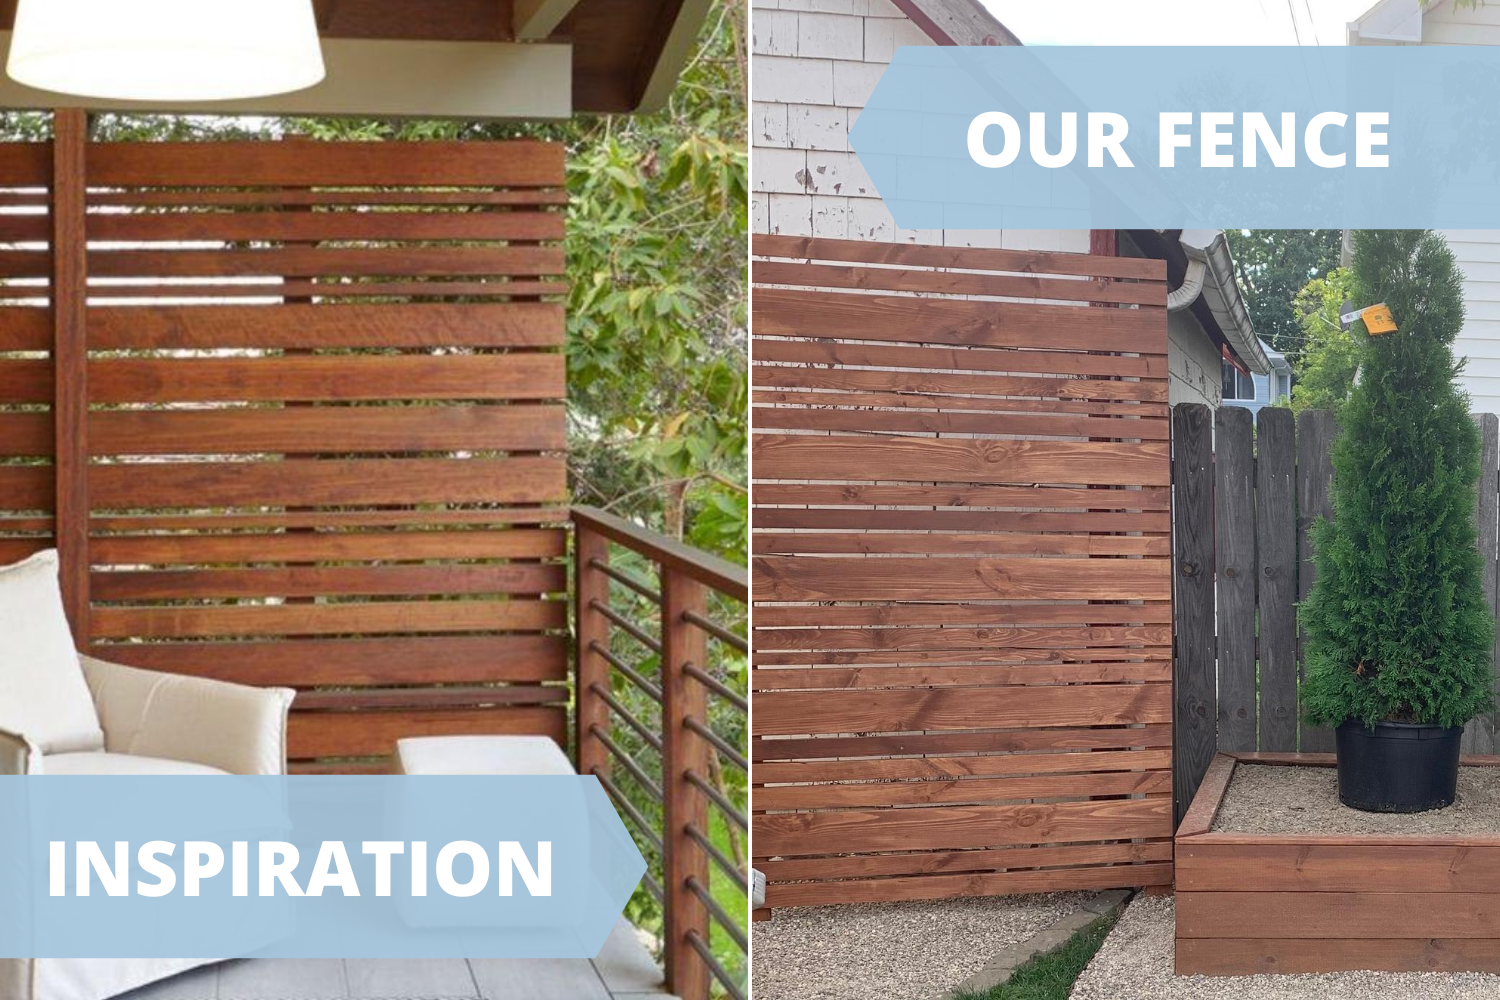


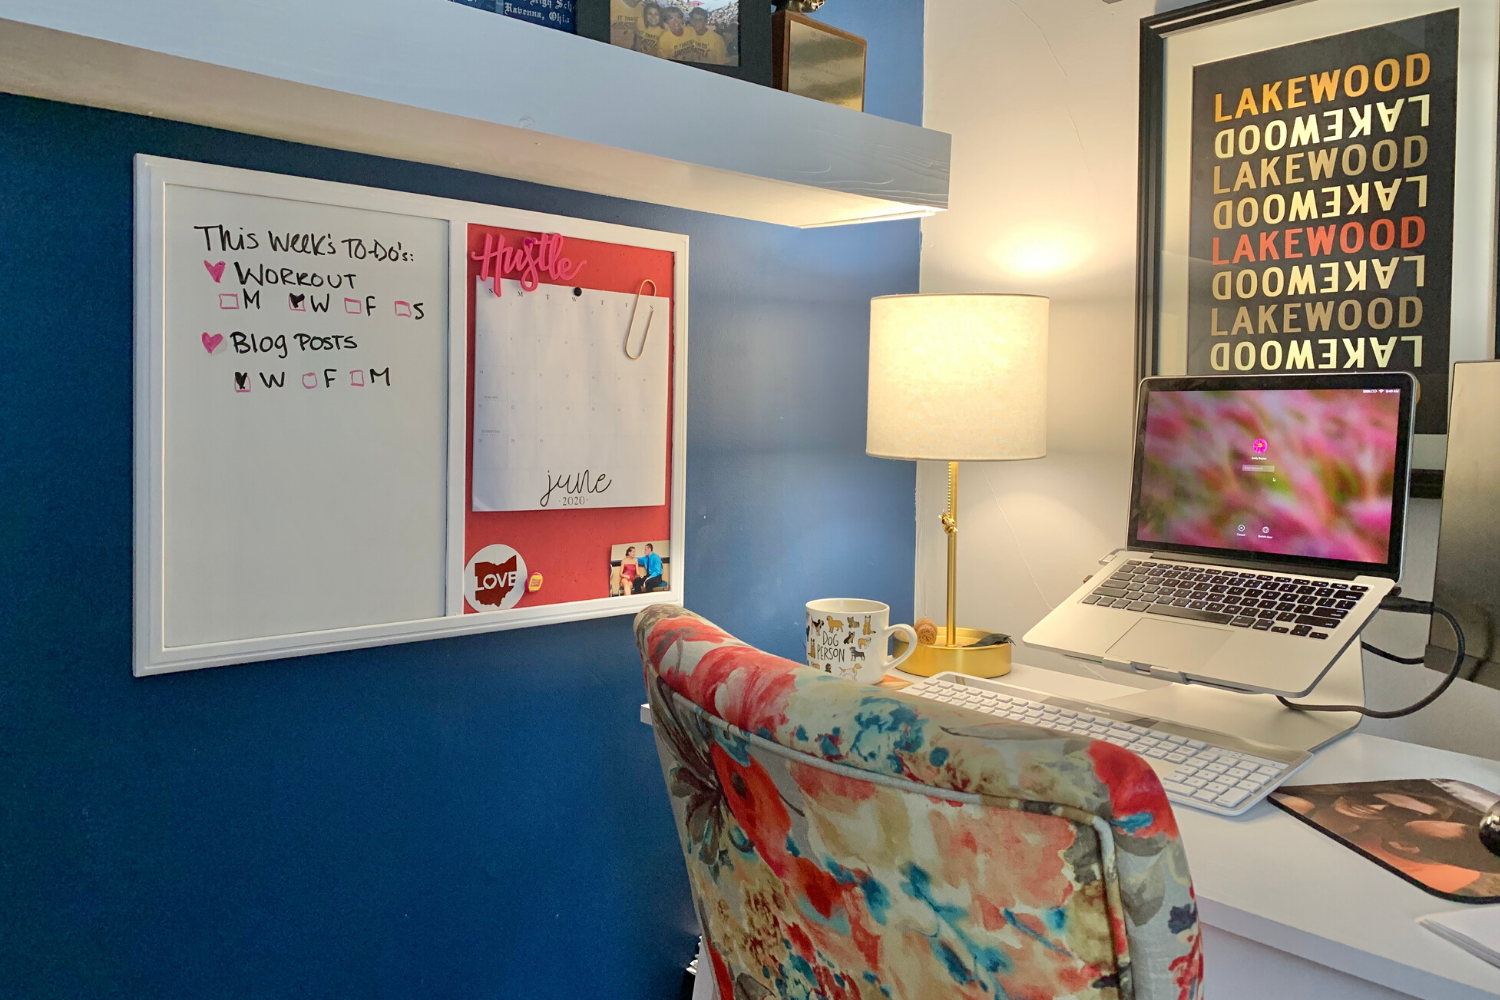
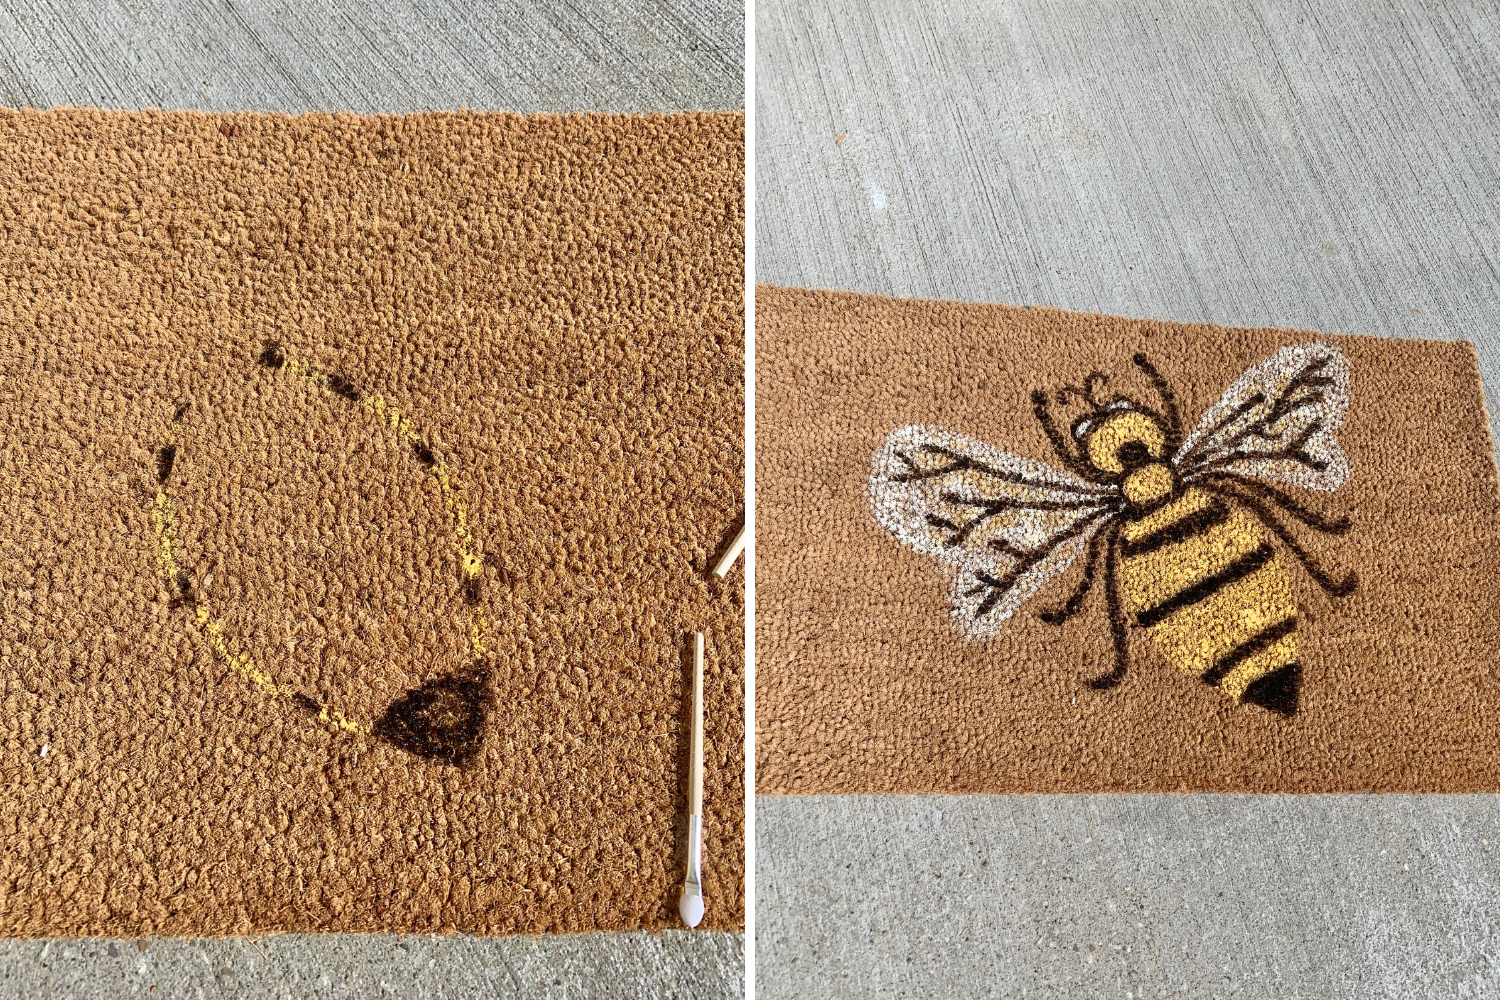
 The best part was I was able to cover up my high school doodles that have lived on for over a decade *cringes a little* and give the dated wood grain a fresh and affordable update with the craft and paint supplies we already had. It just required a few coats of paint and a little patiences.
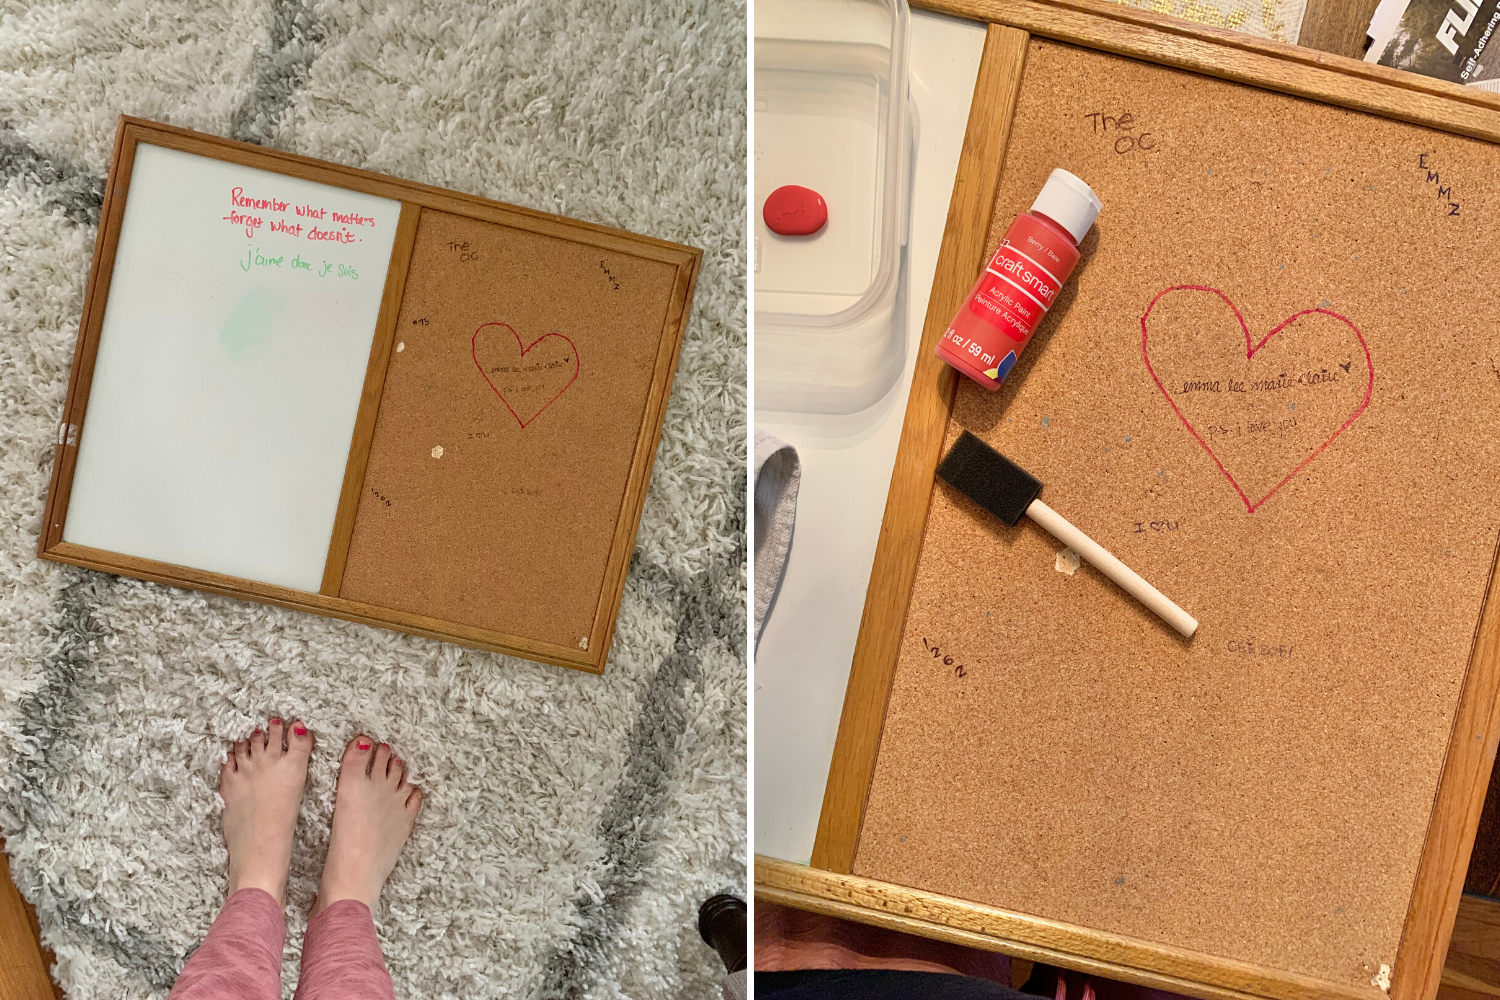 Step-by-Step:
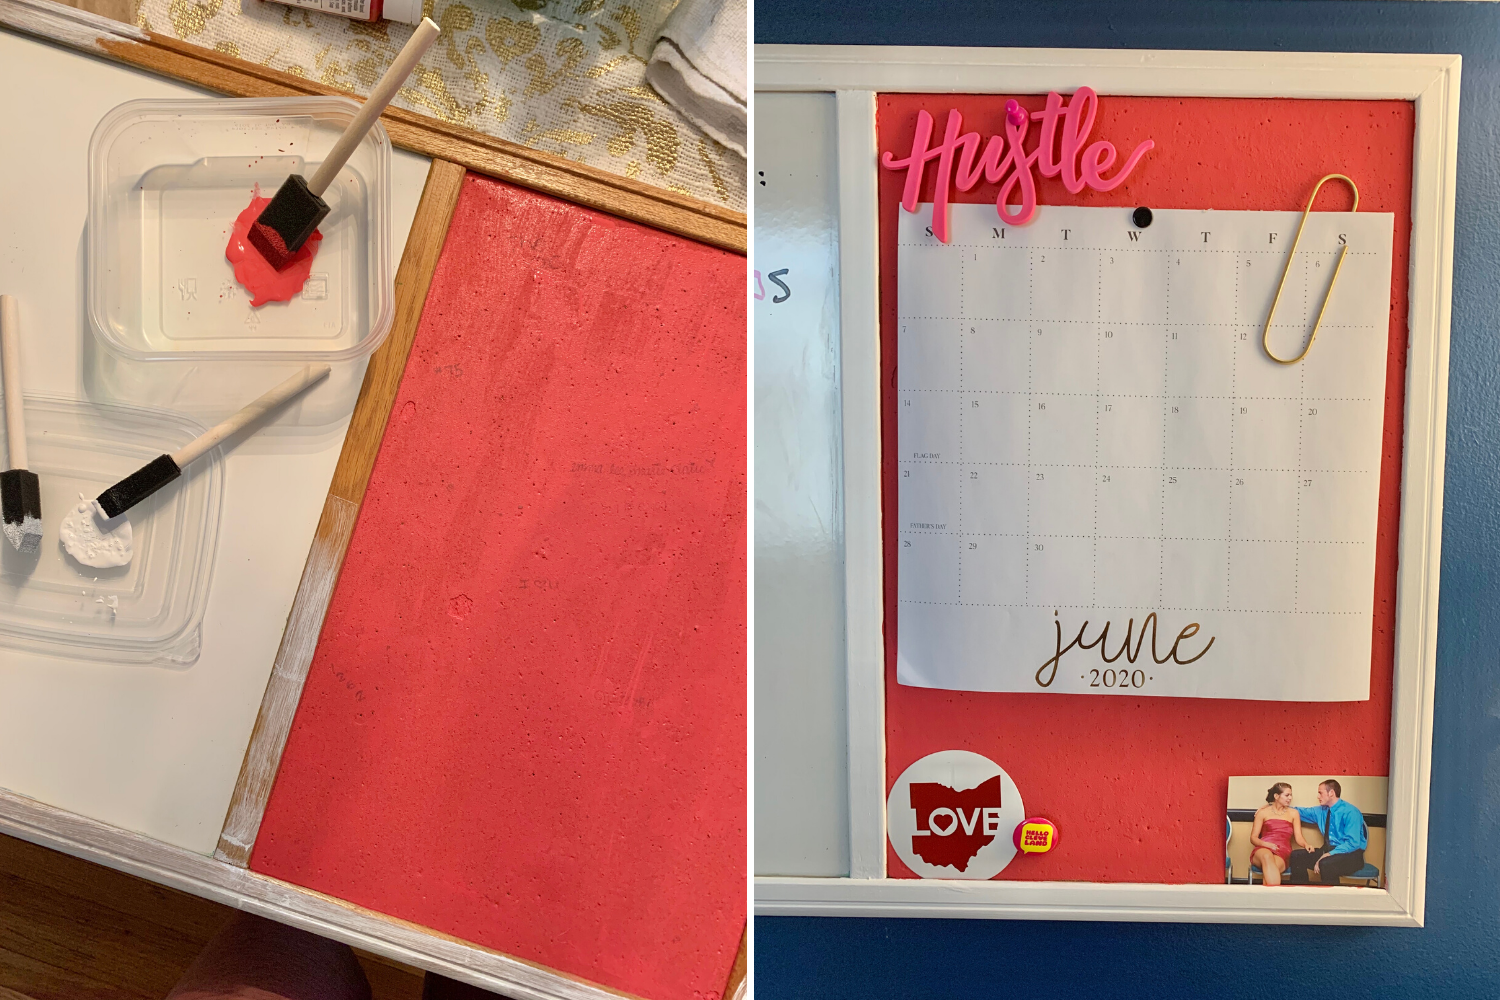

")
")

 Ok! Here is what you’ll need to get started, in addition to a step-by-step guide to filling in your letters with florals and then securing for a stunning statement piece for your front door!
")
")

 Step-by-Step:
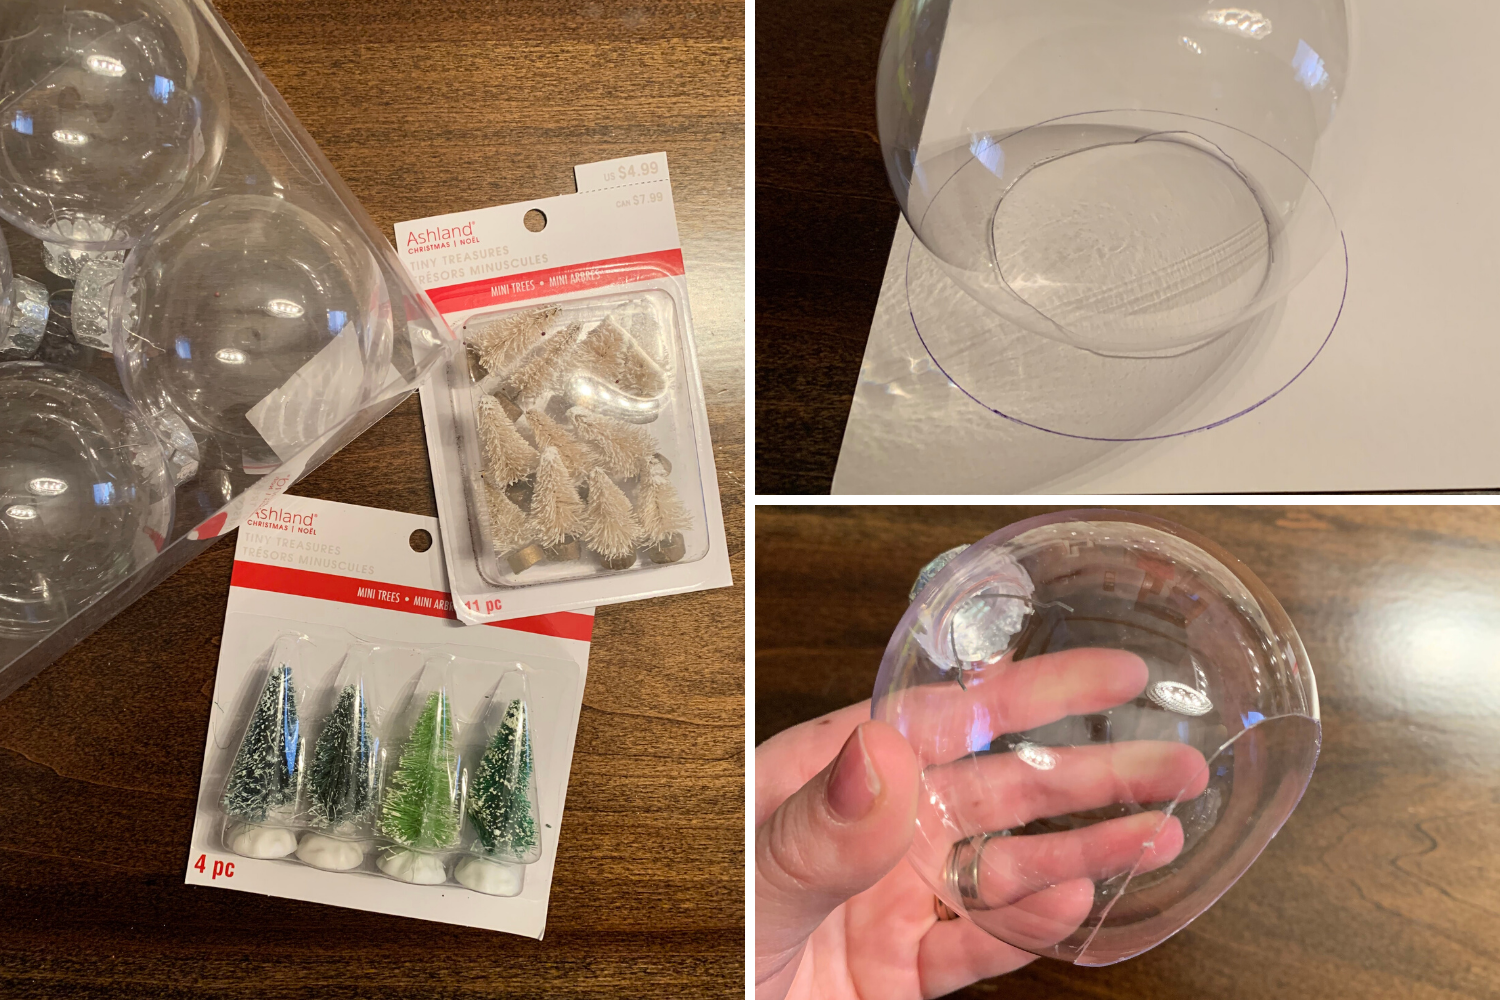 2. Woo! We have our openings, so now it’s time to cut our our bases and start planning our wintry scene. I used thicker card stock, that I ended up painting and putting glitter on — I would highly recommend buying
 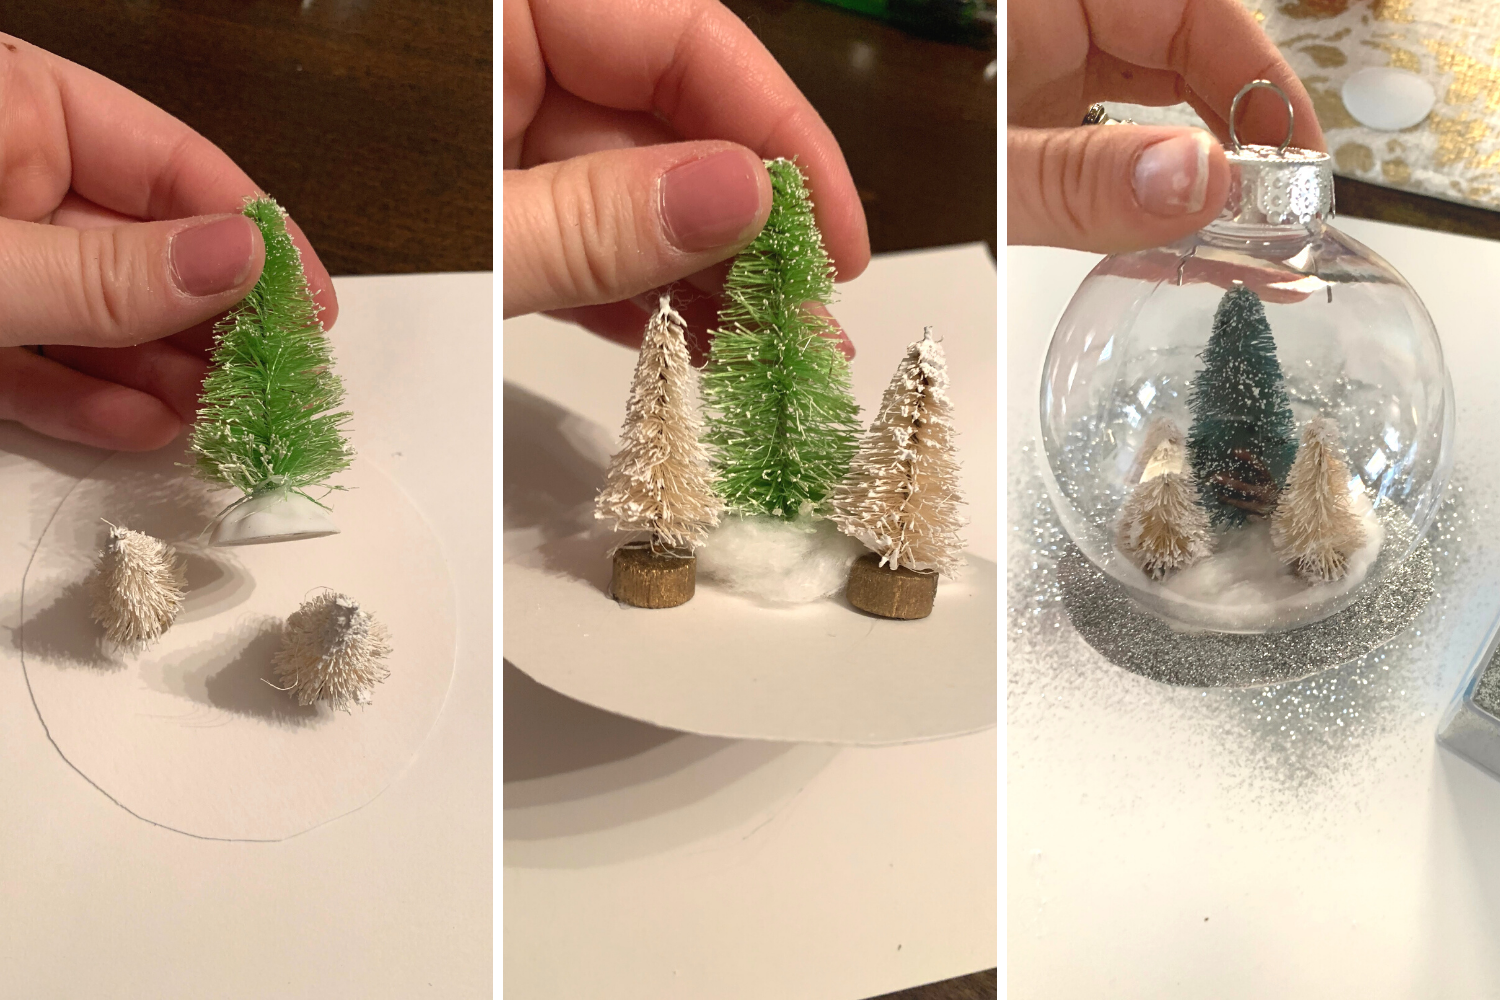 5. Now, depending on if you bought glitter paper or not, this step may not be needed. Using mod podge glue I painted the top of the white paper bases and then covered in silver glitter over a paper plate to catch the excess. I had to touch up a few spots once the glue dried and I dumped the remaining glitter off to see emptier spots. If you bought glitter paper, you are 10-steps ahead of me!
")
")