DIY – Rattan Side table Upcycle

Embarrassingly enough, this upcycle has been 11 months in the making — eeek! Part of it was sheer shelf doubt and being intimidated about using and installing rattan for the first time. On top of that, I did not find too many other DIYs for installing rattan in the way I was going to use it, another stumper, so there was a lot of thinking and planning. Did I mention, I was intimated about installing rattan? Luckily, I finally got over that because, ultimately, I love how this piece came out!
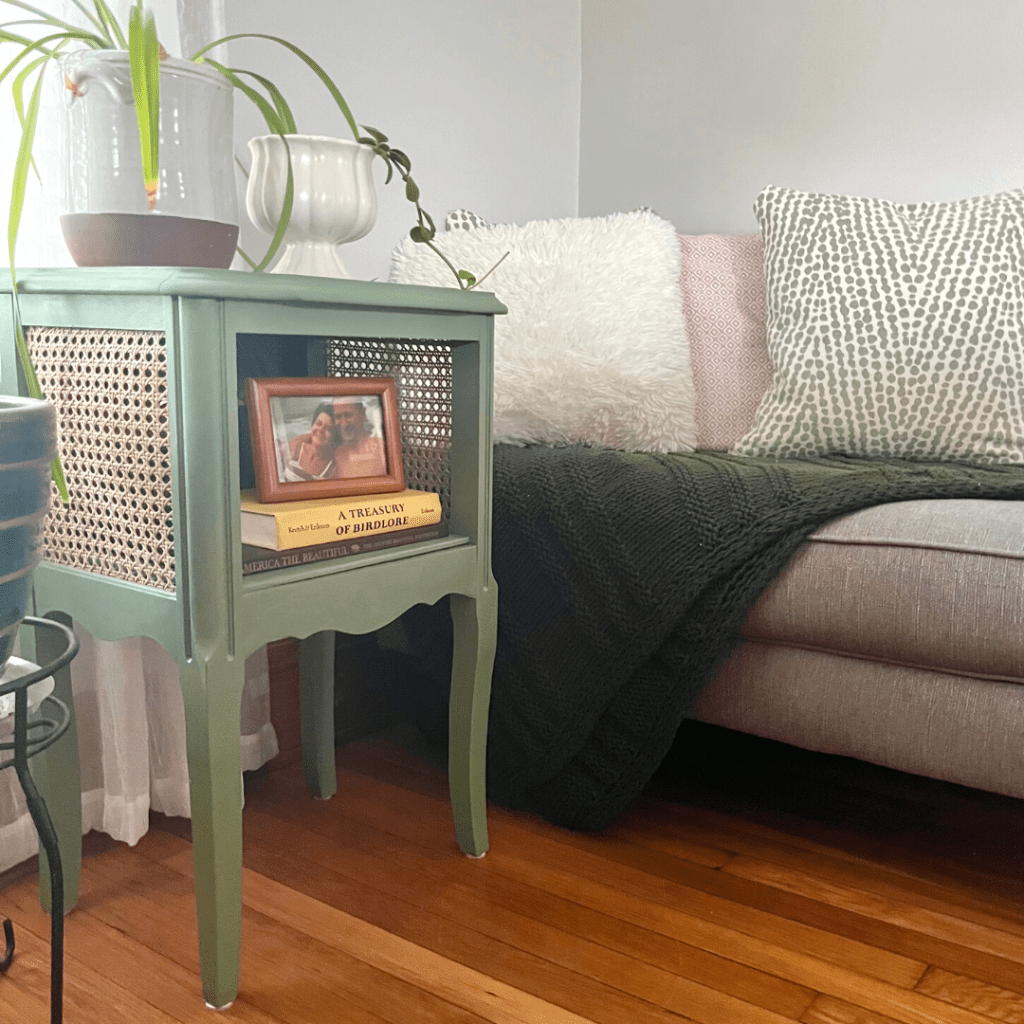
This upcycle was pretty low budget, as I utilized 90% of materials I already owned from previous projects (like my Sideboard Glow Up) — but I’ve linked everything below if you’re a first timer a furniture flip.

Makeover Supplies:
Rattan (17″ x 3.3′)
Wood Filler
Hand Sander
Liquid Nails
– Wallpaper
Magnolia Chalk PaintWax Sealer
Round Felt Furniture Pads

My Total Cost: $46 (liquid nails + rattan)
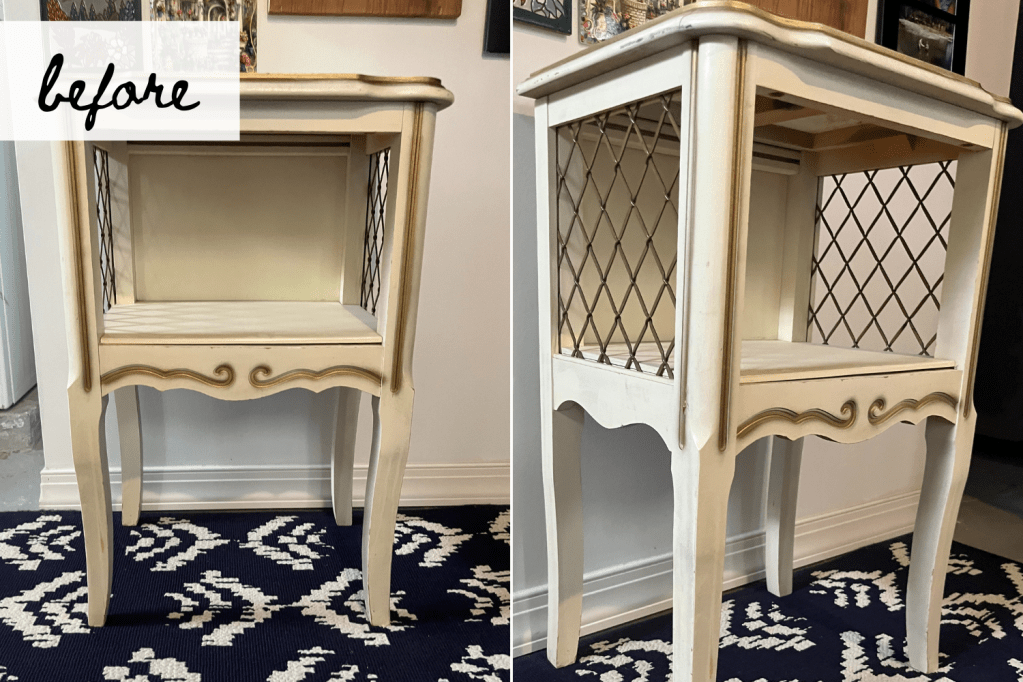
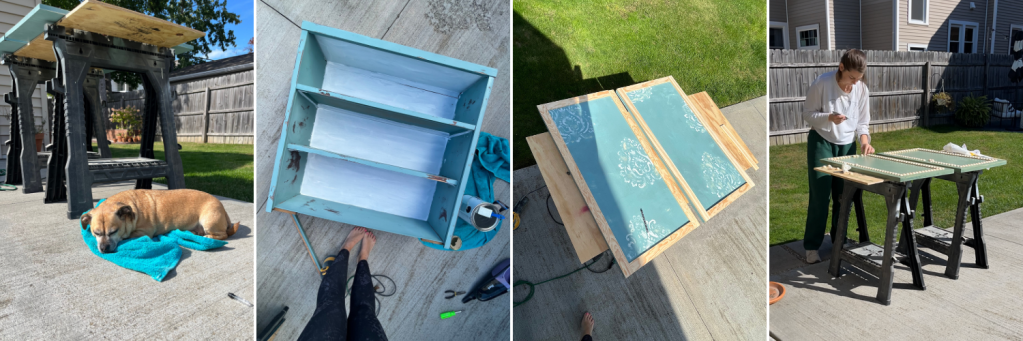
For an 11-month project, this was fairly simple as it was just a paint job and switching out the side panels. One added touch to get rid of some of the gaudy was filling in the detail on the bottom front with wood filler which instantly elevated the piece. I had left over chalk paint and had already worked through the kinks of using Chalk Paint, so I knew what to expect when it came to painting with it — although I still did not LOVE working with chalk paint, I at least knew what to expect. The wax seal definitely helps protect any surfaces that are going to be high-traffic.

Let’s talk about the rattan. Removing the original metal was pretty easy, I just cut it out with wire cutters. The rattan I purchased does recommend soaking prior to use, so I did soak the roll before cutting and installing into the sides of my table. Disclaimer, I don’t think this was the easiest furniture piece to install rattan on and my method definitely wasn’t perfect, but it worked. This table had a framed alcove for the rattan to fit into, so my goal was to utilize some liquid nails to glue into the framed alcove. This was messy and not ideal. I ended up utilizing some dowels with painters tape to keep the rattan in place while everything dried — that definitely helped! Again, this wasn’t perfect, but I didn’t have another way to keep in place, nailing wouldn’t have worked, so I also made sure to try to get as much of the rattan stuffed into the framed alcove as possible for added support.

The final finishing touch was adding in the wallpaper — I had some scraps from the Sideboard makeover that I had planned to use, but then my mother-in-law gave me some wallpaper scraps, which fit this piece so well, so it was a no-brainer to utilize those! I added this to the inside back and then a few pieces on the inside top, just for an added touch. 🤩

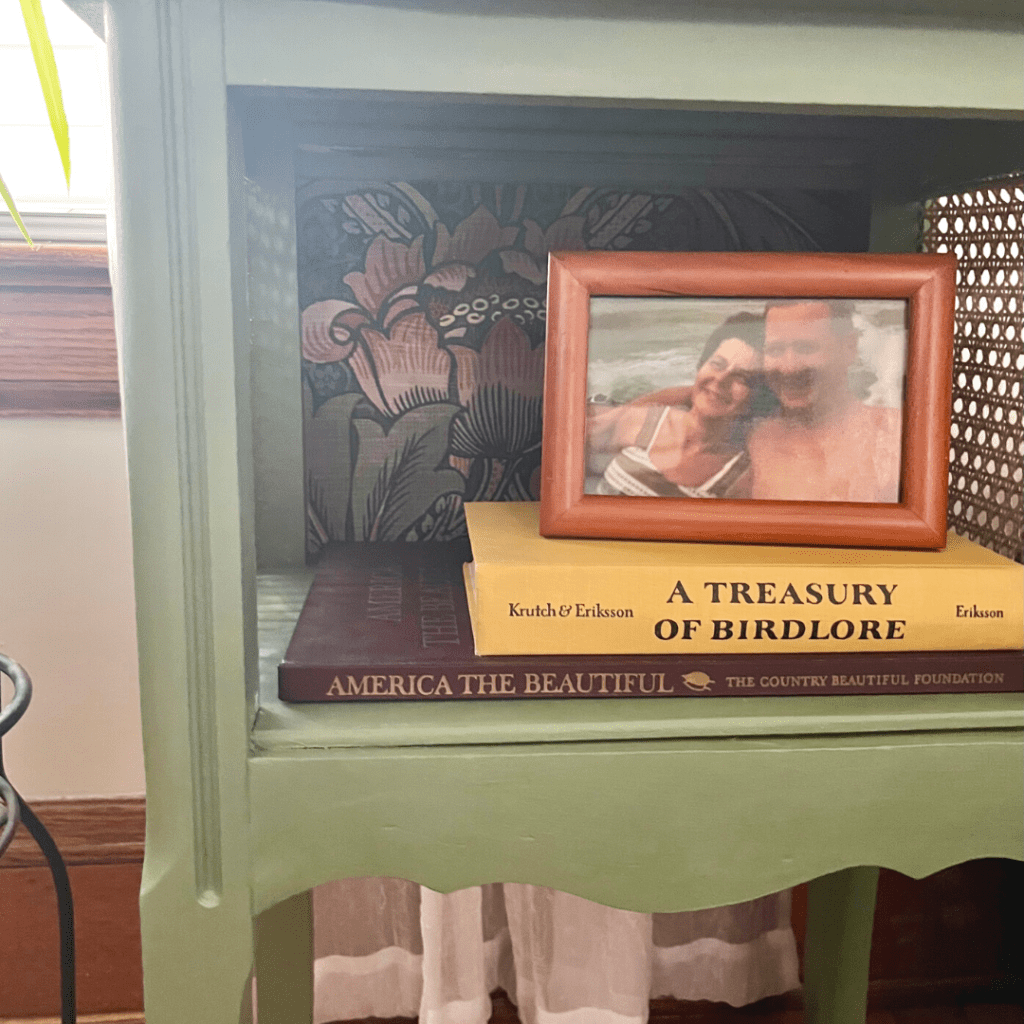
This is the perfect little plant stand/side table with space for a little accent decor (thrifted books & a vintage picture of my great-uncle) while still showing off the pop of wallpaper and the classic rattan sides. And I love how it ties into the sideboard and can be used in different spaces around our home as we change things over the seasons. Would you want this piece in your home?

See More of Bee’s Before & Afters: Sideboard Glow Up, Moody Side Entry, & Glam Front Entry

DIY – Sideboard Glow Up

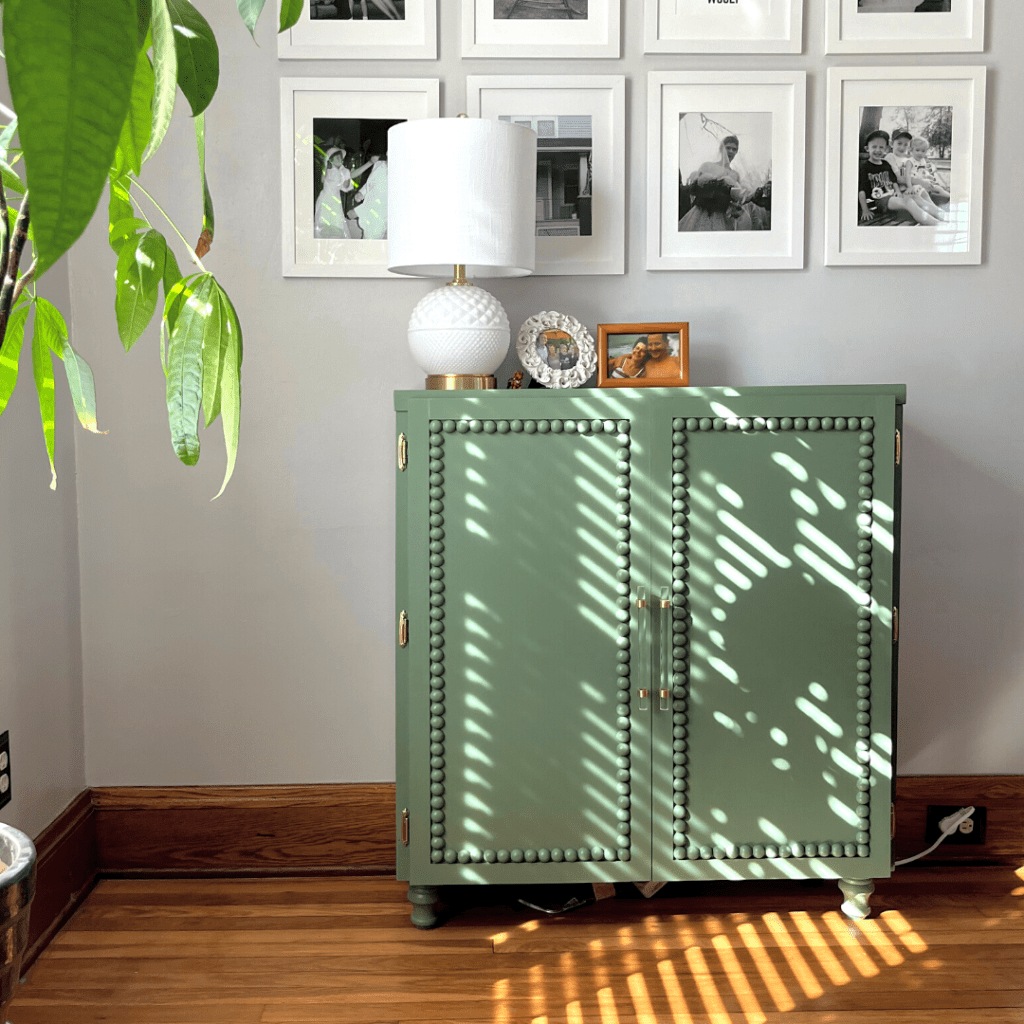
I’ve been itching for a DIY project, and as much as I love the looks of our sideboard that transitions seamlessly from our living room to our dining room, our project skills and taste have improved since we first did this project back in 2016. The functionality and size of this piece are ideal, so there was no sense in trying to find and buy something new, we just needed a little glow up. After much brainstorming, I saw @hotpinkpineapples cabinet makeover and was instantly inspired to recreate this beaded look on our doors — the color was just throwing me.

To throw it back to 2016, we found a battered bookcase on the side of the road and added doors to it to create extra storage for glassware, entertaining, and games. The legs on the bookcase have always been questionable, so with this glow up, I also made sure to reinforce and take the time to fix some things overlooked with the first make over – like new legs, reinforcing the bottom, taking the extra time to sand the doors to remove some of the roughness and using wood filler to create a seamless look.

Makeover Supplies:
4″ Wooden Legs with Metal Leg Plates
25mm Wooden Craft Beads (I got 3 packs)
– 1-inch edging
Gold Acrylic Pulls
Wallpaper
– Magnolia Chalk Paint & Wax Sealer
E6000 Glue
Wood Filler
Gold Spray Paint (for the old hinges)

This was my first DIY with Chalk Paint… and let me say, I was not impressed, actually super bummed. I did the chalk paint because it’s supposed to be easy, durable, and little prep. I ended up sanding the old piece for the wood, but never primed anything… and as I was in the finishing touches stage the paint easily chipped off, or was stripped entirely when I was applying the wallpaper all the way down to the original dark wood grain. I wasn’t happy! So I made sure to get the wax to give it that protective finish – I did a couple coats on the high-traffic areas but am not convinced it’ll hold up. I also put contact adhesive shelf liner down inside to help with the chippy chalk paint.

Another learning on this DIY was gluing all the beads on, super easy, but the glue had a lot of leftover cobwebs, which was annoying when it came to finishing/painting – so either be careful or super diligent when you are gluing to avoid unnecessary webs. I am really happy with the 25mm size of the beads with my larger doors, they definitely make a statement!

Since the front was getting a glow-up, the inside also needed a makeover too. I wanted it to be a fun party inside, especially since this holds games, additional glassware, and other entertaining supplies. I think the fun tropical leaf pattern in black, white, and grey is super chic and lots of fun. What do you think?

I’m low-key obsessed with this makeover, and have found a small place for some green in my home with accessories and supporting pieces! Working on this project definitely got my creative juices flowing, it’s amazing when you spend the time creating and making something how that stems into other ideas and thoughts in other aspects of your life. 🥂

Latest Obsessions 09.21 – Bubbly Fun Edition

National Prosecco Day was last month and I always first think holy sh** we’re half way through August and Summer is over… and then instantly like, oh but it’s National Prosecco Day. *pops open a bottle of bubbly* — I often joke that I try to live every day like it’s National Prosecco Day… but adulting and life sometimes interfere.

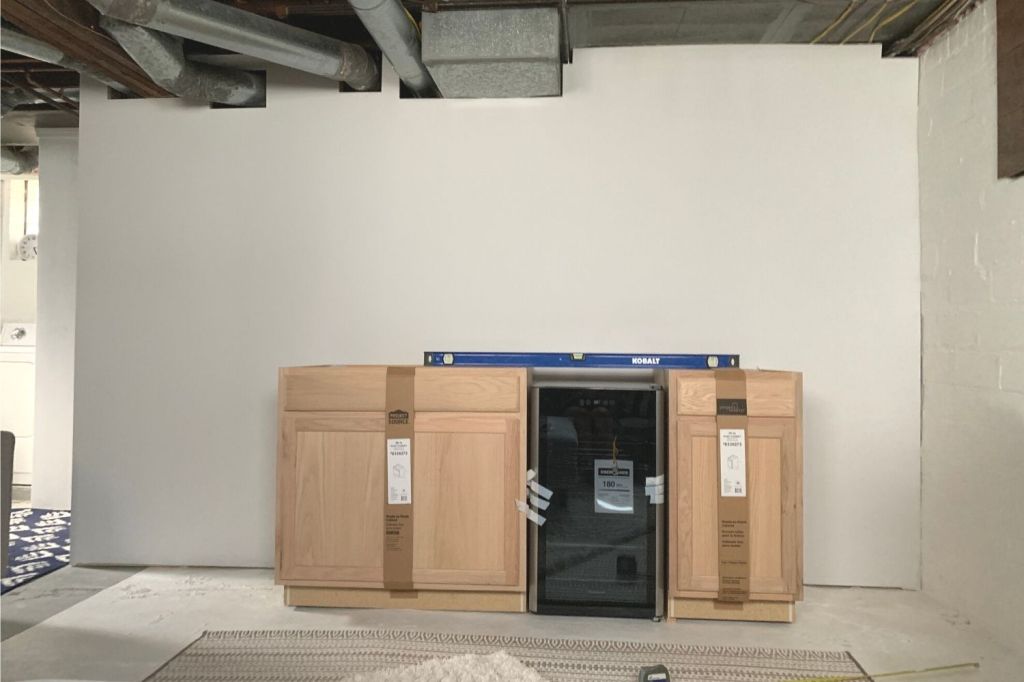
To commemorate a much delayed NPD, I’m sharing a few of my latest process-obsessions. We’re in the process of creating a built in bar in our basement to further complete our intimate basement space — and the best part about it all besides having a new space to decorate is the fact that we bought a champagne fridge! (I mean technically it’s a wine fridge, but we’ll be stocking up on the bubbles). So without further ado, here our my latest obsessions to help make our bar a bubbly sensation!

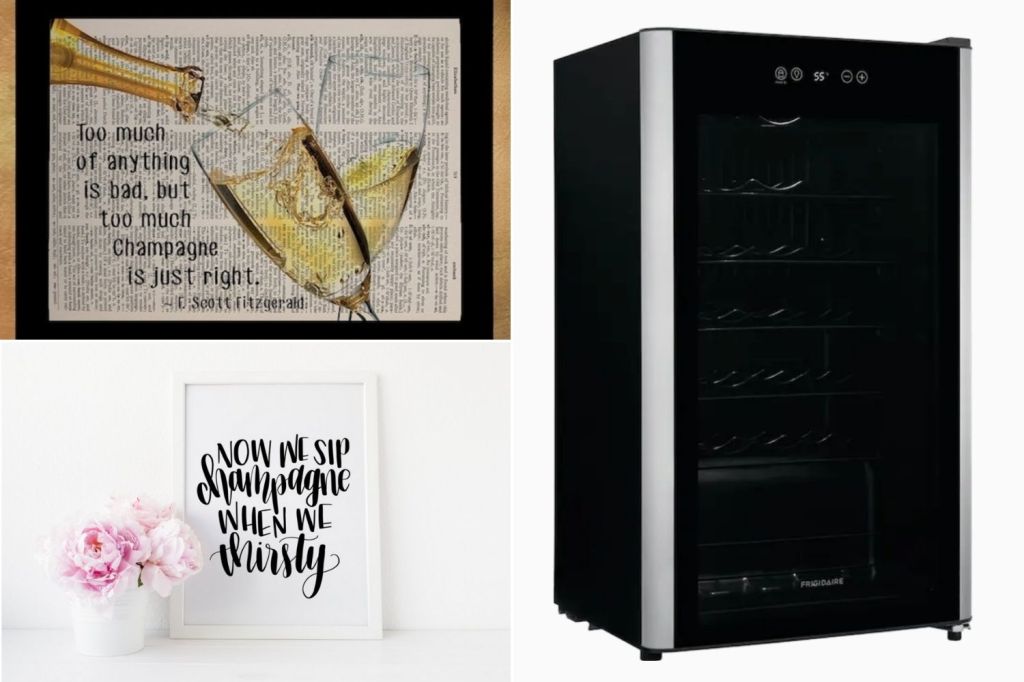
Prosecco Prints. I am playing around with a prosecco themed gallery wall – I love the idea of pulling in black and white to match our large painting we have in our basement. Fun illustrated bubbly bottle outlines, or even great champagne inspired quotes (ugh, there are so many good ones!) is what I keep coming back too – but can’t decide on.

Bubbly Quotes. OK, so there are like SO many good quotes about champagne (I know it’s NBD) and bubbles. And a lot of them are from the great F. Scott Fitzgerald.

Here are a few of my favorites:
– “Too much of anything is bad, but too much Champagne is just right.” – F. Scott Fitzgerald
– “Among the whispering and the champagne and the stars.” – F. Scott Fitzgerald
– “Now we sip champagne when we thirsty.” – The Notorious B.I.G.
– “My only regret in life that I didn’t drink enough champagne.” – John Maynard Keynes

Champagne Fridge. We scored this fridge at almost 50% off – just by chance. We were going to do a bulk online order, and I just happen to just go into the store and saw it was discounted in store! Score – we just had to drive to another location that had the last one in stock. This Frigidaire 34-bottle wine fridge (is actually still discounted from $419 to $319) and fits better with the pre-fab cabinets we got as well. Even better, champagne bottles fit just as easily as the wine bottles. Now, we just need to keep it stocked!

DIY Cork Memories. Another fun little project I may tackle, is creating 3D art with champagne corks that we’ve saved and written on documenting special moments. We have one from our first Christmas married together and a few others – I think it’ll be a fun way to use those, while also creating a custom piece that is special and meaningful to us!

Life of course has been a little nuts, as I had full intensions on sharing this post a few weeks ago on National Prosecco Day, but that’s life! I cannot wait to share our DIY built in basement bar with all our fun bubbly pops and personal touches with you soon!

Before & After: A Glam Front Entry Makeover
For awhile now, I’ve been wanting to do a ‘drastic’ decor upgrade to the main floor – either in the living room or dining room. I really wanted to add an accent wall somewhere with some bold wallpaper, but both rooms just don’t have a simple enough wall to be a true statement wall. Then I thought – what if we wallpaper our front entryway? It’s a small space, closed off from the rest of the living room and an opportunity to do something a bit bold – especially compared to it’s pretty basic current decor. Oh, and it’ll be easy and affordable!

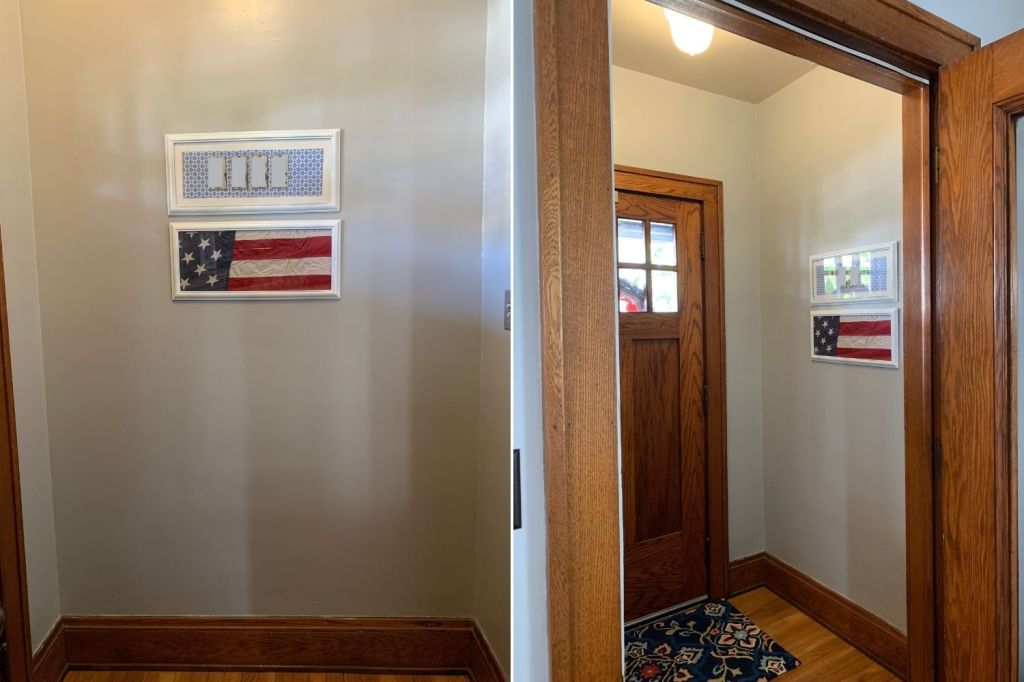
The before

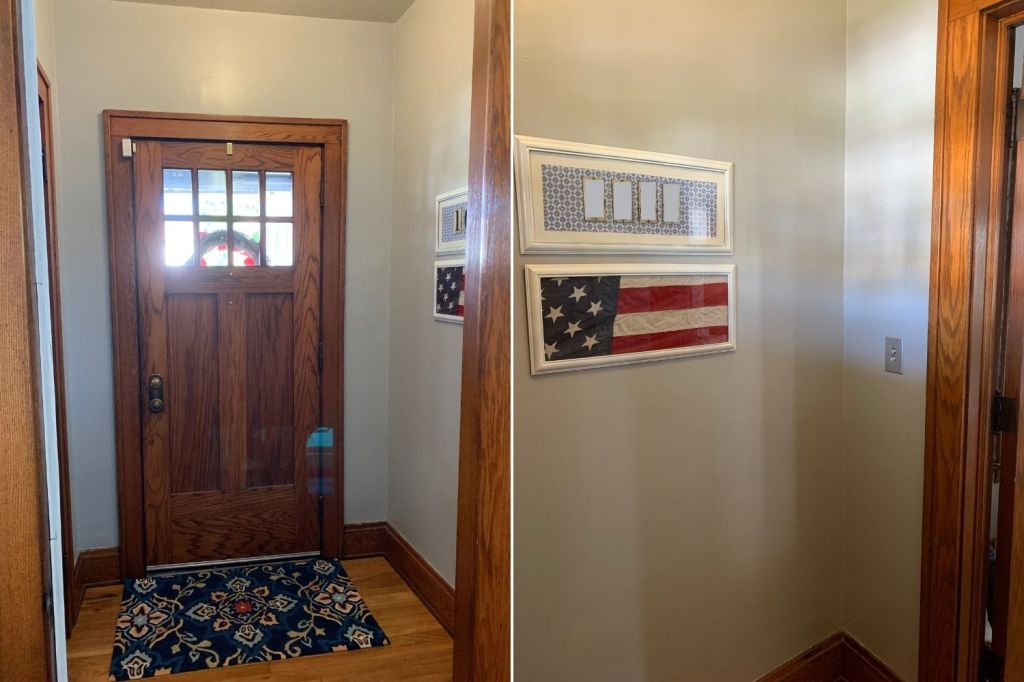
There isn’t a whole lot to say about the before except that we had painted her a grey-ish color along with the rest of the rooms on the main floor, added a rug and I did a fun little DIY with some souvenirs from our house – which I love, they’re in the process of being relocated as I type! We have the same original light fixture and that is about it. Take a look for yourself:

the makeover

Super boring, right?

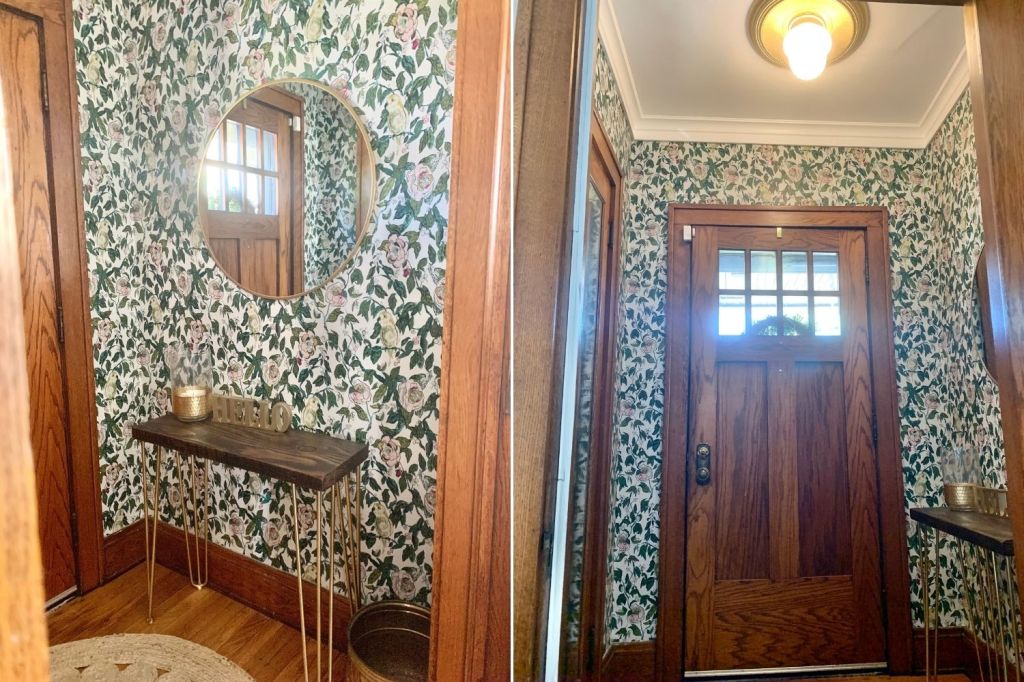
I had two wallpapers picked out; (1) would be a safe option, that would allow us to reuse the current decor and (2) something a bit more fun, glam and daring especially compared to most of my design choices. After consulting with B on both, we decided to go with Glam Option #2! This meant we would be adding in other finishing touches to really pull this space together. Once we had our pattern picked out, we estimated how many rolls of wallpaper we would need based on our small entryway space… welp! The wallpaper added up quickly in rolls and in price, but that was another reason I decided to pick Target, because the peel and stick paper is fairly affordable and decent enough quality compared to other options. We ended up needing four rolls of wallpaper, and used almost every inch.

Wallpapering this space was tough and definitely tested our patiences. We were quickly reminded that our 100-year old house walls are not straight, in addition to having a hell of a time doing the puzzle of making sure the patterns lined up perfectly, while also trying to get maximum coverage from each roll. We got as much of it to line up in long straight pieces as possible, but still had a lot of patching and matching to do. I would definitely suggest sticking to a straight wall for any first time wallpapering projects, especially if you aren’t good at puzzles or have a lot of patiences. We even accounted for starting a few inches from the ceiling in order to be able to get two sheets from one roll (ideally) — starting lower, we planned to add custom ($$) crown molding around the top, as she didn’t have any molding to begin with!

Let me just preference, this glammed up project quickly added up! The wallpaper alone was over $100 and then we probably put in over $100 with just the ceiling updates from the double layered molding to the ceiling medallion that we bought and then spray painted so it would have a pop of gold at the top! Finishing this molding and painting the ceiling, really makes the room look so much taller and bigger. B really did an amazing job repairing some cracks, patching them and then getting her looking like new again.

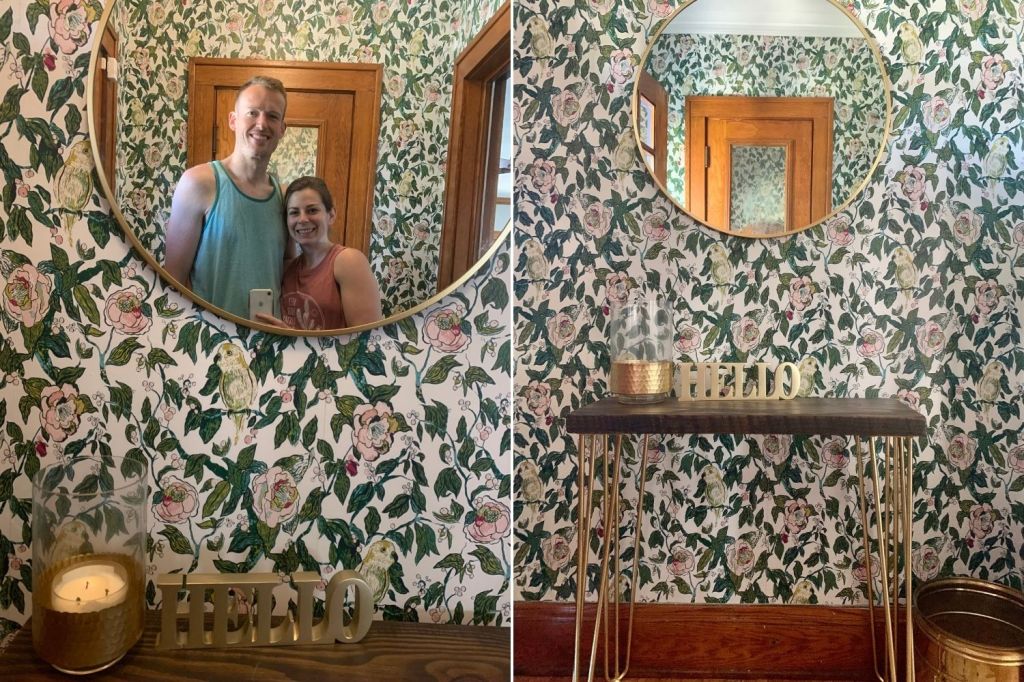
The side table was also another pain in the butt project, long story short – I was trying to not spend too much on legs for the wood top that we already had (thanks f&d) – and after failing with my “cheap” option, I ended up ordering these hairpin legs, which was the original more expensive option I was trying to avoid and then spray painted these beauties to go with the rest of the room. We also spray painted an old silver outlet cover, that again just pulls all the accents together and pops again this romantic wallpaper.

Now let’s talk finishing touches! The round gold mirror, definitely is the cherry on top — I really was resisting falling on the round mirror trend, but she just does this space so good. I shopped around and ended up finding mine at Home Sense it was the same brass/gold finish I was looking for, same 28″ shape, but $10 cheaper than Target! So if you’re looking for your own, shop around at those home stores for a little better deal. I also snagged that adorable ‘Hello’ gold table top sign at Home Sense, which IMO is just the perfect welcoming accessory to add to this awesome table. Finally, finding a rug that fit this space and warmed it up a bit was key – I ended up buying a few before ending up on this 4′ round woven rug. I’m sure I’ll be adding a few other details to cozy up the space.

Shop My Pieces: Canary Floral Wallpaper from Target / Ivory Woven Rug from Target / 28″ Brass Mirror / 20″ Ceiling Medallion

Even with this project snowballing over budget (even though there wasn’t a budget) and taking a little longer to finish up with some roadblocks — the space is such a little treasure. We get to enjoy it especially now as the weather continues to shift, we ever catch glimpses of the fun wallpaper pop from the living room or even dining room. Now anyone that comes over, will need to come through the front door to soak in all her glam and glory.

House Tour – Our Fall Front Porch

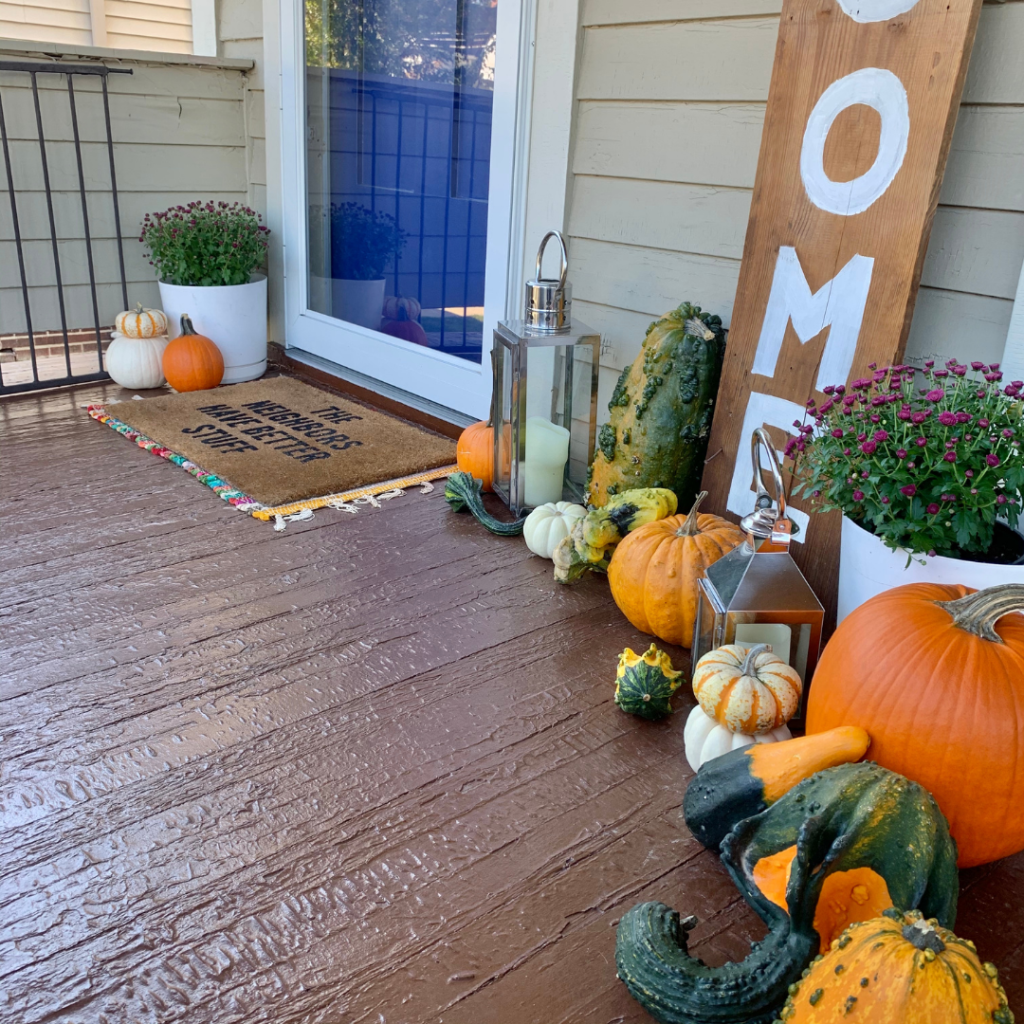
I love decorating our front porch for fall — it is so much fun for me, the colors are incredible the shapes are always different, and I always tend to go a little overboard, but still rein myself in. And because of the stunning floral hoop wreath that is adorning our front door, I definitely wanted to give her a supporting cast of more fall favorites.

As much as I love fall, the thing I love most about fall is the small pumpkin patches and farms I grew up going too. So, one thing, that I’m not sure I’ll ever get ok with, living in/near a city is the lack of traditional pumpkin patches and farms that I’ve known living in a rural farm town. Although we visited my parents earlier in the month, we didn’t get to make it to a pumpkin spot — so I headed to my go-to city spot and stocked up on pumpkins, mums and gourds – to avoid crowds or drive a bit farther out of town.

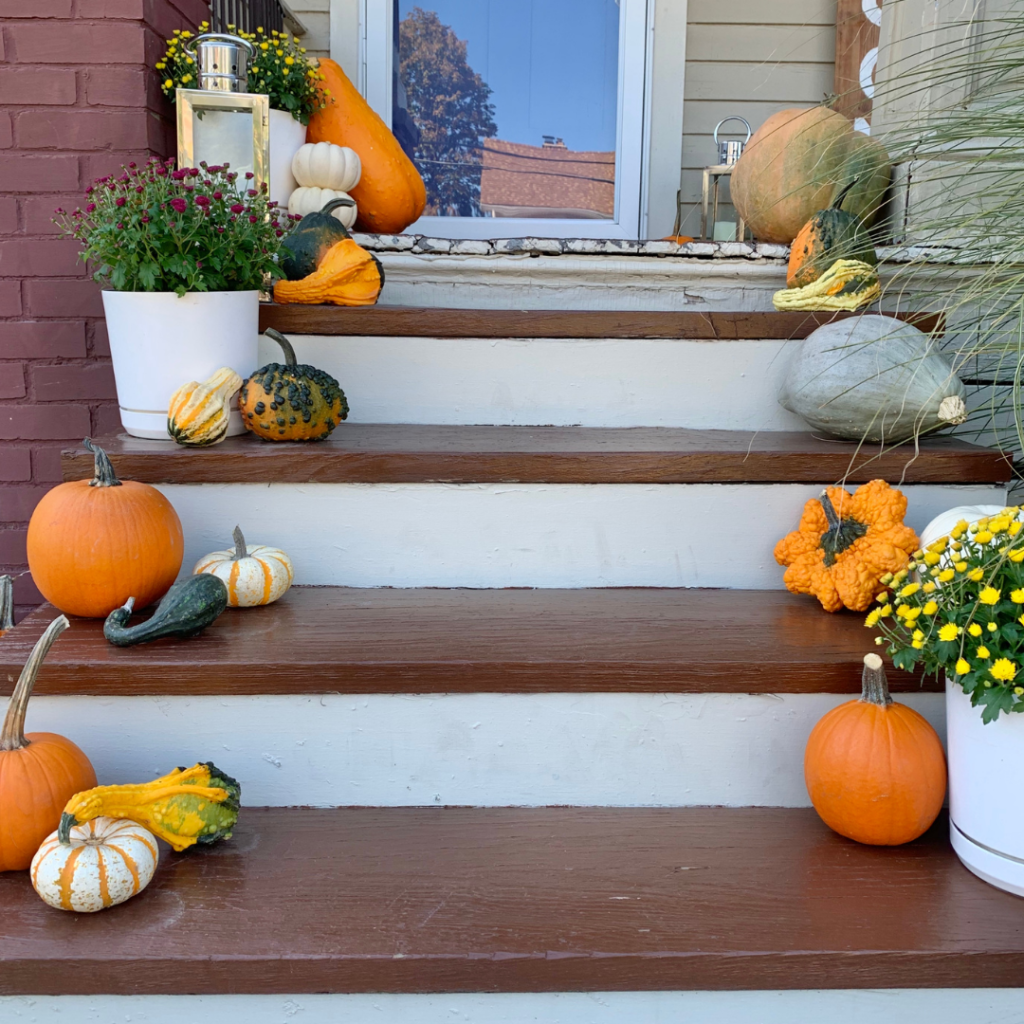
Besides creating a fun statement on our main front porch around our homemade wooden welcome sign — I also stacked up our steps with mums, pumpkins and even more gourds. If our mailbox wasn’t on our front porch, I would’ve considered doing a complete rainfall affect with all the pumpkins and gourds, but we have to be functional over here too!

The mums were a little smaller and not bloomed yet, from what they normally have been in years passed, but I like the mix of purple and yellow that I was able to get and place them in my white planters. And I even went back a second time after getting my main pieces in place for a few more gourds of all sizes to help finish off the look. I was hoping to grab a few more mums, but they were completely out!

I have fun stacking, layering and mixing up different shapes, colors and textures together with the different pumpkins and gourds, on the porch and along the steps. The colors of fall are truly magical, from the trees to the pumpkins — it is truly a beautiful time of the year, the trees around us are really showing off right now and it’s incredible.

House Tour: Spring Inspired Easter Table Decor

It’s April 1st! Flowers are starting to bloom and my peonies are budding out front — which means spring is coming! And the most spring filled holiday is just a few weeks away, Easter. So I wanted to share some inspiration for how you can create an easy, simple and sweet Easter tablescape with fresh blooms!  EasterDecor(4)-beelifeblog
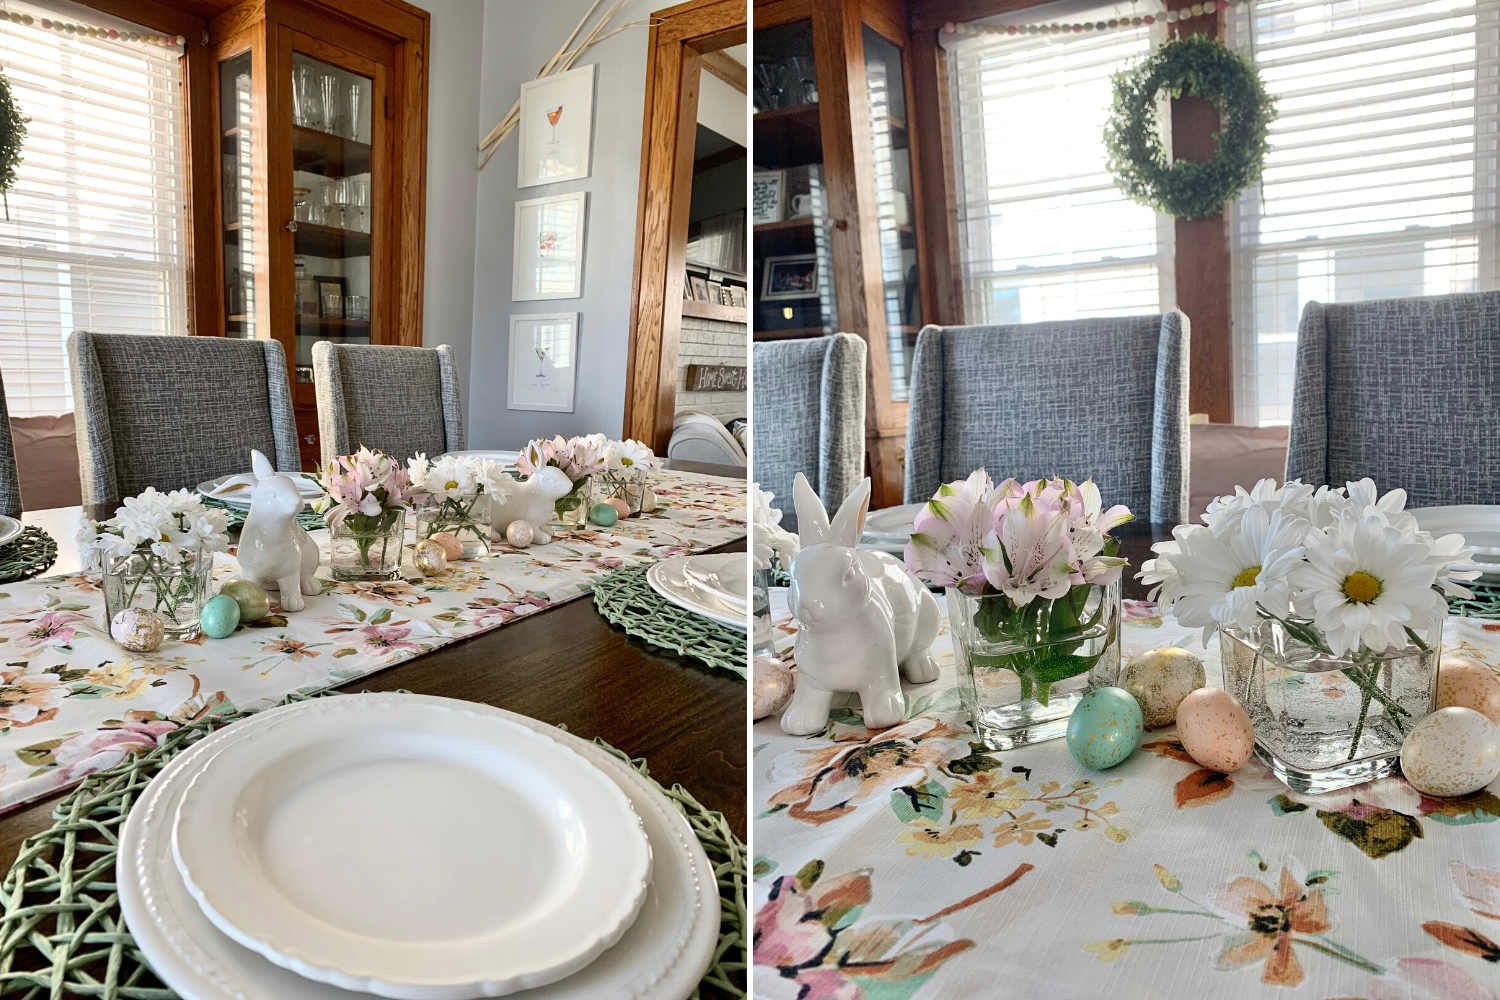
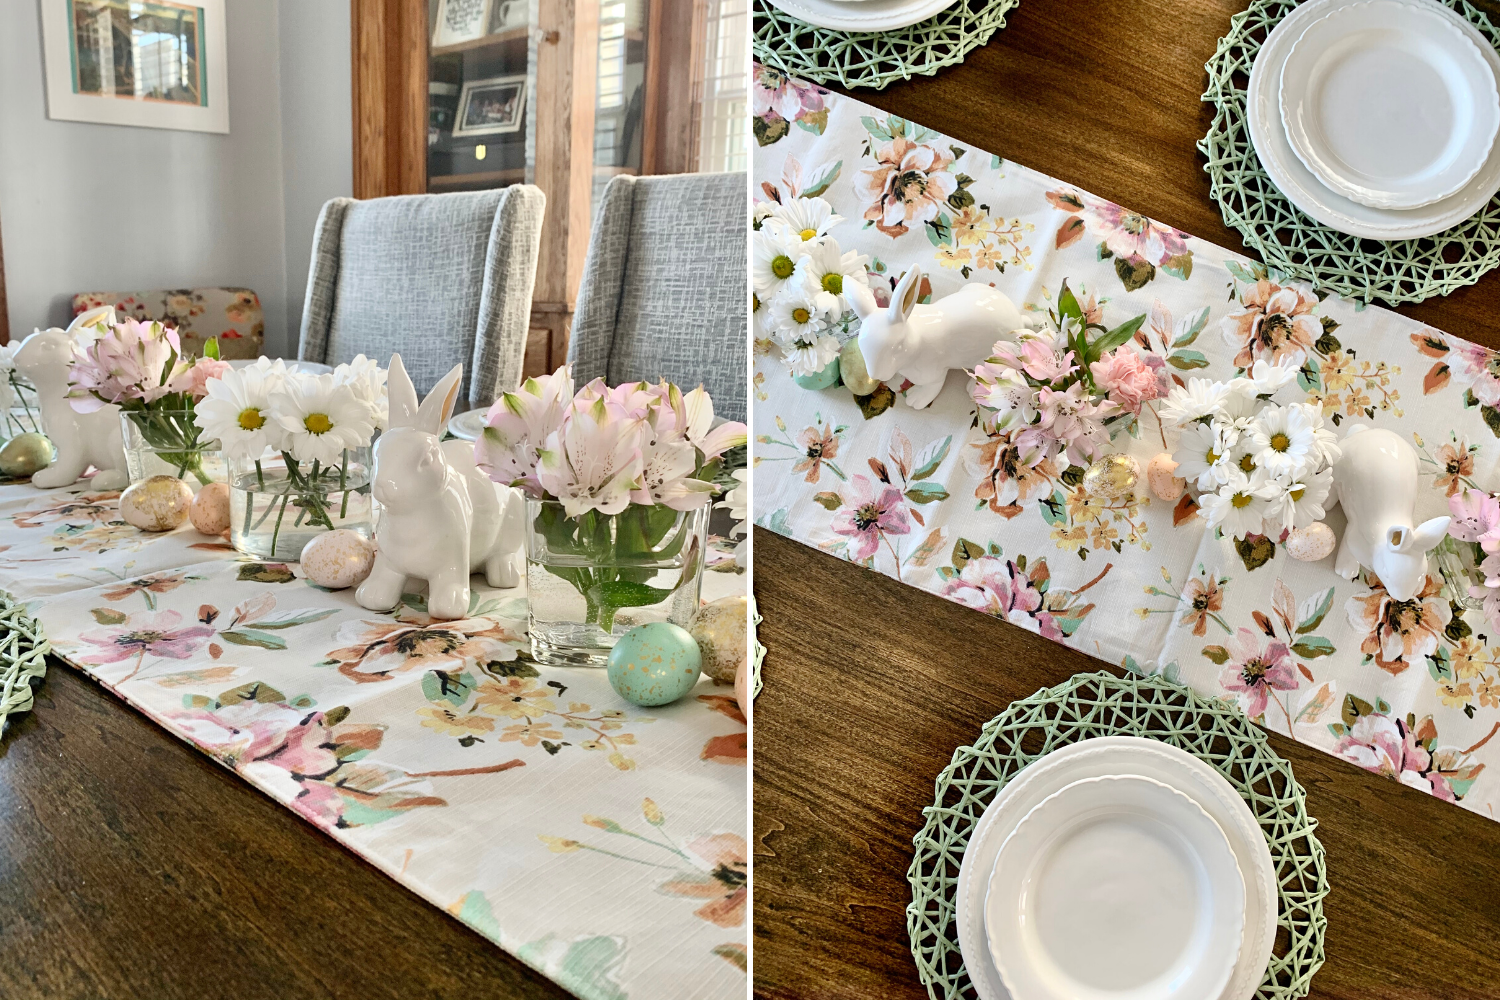
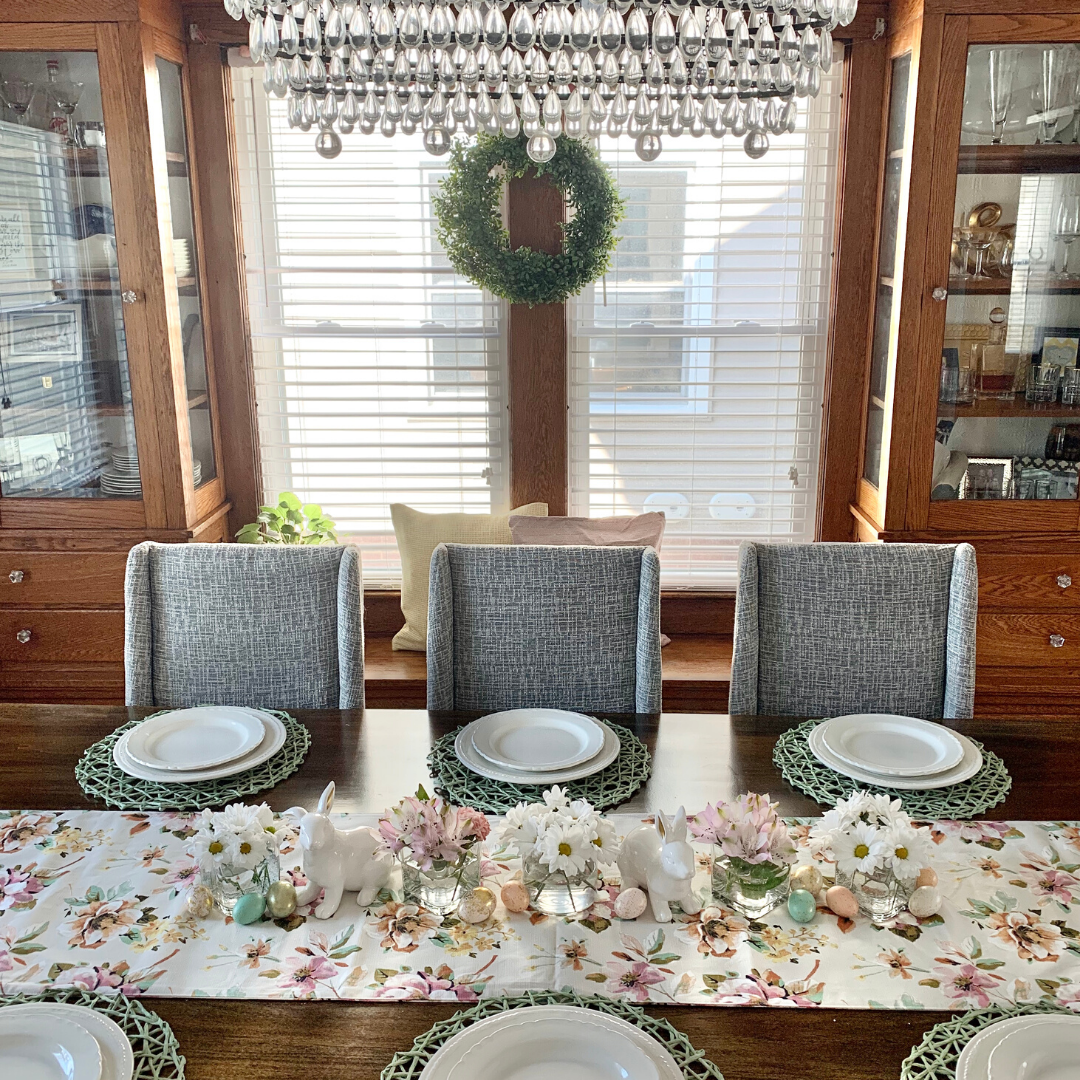
This spring inspired tablescape is made possible because I finally made my first trip to Home Sense in February and instantly fell in love with this muted floral table runner and these fun woven Cynthia Rowley placemats. I opted to use the green to help finish my Easter table look, but also grabbed them in a bright yellow because I loved both of the colors so much and could see them easily transitioning into the Summer. Not to mention they came in 8-packs for an affordable $7.99 each, can’t beat it in my opinion!

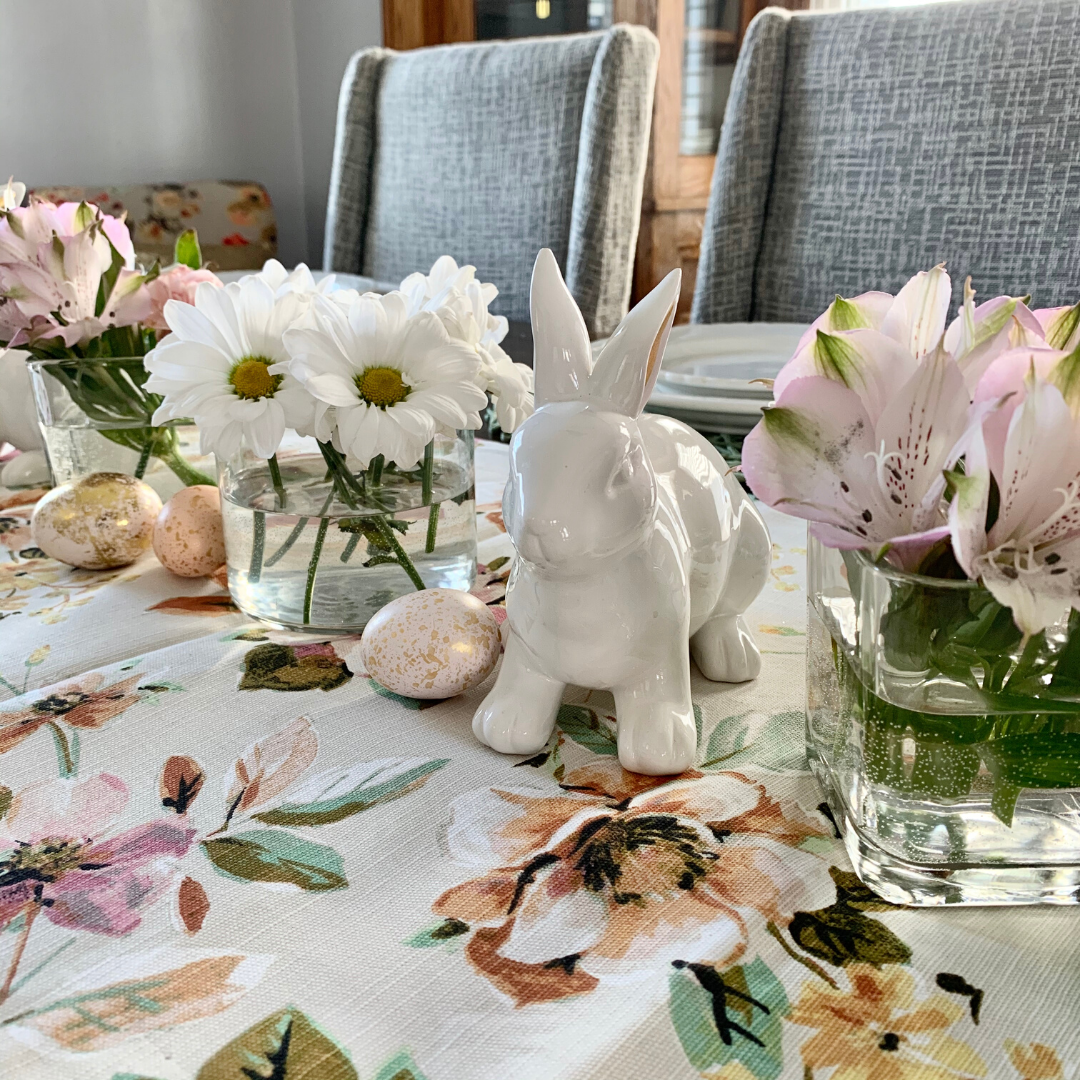
Once you have your base pieces figured out — it’s time to top off with your centerpiece. Putting together this easy centerpiece can be accomplished with simple vases from the Dollar Store (which I use for a lot of different things) and springtime blooms that can be grabbed in a bunch and split up and cut to make these cute arrangements. Try to get flowers that are a bit sturdier and live a bit longer. I then sprinkled gold foil eggs around the vases (here are some similar gold foil eggs I found) — if you don’t have eggs or want it to be a little less-Easter you can nix completely or sprinkle in a spring garland throughout our vases.  Lastly, I finished off the centerpiece by adding in a few of my white porcelain bunnies with gold ears – these were found in Target’s dollar bins the last few years. EasterDecor(2)-beelifeblog
EasterDecor(1)-beelifeblog
To help complete the rest of the room with a touch of Easter, I hung my go-to boxwood leaf wreath in between the windows. Side note: I think everyone should have a boxwood wreath or two, it’s great for spring, summer or just pop of green when the world is a little extra grey – here is an affordable one I found on Amazon for $20. I also love hanging a wreath in a little bit more unconventional space as it helps pull in the focal point of the room. I then hung my pastel egg garland over the window for a little extra pop of Easter. With uncertainty of how Easter is going to be this year, I definitely kept this year’s centerpiece simple, bright and full of spring. Last year we were hosting, so I went a little more over the top and full on Easter. So if you’re looking for something to make a bigger statement, check out last year’s Easter table decor.
EasterDecor(3)-beelifeblog
I’m not really sure what our plan for Easter is this year, whether we’ll be with family or staying home — either way, we’ve got a bright and cheerful focal point to enjoy for the rest of April, and I’m sure the flowers will get refreshed along the way with some more pops of color! Are you planning for Easter yet, or still trying to go with the flow of social-distancing?

bee (1)

DIY – Painted Valentine Table Runner

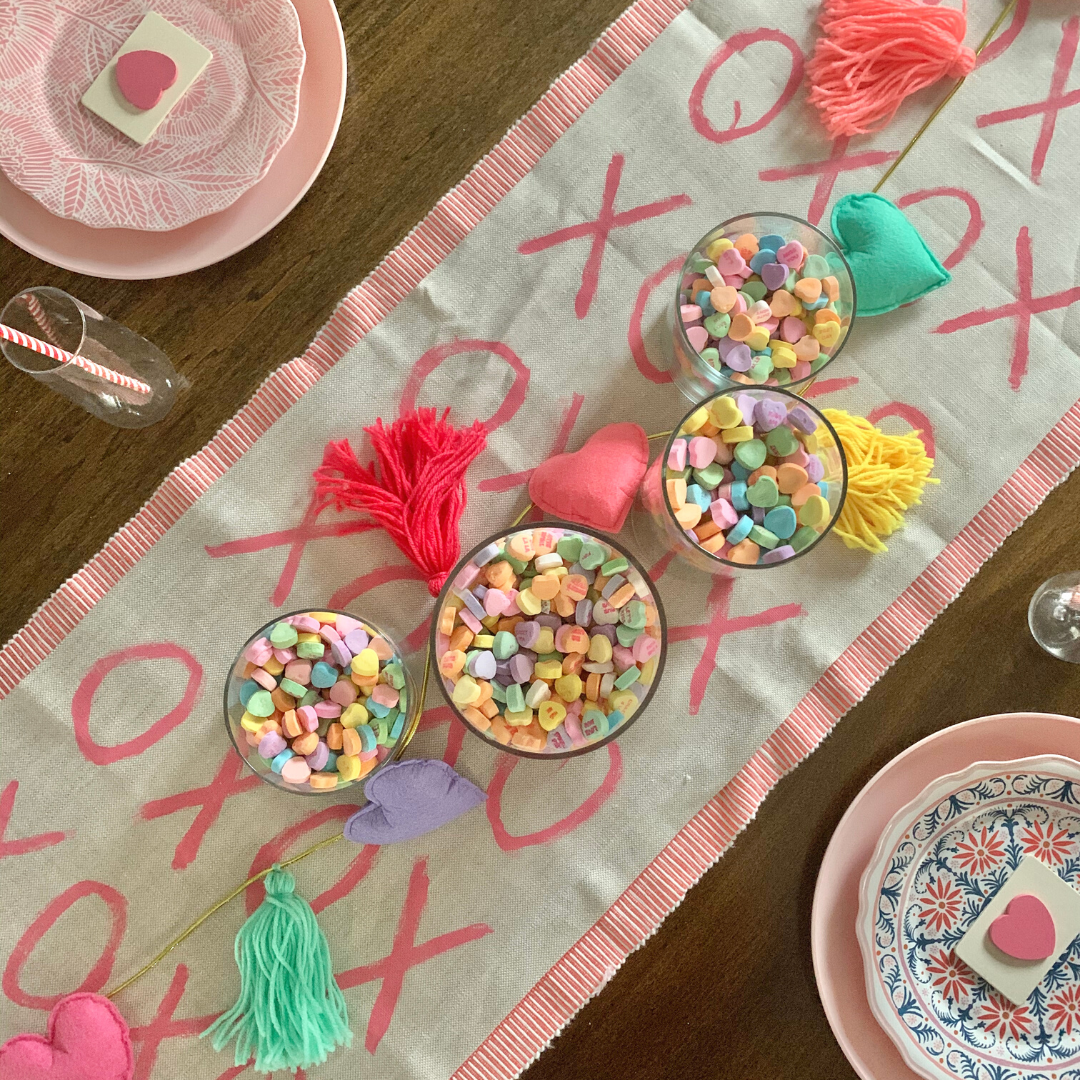
Ohhh, you guys!! This was a fun, easy and affordable craft and I just love how it turned out! This custom Valentine-inspired painted table runner is a spin on an everyday piece and not one that I really ever thought about making, at least one that didn’t involve buying fabric, sewing or investing a ton of time on. Read more to see my supply list, project cost and step-by-step for painting and creating your own X’s and O’s table runner, just in time for a Galentine’s brunch!
DIYTableRunner(3)Craft Supplies:
Off-white plain linen table runner from Amazon ($14.99)
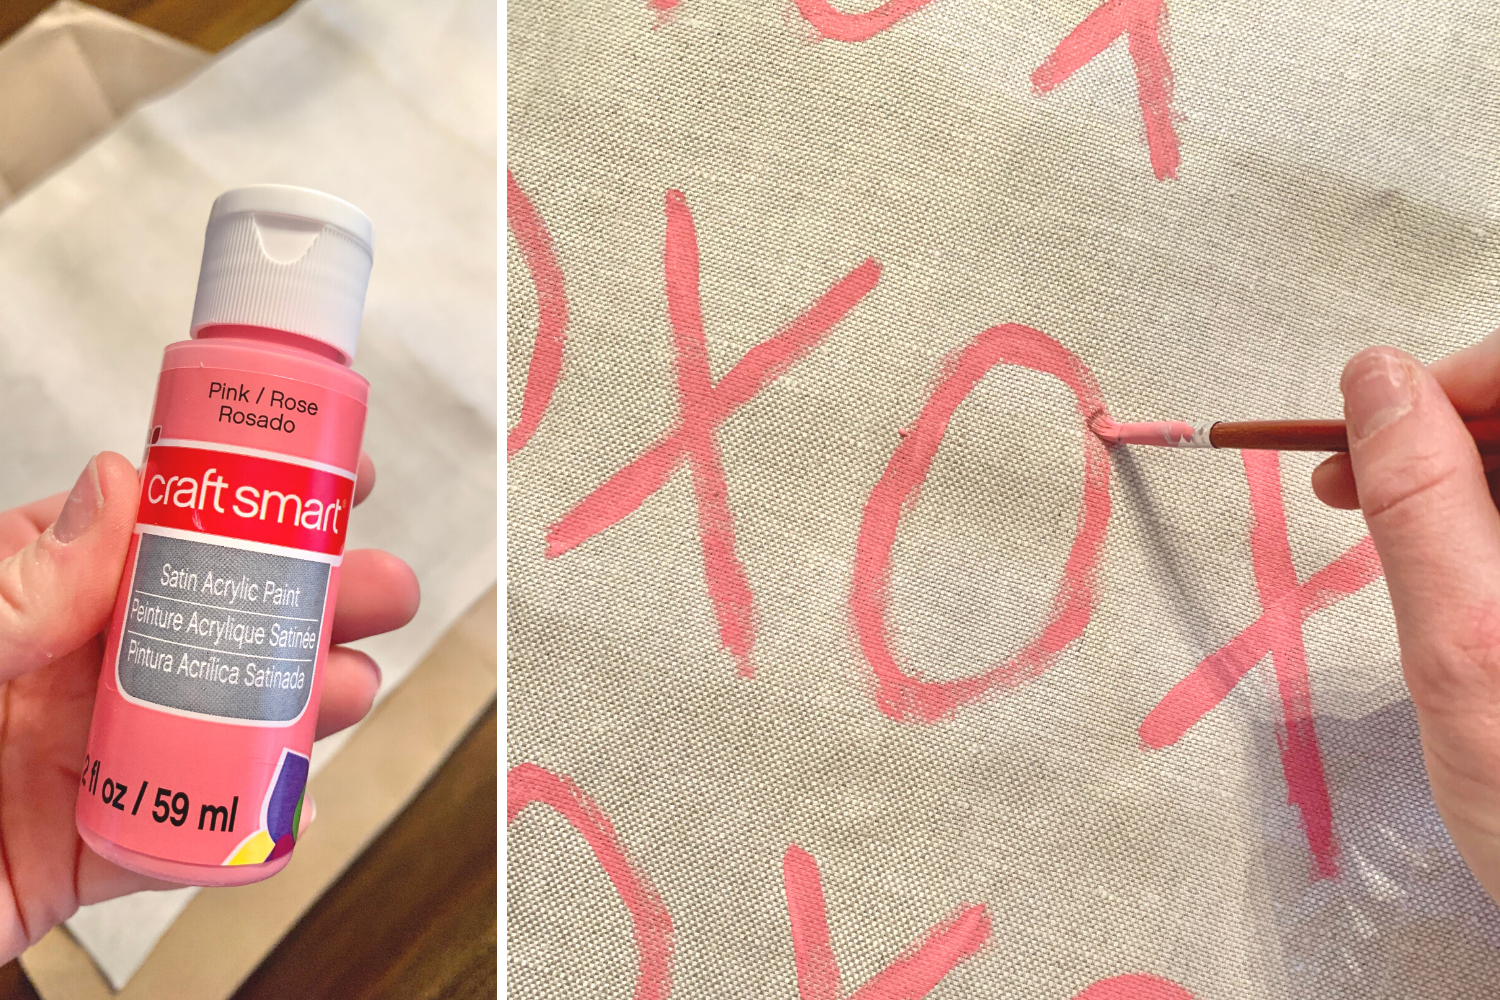
All purpose craft paint: Pink / Rose from Michael’s ($0.79 each)
– Smaller paint brush – I have this 7ct Paint Brush set from Target

Project Cost: $17
(not including paint brushes)

Step-by-Step:
1. I order my linen table runner from Amazon, there was a brief though to try and make my own with buying fabric – but I quickly saw that being a disaster. Two-day shipping and $14.99 on Amazon, sounded way better! I compromised on the size (14″ x 72″), as I like a wider table runner since we have a larger dining room table, but found a off-white linen that looked to be perfect.
DIYTableRunner(1)
2. Paint color was my toughest decision – I initially planned to do black, but thought red could be fun and then ultimately decided on a lighter pink as that worked better with dining home decor and I love how it turned out! Now to the fun stuff…
3. Before I got painted, I did have to iron my table runner to smooth out some of the fold marks! I didn’t get it as smooth as I would’ve liked, but it was much better than before – this was definitely needed before painting.
4. Get ready to paint! I put paper bags down in order to paint, and painted on my dining room table — which was a good feel for the space while I painted and scaling my X’s and O’s. Starting in the bottom corner I kept it simple and fit four across and repeated the pattern by alternating which letter I started with and worked my way towards the center.
Pro-tip: I eyed my spacing and letter size, but you could use a ruler to keep spacing even between lines and/or letter height!
DIYTableRunner(2)
5. Keep going until you finish up the length of your runner! Keep in mind as you’re painting if you mess up, or have brush strokes showing, it’s OK — it’s suppose to look hand drawn and painted which gives it a unique look. Besides, from a distance you can’t really see any of the imperfections.

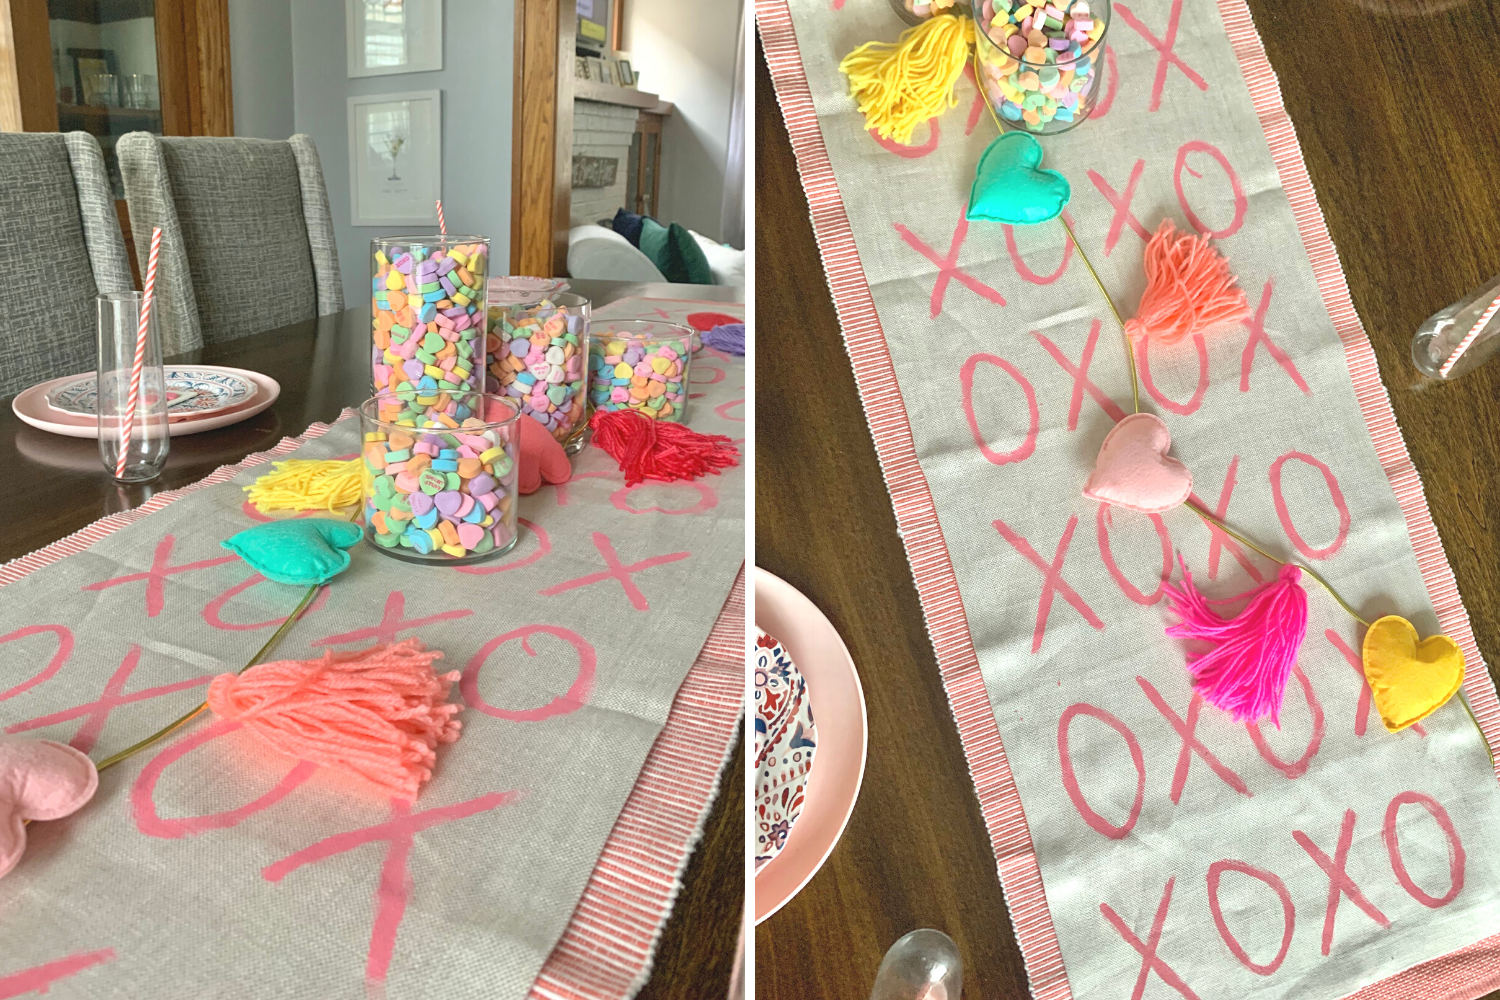
I let this dry overnight before styling this up! I had another pink table runner that was a little wider than mine, so I was able to layer underneath and the pinks complimented each other perfectly! I then added a few jars with conversation sweet heart candy, some fun colorful garland, this table was just needing a few finishing touches for a Galentine’s brunch!

Besides just completely loving how this came out (slightly obsessed!) — the price can’t be beat for a custom piece that fits EXACTLY what you were wanting.  $16 is about the going rate, if not more for you’re every day or holiday themed table runner, so I imagine I’ll be doing this in the future for more holidays or special occasions! Plus it only took me about 45-minutes to iron and paint.

What do you think!?

bee (1)

House Tour: Our 5 Favorite Projects to Celebrate 5-Years in our Home

This week marks our 5-year house anniversary! It’s sort of funny and crazy to think we’ve lived in our house for 5-years, because when we were looking our realtor and even friends buying houses at the time were saying “this could be your 5-year house.” Well… when B and I were searching for homes, we were considering something that could live with us for awhile. So to have a little fun with this post, I sat down with B and we chatted through our favorite house projects!

His #1: Attic Renovation – This was a space that when we first moved in we weren’t using so when we finished it, it opened up so much space on our second floor. Not to mention we use this room everyday since it’s our master suite! This project was our first big project and took longer than we wanted but we did 90% of it so it was really cool.

Hers #1: Basement Living & Bathroom – This is my number one because it was a space that I never had any plans or expectations for, especially within the first 5-years. I basically wrote this space off as basement storage. But once the vision, planning and work started and we starting seeing the potential of this space it was a really incredible feeling. Especially creating two new function spaces on top of maintaing storage and laundry, this makeover just pushed everything over the top!

His #2: Back Patio (he thinks) … haha B said it’s fun to entertain and have a space outside especially in the spring/summer months. It’s the perfect spot for weekend afternoons, late nights with friends or family or even just the two of us.

Hers #2: Our Dining Room – this was the first room that really came together and we actually had furniture for.  Once we figured out paint and had the chandelier put in, it was like one of those moments like ‘Wow we have a dining room.’ We also designed and finished our dining room table, so it’s a custom piece for us. I wanted this room to be a space where everyone could gather around this huge table and when those moments come true I just want to pinch myself.

His #3: Basement Bathroom –  B said it was tough to nail down why but said he thinks it’s because it’s functional for when we have overnight and weekend guests are over. B said he also likes how I really took over with the design and vision of the space that we actually made happen.  This was also a project that we did 90% on our own, and the satisfaction after finishing one of those is indescribable.

Hers #3: Attic Renovation – This project will always be special to me, because it also holds a lot of memories around when B and I got engaged!  We had actually spent all afternoon working late to get a lot of it wrapped up before he proposed. This space was always planned to be our master and it definitely came out way better than I think both of us imagined and like B said it was our first big project that he really tackled and he really did like 90% of all of it – I was totally impressed!

His & Hers #4: Front Landscape – This project just gave our house a complete transformation and added so much curb appeal.  Our front was always pretty much a blank canvas that we always had plans for, but just never had the time or full commitment to figure out the design, plants and getting the job done.  It was also a project that was on our house project to-do list every year since we moved in and we finally finished it up last summer.  Once we finished we were both blown away, and our plants all came back year 2, wooo!

His #5: Floating Shelves in the Office – We were trying to remember, but this was definitely one of the first DIY projects we tackled together (without having any of the right tools or experience). So B said; “this was the start of everything and we’ve learned so much but also knew of all the bigger and better projects that were to come after this.”

Hers #5: Back Patio – This was a project that I didn’t have prioritized to get done when we did it, as it was definitely something B wanted done more than me.  So after some discussion, compromise and design considerations, we pulled the trigger.  It’s a massive space and it’s really like having another living and dining room outside during the warm months – we truly live back here in the summer! We also splurge on furniture that is modern, functional and classic that really makes the space.

We are lucky that we both enjoy working on house projects to transform and continually make this century home ours, while still enhancing all of it’s beautiful charm.  We still have a few other big projects that we want to do at the house, with the big one being our kitchen — although we talk about it every year, so we will see when we can actually turn it into fruition!

bee (1)

Want to see more from our house? Check out these links: Office Tour | Our Living Room | Basement Bathroom | Basement Living Room | Our Sunroom | Guest Room Makeover

Easy Wall Decor Upgrade for $30

Our favorite, homey guest room needed a little upgrade.  This one larger wall space, that had a half finished gallery wall that was honestly just thrown together…  It just wasn’t working. I had switched out a few frames – added a few and then slowly started deconstructing it.  As you can see in the only before picture I have below it was a little sad looking. So, I had been thinking about what to do with this wall, how to incorporate a few photos still – but also wanting to simplify the space.

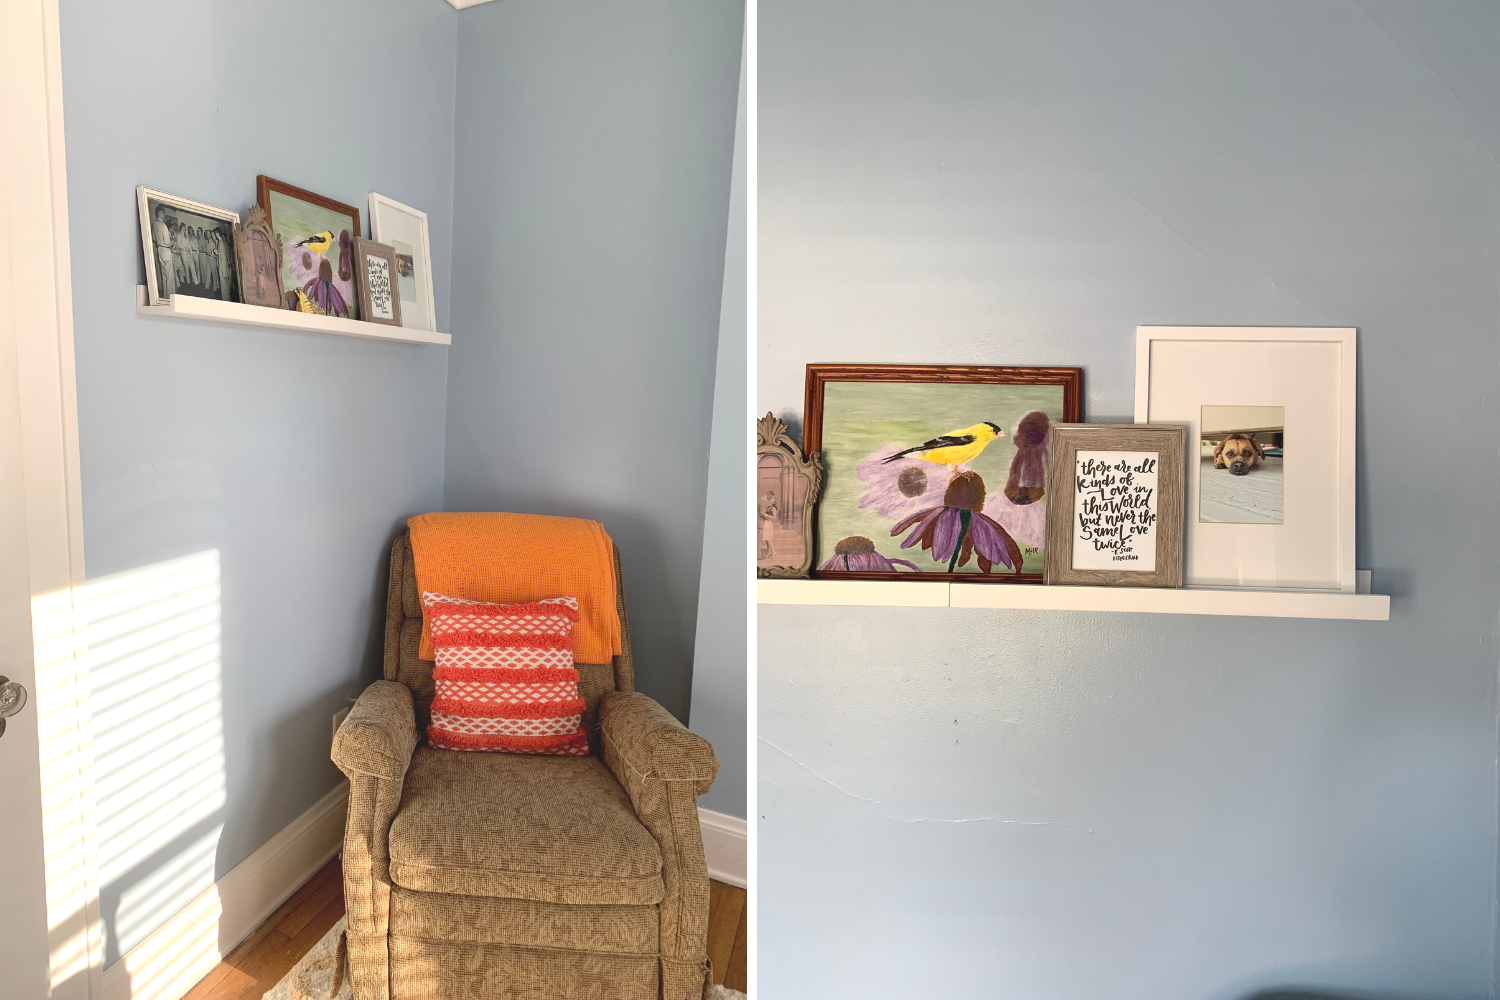
I started looking into a few DIYs around picture ledge shelves and considered the time, money and effort it would take into making one, and I didn’t necessarily love how you would have to hang the DIY ledges either.  So I popped on my trusty Target App and found these 23″ x 4″ White Picture Ledge Shelves – they were even 10% off at the time! The price was reasonable and the color and style was just what I was looking for.  Based on the space of my wall, I ended up getting two shelves to create one long ledge vs. stacking as many of them are styled.

The install was easy, with a hanging template included – we were able to secure the screws and hang the shelves (and by we I should really say B!) within 30-40 minutes.  Creating one long shelf with the two, the space was instantly cleaned up and transformed.  Plus these wall shelves, allow for endless ways of customization and easy to switch up frames, photos, styles based on the season or as the room changes! The only thing I will say about the shelves is they’re pretty fragile and got dinged easily, the corners were a little rough, we checked these out before purchasing at the store.
Wall Decor - thebeelife(1)After styling with my grandma’s gold finch painting and a few other sized photos it was exactly what this space needed.  I’m sure this will change a few more times, but for now it’s more finished, polished and still helps fill a big empty space! And the best part is it was affordable and minimum effort to give this space a little upgrade.  What do you guys think?

bee (1)