House Tour: Back Patio 2.0

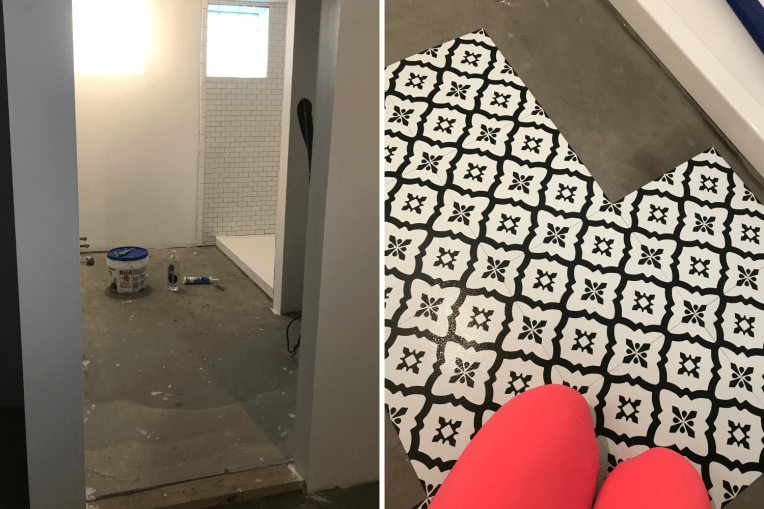
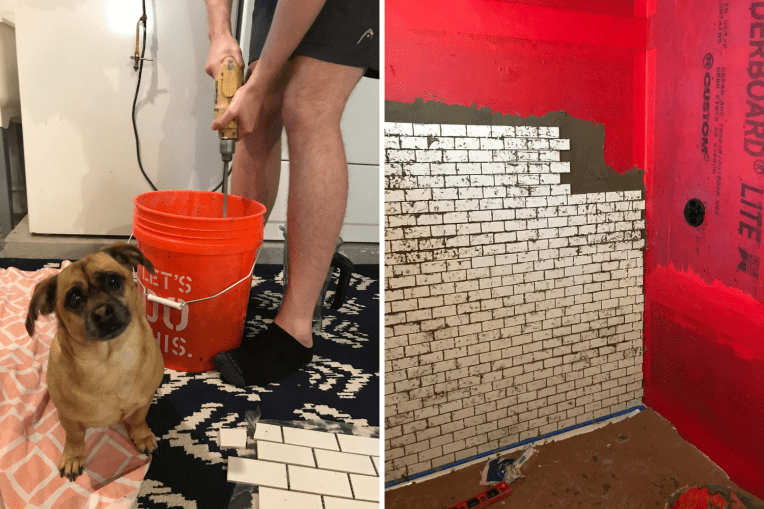
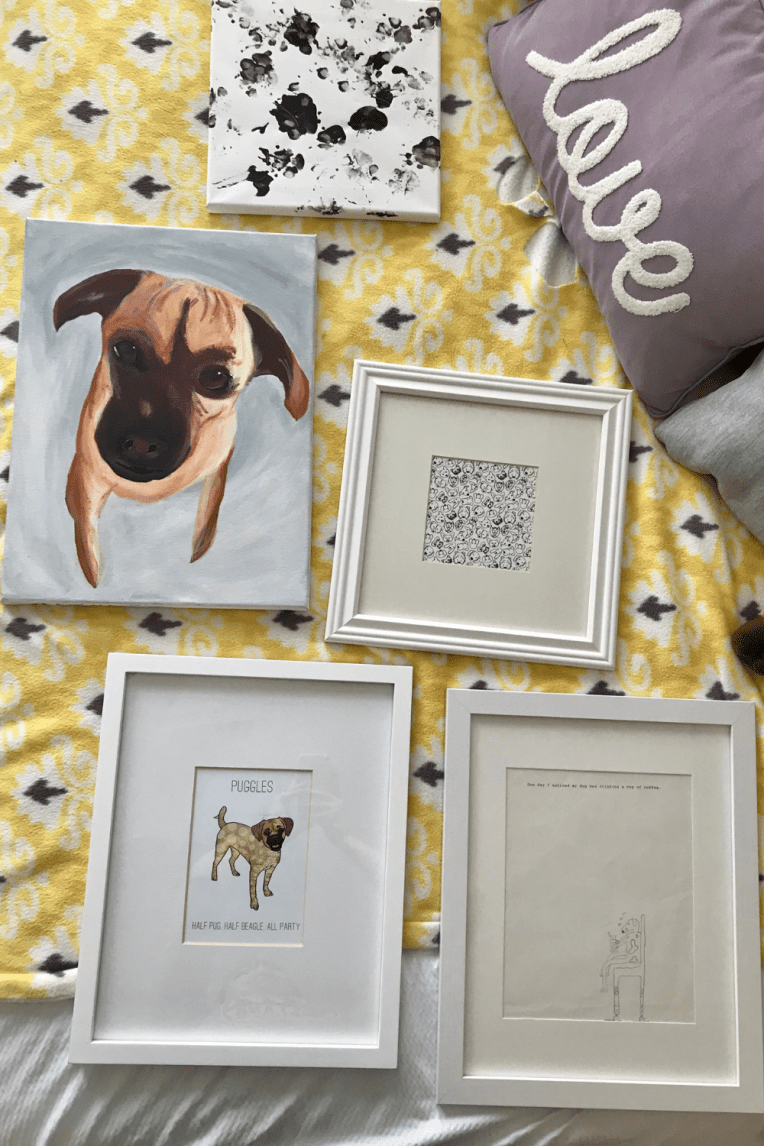
In my July latest obsessions, I was gushing over our outdoor living space and back patio. Well it’s been two years since we first created this space and shared the initial reveal – but I don’t believe I ever shared the before pictures *shocked face* so on this house tour, I’m going to share a few befores of the space and where it is today.  Every year it changes a little bit – last year we added more furniture for company, the plants and greenery change each year, and the bistro light pattern gets mixed up too. This year we even rotated the dining table, I know – HUGE changes. *teasing*

The Furniture: We still love the furniture we got from Target and always keep our eye on the summer sales to see if there are any new pieces we want, or if we are ready to upgrade the dining set with one that matches our furniture. I was tempted, B however was not on board after he saw the price (boo!) – B has ulterior motives and wants the Fernhill Metal sofa, so that he can fit more comfortable for afternoon naps.  We also want to get another umbrella to have for our seating area, as the afternoons around 3-4pm is prime sunshine time, so it gets pretty toasty (and a little unbearable to be honest) which will be functional and pretty.

Color Scheme:  I’ve tried to stick pretty close to black and white to compliment the patio furniture – and I am sure you’re thinking, white cushions for outside?! They’ve lasted pretty great and came with Scotch Guard on them, and I recently learned you can buy Scotch Guard and reapply annually, so these beauties are getting a fresh coat so they can last! I’ve added in pops of green this year with the fun banana leave Tommy Bahama pillows from TJMaxx online (which are 50% off from what I got them for!). And splurge on the black and white pillows and chair cushions for the dining area last summer time.
House Tour - Patio (1)
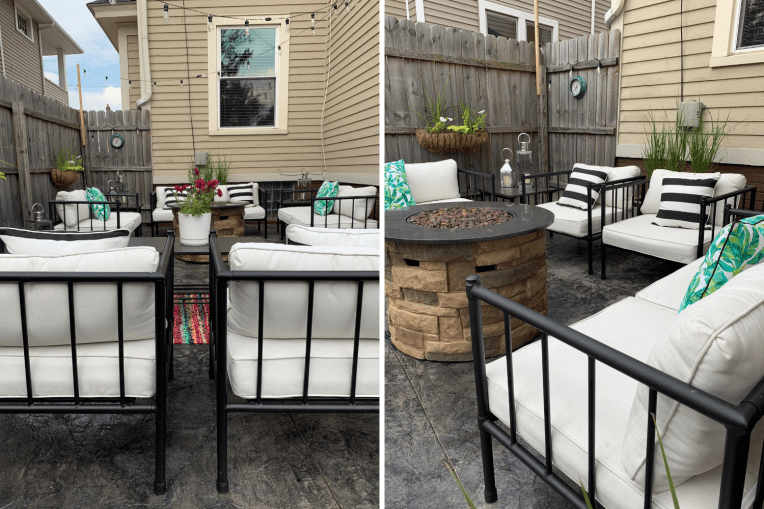
Stamped Concrete: When we were discussing our patio, we were gun-hoe on pavers, but after research in materials and then even discussing with family friends that pavers didn’t hold up as well. So we started looking more into stamped concrete and determined that was a more sustainable investment for our space, plus we had a little more customization options – we were super happy with the way it came out!

Gas Fireplace: This was another must-have on my list, as I HATE the smell of bon fires and smelling like them at the end of the night — this is the perfect central spot for heat, roasting marshmallows or even just a drink holder when the fire isn’t on. We didn’t want anything too big and something a bit more natural looking.  I also love the lanterns scattered throughout the space to give it a homey feel – especially at night it has quite the ambiance.

House Tour - Patio (4)
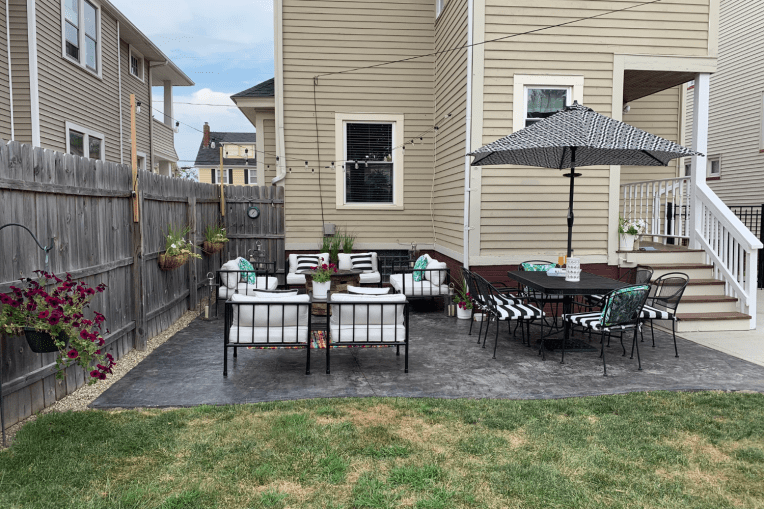
We were able to completely transform a somewhat awkward nook and blank space in our backyard to a functional outdoor living space with living and dining space. It gives us the right amount of privacy, while still being open to the rest of the backyard.  Eventually we want to close off the small back porch to be all kitchen and would put a sliding door in where the window is in that back nook area – yes always planning for the next project.

bee (1)

House Tour: Bathroom Remodel

Are you ready to see our bathroom remodel? It’s finally time to share a tour of the transformed space – which honestly came out amazing – especially for B and I doing 80% of the work! This was part of our basement makeover and gives our basement a completely new livable space.
Bathroom(4) - the bee life
Continue reading

Easy Home Decor: One Banner, Three Ways

It’s no secret I love being festive for the various holidays that come throughout the year – and during the summer that is no exception, except I’m a little lazier and lean on the American flag to help get me through from Memorial Day to Fourth of July to Labor Day.  Last year I scored some discounted American flag banners and have had fun using them differently throughout the year to help mix-up my indoor and outdoor decor.

I wanted to share some inspiration on how you can use one banner three different ways throughout your home to help switch up your decor each year/holiday without needing to buy more pieces!  A banner and even a wreath is a classic piece that can be mixed up and hung in conventional and nonconventional places…

Front Porch: For some added red-white-blue love, I hung these banners across the front of our front porch railing. This is a little pop to accent our American flag and front door decor especially through our front landscape. Disclaimer – I do have two of these banners, so this is the only spot where I felt like one banner just didn’t cut it based on the length of the porch rail.

Continue reading

House Tour: Basement Makeover Reveal

Last August we were game planning and getting ready to give our drab basement a little makeover to be more functional from a storage perspective, while also creating additional living space with a unfinished-finished room.  Our game plan for our basement (and some gross before pictures) started relatively simple and functional – I also had some ulterior motives to have the extra space prepped for B’s surprise party.  So from that perspective, I was trying to keep it simple and low budget – but that didn’t stick!
Basement Makeover - the bee life(2)
Continue reading

How To: Install Vinyl Flooring

As we were getting ready for our bathroom project and pricing out various materials and finishes, we quickly saw the dollar signs as we wanted a completely tiled shower stall and initially wanted a tiled floor.  In addition to the dollar signs, time, effort and labor came into account and as I found slightly more affordable vinyl adhesive flooring options – that also had great patterns – it quickly rose to the top as a realistic option for this space.
How To Vinyl Floor - the bee life (1)
In addition to being more affordable than ceramic tile, vinyl flooring has other benefits like it’s highly resistant, it’s easy to install and low maintenance. Which is exactly the perfect mix of things we needed for this bathroom floor space! It really ended up being a no brainer – so let’s breakdown what you’ll need and how to install your own vinyl floor!

Continue reading

Latest Obsessions 05.19 – Desert Inspired Decor

With our bathroom remodel coming close to an official wrap – the final decor is coming into play and I’ve been having fun by adding in some desert flair, inspired by our trips out to Palm Springs. Which, btw totally has me in vacay mode dreaming of days by the pool and nights dining at trendy restaurants with delicious food (yes I’m watching flights).  So the goal has been to make our bathroom feel like a desert resort – pulling in the all the things we love about PSP.

What I especially love about PSP decor are all the pops of color paired with modern and simplistic lines.  Not to mention, gold!  Channeling some desert inspired decor has allowed our black and while foundation hold strong while building upon those simpler design picks.  And although we’re pulling ours into our bathroom, I couldn’t help but be inspired by some other Palm Springs inspired mod decor, both simple and bold.
Latest Obsessions - PSP - the bee life (2)
Easy Ways to Bring in Palm Springs to Your Decor:

Faux Plants & Succulents: A few years ago finding good faux plants was a bit hard without spending an arm and a leg – today, you can still spend an arm and a leg for a fun faux cactus (I almost did) – or you can get a little creative and pull in a variety of faux stems and plants into the space.  We ended up creating a fun statement and pop of color with these 40″ Monstera Leaf Stem from Target and 41″ Red Ginger Flower Stem from Target. We found the clean vase at Home Goods, but I was also hemming and hahing about the basket route.  I’ll also continue to pull in smaller faux plants throughout the space for more colors and lush feel, also since we don’t have a ton of natural light this is an easy way to bring a little life into the space.

Continue reading

4 Things I Wish We Knew Before Tiling Our Shower

With our bathroom project coming to a close – I wanted to share a few of our trials and tribulations, specifically from tiling our entire shower from floor to ceiling.  Tiling the shower was never something we didn’t feel confident doing – we had successfully accomplished a smaller tiling project a few years prior, so how hard could this be? *smiles*
Tiling Lessons - the bee life (1)
To preface, we did extensive research and YouTube how-to video watching and there were definitely a few steps that these DIYers seemed to leave out of their tiling videos that sort of killed us, from a timing and extra work perspective. Also – a lot of DIYers were using individual tiles vs. the sheets, so I couldn’t gauge if we needed to do anything special or not!

What I Wish We Would’ve Known

(1) Over Estimating Tile Purchase by 10%  Soooo this was something I’d seen on the inter webs, but not something we accounted for – this involved us having to run out and buy a couple more boxes of tile, while we were mid-way in the tiling game. This meant extra money we weren’t planning on spending. Not to mention a few of the boxes we’d purchased included broken tile sheets – so we were able to exchange/return others we worked with. We also hadn’t accounted for ceiling tile – so this was something we also had to pick out and purchase while we were prepping for this project.

Continue reading

DIY – Floating Rectangular Wall Shelves

For our bathroom project we have an ugly door above our toilet that is access to a crawl space area that we don’t use, but might need to access so we couldn’t do anything too permanent. So in addition to painting this ugly door white, we wanted to hide it a little more, I knew I wanted to put some sort of shelf in that area, but I couldn’t decide how many, what kind or finding the perfect pre-made piece that fit.
DIY - Shelf - the bee life (3)
That is when I spotted some beautiful old wood we had in our garage and I was inspired to build our own rectangular floating wall shelf to help cover it up while also bringing in some natural wood feel into the space.  Since these pieces of wood were just shy of 4-feet they would work perfectly for the space. Here is how I built our shelf – you’ll need minimum materials, especially if you have your own scrap wood lying around!

What You’ll Need:
– Wood Glue
– Miter Saw
– Nail Gun + Nails
– Wood Boards
– L brackets for hanging + Screws

Step-by-Step:
1. Measure your space & determine the size of your shelf, I wanted it to be a bit oversized the crawl space door area, but didn’t want it to be too tall. So I went with 3-feet in length and then about 8-inches high including the thickness of the main shelfs.
2. Measure and draw lines and cut your pieces of wood for your main top and bottom shelves with the miter saw.
3. Determine and measure your in-between pieces and cut appropriately with the miter saw. You should have all your pieces cut! Two long top and bottom pieces and then two smaller side pieces that will fit in between the longer pieces, connecting them!
4. Add wood glue to your in-between pieces and attach the top with your in-between with a nail gun.  You may need a helper to hold the pieces in place while one staples, be sure to staple along the length of your board. Continue this for all four corners, be sure to wipe any excess glue after stapling the pieces together.
5. Let your piece dry before moving forward with adding the L brackets and hanging. Sand any rough edges, paint or stain if necessary based on your aesthetic.
Pro-tip: Make sure the screws going into the shelf aren’t longer than the board thickness!
6.  Determine spacing based on wall studs and add the L brackets to the inside of the top of the shelf and then drill into the wall with screws (this is probably a two person job!). We will be painting the metal part touching the wall – although once filled up with towels you can’t even tell!
7. Now for the fun part – adding the finishing touches and add your finishes!
DIY - Shelf - the bee life (5)
I’m so excited to be adding in finishing touches to our bathroom space – and as you can see you’re getting a bit of sneak peak of the space, but mainly the showstopper (that floor!) We still have small finishing touches to do around the room, like the crawl space door we’re trying to hide, we still need to cover up that heating pipe entrance – plus I’m sure I’ll be getting some different accents to put on top of the shelf.

Price Breakdown:
So the obnoxious part of this (for you, not me!), is the cost of this project was $0. The wood for the shelves we got from my sister in-law’s house, because I knew I would have a good project pop up to use them with!  Everything else was around the house – but pending the wood, you can get the Wood Glue for about $3, L-brackets for about $5, and screws for anywhere from .30 – .50 cents each. Meaning you could make this shelf for about $10-15.
DIY - Shelf - the bee life (4)
Since a lot of our bathroom is white with the black pops of black in the floor, I love the addition of natural wood, we have another finishing piece to help tie into this vibe that we have yet to do as well – so the big reveal will have to be a bit delayed still.  But I’ll be sharing some of our project woes, lessons learned to help you prevent the same mistakes on your upcoming projects!

bee (1)

How to: Create an Off-Centered Gallery Wall

Everyone has seen a bunch of how-to’s and pro-tips on how to hang your standard proportional gallery wall with matching frames – don’t get me wrong, I love a perfect gallery wall, we have one as our main focal point in our living room. But I was recently inspired in one of our guest rooms – formerly our master – to do a fun little off-centered gallery wall around another photo we had hanging.
Off Centered Gallery Wall - the bee life (3)
What inspired this was a few things: B and I went to a Paint Your Pup canvas painting class so we took home two awesome portraits of our sweet Moz – but didn’t have a great place to hang them, I mean I try and keep the dog portraits throughout the house to a minimum. *smiles* But this was just sitting on the wayside, so I had the idea of expanding and making a little Moz-dog themed gallery wall based on other art prints we had around the house and some more original artwork! Once you have your art pieces picked out and framed it’s time to start hanging them!

What You’ll Need:
At least 6-framed pieces of art, I kept all my frames white for a uniformed looked
– Hammer
– Nails and picture hanger hooks

Step-by-Step:

  1. Determine your focal point – Once you have your focal point established, you’ll want to build off from here and building parallel working to the left and going up and down.
  2. Pick your lowest point – From the focal point, it’s time to work down to determine the lowest point – be sure to play around with placement before committing even as you work through these steps – see how they work before fully committing.
  3. Start working to the left, to the left – Working in that parallel pattern I next wanted to work up and to the left from my focal point and I chose the canvas so I could build around it with other frames and mix up the types of art.
  4. Work down! Since I had four larger 11×14 // 8×10 prints and frames creating a  diamond shape rectangle
  5. Build your final row. Repeat the process with your final row – my last two pieces were smaller squares which was a nice way to finish off  and work from large pieces to smaller.
  6. Last piece to the puzzle.  I put the canvas on the lower part of the third row so that the canvas’ were away from each other – playing around with them next to each other didn’t work out, but I love having two of those to mix in, they work since they’re different shapes.

Off Centered Gallery Wall - the bee life (1)
5
How to pick your art? Choosing a theme or topic can be a good starting point for you to stay focused – even if it’s vintage photos, places you’ve been on vacation, or a mix of photography and inspiration words. I had almost all of our art pieces around the house: one is an old drawing B’s made from grade school (of a dog!) the other is a fun Puggle print I got off Etsy.  The second square canvas was a DIY print that Moz made with her paw prints and then the other square print is a fun dog collage illustration from Society6. Which, btw, Society6 has a great variety of prints if you’re looking for so unique pieces.  When picking the art, I wanted a variety of styles – photograph, painted, drawn, while also having a variety of shapes with these – this helps with the off centered part. #notsponsored
Off Centered Gallery Wall - the bee life (4)
I had a lot of fun pulling this together and using pieces that are special to us and also center around pups and our Moz!  This space worked perfectly since I like to switch up this room, this wall either houses the bed (currently) – so the pictures won’t get in the way of sleep OR the new dressers I just recently made over butt up against this wall, which would also work around the height.  Ultimately it’s all about creating a statement in your home that feels good and special to you!

bee (1)