Ten Things – 2018

Three years ago I shared ten things to help my readers get to know a little more about me – it was funny reading it back and looking at how I would answer now. So I thought it was time for an update and another little intro to any new bee readers. So please enjoy these ten things about me, oh and I’ve included my 2015 answers just for fun!
Meet the Bee
1. If money was no object, what’s something you’d buy right now.
2015: My own personal gym.
2018: A vacation or four… maybe a sports car.

2. Spring vs. Fall?
2015: Fall – clam bakes, sweaters, pumpkins, coffee, jeans, scarfs, cool runs… shall I continue?
2018: Still fall. ❤

3. What’s on your nightstand?
2015: Pictures of me and B and my glasses.
2018: Lamp, ring holder, small vase with flowers, coaster & water glass

4. What’s your favorite room in your house?
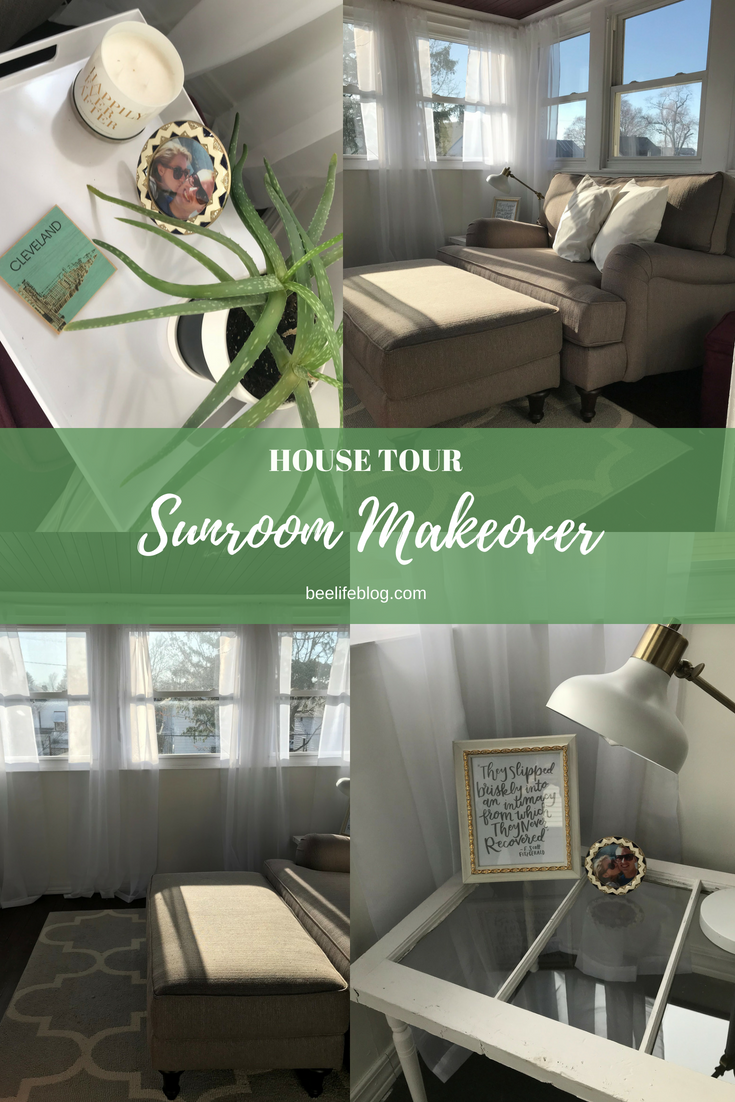
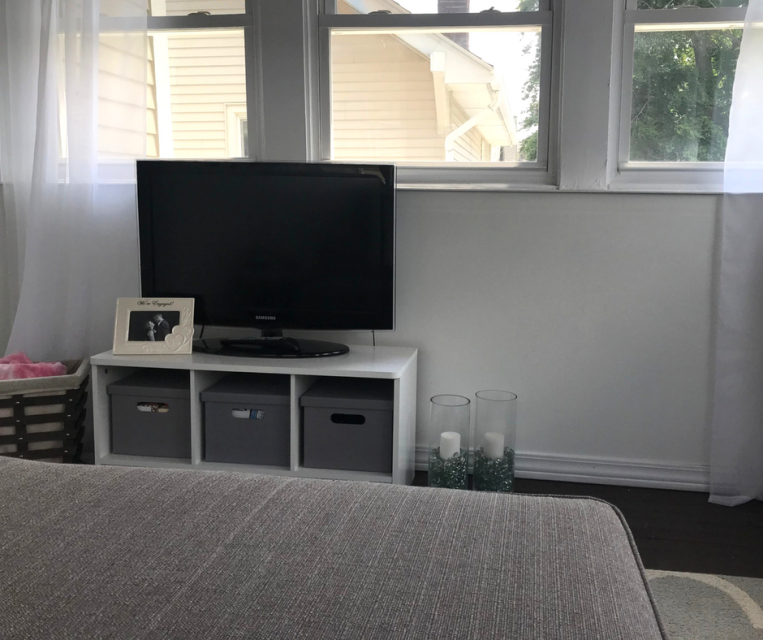
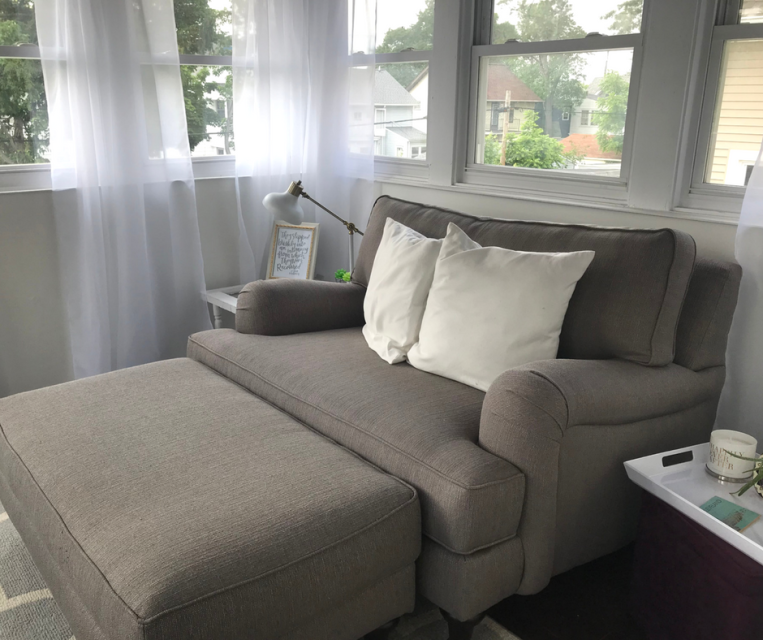
2015: Our sunroom!
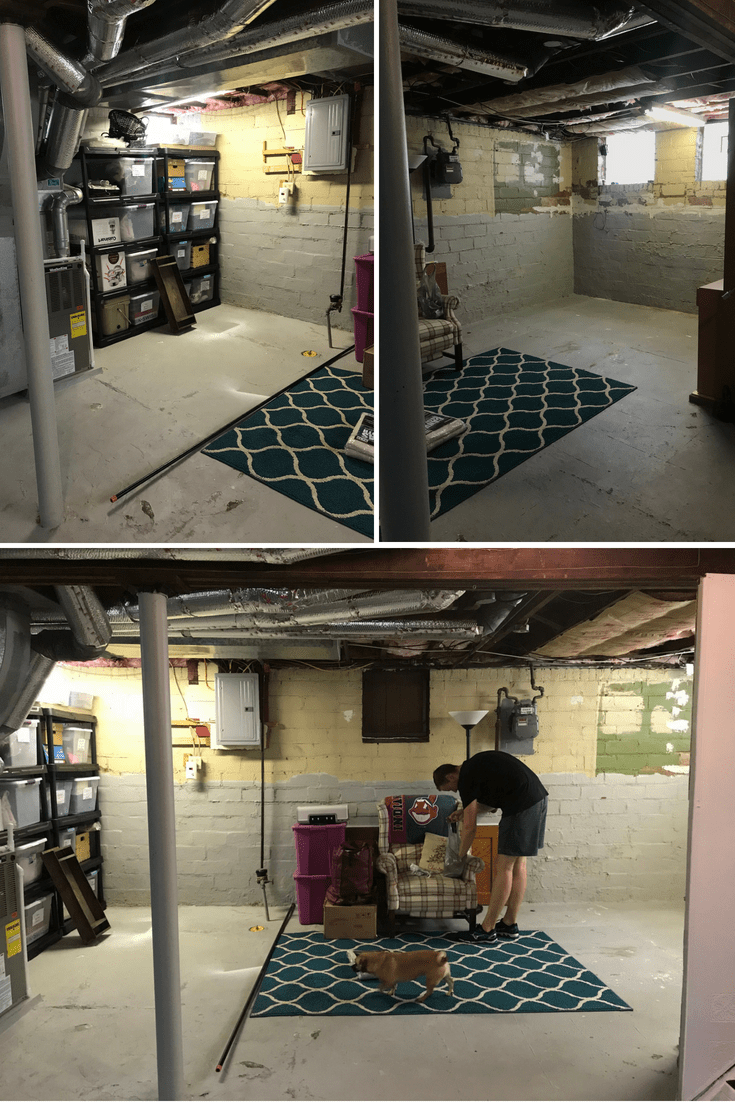
2018: Although our sunroom is still a gem, my new favorite room is our master suite (it was not finished in 2015!) … and our basement makeover (reveal coming soon!)

5. If you could have lunch with anyone in the world, who would it be?
2015: Too many choices…. it’s a toss up between Derek Jeter and Katy Perry
2018: This one is tough, maybe some Bravo reality stars? RHOBH or Vanderpump!

6. Name one thing on your bucket list.
2015: Sky dive with B
2018: Travel to Europe

7. What’s the best vacation you’ve taken?
2015: Jackson Hole w/ B and my parents! The company makes all the difference.
2018: Our honeymoon to Palm Desert was a pretty great vacation

8. Congratulations, you just won an all expenses paid trip to…
2015: Ireland & Germany
2018: Lake Como & Greece

9. Backyard BBQ or Formal Dinner?
2015: Formal dinner – I love getting dressed up, and sitting around the table sharing stories, good laughs and a bottle of wine.
2018: Same! But I do love a good meal out on the patio on a summer night.

10. What advice would you give your teen self?
2015: There is a much bigger world out there; explore it as much as possible, and even if you break away – there is still a bigger world beyond that.
2018: Don’t let silly people affect you to the point of insecurities or anxiety – they do not define you, and there is a world of people out there that won’t tear you down.

Some of these were tough to answer again! But it’s fun to reflect on these ten things, as life and the world seems to move too fast.  Have a question you want me to answer? Leave a comment below!

bee (1)

DIY – $50 Trunk Makeover

You see, we found this old trunk on a neighbors tree lawn and had to snatch it up, it had admittedly seen better days… but that never stops me.  I didn’t know what I wanted to do with it just yet, but that would come in time… after some trunk searches on Pinterest I determined to flip this baby into a coffee table, but I had a hard time figuring out how I wanted to finish this piece.   I was tempted to go the all white route or maybe pink with gold accents? And then the inside… what was I going to do with the inside?!  Oh, and we didn’t need another coffee table. *smiles*

The trunk was pretty banged up, it had old stickers all over it and then the inside was a little stinky with some blue paper that was torn.  It was a little daunting – how easy was the inside paper going to come off? What about the outside… and getting those stickers off?  Well with a little bit of water and a scrapper the paper came off with a little added elbow grease and help from B.  To my surprise, the stickers came off the same way! Although, I still didn’t know how I wanted to finish this sucker.

After doing some research, I liked the look of Hairpin legs and found these 6″ black ones on Amazon, so I purchased – still trying to figure out the color scheme, knowing I could spray paint to match if the black wouldn’t work.  I finally decided I was going to stick to the trunks original colors and just bring some life back to it! I loved the gold accents and couldn’t cope with the idea of painting over them in white or another color. After a good clean and a few layers of paint, this trunk was seeing new life.

To finish off this DIY, I finally went with some fabric for the inside vs. peal and stick paper.  I thought the fabric would be nice to work with, and a lot of options for the patterns and colors.  $18 later we had our fabric picked out, I bought 4-yards just to be safe and within one night cut and place the fabric to line the trunk with 3M Adhesive spray.   Before adding the fabric, I did spray the inside with bleach a few times (with weeks in between) to help with the smell and kill anything that might be hanging out!

DIY Cost Breakdown:

  • Trunk = $0.00
  • Hairpin Legs = $25.00
  • Paint Supplies = $12.00
  • Fabric = $18
  • TOTAL = $55.00 

We also figured out a home for this guy, with our Basement Makeover happening, this was another piece of the puzzle that fit just perfectly with the overall look and feel of the space.  It’s a little side table and perfect for some extra storage for blankets, games and extra candles!  Of course, I love the way it came out and how the gold pops against the black – plus it looks perfect in the new space.

bee (1)

Latest Obsessions 09.18

This month’s latest obsessions is all about making a statement in your home, whether it’s in your bathroom, your bedroom, in a office or your main living space – there are easy ways to focus your efforts on creating a big visual impact and making a room feel special even if it is just your bedroom. Latest Obsessions 09.18 - bee life

The best part about making a statement is sometimes you only need to focus on one aspect of the room, or a finishing touch which could be furniture, paint or a orientate tile – so remember you don’t need to rack your brain to pull off a show stopping look, just keep it simple!

Painted Wood. This can really add for some drama in a study/office or even a dramatic wall in your master suite in place of a headboard.  Although this might not be for everyone, especially if you’re going a bit extreme with the purple study above – you

Patterned Bathroom Tiles.  It’s no secret I’m a huge fan of a good statement tile, and I think pulling it into your bathroom can be a really great way to add some flair to functional space.  Whether it’s on the floor or a whole wall in a glass shower – it’ll really impress, but remember with tiles you’re making a little more of a permanent commitment so make sure it’s something you’ll love or is a little more neutral and classic.

Modern Aesthetic.  I’ve been on a bit of a kick of pulling in a little more of a modern aesthetic, especially for our basement makeover.  If done correct you can really add some drama into your space with modern furniture pieces and accents.  A good way to accomplish this is with a great couch, I love West End 96″ Sofa in the Blue from Value City.

Statement Mirrors.  A good mirror can add some drama in any space, but a fun place to splurge a bit is with a vanity or make-up station.  Things to consider with statement mirrors is either buying a mirror that feels oversized for the space – to add that impact, or to buy a mirror with thick frame work and detail – this Amelie Wooden Arched Mirror from Arhaus is a stunner with a vintage twist.

Making a statement can be a fun project, but can also seem a little daunting depending on how bold you want to go! I’ve been on a kick of a modern pop for our basement makeover, which I’m excited to share with everyone soon!

bee (1)


Image Sources: Bathroom | Statement Vanity | Painted Study | Modern Living 

Shiplap Wall Inspiration

Mini-spoiler, we’re working on our own shiplap/wooden plank wall for our Basement Makeover. Since it’s just for our basement and we’re going for the unfinished-finished look, we wanted to keep it simple and not spend too much money.  With that said, when I started looking into DIY’s on the different options of how we could accomplish our shiplap wall, I was overwhelmed at the options and price variations.
Shiplap Wall Inspiration - bee life blog
So if you’re like me and researching the many options of how to shiplap your space,  here are some things to consider while you plan your own DIY.  Take into consideration the overall look, how you’re finishing the rest of the space and how much effort you want to put into this project!

Straight vs. Alternating Boards. The way you decide to finish the space is something to think about! Whether you’re going for a straight across board look or mix and match sizes they’re two completely different looks, especially depending on how you finished them and how much you’re shiplapping.

Pre-finished Wood.  This seemed like the path of least resistance, although the price point and the amount of pre-finished wood we would need with this option added up quick. Although from a low maintenance perspective these options like this Home Depot’s Nantucket Gray Poplar Weathered boards or this kit from Lowe’s of White Barnwood Shiplap Plank Wall kit are great options.

Painted vs. Stained. Depending on how you’re placing your boards – straight or alternating, this may determine the way you want to finish the look!  Also thinking whether you want something painted or stained may affect the pattern you decide.  We decided to go the stain route, because it’s easier and we ended up painting way more than we expected with other projects.  Plus, I think the stain look with bring in a nice place with some of the other unfinished elements.

Type of Wood.  Determining the type of wood you want to use, can also affect your cost and overall look.  Whether it’s plywood, finished wood, actual barn wood, or the pre-finished wood mentioned above.  We ended up going the maple-wood plywood route loosely inspired by this DIY tutorial by Angela Marie Made.

I’m looking forward to sharing more details on our Shiplap Statement Wall DIY in the coming weeks – we are definitely excited to see how it turns out and think it’ll be the right amount of finish for our unfinished basement.  View more shiplap wall inspiration here!

bee (1)


Image Sources: Half Stained Image | Straight plank with wreath | White plank bathroom 


6 Budget Friendly Ways to Upgrade Your Home

We were fortunate enough to find a home that didn’t require a lot of major renovations or immediate upgrades – for us a lot of it was taking out the 40-years of style, giving it a little bit of love with easy cosmetic updates.  And because of that we were able to make a huge impact with these budget friendly upgrades, without breaking the bank which allowed us to splurge on grown-up furniture and help cover those surprise homeowner expenses!
Budget Friendly Upgrades for Your Home - the bee life
So I wanted to share the wealth! Here are a few tips and ways you can upgrade your home without spending a ton of money.

Paint. A gallon of paint can work WONDERS!  We literally painted our entire house, including the ceilings ,and just alone from a paint perspective the house looks like a completely different place.  Another pro tip is working from a similar color palette which can help save costs and create a cohesive flow throughout your home.  Painting with lighter colors or even the ceiling can help make a room look bigger and brighter with just 40-bucks and a little bit of elbow grease.

Light Fixtures & Ceiling Fans. This was a project we worked on updating throughout the house when we first moved it.  Updating old ceilings fans, to something a little more white and modern can help make the space look larger and blend more into the room vs. a bit eye soar.  One of my favorite updates was our dining room chandelier it always gets a ton of comments and looks almost original to the home.

Blinds & Curtains.  We had 1-inch blinds throughout the house when we first moved in and gradually updated all of the blinds to 2-inches.  They look that much more high-end and help with privacy and darkening the room.  Adding in some curtain shears overtop help to add dimension and also makes the room feel cozy and inviting.  You can also help make a statement with a fun patterned curtain in a room that might be more subtle and subdued – just be careful these can sneak up in price especially if you’re shopping for a new curtain rod.

Hardware.  Although this can add up quickly, it doesn’t compare to a whole new kitchen. Updating your hardware or plumbing fixtures can be easy and a more affordable way to make a statement in rooms that need a little extra love.  We updated our faucets in our kitchen and bathroom, and although we’re still waiting for the major reno for both these spaces – it helps!  Adding different knobs in our kitchen helped getting out the old and adding in some new.

Flooring.  Whether it’s ripping up some old dingy carpet to unveil beautiful hard wood floors or buying a nice statement rug for a room – these are other ways to pull the look and feel of your room together and add a more finished look. If you’re shopping right you can usually find a good deal or discount on a rug, too!

Pops of Color.  This can be accomplished with blankets, pillows, photos or a fun tabletop lamp.  Using pops of colors in accent pieces, decor or accent furniture can allow you to update a bit easier if you are ever in need to switch out seasonally or ready for an upgrade.  One of my favorite ways to do this is with H&M’s pillow covers.

It’s easy to want to go all out and make everything perfect when you first move into a new space/home – but it takes time and money!  Hopefully these tips can help you get your home into a better place as you continue to figure out and finish your space.

Questions? Comment below!

bee (1)

Basement Makeover – The Gameplan

Earlier in the month, my August Obsessions post, mentioned that since we organized and cleaned up our basement – the vision of turning this into a more usable and livable space has slowly started turning more into fruition.  So here are a few “before” pictures to walk through the vision of where we want to take the space.  WARNING: Prepare for some not so glam or blog worth photos – but it’s the reality we’re dealing with (and will make the reveal that much better!).
Basement Before (1) - the bee life
Creating a Dedicated Space.  The goal is to help close in the ‘living’ space by using pipe and a drop cloth to make a large curtain ‘wall’ to help close off the electrical box, furnace and shelving in that back corner from the other area.

Painting & Waterproofing. One of the biggest steps that will help improve this space significantly (in multiple ways) will be painting the walls with waterproof paint to help with any dampness that might try and sneak in, while also transforming the space and brightening it up! I cannot wait to see the end result – we’ll also paint the large meter sticking out of the wall to help this blend into the space better.

Functional Furniture.  Because the space will remain largely ‘unfinished’ – i.e. sticking with the brick walls and an open concept ceiling (removing insulation to help with this) I want pieces that are indoor/outdoor or can be easily cleaned and not too costly.  My thought is using a larger outdoor rug as the base to cover the floor and then layering another fluffier rug on top to make it a bit more cozy.

Lighting.  Currently there are terrible florescent lights down there, and although we may not be taking them down just yet (not ready to do dig too deep into the electrical game) – adding some fun string lights from the ceiling will help brighten the space and again make it feel homey.
Basement Before (2) - the bee life
Beyond dressing up this area we also have plans to expand our lonely basement toilet into a full bathroom complete with a shower, sink and walls!  That will probably be happening at some point this winter, as we are already starting to plan and window shop for vanities, fixtures and finishes.

With the right mix of livable space and storage the basement will really become a more functional space for our everyday lives, especially once the bathroom is complete — check back for reveal pictures!

bee (1)


Dog Inspired Home Decor

I’ll be the first to admit it, I am a dog lover – and I am mildly obsessed with our little puggle, Moz!  We’ve invested in a few custom portraits of her,  have attended Paint Your Pet classes and frame some super cute photos of her. And although I feel like our house is quickly becoming consumed with mini gallery walls, I can’t help but want to create a Moz gallery wall. And, it’s okay if you’re whispering ‘crazy dog lady’ or rolling your eyes at me, as you read this!

Needing some inspiration like me? Here are some super cute ways to incorporate DOGS into your home in a chic, playful, sophisticated and not so crazy way.  From a nursery, entrance, living space or even your bathroom, I hope you’re inspired like I was to see how these can pull off a high-end look while still satisfying that inner-love for dogs.

Illustrations are a great way to incorporate your pooch, as the simplicity brings that certain level of sophistication. Incorporating canvas’ with multiple pieces and parts also helps create more of a statement without all the gallery wall work and planning.  Whether it’s created in a DIY paint class or an option you sourced online – there are plenty of options to purchase/create your custom pup portrait.

Another fun way to pull in your love of dogs is with some bold wallpaper that could be used in a mud room.  Wanting to keep it simple? Get an entry rug that will welcome guests and instantly set the mood that furry friends await. Photography is another way to pull in those sweet pups, with a gallery wall of three large prints – I mean, how cute are those puppy photos for a nursery? or using a common thread of familiar frames or black and white photos helps tie everything together for a cohesive look in the space.

If you’re considering adding in your furry friends to your home decor, it’s also important to consider what spaces might be appropriate for this with the way your house functions.  A few starting points to consider might be your master bedroom or theming a guest room themed with dogs (there are so cute dog bedsheets you can score; like these ones from Cynthia Rowley). A guest bathroom or mudroom might be a good space to bring in your love of dogs.  Start small or in a dedicated space and make sure you bring through your love of dogs in a sophisticated and stylish way!

bee (1)


Shop the Looks & Image Sources: Gallery wall with furry bench Frenchie Canvas Vintage Dogs Illustrated Wallpaper Three Puppies in a Nursery I hope you like dogs rug |Golden Gallery

House Tour – Front Landscape

We are feeling pretty accomplished after finally crossing off a house project we’ve had on the list for just about 4-years, our front landscape!  Although, like all house projects it ended up being a bit pricer than we initially expected – it was totally worth it.

When we first moved into the house, there were two over grown/random scrubs that didn’t do much from an aesthetic perspective – so we tore those out pretty quickly after we moved in, leaving us with a blank slate to dream about.  We made some improvements over the years, like updating the front lattice, adding in some perennials and a couple annuals that stuck around, we tried to dress up the empty dirty with mums and ferns as the seasons changed so it wasn’t completely bare, but alas it was still a blank slate that needed some love.
House Tour - Front Landscape - bee life blog
This project seemed daunting especially from a plant perspective, we didn’t want to pay for a landscaper and had a few ideas about what plants/bushes to incorporate, it was really just filling in all of the holes.  So one day, B and I went to three different nurseries and read tags, looked at plants and started to narrow down our options and took pictures, while we also price compared.  From there we ordered 5-yards of dirt to build up the area, it seemed like too much, but somehow we managed to spread it throughout.  And then we went and bought our plants;

(1) Little Lime Hydrangea
(2) Sorbet Peonies
(4) Boxwood Winter Gem
(3) Fern Line: Fern Leaf Buckthorn
(2) Maiden Grasses
(1) Coneflower – Cheyenne Spirit
(1) Lavender plant (already had)
(1) Butterfly bush (already had)

We spread the love with our plants purchases between some locals shops like Petitti’s Garden Center and Gale’s Garden Center. So once we bought all the plants, worked through placement, we got to planting!  Before we mulched, we built the stone wall to help divide the grass and landscape (this was a compromise of the project with B and I!) – he wanted one, I didn’t – the stones I wanted to compromise with were wayyy to much so we found some at Lowes that ended up working out. From there we ordered 3-yards of mulch (via Kurtz Bros!), which was more than enough, giving us a good base and finished look.
14House Tour - Front Landscape - bee life blog13House Tour - Front Landscape - bee life blog
The house feels a little more complete with the front landscape done, we are so happy to get it done and with the way everything turned out.  We also took our time working through this project (clearly!) but I think that helped to our benefit because we weren’t stressed about it and were able to take advantage of some cool summer days/nights to get everything done.   We can’t wait to see how it fills in and welcomes visitors to our home!

bee (1)

House Tour – Sunroom Makeover

Our sunroom got an impromptu mini makeover this spring, as we have finally been able to enjoy it with the weather warming up.  This space started out pretty drab with a stunning yellow and brown color palette, we quickly figured out a cost effective solution to repurpose our old apartment furniture making this space functional, bright and colorful.

This past summer we bought an oversized love seat and ottoman, that matches our main living room furniture – it was time to get rid of that over worn leather sofa for something a bit nicer.  The curtains that were once bright and sunny (and really expensive) were now faded after a few summers in the sun – plus the windows in that room aren’t the greatest (already on the future project list).  So I went with more affordable shears ($5 each) that accented the room nicely.
House Tour - Sunroom Makeover - the bee life
I reused a few other pieces that were throughout the house, the rug was extra that had been in the basement and worked perfectly with the new furniture color.  I also pulled in the white TV stand from a guest room to pull the space together, making it a cozy spot to curl up and watch a movie on a summer night or cool afternoon.  The window table was a DIY that is now a helpful side table, styled with a framed quote from our wedding and a table top lamp that was sitting sadly in the basement waiting for it’s perfect spot.

The only other piece I bought besides the new curtains, was the white tray ($20) to use on the other side of the chair for a bit more function.  I covered a few colorful pillows I had with white pillow cases from H&M that had ended up in the linen closet, the bright colors just weren’t working with the new darker gray chair.  I really loved freshening this space up without spending an arm and a leg – which goes back to my main decorating tip and rule of thumb, buy pieces that can work in multiple spaces!
14Sunroom Makeover - the bee life13Sunroom Makeover - the bee life
We love having the door open in the summer to this welcoming and warm space, and now it just has another elevated feel of this little retreat in our home.  It’s the perfect spot for an afterwork nap (that’s when it’s the warmest with sun shining in) and so bright.  Although this space was complete before, it feels even more so now with this little upgrade!


Shop the Look: H&M Pillow Covers | White Target Tray | Oversized Chair | Shear Curtain Panels | TV Stand Cube Bench