5 Hosting Tips for Fall

It’s getting to one of my favorite times of the year – the time for holiday parties and plenty of opportunities for hosting friends and family.  Whether you’re planning an intimate sit down dinner or a more festive party, these five tips will help cover your bases, wow guests and have a fun night to remember!
Party Hosting Tips - the bee life
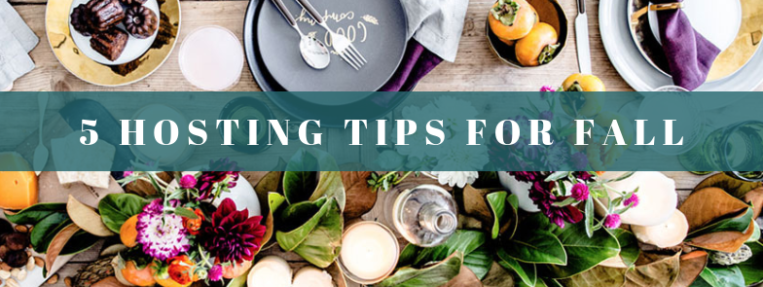
These tips will also help you relax as a host while still having those finishing touches and taking your party to the next level.

  1. Consider a Bulk Signature Cocktail. Signature cocktails can be fun, especially if it’s more of a seasonal drink for the fall and winter months.  As a host pro-tip, make these in bulk ahead of time in a pitcher or shaker – that way you won’t be stuck making everyone a drink as they come in.  Don’t forget the garnish and a fun cocktail napkin to top off the full effect!
  2. Make a Killer Charcuterie Board. This can serve as your focal point and will cover the bases on a variety of food categories from meats and cheeses, to breads, jams, nuts and fresh fruit that will make guests want to dive right in.  Check out Skinnytaste or Spend with Pennies on some tips to making a killer board.
  3. Don’t Forget the Dessert! It’s easy to get caught up figuring out the main dishes for the evening and overlook the best part, dessert!  This is something to keep simple whether it’s buying some more expensive chocolate bars, baking fresh chocolate chip cookies or asking friends to help bring this, so you can check it off the list!
  4. Plastic vs. Non-Plastic Plates. The great debate on which to use continues! I often shy away from plastic because I prefer the aesthetic look of plates – but depending on which type of party you’re hosting, one might make more sense than the other.  For example a more intimate dinner party or smaller guest count may call for plates to add that extra touch, but if you’re having a large party that is a bit more casual save yourself the end of the night clean-up and grab plastic bowls and plates!
  5. Create Welcoming Smells. This can be an easy victory – if you’ve been prepping food all day, your house might have a mixture of smells, so to clear it up light a few candles with similar scents throughout your home (don’t forget the bathroom!) or throw in some chocolate chip cookies right before guests arrive for a homey welcome.

If you’re looking for inspiration to host a fall party and ways to keep it simple read; 5 Reasons to Host a Fall Party.  And don’t forget to have fun and enjoy your own party, as the host it’s easy to get caught up in perfection and making sure everyone else is taken care of – but don’t forget to grab yourself a drink too!

bee (1)


Image Sources:  Skinnytaste \ The Effortless Chic | Apartment 34

Ten Things – 2018

Three years ago I shared ten things to help my readers get to know a little more about me – it was funny reading it back and looking at how I would answer now. So I thought it was time for an update and another little intro to any new bee readers. So please enjoy these ten things about me, oh and I’ve included my 2015 answers just for fun!
Meet the Bee
1. If money was no object, what’s something you’d buy right now.
2015: My own personal gym.
2018: A vacation or four… maybe a sports car.

2. Spring vs. Fall?
2015: Fall – clam bakes, sweaters, pumpkins, coffee, jeans, scarfs, cool runs… shall I continue?
2018: Still fall. ❤

3. What’s on your nightstand?
2015: Pictures of me and B and my glasses.
2018: Lamp, ring holder, small vase with flowers, coaster & water glass

4. What’s your favorite room in your house?
2015: Our sunroom!
2018: Although our sunroom is still a gem, my new favorite room is our master suite (it was not finished in 2015!) … and our basement makeover (reveal coming soon!)

5. If you could have lunch with anyone in the world, who would it be?
2015: Too many choices…. it’s a toss up between Derek Jeter and Katy Perry
2018: This one is tough, maybe some Bravo reality stars? RHOBH or Vanderpump!

6. Name one thing on your bucket list.
2015: Sky dive with B
2018: Travel to Europe

7. What’s the best vacation you’ve taken?
2015: Jackson Hole w/ B and my parents! The company makes all the difference.
2018: Our honeymoon to Palm Desert was a pretty great vacation

8. Congratulations, you just won an all expenses paid trip to…
2015: Ireland & Germany
2018: Lake Como & Greece

9. Backyard BBQ or Formal Dinner?
2015: Formal dinner – I love getting dressed up, and sitting around the table sharing stories, good laughs and a bottle of wine.
2018: Same! But I do love a good meal out on the patio on a summer night.

10. What advice would you give your teen self?
2015: There is a much bigger world out there; explore it as much as possible, and even if you break away – there is still a bigger world beyond that.
2018: Don’t let silly people affect you to the point of insecurities or anxiety – they do not define you, and there is a world of people out there that won’t tear you down.

Some of these were tough to answer again! But it’s fun to reflect on these ten things, as life and the world seems to move too fast.  Have a question you want me to answer? Leave a comment below!

bee (1)

DIY – $50 Trunk Makeover

You see, we found this old trunk on a neighbors tree lawn and had to snatch it up, it had admittedly seen better days… but that never stops me.  I didn’t know what I wanted to do with it just yet, but that would come in time… after some trunk searches on Pinterest I determined to flip this baby into a coffee table, but I had a hard time figuring out how I wanted to finish this piece.   I was tempted to go the all white route or maybe pink with gold accents? And then the inside… what was I going to do with the inside?!  Oh, and we didn’t need another coffee table. *smiles*

The trunk was pretty banged up, it had old stickers all over it and then the inside was a little stinky with some blue paper that was torn.  It was a little daunting – how easy was the inside paper going to come off? What about the outside… and getting those stickers off?  Well with a little bit of water and a scrapper the paper came off with a little added elbow grease and help from B.  To my surprise, the stickers came off the same way! Although, I still didn’t know how I wanted to finish this sucker.

After doing some research, I liked the look of Hairpin legs and found these 6″ black ones on Amazon, so I purchased – still trying to figure out the color scheme, knowing I could spray paint to match if the black wouldn’t work.  I finally decided I was going to stick to the trunks original colors and just bring some life back to it! I loved the gold accents and couldn’t cope with the idea of painting over them in white or another color. After a good clean and a few layers of paint, this trunk was seeing new life.

To finish off this DIY, I finally went with some fabric for the inside vs. peal and stick paper.  I thought the fabric would be nice to work with, and a lot of options for the patterns and colors.  $18 later we had our fabric picked out, I bought 4-yards just to be safe and within one night cut and place the fabric to line the trunk with 3M Adhesive spray.   Before adding the fabric, I did spray the inside with bleach a few times (with weeks in between) to help with the smell and kill anything that might be hanging out!

DIY Cost Breakdown:

  • Trunk = $0.00
  • Hairpin Legs = $25.00
  • Paint Supplies = $12.00
  • Fabric = $18
  • TOTAL = $55.00 

We also figured out a home for this guy, with our Basement Makeover happening, this was another piece of the puzzle that fit just perfectly with the overall look and feel of the space.  It’s a little side table and perfect for some extra storage for blankets, games and extra candles!  Of course, I love the way it came out and how the gold pops against the black – plus it looks perfect in the new space.

bee (1)

Fitness Friday 09.18

Can you believe it’s already September? Like the end of September?  Time is seriously flying! And with that we’re almost saying good bye to another year – another year of learning and adapting to work towards our fitness and health goals.  I’m sure not many of you have been reading along for as long as I’ve been writing on the bee life, but trust me it’s been a journey, especially my fitness journey!
Fitness Friday 09.18 - the bee life I look back at old fitness posts and I cringe a little, but I also smile because I’ve finally beat my old ways that were SOO annoying and full of excuses (even though I said they weren’t excuses) and I finally know what I have to do.

I get it – the mental battle is just as much as the physical battle – but it took me a long time to really accept that and finally making the financial investment, time commitment and leaving the excuses at the door.  If you’re like me (stubborn) the mental battle may be winning over your physical one… trust me you’ll reach your breaking point – you’ll reach your complete unhappiness, mine happen to come to being 15+ pounds heavier, not being able to fit into over half my pants and not feeling great about myself.  And even then, I started working out but it still took another switch to click with the food, and having those hard talks with myself to stop lying that I was eating ok enough.

So with all my rambling, what I’m trying to say is the physical challenges will be easy, you’ll be able to grow stronger and master the art of burpees and lifting – but that mental battle will always be something you can cheat yourself out of.  So take a hard look, question your excuses or reasons and overcome that mental battle!

bee (1)


Catch-up on past Fitness Fridays: Food Accountability | Maintaining Balance | Reaching Your Goals

Shiplap Wall Inspiration

Mini-spoiler, we’re working on our own shiplap/wooden plank wall for our Basement Makeover. Since it’s just for our basement and we’re going for the unfinished-finished look, we wanted to keep it simple and not spend too much money.  With that said, when I started looking into DIY’s on the different options of how we could accomplish our shiplap wall, I was overwhelmed at the options and price variations.
Shiplap Wall Inspiration - bee life blog
So if you’re like me and researching the many options of how to shiplap your space,  here are some things to consider while you plan your own DIY.  Take into consideration the overall look, how you’re finishing the rest of the space and how much effort you want to put into this project!

Straight vs. Alternating Boards. The way you decide to finish the space is something to think about! Whether you’re going for a straight across board look or mix and match sizes they’re two completely different looks, especially depending on how you finished them and how much you’re shiplapping.

Pre-finished Wood.  This seemed like the path of least resistance, although the price point and the amount of pre-finished wood we would need with this option added up quick. Although from a low maintenance perspective these options like this Home Depot’s Nantucket Gray Poplar Weathered boards or this kit from Lowe’s of White Barnwood Shiplap Plank Wall kit are great options.

Painted vs. Stained. Depending on how you’re placing your boards – straight or alternating, this may determine the way you want to finish the look!  Also thinking whether you want something painted or stained may affect the pattern you decide.  We decided to go the stain route, because it’s easier and we ended up painting way more than we expected with other projects.  Plus, I think the stain look with bring in a nice place with some of the other unfinished elements.

Type of Wood.  Determining the type of wood you want to use, can also affect your cost and overall look.  Whether it’s plywood, finished wood, actual barn wood, or the pre-finished wood mentioned above.  We ended up going the maple-wood plywood route loosely inspired by this DIY tutorial by Angela Marie Made.

I’m looking forward to sharing more details on our Shiplap Statement Wall DIY in the coming weeks – we are definitely excited to see how it turns out and think it’ll be the right amount of finish for our unfinished basement.  View more shiplap wall inspiration here!

bee (1)


Image Sources: Half Stained Image | Straight plank with wreath | White plank bathroom 


6 Budget Friendly Ways to Upgrade Your Home

We were fortunate enough to find a home that didn’t require a lot of major renovations or immediate upgrades – for us a lot of it was taking out the 40-years of style, giving it a little bit of love with easy cosmetic updates.  And because of that we were able to make a huge impact with these budget friendly upgrades, without breaking the bank which allowed us to splurge on grown-up furniture and help cover those surprise homeowner expenses!
Budget Friendly Upgrades for Your Home - the bee life
So I wanted to share the wealth! Here are a few tips and ways you can upgrade your home without spending a ton of money.

Paint. A gallon of paint can work WONDERS!  We literally painted our entire house, including the ceilings ,and just alone from a paint perspective the house looks like a completely different place.  Another pro tip is working from a similar color palette which can help save costs and create a cohesive flow throughout your home.  Painting with lighter colors or even the ceiling can help make a room look bigger and brighter with just 40-bucks and a little bit of elbow grease.

Light Fixtures & Ceiling Fans. This was a project we worked on updating throughout the house when we first moved it.  Updating old ceilings fans, to something a little more white and modern can help make the space look larger and blend more into the room vs. a bit eye soar.  One of my favorite updates was our dining room chandelier it always gets a ton of comments and looks almost original to the home.

Blinds & Curtains.  We had 1-inch blinds throughout the house when we first moved in and gradually updated all of the blinds to 2-inches.  They look that much more high-end and help with privacy and darkening the room.  Adding in some curtain shears overtop help to add dimension and also makes the room feel cozy and inviting.  You can also help make a statement with a fun patterned curtain in a room that might be more subtle and subdued – just be careful these can sneak up in price especially if you’re shopping for a new curtain rod.

Hardware.  Although this can add up quickly, it doesn’t compare to a whole new kitchen. Updating your hardware or plumbing fixtures can be easy and a more affordable way to make a statement in rooms that need a little extra love.  We updated our faucets in our kitchen and bathroom, and although we’re still waiting for the major reno for both these spaces – it helps!  Adding different knobs in our kitchen helped getting out the old and adding in some new.

Flooring.  Whether it’s ripping up some old dingy carpet to unveil beautiful hard wood floors or buying a nice statement rug for a room – these are other ways to pull the look and feel of your room together and add a more finished look. If you’re shopping right you can usually find a good deal or discount on a rug, too!

Pops of Color.  This can be accomplished with blankets, pillows, photos or a fun tabletop lamp.  Using pops of colors in accent pieces, decor or accent furniture can allow you to update a bit easier if you are ever in need to switch out seasonally or ready for an upgrade.  One of my favorite ways to do this is with H&M’s pillow covers.

It’s easy to want to go all out and make everything perfect when you first move into a new space/home – but it takes time and money!  Hopefully these tips can help you get your home into a better place as you continue to figure out and finish your space.

Questions? Comment below!

bee (1)

Fitness Friday 08.18

It’s time to talk food again.  The love-hate we have with sweet, delicious, carby food.  Last Fitness Friday, I was talking a bit about falling off the rails, being a little less strict with my routine – the boundaries started to get looser and I needed to rain it in.  So within the last month or so, I’ve tightened up on my diet and I can see the difference on a daily basis.  Trust me, there are some days where I ask myself, what more could I possibly change? But when I really test the accountability factor – I quickly figure out what needs to go and what can stay, and it usually comes down to FOOD!
Fitness Friday 08.18 - the bee life
Here are five tricks I do when I need to crack down, and honestly after a week or two of being strict, these aren’t as much of a battle as it is at first!  The most important thing to keep in mind – is that these aren’t quick ‘do this for a week’ and you’ll loose 20-pounds, these are lifestyle changes that will help you achieve your fitness goals and love yourself even more!

Smart Snacking.  A great work perk that I have is having snacks around, the decision between a mini bag of Doritos or picking up a banana/handful of nuts is the pass or fail. Don’t want to be tempted at all of picking wrong? Stop snacking and drink water!  It’ll be tough at first, but your body will quickly adapt and you won’t be craving a snack at 3pm.

Less Carbs, More Protein. Especially at dinner, this is a time when B and I have been loading up on meat and skipping out on the extras or scary sides.  We also switch out the buns for lettuce wraps, which is just as tasty and looks fancy for a week night meal at home.

Smaller Portions.  With smarter snacking and eating more filling foods, portions in line get a bit smaller, allowing you to get full faster.  Those after dinner cravings for some sweats are often eliminated after a nice filling and healthy dinner.

Limit Alcohol. Alcohol and beverages in general can be a surprise at how much sugars/carbs are actually jammed into them – so be sure to check the labels before drinking, you’ll thank yourself later.  Alcohol choices can also impact negatively or help, for this I stick to the Keto Alcohol rules, no beer and opt for those bubbles! Red wine is also a good choice or pure spirits, but be sure to avoid those sugary mixtures.

Stop Eating Pizza! Yup, I said it – just stop eating pizza! Try it for a month, try it for two… you won’t miss it, I promise.  Pizza is an easy food to over indulge on and is full of carbs, some people have pizza every Friday night… and then there are probably leftovers for the next day… just cut it out – you’ll see a difference.

The true key to living a healthy lifestyle, making gains, and maintaining your goal weight, all boils down to not only exercise but the supporting cast of FOOD – it’s that balance of both that is the perfect formula.

bee (1)


Miss a Fitness Friday? Catch-up!  May | June | July

Hofbrauhaus Half Marathon – Recap

This past weekend marked our 7th half marathon and it’s incredible what a difference a year makes.  We… or I should say, I struggled through out last half marathon, the Mighty Niagara last September, and this year seemed like a breeze, well… mostly.

Let’s rewind a bit – we signed up for this race a little over 2-months ago, I saw the price was about to increase and thought, why not? I easily convinced B and a little while later our registration was secured.  I took a difference approach to half training this year, and it seemed to work out, as I definitely got a few more mid-size runs than I had anticipated.  We ran 10-miles last weekend – so we were feeling as ready as we’d ever be going into the half on Sunday morning.
Work - Life
The start time for the race was 7am, which was good since it was going to warm up quickly and be pretty toasty by 9am, which would be just about finish time.  We started out at a good pace and keep in sync with each other, slowed down a little around mile 5 but then were cruising and feeling really good after mile 6, moving into miles 9 and 10.  The last three miles, were the longest and of course were straight pavement with the sun beating down on our backs.  Thankfully the first 10-miles were relatively covered, which helped immensely, or we definitely would’ve been screwed! But those last three were giving us flashbacks of last year’s struggle, but we didn’t stop, we kept running and we crossed that finish line together! I finished 12th out of 32 in my age division, (woah!) and we had a respectable time of 2:08:51 – it was a good run.
Hofbrahaus Half - the bee life (2)
We were covered in sweat when we crossed the finish line, and were happy to see the end.  The after party at Hofbrauhaus was a great atmosphere and the definition of a race-after party. In addition to the awesome metal all runners also got a beer and a brat, it was the perfect treat!  Live music was playing in the biergarten and there was a Starbucks truck sharing samples of their new coffee smoothies made with almond milk, yum!  It was an accomplishing start to our Sunday and good to check off another half.  As B said; “First half of 2018 and first one as a married couple. My run or die chick.”  ❤

bee (1)


Image Source: Finish Line photo from Hermes Road Racing Cleveland


Dog Inspired Home Decor

I’ll be the first to admit it, I am a dog lover – and I am mildly obsessed with our little puggle, Moz!  We’ve invested in a few custom portraits of her,  have attended Paint Your Pet classes and frame some super cute photos of her. And although I feel like our house is quickly becoming consumed with mini gallery walls, I can’t help but want to create a Moz gallery wall. And, it’s okay if you’re whispering ‘crazy dog lady’ or rolling your eyes at me, as you read this!

Needing some inspiration like me? Here are some super cute ways to incorporate DOGS into your home in a chic, playful, sophisticated and not so crazy way.  From a nursery, entrance, living space or even your bathroom, I hope you’re inspired like I was to see how these can pull off a high-end look while still satisfying that inner-love for dogs.

Illustrations are a great way to incorporate your pooch, as the simplicity brings that certain level of sophistication. Incorporating canvas’ with multiple pieces and parts also helps create more of a statement without all the gallery wall work and planning.  Whether it’s created in a DIY paint class or an option you sourced online – there are plenty of options to purchase/create your custom pup portrait.

Another fun way to pull in your love of dogs is with some bold wallpaper that could be used in a mud room.  Wanting to keep it simple? Get an entry rug that will welcome guests and instantly set the mood that furry friends await. Photography is another way to pull in those sweet pups, with a gallery wall of three large prints – I mean, how cute are those puppy photos for a nursery? or using a common thread of familiar frames or black and white photos helps tie everything together for a cohesive look in the space.

If you’re considering adding in your furry friends to your home decor, it’s also important to consider what spaces might be appropriate for this with the way your house functions.  A few starting points to consider might be your master bedroom or theming a guest room themed with dogs (there are so cute dog bedsheets you can score; like these ones from Cynthia Rowley). A guest bathroom or mudroom might be a good space to bring in your love of dogs.  Start small or in a dedicated space and make sure you bring through your love of dogs in a sophisticated and stylish way!

bee (1)


Shop the Looks & Image Sources: Gallery wall with furry bench Frenchie Canvas Vintage Dogs Illustrated Wallpaper Three Puppies in a Nursery I hope you like dogs rug |Golden Gallery