House Tour: Basement Makeover 3.0

It’s been 8-years since we purchased our home, and last fall we finished the next stage of our basement makeover which has been in progress since 2018. I can’t believe I haven’t shared it, because this really just ties a bow on this ongoing project – it’s also a space that when we purchased our house I had 0 intentions for our basement and for it to merely serve as a basement for storage and other basement things. I hope this post also serves as a reminder that in a world of Before & Afters in mere seconds through an Instagram reel, that house projects can take time and also evolve… and that’s OK!

Here is a quick timeline of our basement projects;
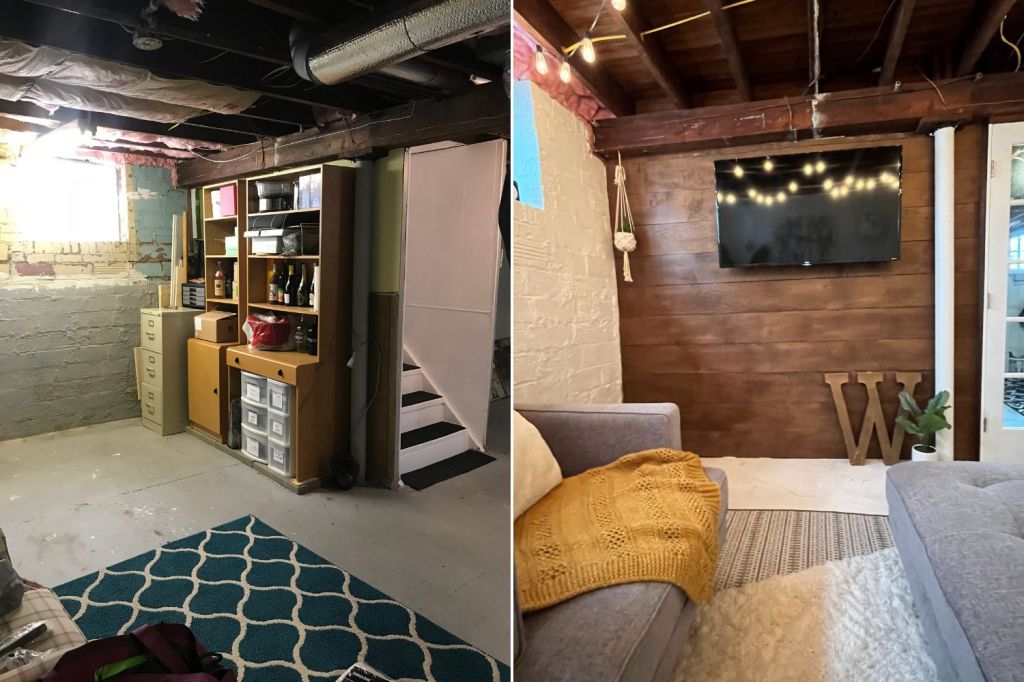
– 2018: Waterproof & create initial living space + $60 shiplap wall
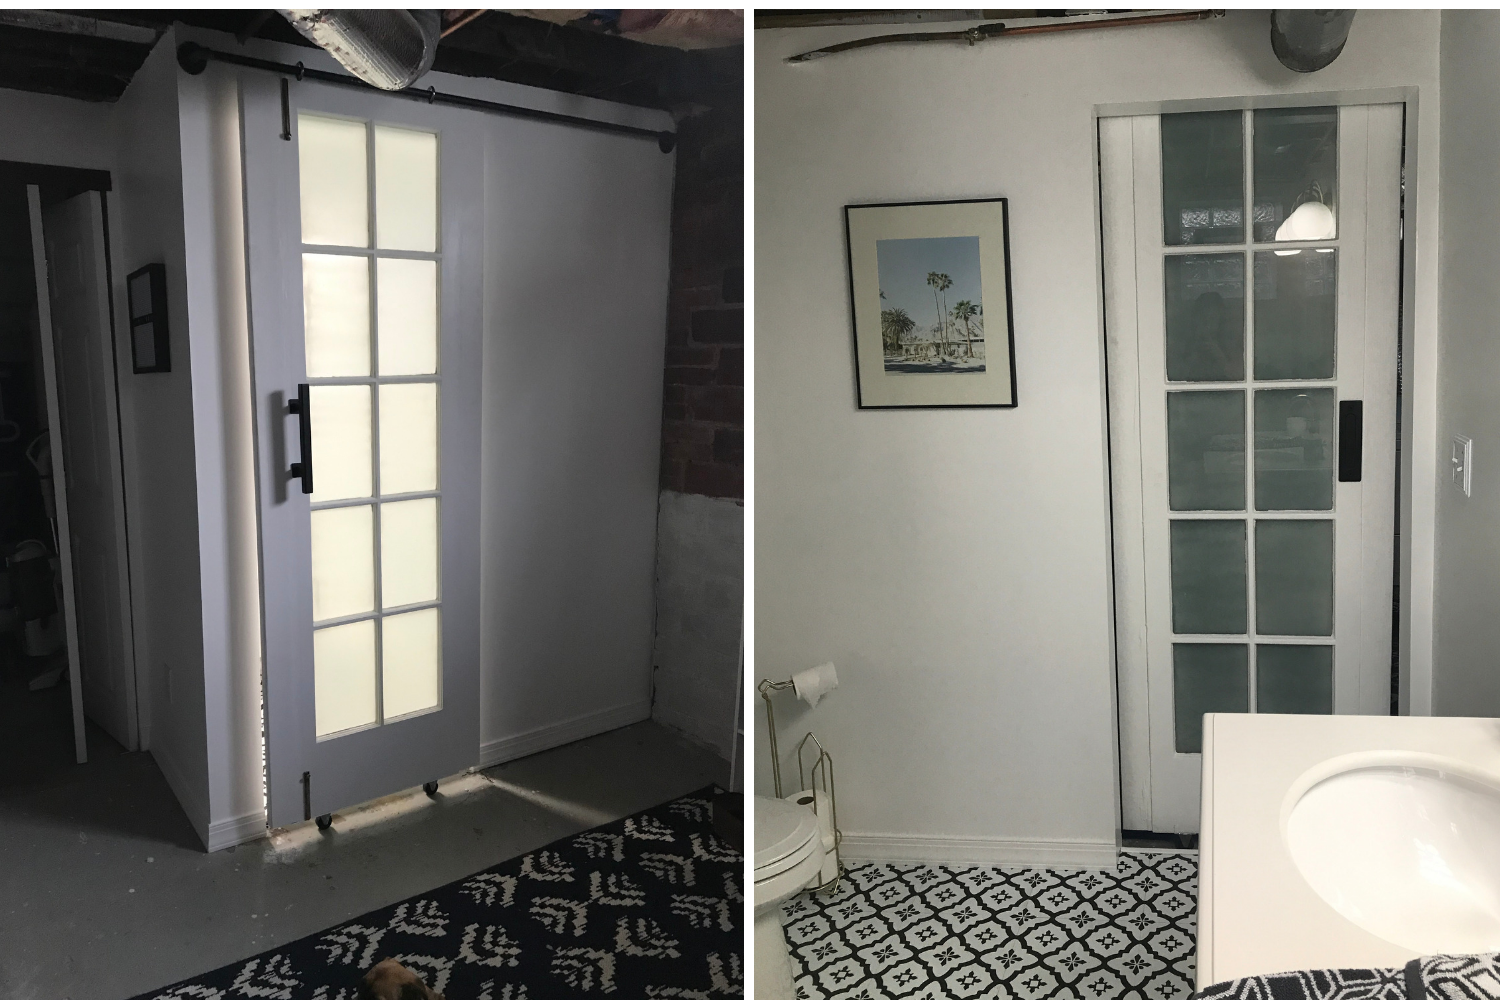
– 2019: Remodel basement bathroom
– 2021: Build drywall, add french doors, and built-in bar

The Compromise

I will totally admit, that this third phase of our basement makeover was initiated by B (in the midst of our kitchen being ripped apart no less!). He was itching to build an actual wall — I was having a tough time trying to invision the best configuration AND I felt how we had it worked out fine… well once I spent some time to give B the wall configuration and it started coming to life, I was instantly in love! Our compromise for the project (B wanting to do drywall, me not as into it) was if we could add a built in bar as well along the new wall. I showed B the vision, and we both had a game plan to work through phase 3.

In addition to building a wall to replace the make shift drop cloth wall, we also built around our furnace to consolidate our storage and other equipment from the main area in our basement and added a bi-fold door! This was part of my hold up, since I wanted it to be more than just a wall to seperate the rooms, but more encompassing of a few other things for our basement space.

What We Did

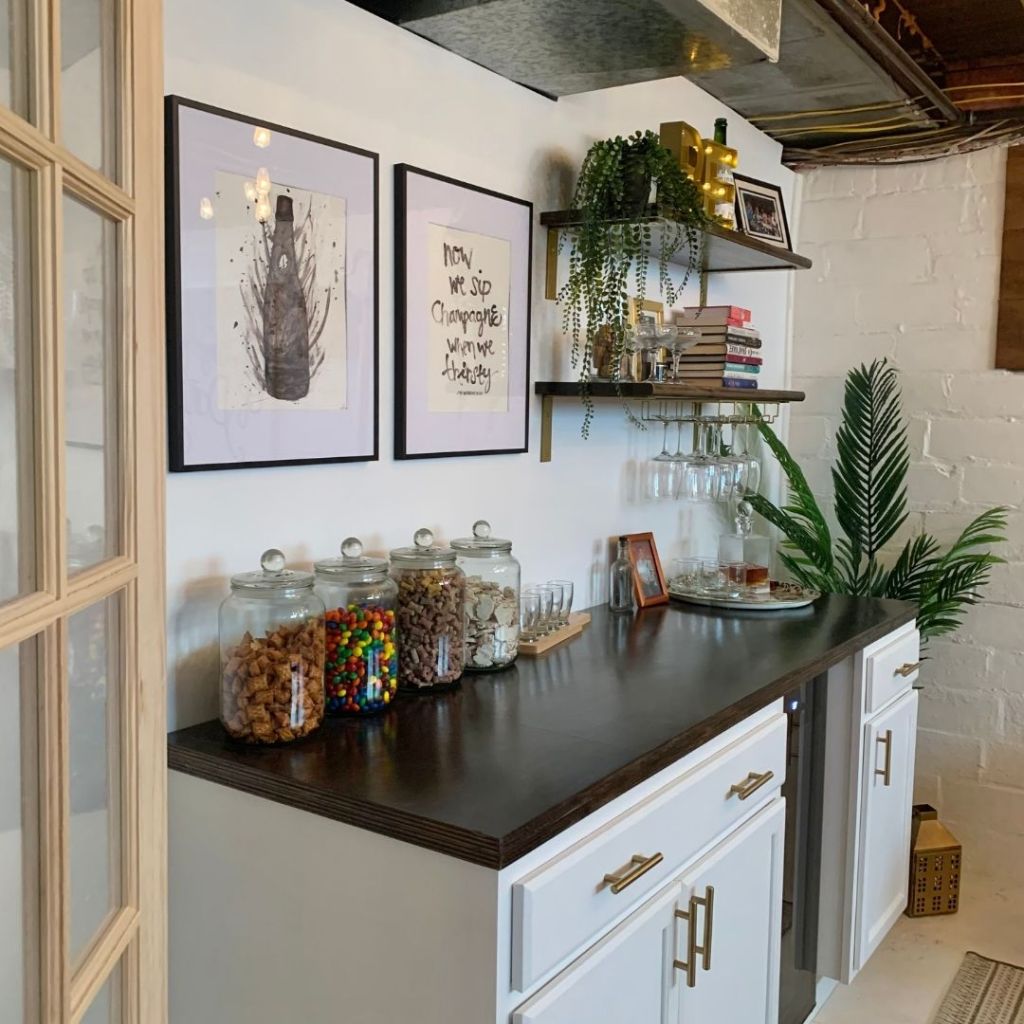
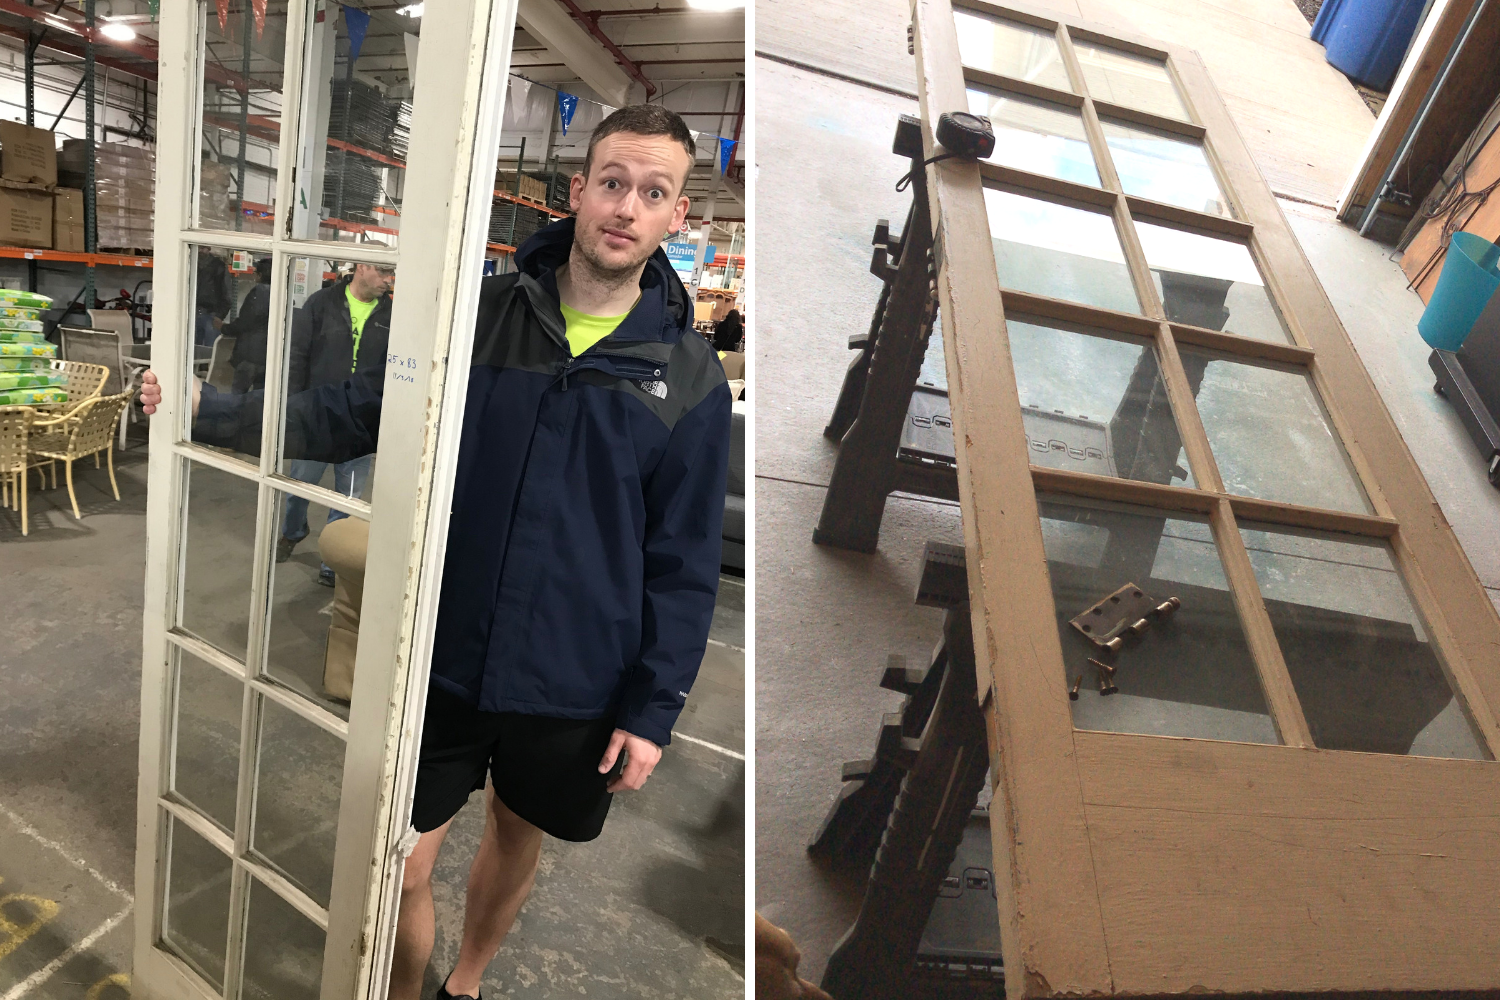
In addition to building a real wall in place of our make shift drop cloth wall, we also worked to enclose the storage area and the furance and water heater. From there we started dreaming about how cool it would be have double french doors from the living room area to the rest of the basement, we had actually talked about that many years ago as big goals. And then we made it happen! Installing the french doors was definitely not fun, and probably should’ve been like 4-person job – but somehow we did it, with all the credit going to B.

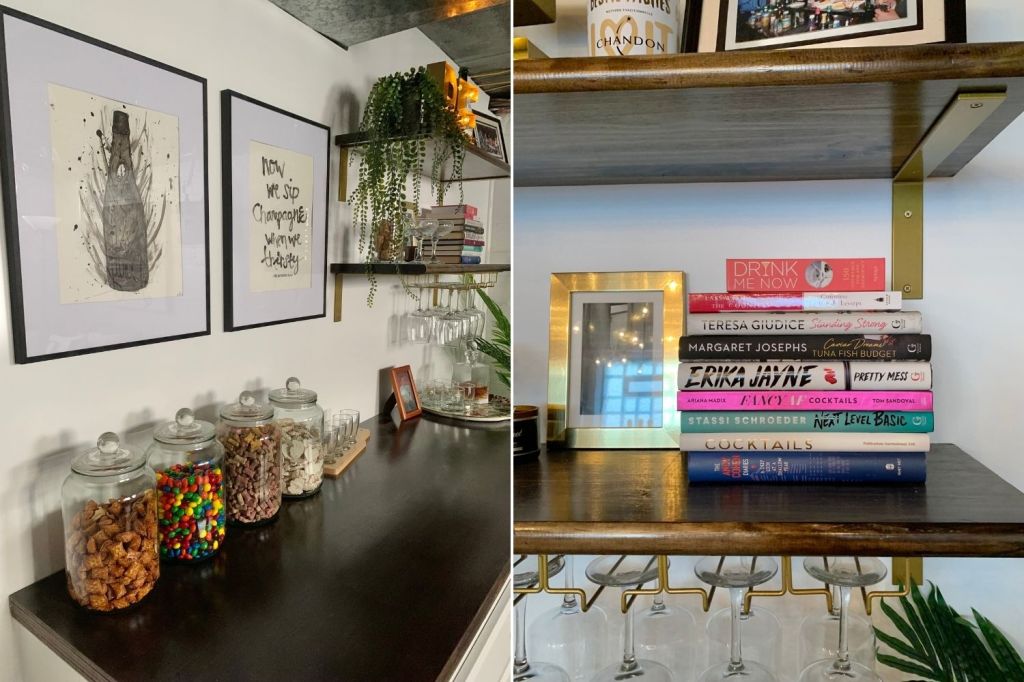
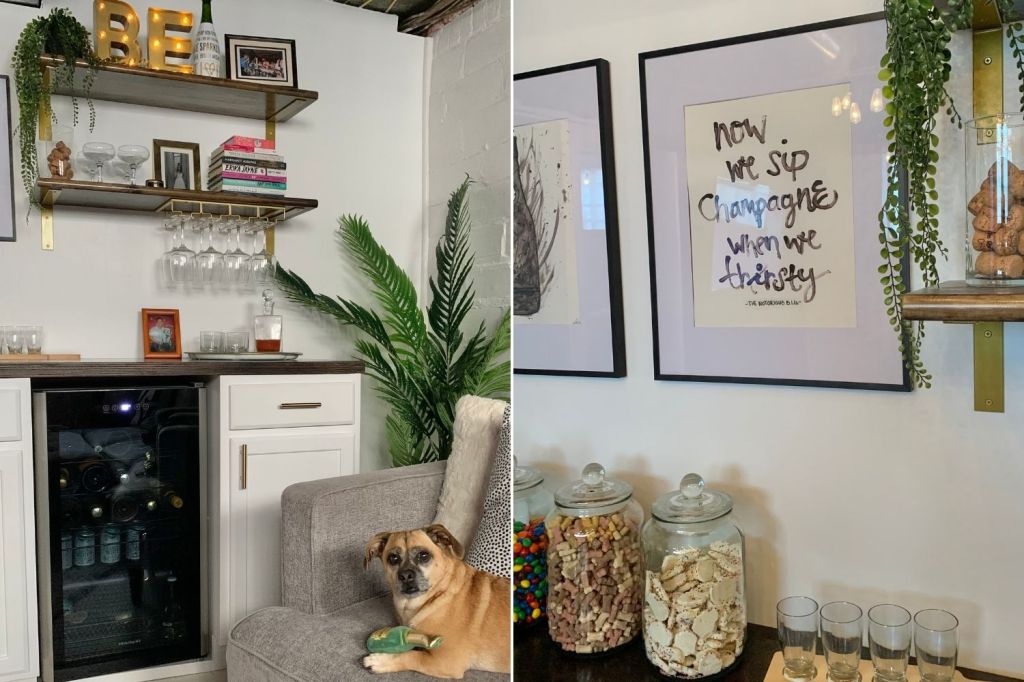
For the built in basement bar, we wanted to keep this as affordable as possible – so we ended up getting the pre-fab cabinet bases from Lowe’s — one compromise for this was having 24″ depth, it took up a little bit more of our living space than I would’ve preferred, but getting custom or skinner ones was significantly more! We scored my champagne fridge on sale and then used nicer plywood, glued together and created our own counter top that we stained in our go-to Walnut and polyurethaned the top for extra protection, again an affordable route!

We were already blessed with a bright basement with big windows and lots of them, but painting the basement white with waterproofing and the overtop, definitely help brighten up and clean up this space from it’s dingy blue walls.

Our basement was a blank slate, that we’ve turned into something. We’ve added function, additional living space, a whole new bathroom, and storage! And now it’s just time to live in it and enjoy – although since the 2020 C-word, we haven’t hosted with overflow in the basement as I always envisioned, like the guys downstairs watching the game, with snacks on the bar and mixing their own drinks – maybe some day!

Cheers to constantly evolving and making these a bit more beautiful than the way we found them!

House Tour: Basement Bar DIY

Ready for a fun reveal? As we’ve been in influx awaiting the official go ahead for our kitchen, we of course found another project to keep busy with. So why not build a wall in the basement and create a built in bar?

A few years ago, we created a ‘finished/unfinished’ space in our basement for an additional living space with a TV, $60 DIY shiplap wall and some deep couches. To help section this off from a storage area, we created a wall with a large drop cloth and piping, which worked great for an easy, temporary solution – but the plan was always to create an actual wall… eventually. Well, B had been itching to build the wall, and I told him I really wanted to add a built in bar and shared some inspiration, so together we worked to figure out the spacing and how we could pull it together – but not without a few disagreements of course.

To keep it somewhat simple, we bought prefab base kitchen cabinets from Lowe’s — we originally wanted to find something a bit more swallow, but everything was super expensive, so upon searching we found a taller wine fridge and compromised for deeper cabinets. From there we needed to figure out a counter top, all your typical counter tops at Lowe’s were either super basic and blah or a bit more than we wanted to spend, so upon doing some research B found this nicer plywood that we could stack, glue, stain and polyurethane to create our own counter top. It actually came out way better than expected.

Once we had our base all figured out, it was time for the fun part – decorating! We were able to utilize some left over gold handles from a previous project for our cabinets, that give it a modern and sleek look, pulling in the gold accents. I went with a simpler approach to two parallel photos vs. a gallery wall like I was initially thinking – it definitely keeps it cleaner with the two stacked shelves on the right side. We got the brackets off Amazon and then bought the shelves, that were a little more expensive but a nice sleek look that we were also able to stain and polyurethane. We also got the wine glass holder from Amazon, which fits perfectly and has ample counter space still underneath it.

A few other fun touches include the artwork, that B and I ended up hand painting ourselves – I did the fun Notorious B.I.G. quote and B did the champagne bottle! We also had to get oversized snack jars for some sweet and savory treats, although I can’t say they’ve been staying full. Moz also has her own filled with her favorite treats. Lastly, we finally have a place for the cocktail books we’ve received over the years – and the Fancy AF book inspired me to also make this an unofficial Bravo Books library – more to come as my collection grows! Some greenery and other fun bubble trinkets also helped finish off the space.

We are finishing up painting some french doors that will open and close also into our new basement space – which will make it perfect for any guests who may end up staying in the future. The space has seen a complete transformation – and we also now have an enclosed nice big storage closet on the opposite side of the wall too.

We can’t wait to host some friends, catch a football game and eat some snacks – because that counter is also big enough for plenty of food and we’re stocked with plenty of beverages!

Shop Our Look: Oversized Snack Jars | Gold Hand Pulls | Gold Shelf Brackets | Gold Wine Glass Rack | 4.6ft Artificial Palm Tree | Frigidaire 34-Bottle Wine Cooler | Larger Base Cabinet | Smaller Base Cabinet

DIY – French Barn Door

Our bathroom makeover was a complete revamp, and figuring out what we were going to do with the door was all over the place.  Since we had limited room we were initially planning to do a pocket door. But then we switched to something more modern with frosted windows – but the doors I found and liked were well over $300, way more than we wanted to spend, so we went back to the drawing board and tried to figure out a door we might be able to make.

We got the idea to check out our local Habitat for Humanity Restore to see if they had any doors that might fit the bill, or even something we could turn into our own.  We really wanted something that had windows in it, like a french door, but wanted to frost the windows since it’s for a bathroom… we just needed to find an affordable french door.  And we did! It was a little skinner than we needed, but we were confident we could extend it and make it our own and DIY-ing our own barn door using black pipe.
DIY door - thebeelife
Cost Breakdown:
– French Door – $55
– Frosted Spray Paint – $5
– White Paint – $18
– (2) 2x4x8′ – $8
– Wood Glue – $15
– (2) Wheels – $7
– (2) Hooks – $6
– (1) Bar w/ base and corners – $30
Barn Door Handle – $21
Total Cost: $165

What We Did:

  1. First we sanded down the door and removed some of the extra pieces/frame that was on the door.
  2. Through trial and error we finally figured out the proper piece of wood to use to extend the width of the door which was two 2x4x8′ – this definitely took a bit longer to figure out, including securing it to the door and then using wood filler to make it look like one piece.  Again, this was the toughest part, but we finally got it into a good spot with the wood filler.
  3. Next up was painting the door, white! After a few coats on each side, we were almost in business and then sprayed the windows on the outside of the door with the frosted glass look.
  4. We then drilled in our larger circular hooks at the top, added the wheels (which we had to switch with different ones that worked better), and then put together the pipe bar for placement!
  5. With some tweaking and DW-40 we got this door sliding easily and working great in the space! Once we had the door working, we added the handle while it was standing for more accurate placement.

DIY door 4 - thebeelifeThe frosted windows definitely help the bathroom space feel private, while from the outside it feels welcoming and open.  Since there are two windows in the room, we wanted the light to still be able to come through.  From the bathroom side of the door, you can see a slight difference in the additional side pieces – only because the door width with the wood pieces wasn’t an exact match – but from the outside it’s nearly perfect! 

Although this was a little extra work and challenged our problem solving skills, the end price was still WAY more affordable for the look and type of door we wanted to purchase – it was a savings of over half the price of the doors I wanted – plus we both love the way it came out!  And it’s completely custom to our space, don’t worry the full bathroom reveal is coming soon – in the meantime check out this $15 Floating Shelf, How to Install Vinyl Flooring and What We Wish We Knew before Tiling Our Shower.

bee (1)

How To: $60 Shiplap Wall

One of our side projects for our Basement Renovation was a statement wall that we decided to finish with shiplap.  If you read my post about Shiplap Wall Inspiration, you saw there are a lot of options and considerations for a shiplap wall! Well, B and I weighed our options and since our basement look is more of a unfinished-finished look, we didn’t want to drop too much money into this and opted for a more natural wood look vs. painted.  And I’d say we were successful with the whole statement wall because it is definitely a statement and looks more than just stained plywood.

We also decided to do long singular unison pieces, since we were working with a smaller wall vs. doing alternating pieces.  Our wall was also not level – being a century home and in the basement so we had to get a little creative once we started placing the actual boards.

What You’ll Need:

  • Measure your space & determine your measurements; we bought (2) 4×8′ maple plywood boards from Lowe’s ($25 ea.)
  • Table Saw – this will ensure even and straight cuts for your panels, we cut our panels to be 8″ wide (my dad helped us with this one!)
  • Stain of your choosing, we used Minwax – light Walnut ($9)
  • Nail Gun w/ compressor and finishing nails
  • A couple of popsicle sticks

Step by Step:

  1. Before you get your wood, you’ll want to prep your area, we removed some walls/studs and had to put up new studs since we were working with some odd configurations – we also made sure that all of our water proofing paint was taken care of on the wall, floor and the pole in that area.
  2. Upon determining your measurements and purchasing the wood, you’ll want to measure and cut your boards to create your panels – as I said we decided on 8″ for our panel width. A table saw will be super helpful in this case to make sure your panels are straight all the way across! Be sure to use the proper safety precautions when cutting.
  3. After we had our boards cut, we picked out a stain – light walnut to be exact. We applied two coats of stain over the course of 2-days.  I used a foam brush for easy application.  I wasn’t too careful about the thickness of the stain for the first coat since I knew it would soak into the wood, which it did. After the second coat the color was the dark hue I was looking for, we were ready to hang!  If you’re using this in a more finished space, you might want to consider putting a poly over top to keep it a bit more polished and shiny.
  4. Thanks to our handy friend C – we were able to borrow his compressor and nail gun, which allowed putting up the boards quick and easy.  We measured each board and made final length cuts on the site before securing into place, because we were butting these up against an uneven wall.  You may be wondering about the popsicle sticks, well we used these in between each panel to have even space, we put these in tight and removed once we had our next panel up.
  5. Beyond the minor cutting of the ends of the boards, we only had to cut around one outlet and had to do a smaller skinner piece across the top that took some measuring twice and cutting three times. *smiles*  We were able to get all the boards up in one night, although it was a little late by the time we finished!

The nail gun was crucial to getting this wall up and making the boards look almost like they’re glued up and hole free! It was a dream to finally get to use one, they’ve always looked like fun and I have to say it was awesome and efficient.  I am trying to think of other projects and excuses to borrow it again…. but I digress. With our Shiplap statement wall complete we were one step closer to wrapping up this makeover and adding the finishing touches!

For $60 we made a huge impact and it was super easy to pull together, the natural wood and color pull into the ceiling of the original beams and makes this unfinished finished basement feel cohesive and complete.  B was pretty impressed and happy with the way these turned out, it was an all around win!

bee (1)